In this tutorial, we will look at how to set up a cluster in Proxmox. There are many benefits to setting up a cluster in Proxmox.
Not only will you be able to manage all of your Proxmox instances centrally, but you can migrate virtual machines and containers from one host to another, and you can easily configure high availability (HA).
In general, if you have more than one instance of Proxmox on a given network, there’s almost no reason why you shouldn’t set it up as a cluster. The exception is if you use one as a test server only (and even then, you might be able to gain some benefits from configuring it).
What is a Proxmox Cluster?
A Proxmox cluster refers to a group of Proxmox servers networked together. Within this cluster, multiple Proxmox servers share resources and function as a single system. These resources can include storage, but the true power of Clusters comes in the form of high availability and replication, which we’ll look at below.
Here are some key features of a Proxmox cluster:
- High Availability: If one of the servers in the cluster fails, another one can automatically take over its tasks, ensuring that services remain available.
- Central Management: Proxmox provides a central web interface to manage all the nodes in the cluster. This makes it easier to manage the resources of the cluster, such as starting, stopping, and migrating VMs and containers.
- Scalability: You can add more servers to the cluster as your needs grow, allowing you to increase the resources available to your workloads.
- Shared Storage: Servers in a Proxmox cluster can access shared storage, enabling VMs and containers to migrate between servers without the need for data to be moved.
- Fencing: In case of a partition in the network, Proxmox can isolate nodes to prevent the “split-brain” scenario where multiple nodes attempt to take control of the same resources, potentially causing data corruption.
- Quorum: A Proxmox cluster has a quorum requirement to avoid split-brain scenarios. A majority of nodes (more than 50%) must be operational and able to communicate with each other for the cluster to be functional.
How to Set Up a Cluster in Proxmox
The steps below will explain how to set up a Proxmox Cluster. It’s important to have all of the Proxmox Nodes available, online, and their IP addresses static (meaning that they won’t change).
After those steps have been completed, you can move on to creating the Proxmox Cluster.
Step 1: Install Proxmox VE
Each Node that you’d like to add to a Cluster must have Proxmox installed on it, and be accessible by its own IP address. Before proceeding, install Proxmox VE on each node and then proceed to configure the cluster in Proxmox.
Step 2: Configure the Cluster using Proxmox VE
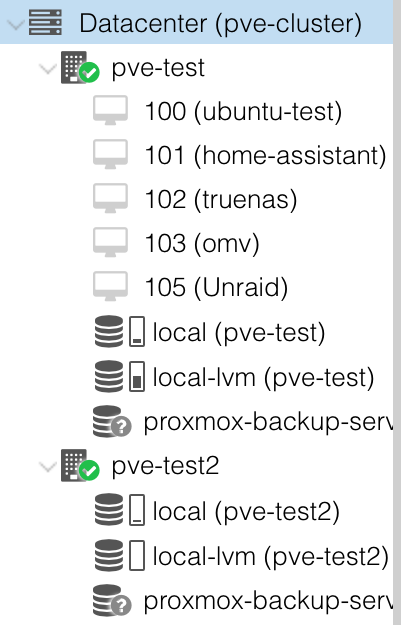
In my example, I have two Proxmox servers (pve-test and pve-test2) which we will use to configure this. Please keep in mind that you should have three servers at minimum, but I am using two for this example.
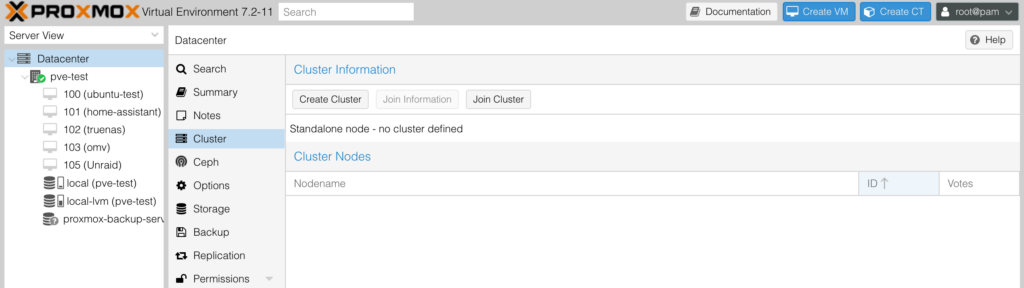
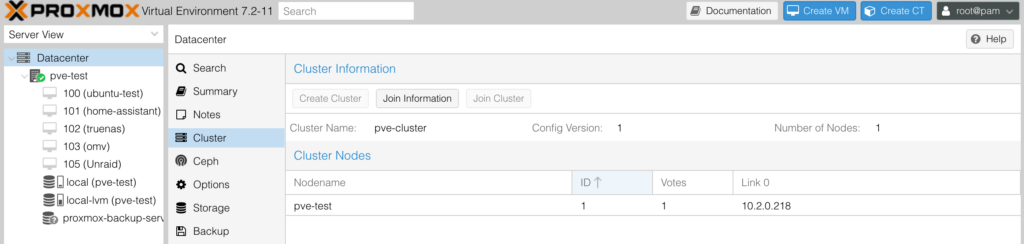
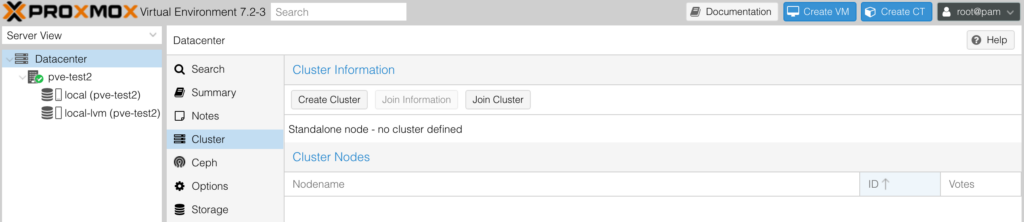
1. Log in to the first Proxmox server, select Datacenter, then Cluster, and select Create Cluster.
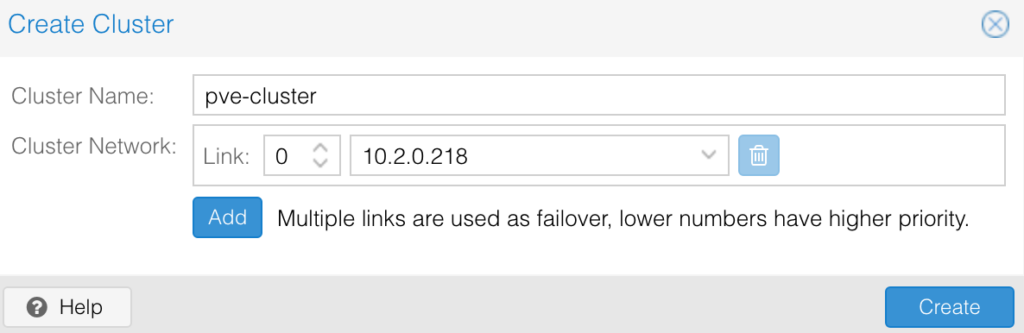
2. Give the cluster a name, then select create. The cluster will then be created and you’ll be able to join it from other Proxmox instances.
Step 3: Configuring Firewall Rules
Before we join a cluster, we have to set up a few firewall rules so that both Proxmox instances can talk to each other. We will create three total rules for UDP ports 5404, 5405, and TCP port 22.
If you aren’t using the Proxmox firewall, this isn’t necessary, though it’s a good idea to include them in case you ever decide to use it (as you might not remember you need to add them).
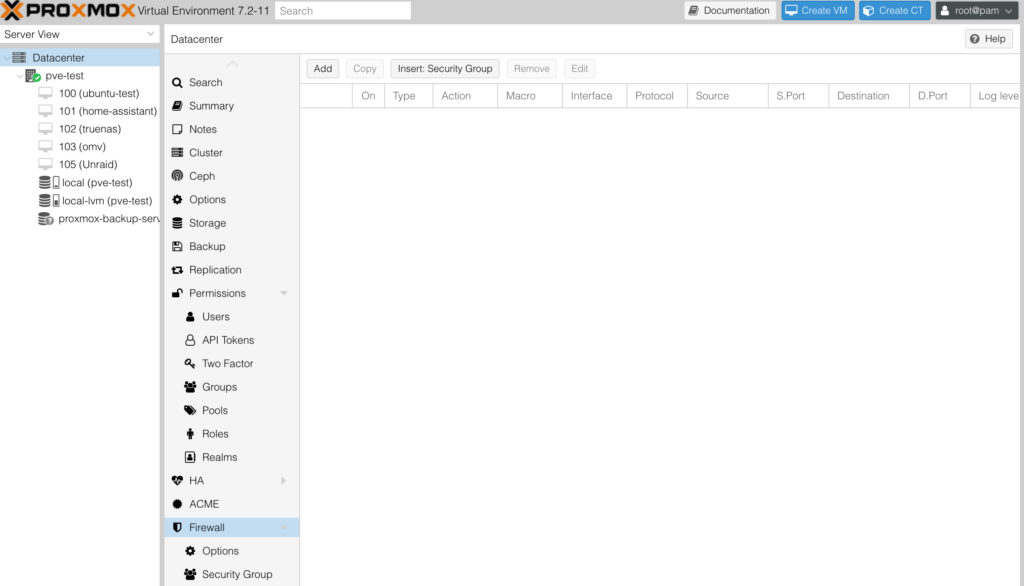
1. On the first Proxmox server, select Datacenter, Firewall, then Add to create a new firewall rule.
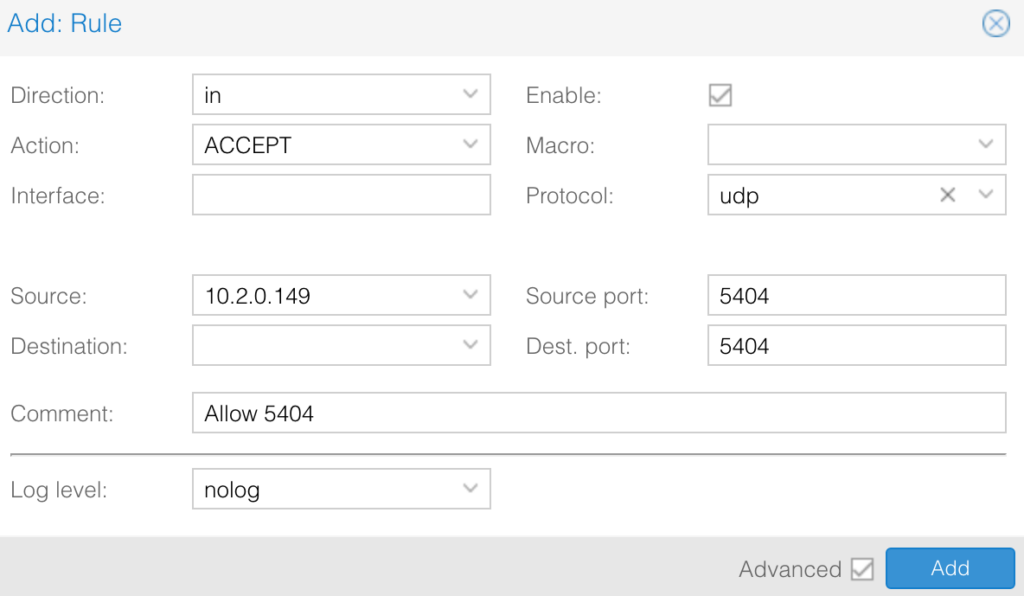
2. Create the first rule below for UDP port 5404:
- Direction: In
- Action: Accept
- Protocol: UDP
- Source: Proxmox Node 2’s IP Address
- Source Port: 5404
- Destination Port: 5404
- Comment: Allow 5404
3. Create the second rule below for UDP port 5405:
- Direction: In
- Action: Accept
- Protocol: UDP
- Source: Proxmox Node 2’s IP Address
- Source Port: 5405
- Destination Port: 5405
- Comment: Allow 5405

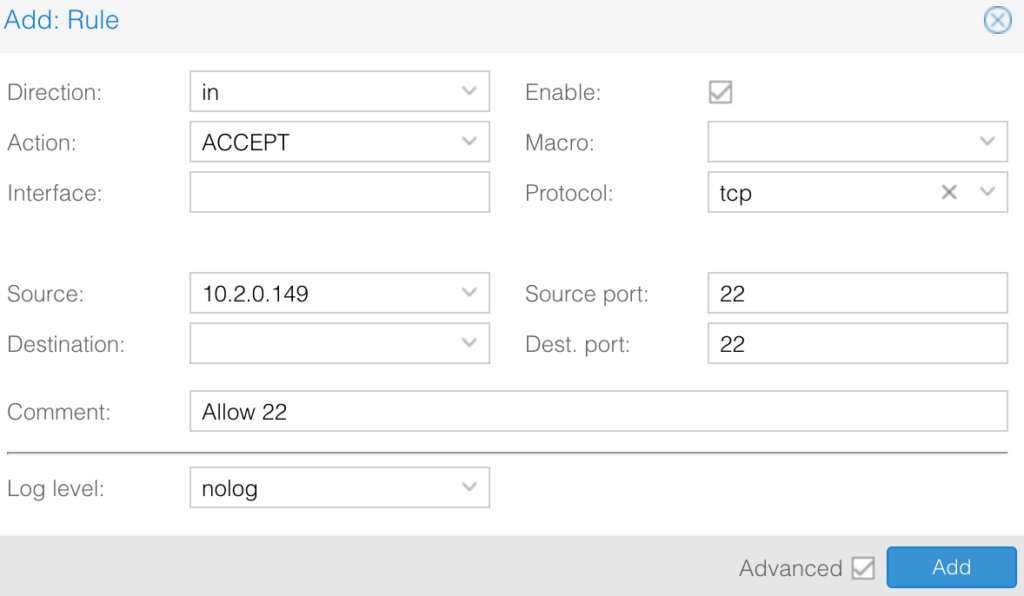
4. Create the third rule below for TCP port 22.
- Direction: In
- Action: Accept
- Protocol: TCP
- Source: Proxmox Node 2’s IP Address
- Source Port: 22
- Destination Port: 22
- Comment: Allow 22
5. Create the same three rules on the second Proxmox node, but with the correct source IP address (IP address of Proxmox node 1).

Step 4: Join Nodes to the Proxmox Cluster
1. On the device you just set up the cluster with (pve-test in my example), select Join Information under Cluster.
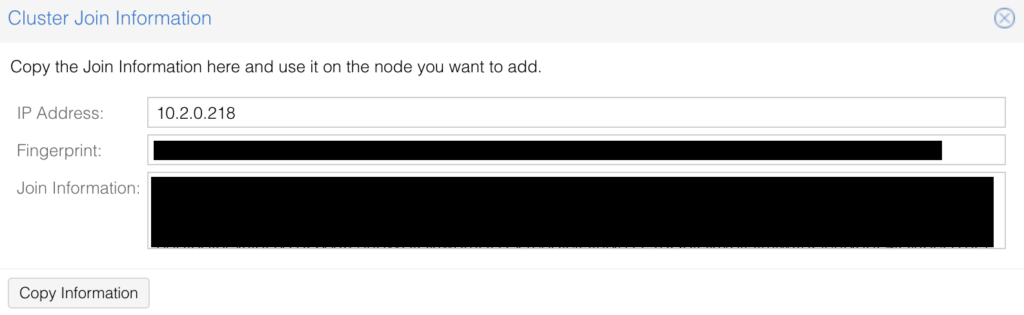
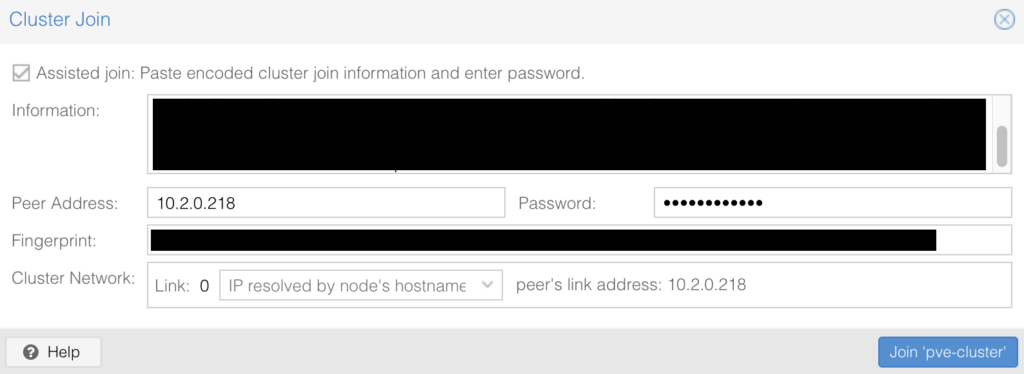
2. The join information will be displayed. You will need both, the Fingerprint and Join Information to join the cluster. Select Copy Information, then open your second Proxmox node.
3. On the second Proxmox node, select Datacenter, Cluster, and Join Cluster.
4. Paste in the information and the peer address and fingerprint will display. In the Password section, enter the root password of the other Proxmox server, then select Join [CLUSTER_NAME].
5. If the firewall rules are set up correctly, the cluster should join properly (though it may take a few minutes)!
Step 5: Migrating a Virtual Machine
After you’ve set up a cluster, one of the benefits is that you can easily migrate VMs from one Proxmox node to another. You can do this to test and ensure that everything is functional on the node. Please test with a non-critical VM, or preferably, a test VM.
1. Right-click a virtual machine, then select Migrate.
2. Confirm the settings are correct, then select Migrate.
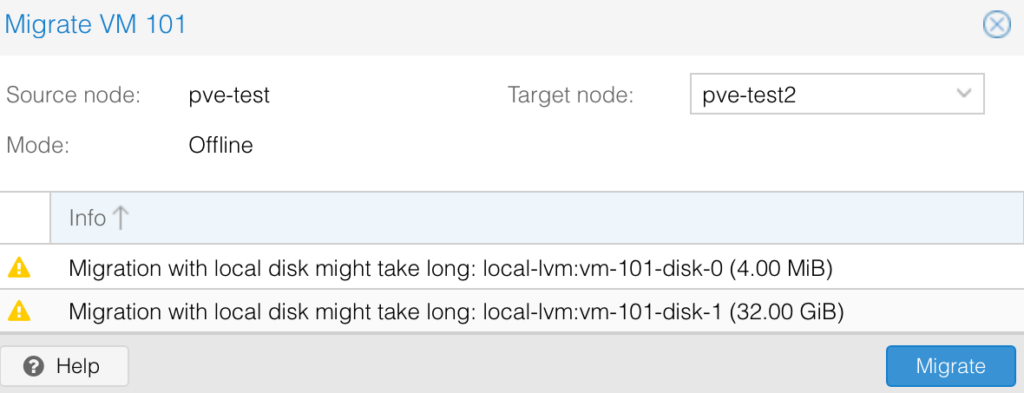
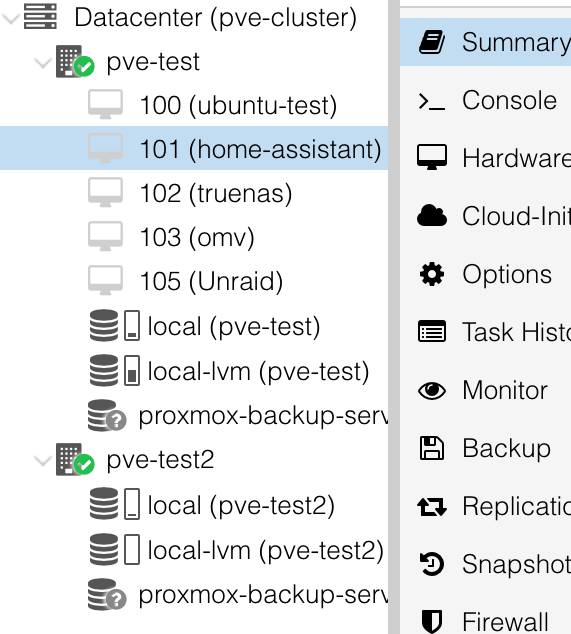
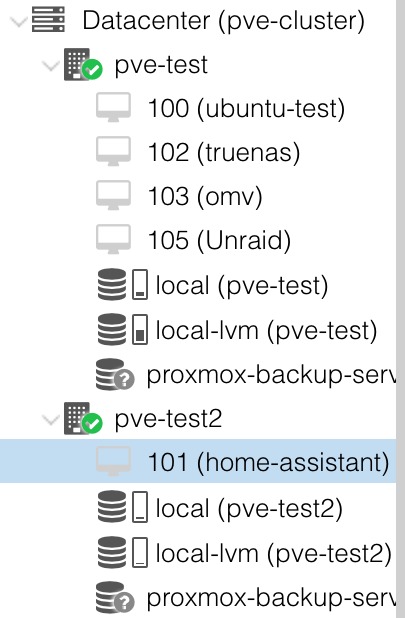
3. The process will start to migrate the virtual machine (this will vary greatly depending on the size of the hard disk that you’re moving) and after a little while, the VM will be migrated to the second Proxmox host (VM 101)!
You can then start the virtual machine and the entire contents of that VM will run off the second Proxmox host when it originated on the first Proxmox host.
Step 6: Managing Backups
Now that the Proxmox Cluster is configured, you can configure external storage. This will allow you to configure the storage at the Cluster level, meaning that you can back up VMs and Containers, and restore them if you ever need to. This can also be done if you’re using Proxmox Backup Server.
Backups are handled so well in Proxmox that configuring them initially can save you in the event of corruption, a guest VM or Container issue, or simply to roll back a change.
Proxmox High Availability (HA)
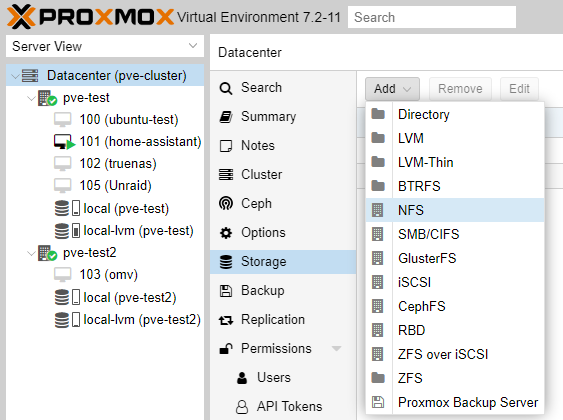
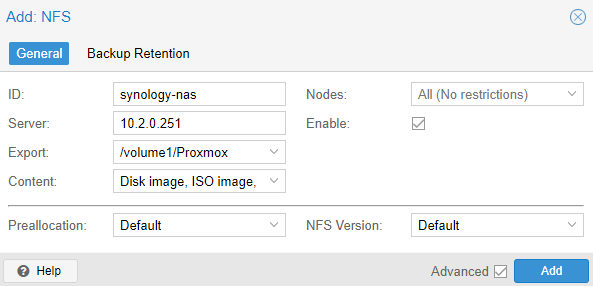
Now that the Proxmox Cluster is configured, you can set up High Availability if you’d like. In order to set up high availability (HA), you’ll need some sort of shared storage. To demo this, I’m going to be using an NFS share on my Synology NAS, but there are countless ways to handle this.
1. In Proxmox, select Datacenter, Storage, then NFS (as mentioned in the intro, you might choose to select a different type of storage).
2. Create the NFS storage. If you’d like detailed steps, please follow the first section of this tutorial. Make sure that All Nodes are selected.
3. After the storage is created, it should be shown as shared storage (yes under shared). This is what we need to set up high availability (HA).

Step 2: Configuring Proxmox High Availability (HA)
High Availability ensures that a VM will stay running even if an individual node is shut down. This means that if the device is either powered off or has any sort of issue, the VM will automatically migrate to another node and start there. This will use all nodes to ensure the VMs configured will stay running as close to 100% of the time as possible.
We will look at how to configure high availability below, but before we do, we’ll look at a few important points:
- High Availability must be configured for the specific virtual machine (shown below).
- You must have three nodes set up for voting purposes. If you only have two, the system will confuse itself and the VMs won’t automatically switch to the active node.
- If you don’t have a third node, you can set up a separate device that does nothing other than vote. This will ensure that a cluster with only two nodes works properly.
- You must use shared storage for the VM!
- There are HA Settings that must be configured if you want the VM to stay in its current state when migrated.
1. Select Datacenter, then HA. Under Resources, select Add to add an existing virtual machine.
Please keep in mind that the virtual machine must use shared storage (which we created in the steps above).
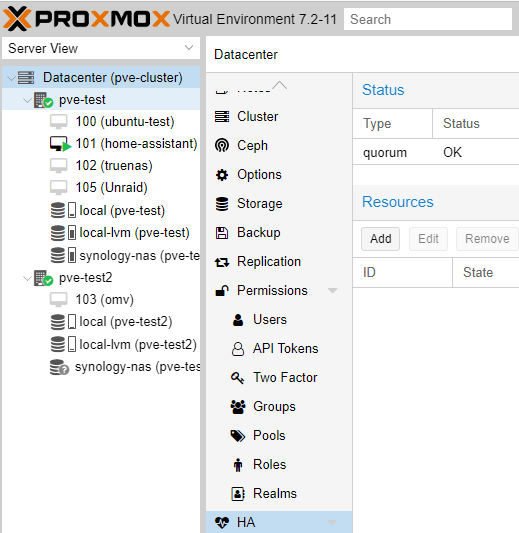
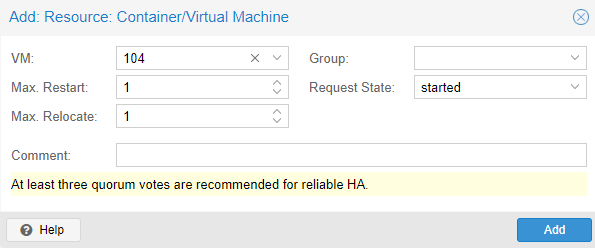
2. Select the virtual machine that you’d like added for high availability, then select Add.
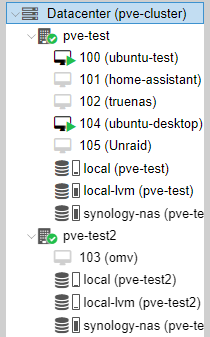
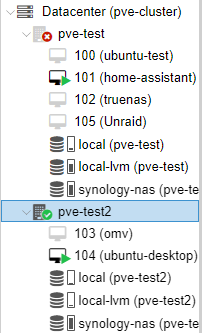
3. After the VM has been added, HA is technically configured. To demonstrate this, we’re going to shut down the pve-test node and VM 104 should automatically switch over to the pve-test2 node.
4. The virtual machine automatically switched to the pve-test2 node when the pve-test node lost connection!
Conclusion & Final Thoughts on Creating a Cluster
In this tutorial, we looked at how to set up a cluster in Proxmox. There are many different benefits to setting up a cluster in Proxmox, with the most simple reason being central management.
Even if you don’t want to migrate VMs or set up high availability, managing all of your Proxmox nodes from any node’s GUI is very valuable. Then, throw on VM migration and high availability and there’s almost no reason not to set this up if you have multiple Proxmox nodes. Make sure that you configure Wake-on-LAN to ensure you can turn on all nodes remotely. To be clear, you can also remove nodes if you ever need to.