In this tutorial, we will take a look at how to backup Proxmox to a Synology NAS.
In specific, we will take a look at how to back up virtual machines in Proxmox to a Synology NAS. In my opinion, it’s easiest to utilize NFS for this, so the first thing we’ll be doing is configuring NFS. This allows Proxmox and your Synology NAS to communicate. A few things you need to be aware of is that you must have a static IP address for your Proxmox instance (which most people do, by default).
1. How to Backup Proxmox to a Synology NAS
Before we configure Proxmox, we need to set up NFS permissions on our Synology NAS. This will allow Proxmox to read and write to our Synology NAS.
- Open the Control Panel on Synology DSM and select File Services then NFS.

2. Select Enable NFS service and then Apply.
NOTE: You can leave the Maximum NFS protocol as NFSv3.
3. Select Shared Folder, then Edit the folder where you’d like your Proxmox data to be stored.
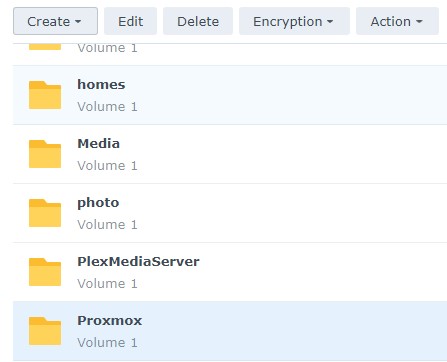
NOTE: If you aren’t sure how to create a Shared Folder, you can click this link to learn how.
4. Select NFS Permissions then Create.
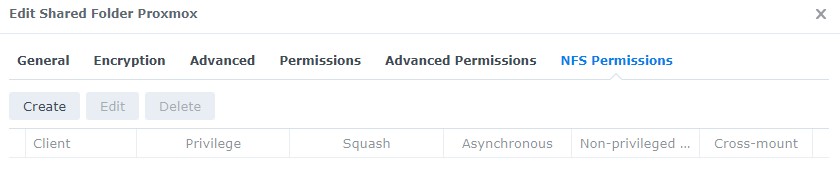
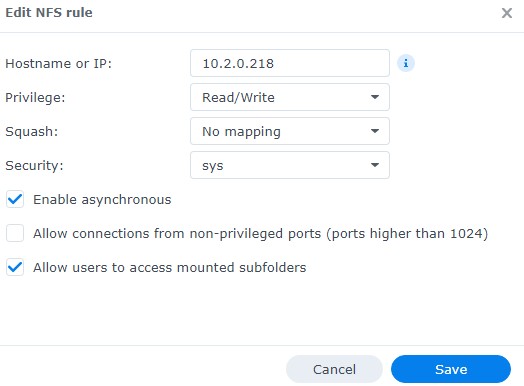
5. In the NFS rule, add the IP Address of your Proxmox server. Leave the privilege as Read/Write and then select Allow users to access mounted subfolders.
6. Save everything and then log in to Proxmox.
2. Proxmox Configuration
Now that our Synology NAS has been configured, we will need to set up Proxmox to read/write from our Synology NAS. We’ll then be able to backup Proxmox to a Synology NAS.
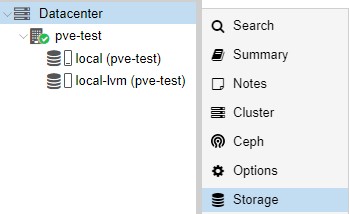
- Select Datacenter then Storage.
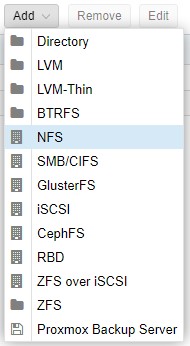
2. Select Add then NFS.
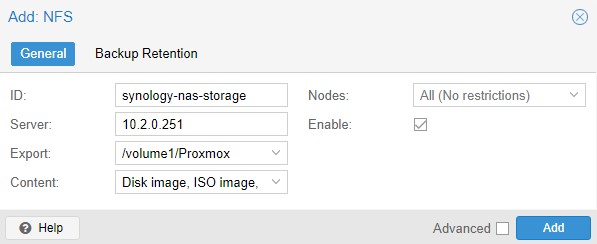
3. At the NFS screen, create an ID, then enter the IP Address of your Synology NAS server. In the Export drop-down menu, the location of your Proxmox folder should automatically appear. In the Content drop-down, select ALL entries. You can then select Add.
4. Proxmox should now show the Synology NAS Storage that we created above.

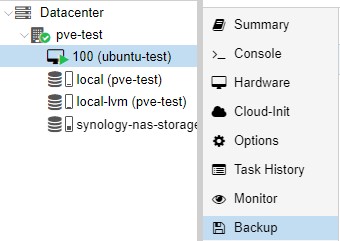
3. Back up an Individual Virtual Machine
Now that we configured Proxmox and our Synology NAS, we can easily back up a virtual machine.
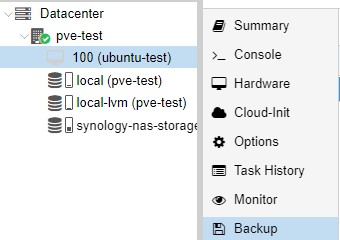
- Select the virtual machine you’d like to back up, then select Backup.
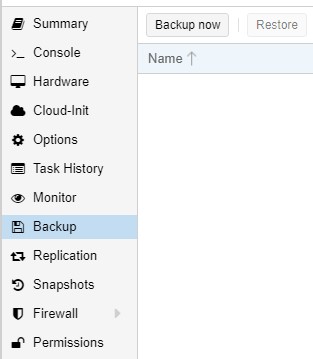
2. In the backup tab, select the Synology NAS storage location in the top right. This will ensure that we back up to the correct location.

3. Select Backup now in the top left corner.
4. Select your Storage, Mode and Compression, then select Backup and the backup will start!

3. Automatic Backups – How to Backup Proxmox to a Synology NAS
You can easily configure Automatic backups in Proxmox for all of your virtual machines if you’d like. This will automatically back up every virtual machine on a specific schedule.
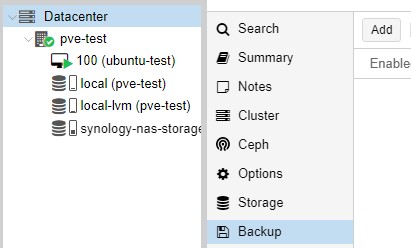
- Select Datacenter then Backup, then select Add.
2. Select the Storage for your Synology NAS, then specify the Schedule, Selection mode, Compression, and Mode.
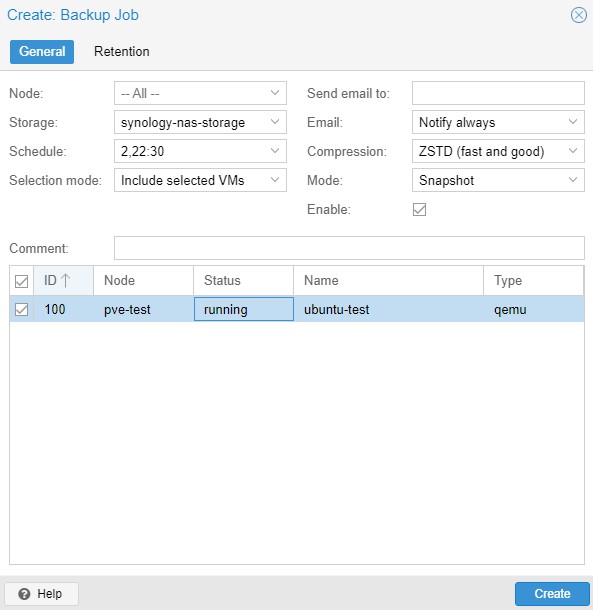
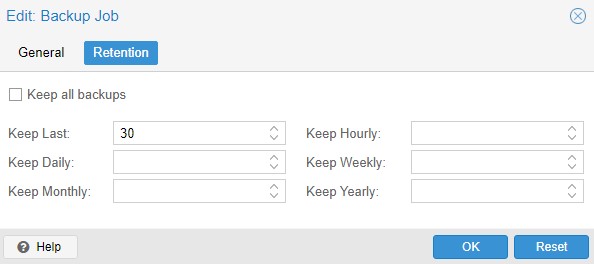
3. You can also change the retention policy to only keep a certain number of versions by selecting the Retention tab. Without specifying a retention policy, all backups will be stored which will drastically reduce storage space on your Synology NAS over time.
4. Your virtual machines will now back up to your Synology NAS automatically after you select Create!
4. Restoring a Virtual Machine from a Backup
After the backups have been created, you can easily restore your virtual machine to one of them if you ever need to.
- Select the virtual machine, then Backup.
2. Select the Synology NAS storage in the top right under Storage.

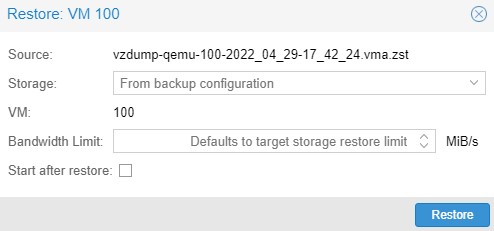
3. Select the snapshot you’d like to restore to, then select Restore.

4. All information can stay as default, then select Restore.
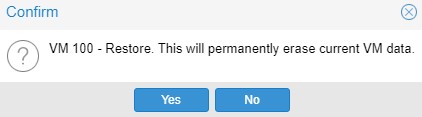
5. You will receive a message that this will permanently erase the existing virtual machine. If you agree, select Yes. Your virtual machine will now be restored from the backup you selected!
5. Conclusion – How to Backup Proxmox to a Synology NAS
This tutorial shows how to backup Proxmox to a Synology NAS. Overall, this is a really good way to ensure that your virtual machines are backed up properly and automatically. This also gives you a pretty easy path to backing them up offsite using Hyper Backup if you’re interested.