This article will look at Container Manager on a Synology NAS. Container Manager is the successor to the Docker package and was recently released with Synology’s DSM 7.2. While Docker on a Synology NAS may be gone (from the look of it), Container Manager is the new Docker.
Container Manager has the same features, but an entirely new user interface that is extremely different than the old and now outdated Docker interface, plus a few new enhancements.
We will look at some of the key features of Container Manager on a Synology NAS below.
What is Docker, and How Does it relate to Container Manager?
Docker is an open-source platform that allows you to deploy and manage applications inside Containers, which are managed in Container Manager in Synology DSM. Containers are incredibly portable, meaning that you can take the data and move it to a completely separate device running Docker, and it’ll work on that device as well.
This is because Containers write their important configuration data to volumes (assuming it’s configured properly). That volume data can be moved to a separate device and recreated with minimal downtime, maintaining all previous functionality.
Adding Docker Compose on top of it (which Synology’s Container Manager now supports), you can maintain a Docker Compose file that has the configuration for the Container as well. So not only is the data portable, but the actual configuration is portable as well – something that isn’t common outside of this type of setup.
How to Set Up Container Manager on a Synology NAS (Docker)
These are some key features of Container Manager on a Synology NAS and how you can use them.
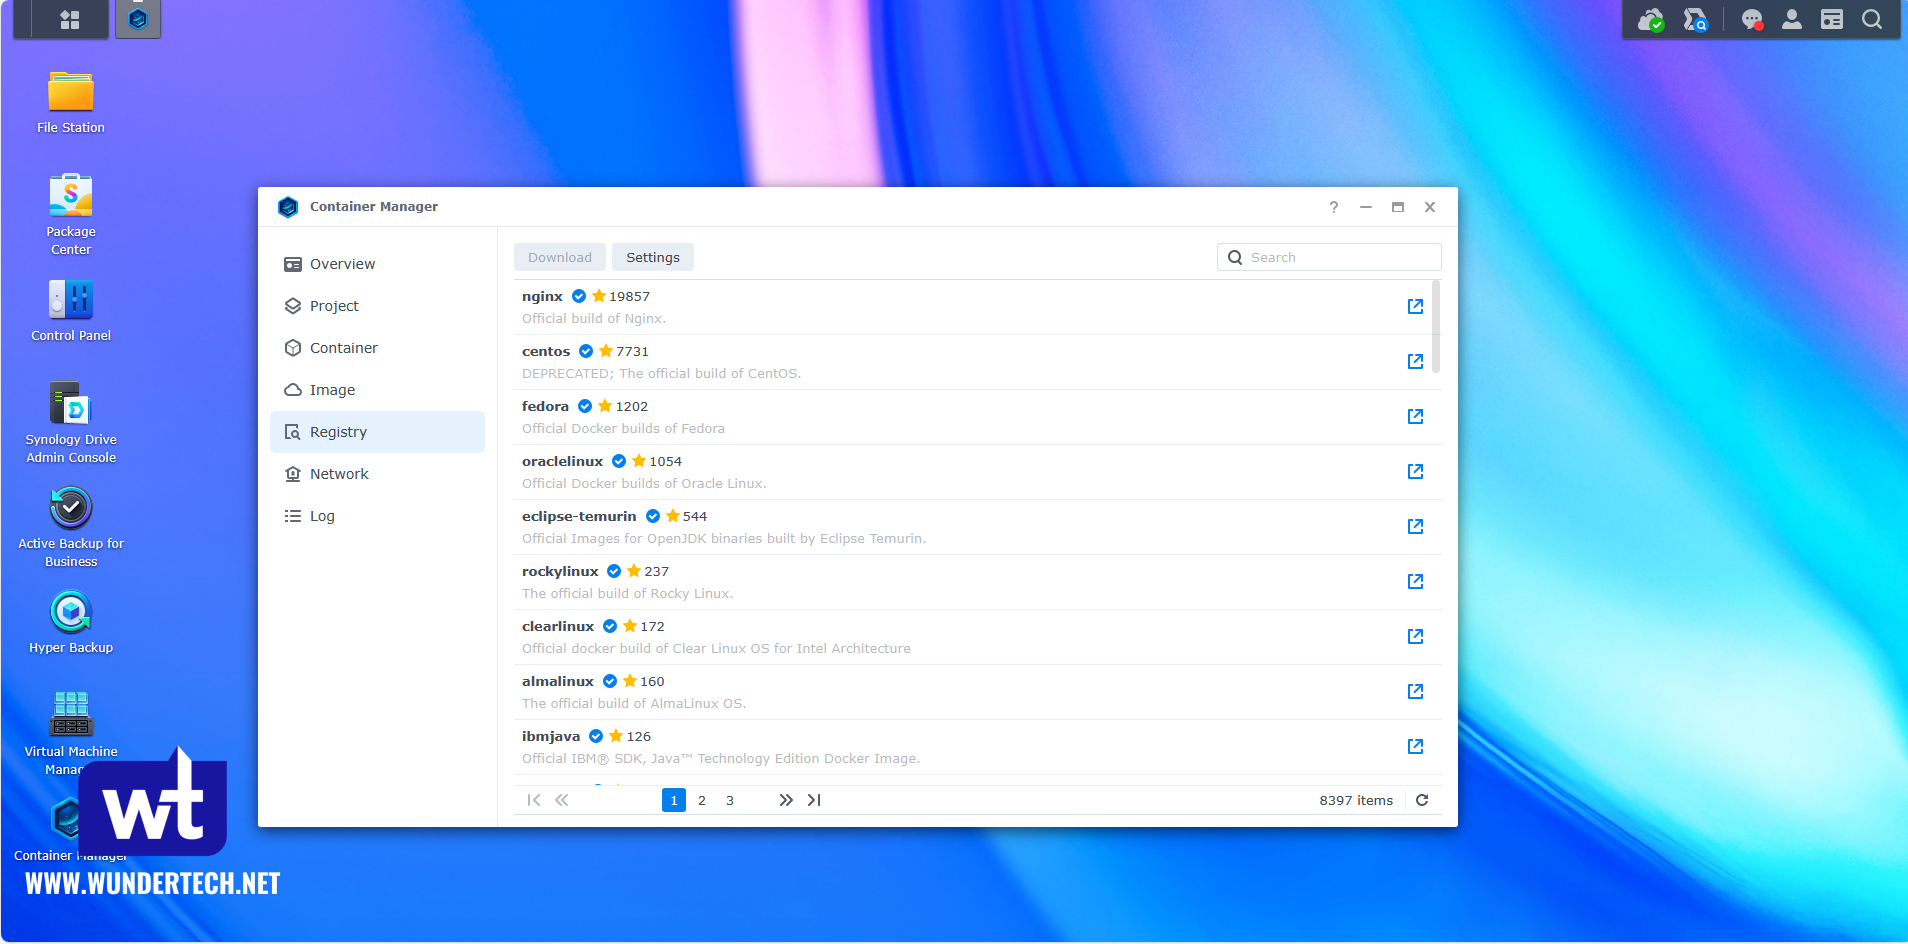
User Interface for Container Manager
You can access Container Manager by using its new icon to launch the application.
When you launch the tool, you’ll be brought to the new user interface. The interface will show various tabs, all of which we’ll go over below.

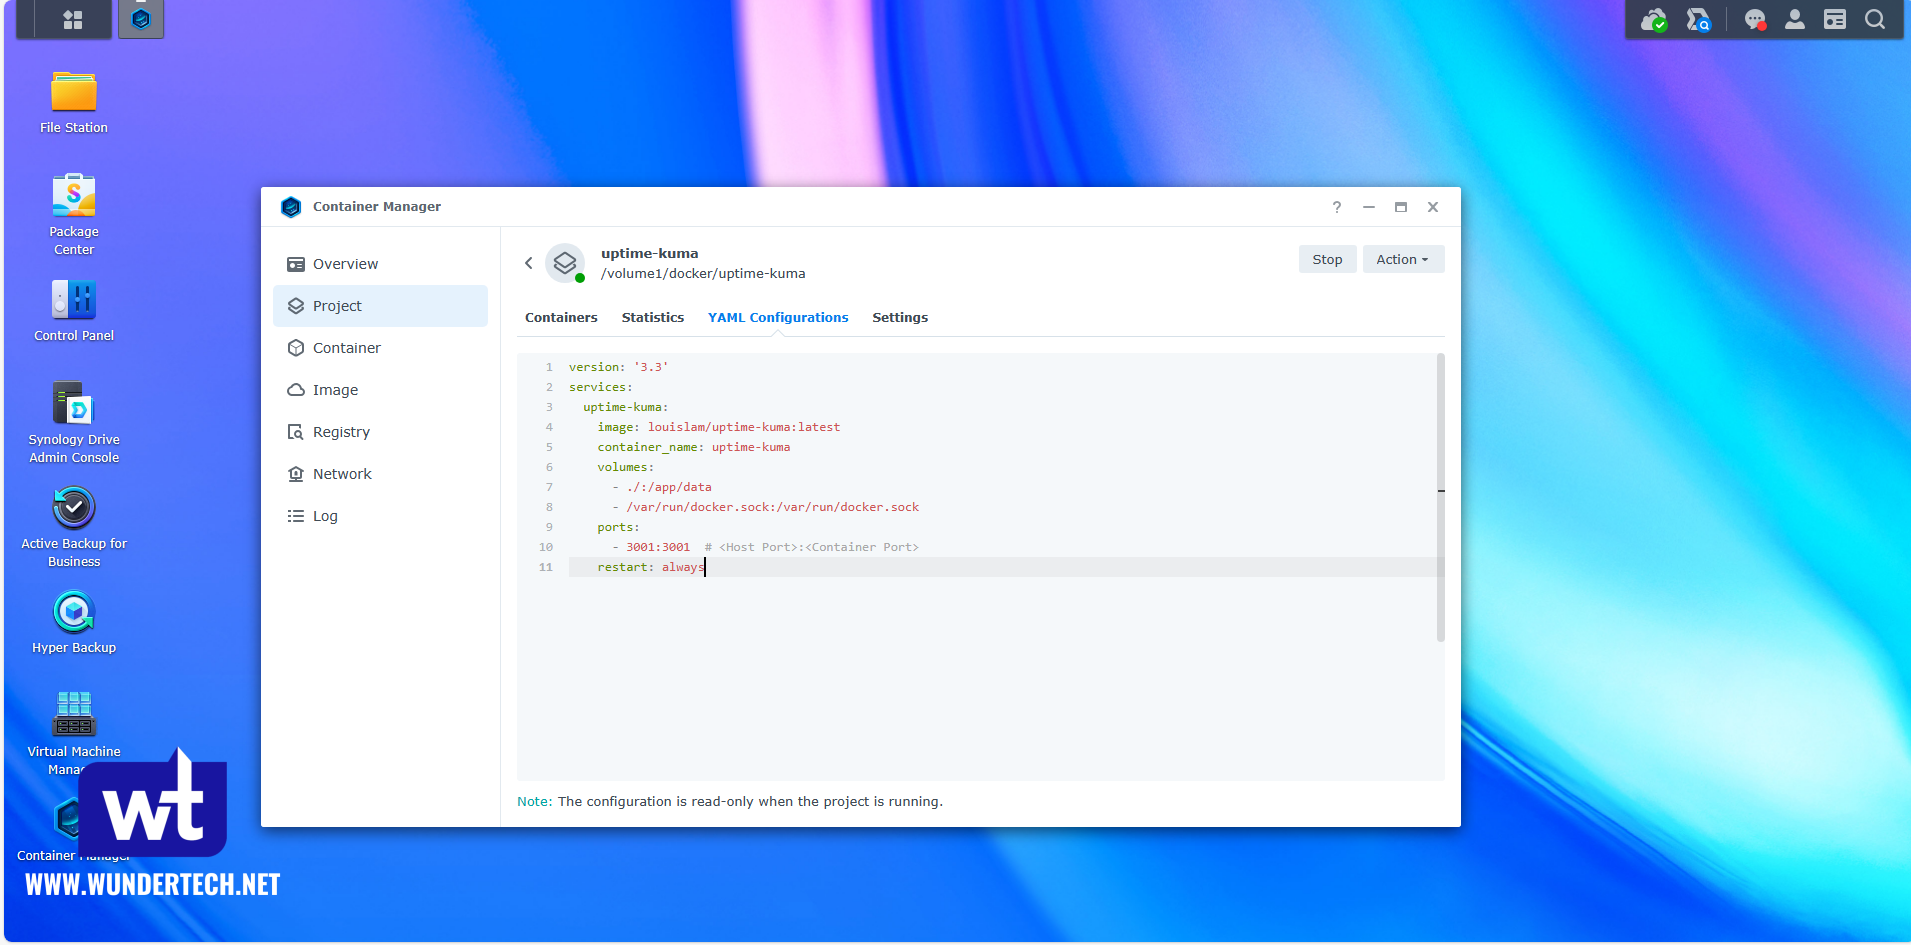
Project Tab – Docker Compose
The Project tab is a new improvement in DSM 7.2 and allows you to create and manage Docker Compose containers.

Speaking transparently, I don’t think that there’s any reason to create a Container on a Synology NAS using the Synology GUI anymore.
Docker Compose files have always provided an easier setup process and allow you to maintain the configuration of the container in case you ever need to recreate or move it.
Think of it this way – if you purchase a Proxmox server and want to move all of your Containers over to it, Docker Compose will allow you to move the entire container, its data, and start it up by running a single command.
If you don’t use Docker Compose, you’ll be forced to recreate each Container using either Docker Compose, a Docker Run command, or something like Portainer, so this is a pretty significant improvement for portability.
You’ve always been able to use Docker Compose on Synology NAS devices, but you’ve never been able to do it through the Synology GUI. To use Docker Compose, follow the instructions below.
1. Select Create to create a new Project.
2. Give the project a name, select the path where the files should be stored, then either upload or create a Docker compose file.
If you choose to upload the file, it should be a docker-compose.yml in the path specified.
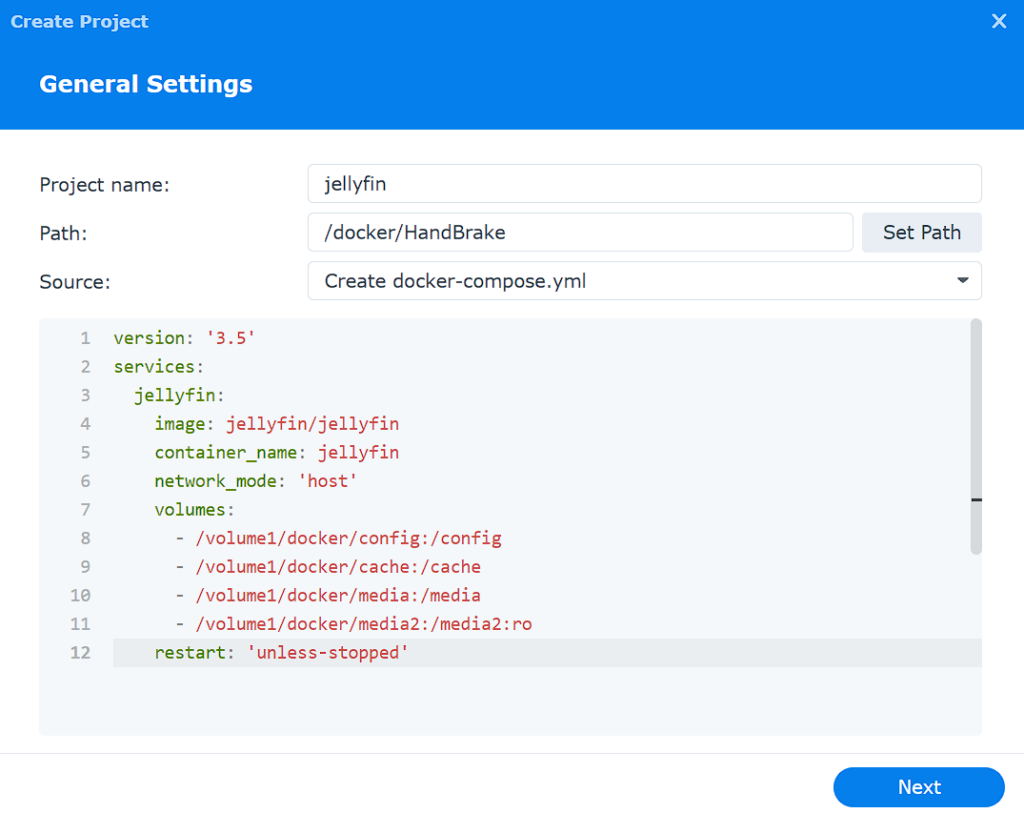
3. One important thing to remember is that you must use the path that includes the volume number when using Docker Compose.
For example, using the Jellyfin configuration example below, you must set the path for volumes as the correct folder location (/volume1/docker/).
version: '3.5'
services:
  jellyfin:
    image: jellyfin/jellyfin
    container_name: jellyfin
    network_mode: 'host'
    volumes:
      - /volume1/docker/jellyfin/config:/config
      - /volume1/docker/jellyfin/cache:/cache
      - /volume1/docker/jellyfin/media:/media
    restart: 'unless-stopped'
Ironically, there is no Container Manager default folder in DSM, so it’s probably a good idea to continue to use the default docker folder.
Container Tab
The Container tab will allow you to create Containers the way you always did in prior versions of DSM.
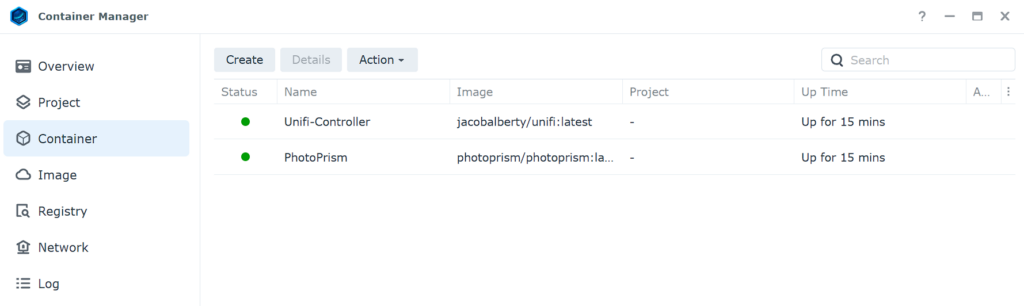
While the user interface is slightly different, you can use the GUI to find an image and then create a fully functional Container using all of the settings you’ve always been able to.
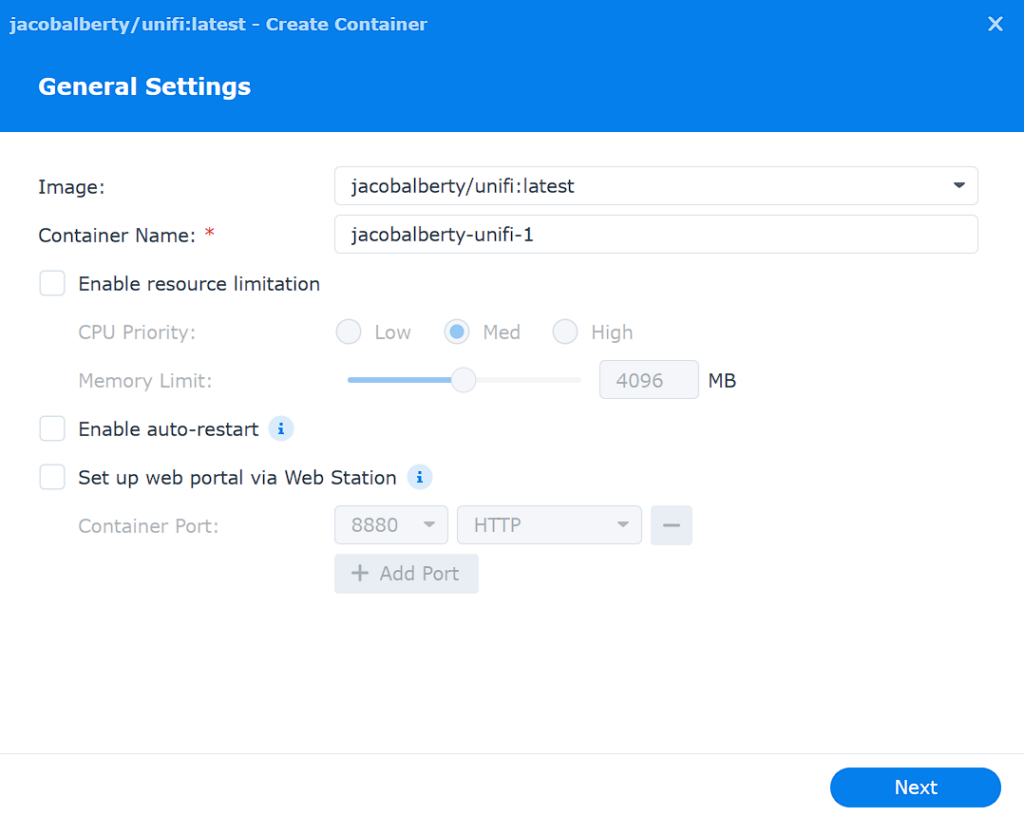
This step differs greatly depending on the Container you’re trying to configure, but here are a few important notes:
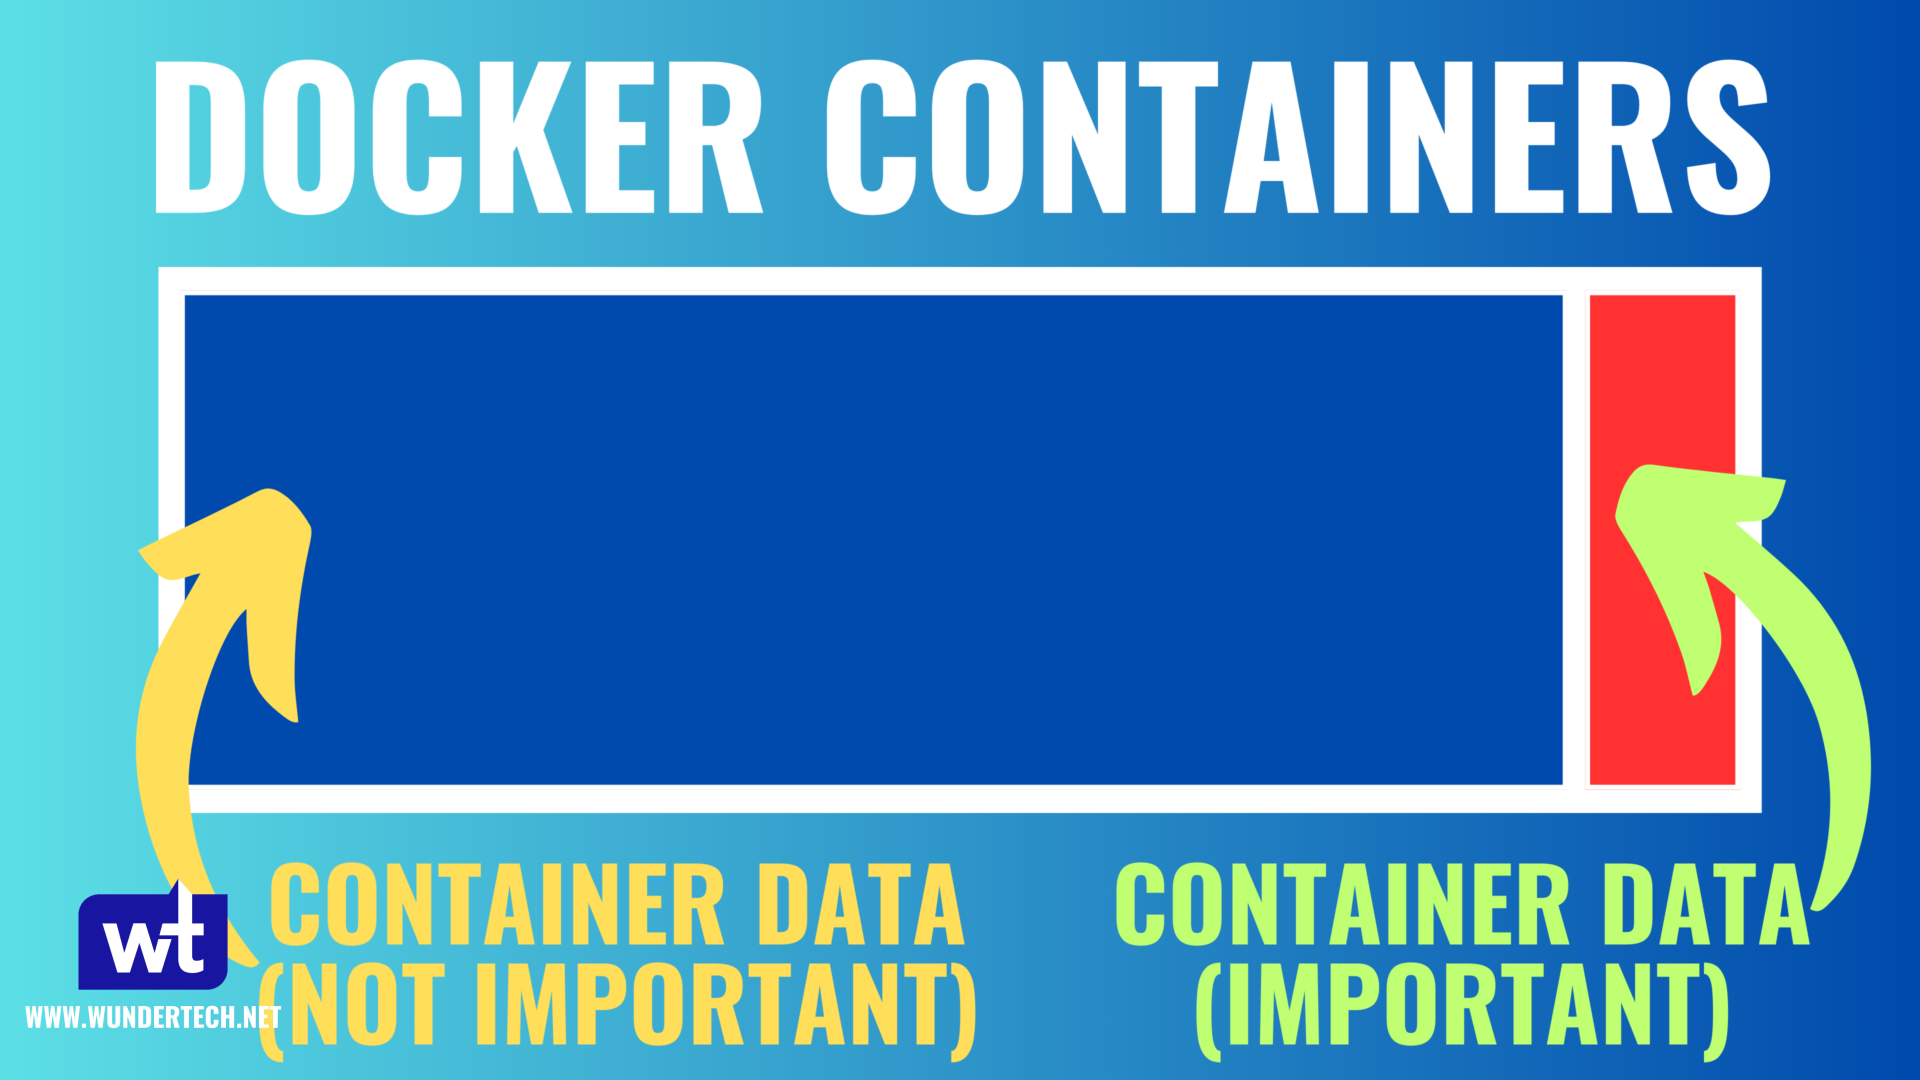
Volume Mappings for Docker on a Synology NAS
When creating a Container using Container Manager on a Synology NAS, the important data must be mapped to a local folder. This is completed in the Volume section, where a local folder is mapped to a container folder.
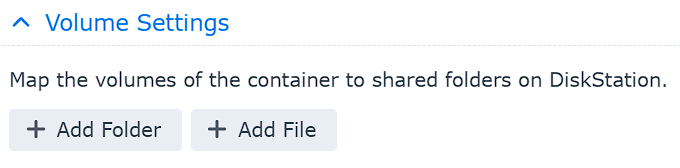
When the container runs, the container’s folder location in the Mount Path below is written to the File/Folder entered on your Synology NAS. Any data that is modified on the local Synology NAS folder will be written to the containers folder.
It’s important to highlight that you can’t mount any folders that you’d like. When you download an image from the registry, a little icon (shown below) will bring you to the documentation for that container. You can search the documentation to see what folders can be mounted.

After you navigate to the documentation, you will have to search the page to see what volumes can be mounted. Unfortunately, all documentation is different, so you will have to search through it to find the volume information.
Using Pi-Hole as an example, an example Docker Compose file is provided. Under the volumes section, you can find the two volumes that can be mounted.
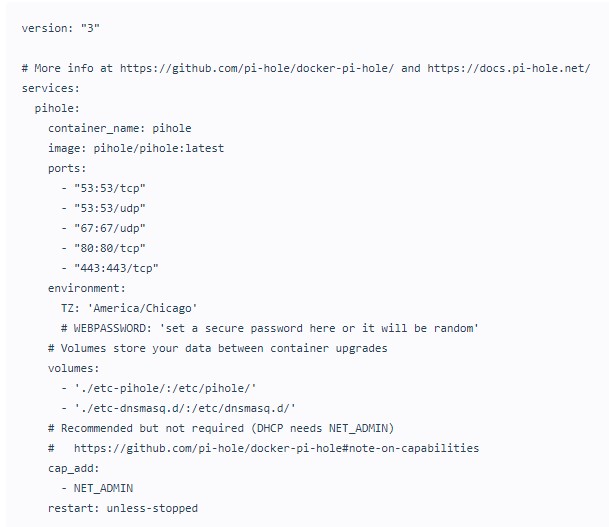
Using ./etc-pihole/:/etc/pihole/ as an example, pihole is the local folder and /etc/pihole is the container’s folder.
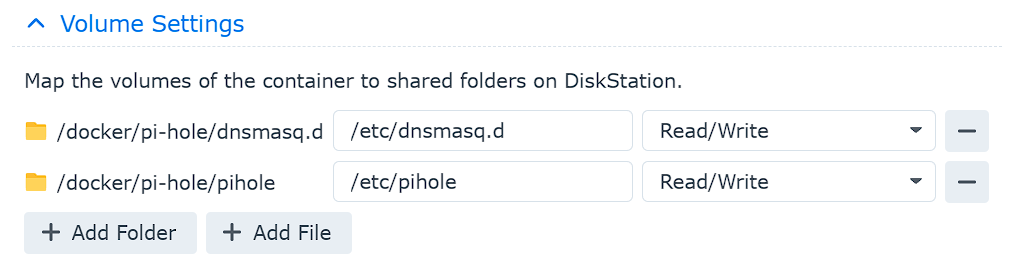
You can easily translate this to a Synology NAS by creating subfolders in the docker folder and mounting that folder location to the container’s folder. Using the screenshot below, I created a folder named pi-hole and a sub-folder name pihole.
Those folders are inside of the docker folder and are mounted to the container’s /etc/pihole folder. When the container is started, the contents of the container’s /etc/pihole folder will be written to my Synology NAS’s pihole folder.
If you are interested in backing up a container, the folders you mount for each container hold all of your personal data. These are the important folders that must be backed up. The rest is simply configuration that can be created on a separate NAS or Docker installation.
Environment Variables for Docker Containers
By default, many Containers have environment variables that you can modify to change the settings of the container.
There aren’t standard environment variables across containers and while some share variable names, it’s always suggested to view the documentation and determine which environment variables you’d like to use.
The container will come standard with certain variables, but you have the option of changing them or adding new ones before the container is created.
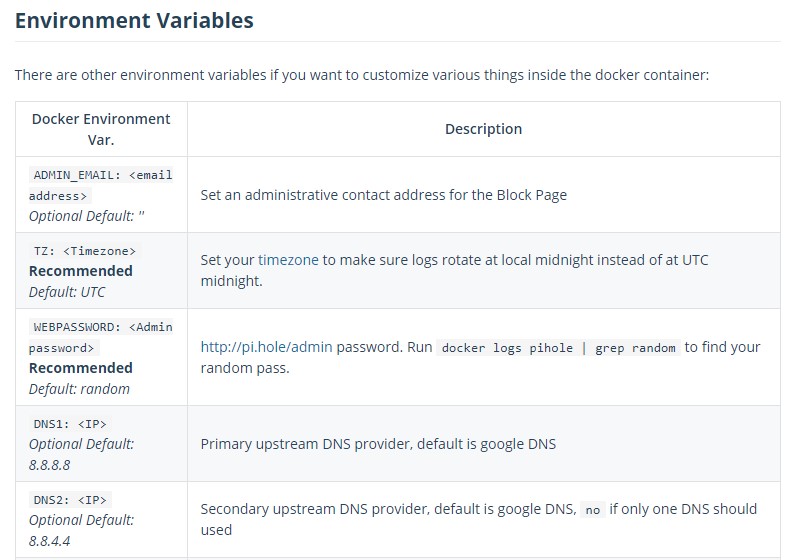
This is an example of the Pi-Hole environment variable details listed in the documentation.
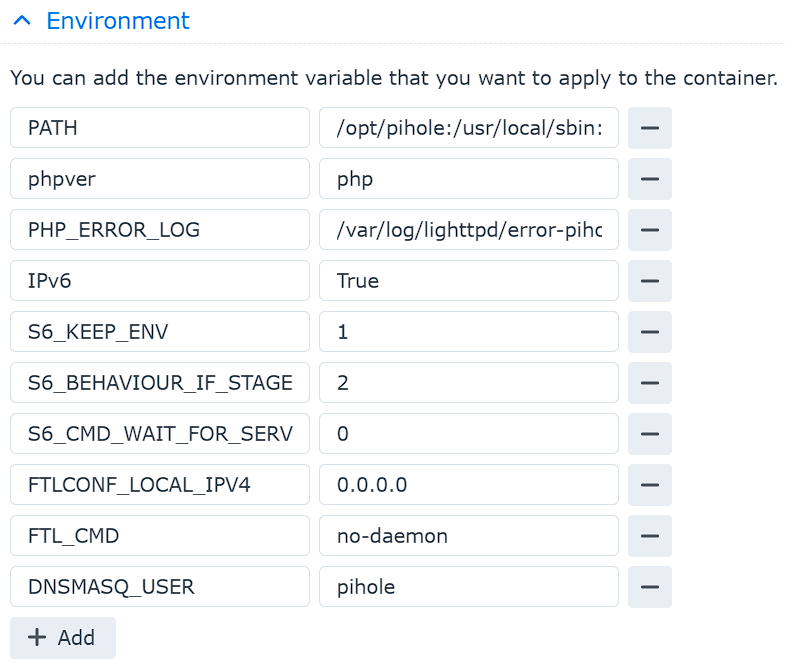
In the Container on your Synology NAS, the Environment section is where you can add, remove, or change environment variables.
Network Settings for Docker Containers
For most configurations, a host or bridge network is used. However, there are certain times when you might want to configure a macvlan network interface (like for Pi-hole).
This generally occurs when there is a port conflict (like when a Container will use 80/443 and the host network interface already uses them). When this occurs, the port conflict will stop the container from functioning properly. In situations like this, you have two main ways of fixing the problem:
1. Change the local port so that you’re using something different.
For example, if the Docker container wants to use port 80, change the Local Port to something different, like 8080 as shown below. To access the Docker Container, you’d then use your Synology NAS’s IP address and the local port.
http://[SYNOLOGY_NAS_IP]:8080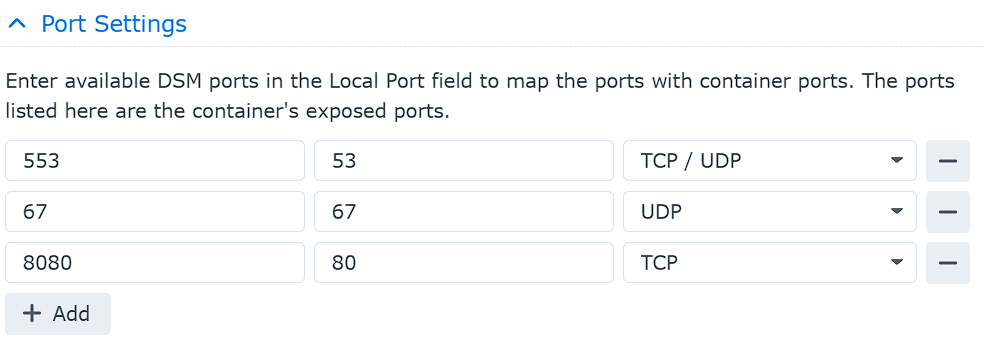
2. Create a macvlan network interface. A macvlan network interface will avoid all port conflicts as you’re specifying a unique IP address that the container you’re creating will use.
This means that you’ll access that container using a completely different IP address than your Synology NAS. By default, your host (Synology NAS) will not be able to communicate with your container.
For this reason, a bridge network is required so that the host (Synology NAS) and the container can communicate. To be clear, if the Synology NAS needs to communicate with the container, you will use the bridge network IP address and NOT the macvlan IP address.
Creating a Macvlan Network Interface
We will look at how to create a Macvlan interface below.
1. SSH into your Synology NAS using your favorite SSH tool.
2. First, we need to determine what network interfaces currently exist (on your Synology NAS) and note down the adapter name. To do this, run the command below and note down the network interface name that has your Synology NAS’s IP address (in this example, mine is eth0).
ifconfig

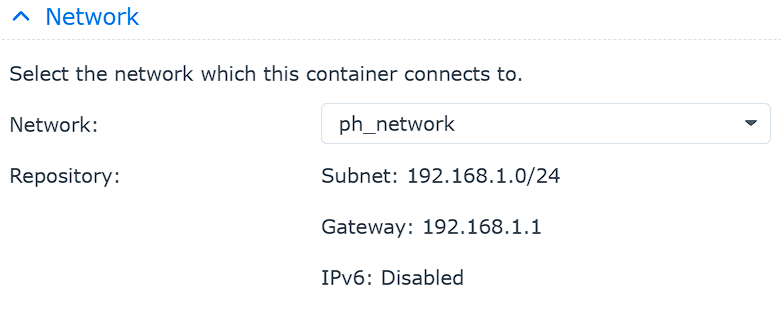
3. Next, you need to run the command below while substituting the correct subnet (most are 192.168.1.0/24 by default). You also need to pick an IP address that you’d like to use that’s not currently in use. I will be using 192.168.1.198.
NOTE: ph_network will be the name of the network (you can substitute this as you’d like).
sudo docker network create -d macvlan -o parent=eth0 --subnet=192.168.1.0/24 --gateway=192.168.1.1 --ip-range=192.168.1.198/32 ph_network
Our network is now created. We can then exit our SSH session and disable it in DSM (if you won’t be using it). If you are disabling it and created a firewall rule for it, you should inactivate the firewall rule as well.
4. You can then add the network to your Docker container when you create it!
Adding Multiple Network Interfaces
If you’d like to add multiple network interfaces to a Container, you must do it from the Network tab in Container Manager.
1. In the Network tab, select Manage under a Network Name.
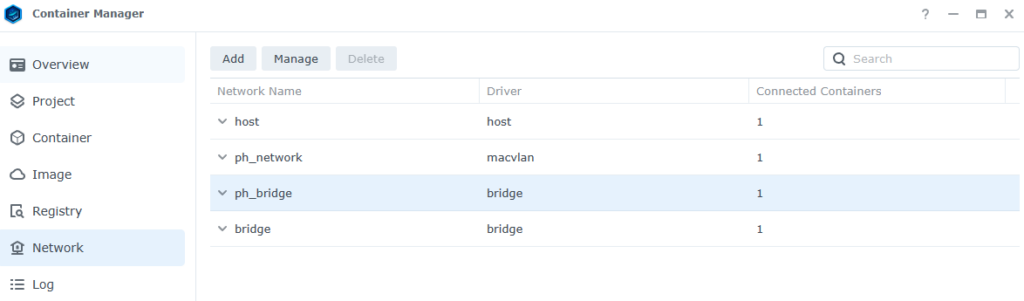
2. Select the Container you’d like to add the Network Interface to.

3. That’s it! The Network Interface will now be part of the Container!
Updating Docker Containers in Container Manager
Over time, you may run into scenarios where a Docker container has an update that you want to install. Container Manager makes this extremely easy.
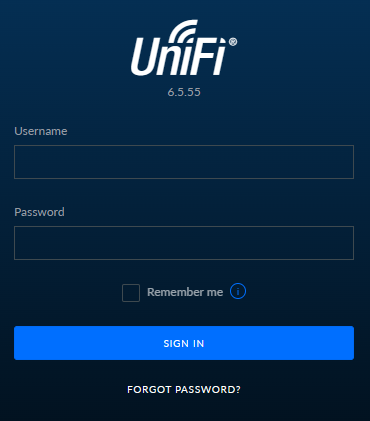
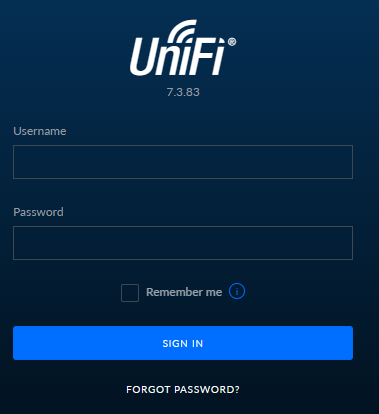
For reference, we will be updating the Unifi Controller in this example (currently running v6.5.55).
Always make sure you have backups of your important data before updating a Container!
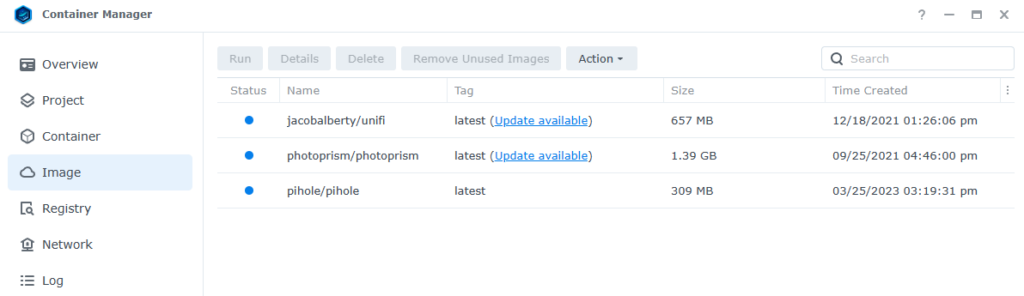
1. Stop the Container, then open Container Manager and select Image, then select Update Available.
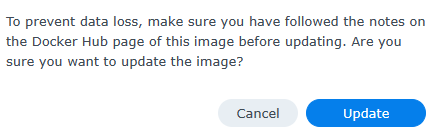
2. Select the Update button to update the container.

3. Select Update if you’d like to proceed.
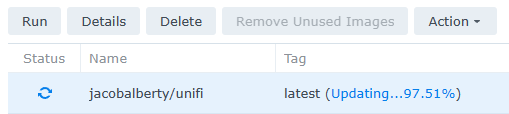
4. The container will now update! That’s literally it.
5. When it’s finished updating, you will have the latest version!
How to Access a Container via Command-Line Interface (CLI)
There are certain situations where you will need or want to access the container’s files. Whether you need to modify something (by mounting a file volume) or view the structure, there’s a way to do it on a Synology NAS, but it must be done through SSH.
1. Start your container! If the container is not started, you will not be able to access the container!
2. Ensure you can SSH into your Synology NAS. Open Control Panel, select Terminal & SNMP, and Enable SSH service.
If you are using Synology’s Firewall, ensure that you allow port 22 traffic. I created a video on how to SSH into your Synology NAS if you have any problems.
3. Run the command below to list the running containers. Copy the Container ID.
sudo docker container ls

4. Run the command below and substitute the container ID found above.
sudo docker exec -it CONTAINER_ID bash

5. You will now be connected as the root user for the container!

Why Use Docker Containers?
Using a Docker Container as opposed to a package has all of the benefits that we spoke of above in terms of portability, but it also brings the benefit of opening the possibilities to all types of different, standardized applications.
For example, people love Synology Drive (and it’s my favorite tool), but it’s only available in Synology DSM. For users looking for an alternative, they can run something like NextCloud, which would provide extremely similar functionality, with the benefit of being an application that runs on other operating systems as well.
This is arguably the biggest benefit, as you are indirectly locking yourself into an ecosystem if you use first-party tools. If you choose the Package comparison (using Plex as an example), the data will exist on the NAS, and you’ll technically be able to get it, but not like you can with Docker. Instead, you’ll be looking through the Synology filesystem hoping to find the data and trying to piece it back together on whatever operating system you’re moving to.
This all ignores just how many total options you have with Docker. Synology’s Package Center is extremely limited, but Docker has an insane amount of packages. Some of my favorites being Pi-hole for DNS ad blocking, Uptime Kuma for uptime tracking, Vaultwarden for password management, and much more.
The point is, there are some great first-party packages you can use and I’m not trying to discourage anyone from using them. It’s just that as time goes on, you’ll slowly realize (like I did), that Docker’s flexibility is worth the slightly more time-consuming setup process, especially after you learn how it all works!
Conclusion & Final Thoughts: Docker on a Synology NAS
In general, Container Manager on a Synology NAS isn’t drastically different than it was on DSM 7.1 and below. The user interface is different and the addition of Docker Compose is awesome, but in general, the settings are all there like they used to be…just in entirely different locations.
Container Manager is an upgrade in almost every way, so even though there will be a transition for it with existing tutorials still referencing Docker, in the long run, Container Manager will be a better overall product.