If you’re interested in implementing 10GbE on a Synology NAS, you’re probably left wondering where to start. While the process of adding 10GbE on a Synology NAS is fairly straightforward (from a hardware perspective), without configuring it properly on the software side or having the correct hardware, you won’t see any of the benefits.
Before we look at how to configure 10GbE on a Synology NAS in DSM, let’s take a look at some of the important prerequisites to ensure that you will actually see increased speeds.
Some links below are Amazon affiliate links which means that I earn a percentage of each sale at no cost to you. Thank you for your support.
Synology 10GbE Hardware & Prerequisites
If you’re interested in implementing 10GbE on a Synology NAS, the first step is ensuring that you have the correct hardware. There are two different ways to look at this and the hardware required will be different depending on which option you’d like to use.
Before you look at the hardware requirements, you need to determine how you’d like to utilize 10GbE:
- If you want only the Synology NAS to communicate with the Switch through 10GbE (meaning that multiple clients can access the NAS at full 1Gb or 2.5Gb speeds), you only need the Synology 10Gb adapter and a 10Gb Switch.
- If you want one individual device to access the NAS at 10Gb speeds, you will need a 10Gb Switch with at least two 10Gb ports, and a 10Gb network adapter for your device. This adapter will be different depending on what device you’re using, but it’s the only way to utilize 10Gb speeds.
Again, if you’re interested in ONLY having 10GbE speeds going from the Switch to the NAS, the only thing you need is a Synology 10GbE Adapter below and a 10GbE Switch.
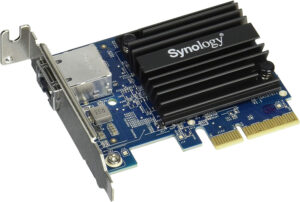
DS723+ / DS923+ / DS1522+ 10GbE Adapter
This mini adapter can be used to increase the networking speeds to 10GbE for the DS723+/DS923+/DS1522+: E10G22-T1-Mini
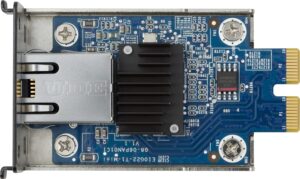
DS1621+ / DS1821+ 10GbE Adapter
This PCIe expansion device will provide 10GbE networking to the Synology DS1621+/DS1821+: E10G18-T1.
10Gb Switch
There isn’t a right or wrong answer on the type of 10Gb Switch that you should use, but it has to have at least one 10Gb NIC (or two if you want full 10Gb speeds to one device). Remember that you must use at minimum, a Cat 6 cable as well to ensure that you will get 10Gb speeds.
Maximizing Performance with RAID or SSD Cache
Most Synology NAS devices are used with 3.5″ HDDs, meaning that on average, you’ll get read/write speeds of around ~200MB/s per drive. This is an overly simplified way of looking at it and you should use a calculator to determine the actual performance you’ll receive, but the point is that if you want to saturate a full 10Gb connection, you’re going to need more than one 3.5″ hard drive working together.
Generally, you won’t be able to max out a full 10Gb connection with less than 5-6 total 3.5″ HDDs working together in RAID, so you have three other options if you don’t want to do this or don’t have a NAS that large:
- Configure SSD Cache on the storage pool. This will utilize NVMe SSDs to temporarily cache data and serve it faster, which generally allows you to use 10Gb speeds with a lower total number of hard drives. Just keep in mind that if the data you need isn’t cached, you won’t see increased speeds.
- Use NAS SSDs as opposed to HDDs. SSDs perform faster than HDDs, so a lower total number of SSDs is required to saturate a 10Gb connection than with HDDs.
- If your NAS supports NVMe volumes (newer Synology models do), you can configure an NVMe volume that will be able to perform at 10Gb speeds.
The point here is that if your storage isn’t capable of getting read/write speeds up to 10Gb, purchasing a 10Gb network adapter, Switch, and any other equipment needed is going to be a waste.
Configuring 10GbE on a Synology NAS
The process of configuring 10GbE on a Synology NAS is actually very straightforward. Ultimately, you just have to follow three steps:
- After purchasing the 10GbE adapter, install it in your Synology NAS.
- Connect the 10Gb port to a 10Gb Switch.
- In the Control Panel, select Network and then check the new LAN device. If it’s working at 10Gb, it’ll say 10000 Mbps.
Remember, this adapter can be configured statically (meaning on the NAS), or using DHCP and will be given an IP address from your DHCP server.
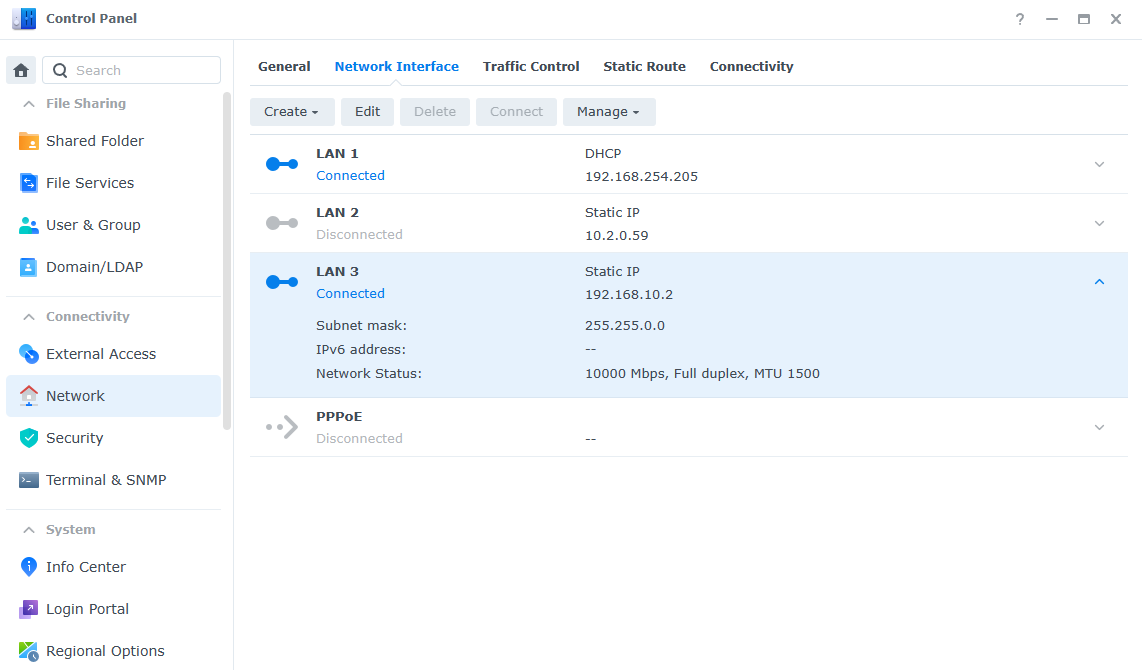
Outside of this configuration, the only thing that you have to remember is that if you want to access the NAS on the 10Gb connection, you must use that IP address. If you use the 1Gb connection’s IP, you’ll be limited to 1Gb speeds.
Final Thoughts & Conclusion on a 10Gb Synology
The process of configuring 10GbE on a Synology NAS is generally hardware-related, though there are some minor software changes that should be made as well. Overall, this is one of the best ways to increase the performance of your NAS and have all the devices you use to communicate with the NAS work in a more efficient way.