In this tutorial, we’ll look at how to back up a VM/container in Proxmox. While you can back up a virtual machine (VM) or Container inside of the guest operating system itself, it’s significantly easier to manage the backup process in Proxmox itself.
Proxmox allows you to back up and restore VMs and Containers by setting up external storage and configuring backup tasks. You can then back up and restore individual guests directly from the GUI.
How to Back up a VM/Container in Proxmox
Before you can back up VMs or containers in Proxmox, you must configure external storage so that there is a location to actually back the data up to.
Step 1: Configuring External Storage for Backups
From a functionality perspective, you’ll configure external storage in the Proxmox Datacenter, and then configure backup schedules. There isn’t necessarily a correct or incorrect way of doing this, but one of my favorite options (from a file server perspective) is NFS.
With that said, if you have a device capable of running Proxmox Backup Server, you should strongly consider it as Proxmox Backup Server will back up VMs and containers incrementally. This will allow for (potentially) smaller transfer sizes and quicker backups.
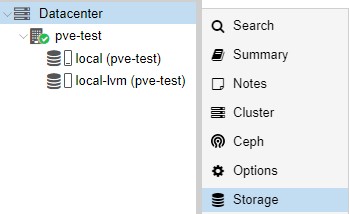
1. To configure external storage, select Datacenter, then Storage, then Add, and the type of storage you’d like to add. As mentioned above, NFS is a great option (this is an example using a Synology NAS) if you’re connecting to a file server, with Proxmox Backup Server being the preferred option if you have a device capable of running it.
1. Select Datacenter then Storage.
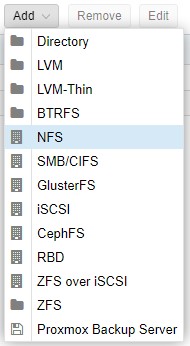
2. Select Add then add the type of storage that you’d like to use. In this example, I’ll be using NFS, but you can use anything you’d like.
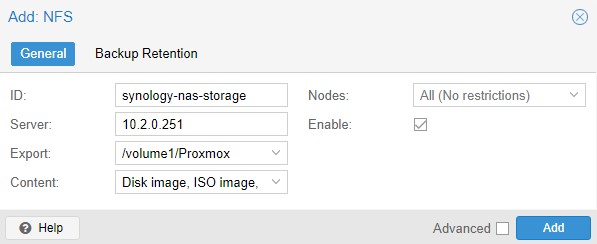
3. At the NFS screen, create an ID, then enter the IP Address of your NFS server. In the Export drop-down menu, the location of your Proxmox folder should automatically appear (assuming it was set up with the proper NFS permissions – use this Synology tutorial if you’re interested in seeing the NFS permission section).
In the Content drop-down, select ALL entries. You can then select Add.
4. Proxmox should now show the storage that we created above. At this point, you can move on to the backup portion.

Step 2: Backing up a VM/Container
Now that we configured Proxmox and our NFS share, we can back up a virtual machine or container by following the steps below.
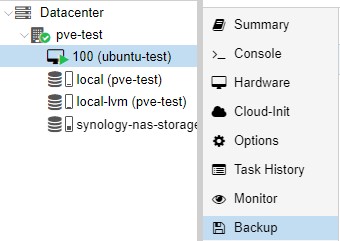
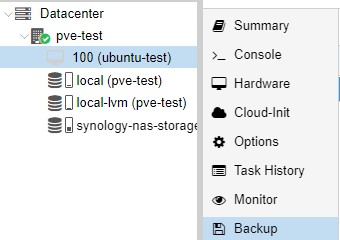
1. Select the virtual machine you’d like to back up, then select Backup.
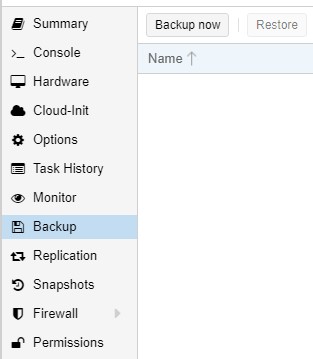
2. In the backup tab, select the NFS storage location in the top right. This will ensure that we back up to the correct location (in my example, synology-nas-storage).

3. Select Backup now in the top left corner.
4. Select your Storage, Mode, and Compression, then select Backup and the backup will start!

Step 3: Configuring Automatic Backups
You can easily configure Automatic backups in Proxmox for all of your virtual machines if you’d like. This will automatically back up every virtual machine on a specific schedule.
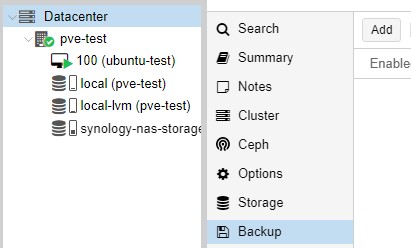
1. Select Datacenter then Backup, then select Add.
2. Select the Storage for your share (NFS/Proxmox Backup Server, etc), then specify the Schedule, Selection mode, Compression, and Mode.
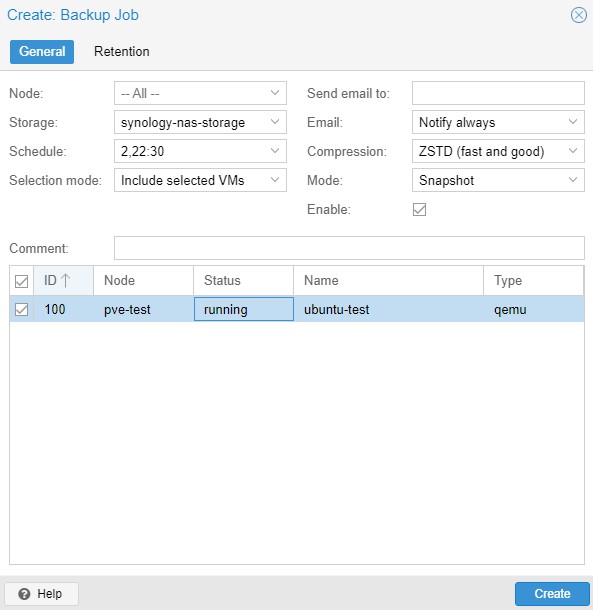
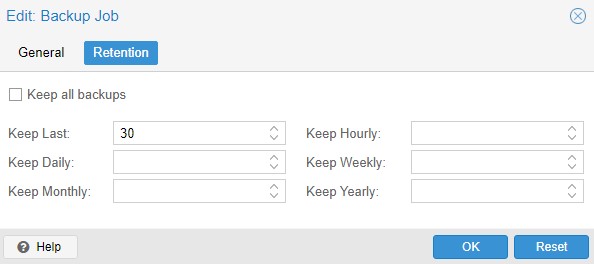
3. You can also change the retention policy to only keep a certain number of versions by selecting the Retention tab.
Without specifying a retention policy, all backups will be stored which will drastically reduce storage space on your external server over time.
4. Your virtual machines will now back up to your external server automatically after you select Create!
Step 4: Restoring a Virtual Machine from a Backup
After the backups have been created, you can easily restore your virtual machine or container if you ever need to.
1. Select the virtual machine, then Backup.
2. Select the storage location in the top right under Storage where the backup exists.

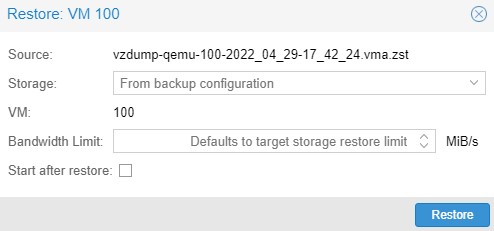
3. Select the snapshot you’d like to restore to, then select Restore.

4. All information can stay as default (unless you want to automatically start it after restoration), then select Restore.
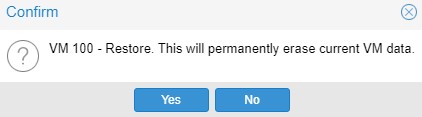
5. You will receive a message that this will permanently erase the existing virtual machine. If you agree, select Yes. Your virtual machine will now be restored from the backup you selected!
Conclusion & Final Thoughts: Proxmox Backups
This tutorial looked at how to back up a VM/Container in Proxmox. The most important section in this tutorial is ensuring that the backup destination’s storage is on an external server. As mentioned above, if you can use Proxmox Backup Server, that’s probably your best bet, but an NFS share is a great option as well. The key is that Proxmox backups are extremely easy to manage and use, and are an easy thing to implement.