In this tutorial, we’re going to look at how to create a 2-node cluster in Proxmox. There is so much functionality that you can gain by configuring a cluster in Proxmox, but in order for it to work properly, there really needs to be three full nodes for quorum.
While three nodes are ideal, many users will be able to run all of their services on two nodes, and adding a third device can increase the overall costs for the device and the electricity costs of running it 24/7. In situations like this, creating a 2-node cluster makes sense, but you really need a third vote in order to ensure that everything works properly.
The third vote is extremely important in this, as it will ultimately determine which node is down or disconnected (as two nodes will basically be able to vote against each other).
Some links below are Amazon affiliate links which means that I earn a percentage of each sale at no cost to you. Thank you for your support.
What Should You Use as a QDevice?
We’ll be configuring a QDevice in this tutorial for Quorum. Quorum is used to ensure that most of the nodes in a cluster are online, with the overall goal being to have three total votes. The QDevice we’ll be setting up acts as the third vote without actually running the Proxmox OS.
The steps below can run on any Debian-based device, but we’ll be using a Raspberry Pi specifically because it’s one of the cheapest options you can use. Remember, you don’t need a Raspberry Pi, but you do need it to be a separate device from the two Proxmox nodes, so any Linux system should work.
This ensures that if one of the two devices goes down, this device will stay up to vote and maintain Quorum.
Video Tutorial on Creating a 2-Node Proxmox Cluster
We created a step-by-step video tutorial that highlights how to create a 2-node Proxmox Cluster, but refer to the commands below for reference.
How to Create a 2-Node Cluster in Proxmox
Before you look at the steps below, you need to configure the Proxmox Cluster. This is the most important step, but rather than using three nodes, you’ll stop at two. The steps below will configure the QDevice, which will act as the third vote.
Step 1: Configure Corosync on the QDevice
1. After configuring the Raspberry Pi OS, run the command below to access the SSH configuration and permit login for root. This will allow you to SSH into the Raspberry Pi at a later step.
sudo nano /etc/ssh/sshd_configIn the configuration file, uncomment (by removing the # symbol) the line below, then restart the SSH service. Please note, we’re adding yes so that we can log in with a password.
PermitRootLogin yes
sudo systemctl restart sshd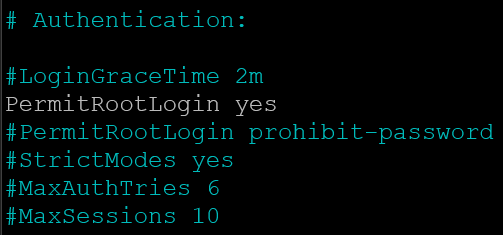
2. Now that we’ve permitted root, you can install the two necessary components by running the command below:
sudo apt install corosync-qnetd -y && sudo apt install corosync-qdevice -y3. After the packages are installed, we need to modify the root user’s password by running the command below and setting a password.
sudo passwd rootStep 2: Configuring Both Nodes in Proxmox
Now that we’ve configured the Raspberry Pi (or whatever device you’re using), we need to add this device to both Nodes. Before you can do that, you have to install this package on each node by accessing the shell and running the command below. After that’s done, you can add the device below.
apt install corosync-qdevice1. Open Proxmox, select the first Node, and then open the Shell for that node. Run the command below, substituting the IP address of the device we configured above.
pvecm qdevice setup [IP ADDRESS]After the device connects, you’ll have to sign in to it using the root password for your QDevice. As soon as you do, it’ll be configured on that device.
2. After you do, you can run the command below to list out the nodes, and you should see one listed as Qdevice. This will be the device that will act as the third vote. You do not need to run this on both nodes, but I’d suggest checking both to ensure they display the QDevice.
pvecm nodes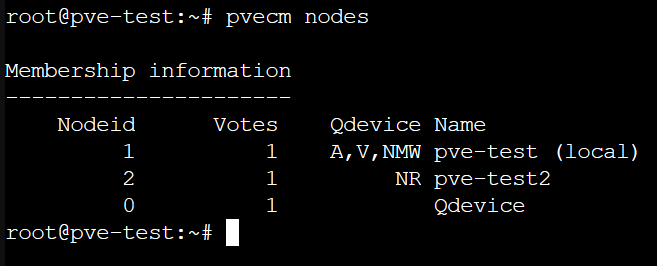
At this point, the nodes are configured, and the Raspberry Pi will act as the final vote, so if one of the Proxmox nodes goes down, everything will continue to function as expected.
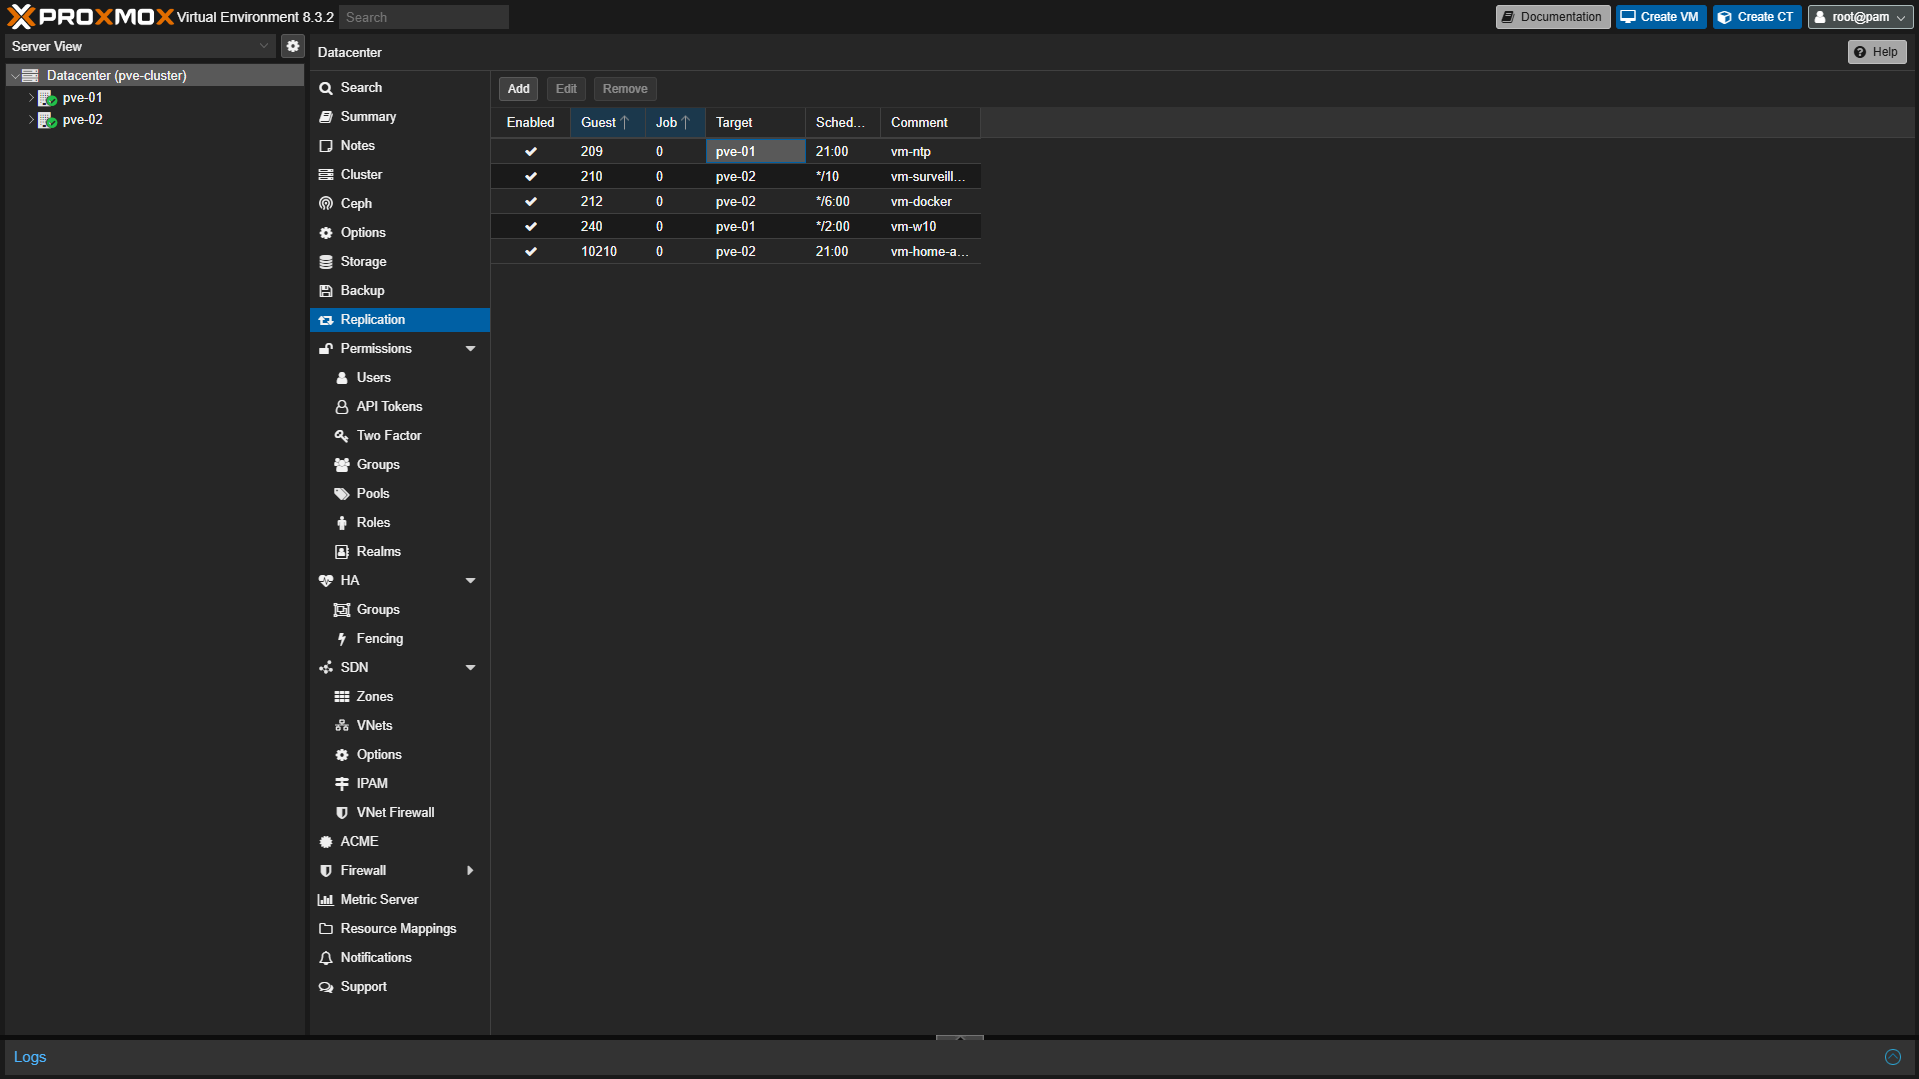
Migrating VMs or Configuring High Availability
At this point, your cluster is configured, and migrating VMs will work, as well as configuring high availability. However, high availability requires shared storage or VM replication.
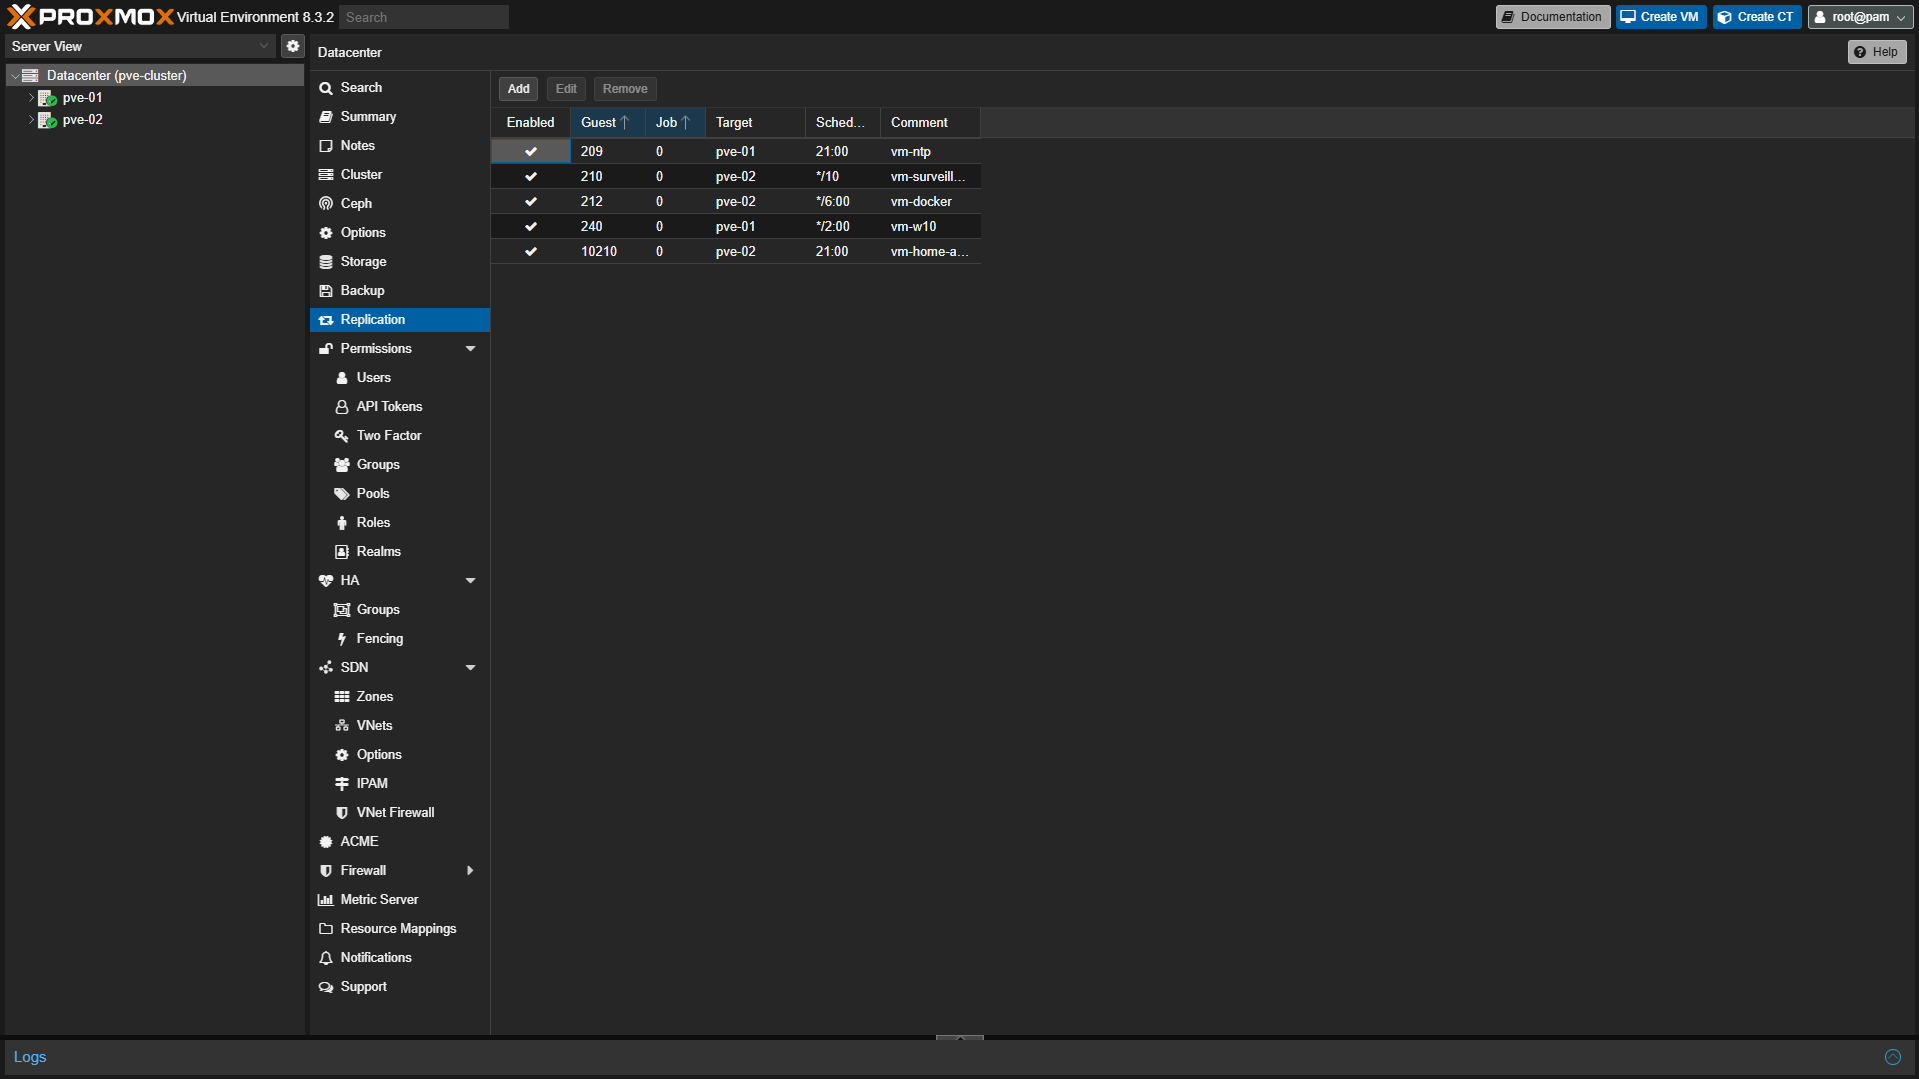
Both are solid options, but your requirements will determine which makes the most sense. Check out our article on high availability or replication to implement either option.
Conclusion & Final Thoughts: Should You Use a 2-Node Cluster?
Setting up a 2-node Cluster in Proxmox simplifies everything as you may not need a third device. However, utilizing a cheap Raspberry Pi and configuring Quorum will ensure that you have three votes at all times, and your Proxmox cluster will function the same way with only two nodes, as a fully functional three-node system would.