Proxmox makes it easy to give a VM more disk space — one command and it’s done on the hypervisor side. The part people miss is that the guest OS still needs to claim the newly allocated space before it shows up as usable storage. This guide covers both halves: the Proxmox side and the VM side, for Windows and Linux.
One thing worth knowing before you start: expanding a disk is easy, but shrinking one is not. Keep size increases incremental, and take a backup before you touch anything. Setting up Proxmox Backup Server before making disk changes is the right move — if something goes wrong, you can restore the disk and be back where you started.
Expand the Disk in Proxmox
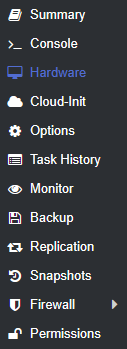
1. Select the VM, then open the Hardware tab.
Find the VM you want to resize in the left panel. Click on it, then select Hardware from the menu.
2. Note the disk name and VM ID.
You’ll need both for the resize command. In this example, the disk is sata0 and the VM ID is 101.

3. Open the Shell and run the resize command.
From the Proxmox shell (either the web UI shell or SSH), run:
qm resize [VM_ID] [DISK_NAME] +[SIZE_INCREASE]GUsing the example values above, the command looks like this:
qm resize 101 sata0 +20G
4. Confirm the new disk size in Hardware.
Go back to the Hardware tab. The disk should now show the updated size.

That’s all Proxmox needs. The disk is larger, but the guest OS doesn’t know yet.
Claim the Space in a Windows VM
If you followed the Windows 11 on Proxmox setup, this next part will look familiar. The disk was expanded to 120GB in Proxmox, but Windows still reports 100GB until you extend the volume manually.
1. Open Disk Management.
You can get there by right-clicking the Start menu and selecting Disk Management, or by running diskmgmt.msc.
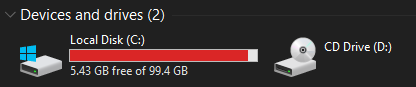
The C: drive still shows 100GB. If you don’t see the unallocated space yet, restart the VM first.
2. Restart the VM if needed, then recheck Disk Management.
After a reboot, the 20GB of unallocated space should appear next to the existing partition.


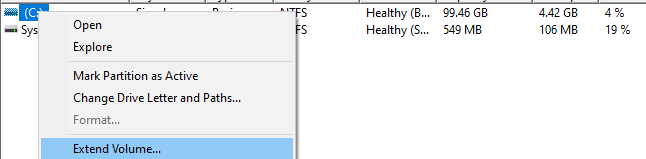
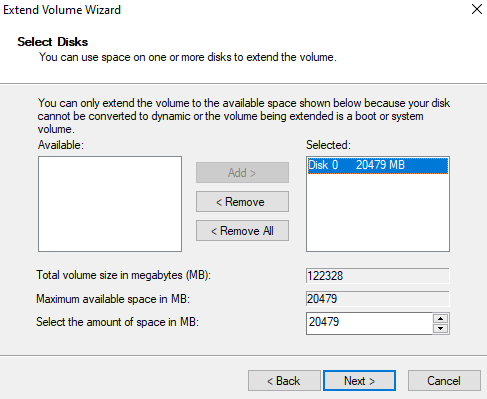
3. Right-click the C: drive and select Extend Volume.
This opens the Extend Volume Wizard.
4. Walk through the wizard.
Select Next, move the disk from Available to Selected, confirm the settings, then select Next again.
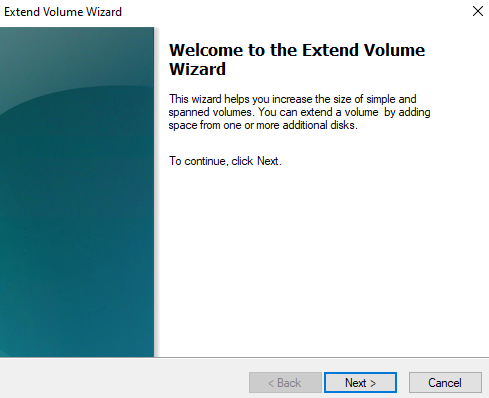
5. Select Finish.
The C: drive will now reflect the full available space.
Claim the Space in a Linux VM
Linux is a bit more involved. The easiest way to handle this is with GParted, which gives you a GUI similar to Windows Disk Management. You can do this via the CLI, but the process has more room for error.
Here’s the thing — the CLI method in older guides (including the original version of this post) recommends deleting the partition and recreating it. That works, but it’s risky and unnecessary for most setups. A safer approach on modern systems is to use growpart and resize2fs (for ext4) or xfs_growfs (for XFS), which resize the partition and filesystem without deletion.
If you do need to go the fdisk route, the steps below are a general guideline, not a plug-and-play tutorial. Every Linux setup is different depending on partition layout, filesystem type, and whether LVM is involved. Take a backup before proceeding.
1. Find the partition you want to expand.
sudo fdisk -lIn this example, the target partition is /dev/sda3. Note your actual partition path.
2. Run fdisk on the parent disk.
sudo fdisk /dev/sda3. Delete the partition, then recreate it at the new size.
Run the following commands inside fdisk:
d
[PARTITION_NUMBER]
n
[accept defaults]
w
The n command recreates the partition using the full available space. If prompted about an existing signature, confirm you want to remove it.
4. Resize the filesystem.
After writing the partition table, resize the filesystem to match:
- For ext4:
sudo resize2fs /dev/sda3 - For XFS:
sudo xfs_growfs /dev/sda3
The disk should now reflect the new size.
This is one of the simpler Proxmox operations, but it’s a good reminder that most disk changes on a VM happen in two places. If you’re setting up VMs for the first time, the guides on running Docker in Proxmox and installing Home Assistant on Proxmox are worth bookmarking — both end up needing more disk space than the defaults give you. If you’re on an older version of Proxmox, updating Proxmox VE first is worth doing before making storage changes. And if you’re not already backing up regularly, backing up Proxmox to a Synology NAS is a straightforward way to keep a second copy offsite.