This tutorial will look at how to install TrueNAS on Proxmox.
The process of installing TrueNAS on Proxmox is extremely similar to installing other operating systems on Proxmox. The main difference is how the hard drives (which can be used to create a storage pool) are added to the virtual machine. Before you look at how to install TrueNAS on Proxmox below, I highly suggest that you determine if you’d like to use TrueNAS Core or TrueNAS Scale.
The process of setting up the VM is the same, but the operating system is different. With that said, TrueNAS Core or TrueNAS Scale will allow you to configure a NAS (as a VM) on Proxmox.
Some links below are Amazon affiliate links which means that I earn a percentage of each sale at no cost to you. Thank you for your support.
How to Install TrueNAS on Proxmox
We will look at how to install TrueNAS on Proxmox below.
1. Determine if you’d like to use TrueNAS Core or TrueNAS Scale. After you’ve determined which OS you’d like to use, download the latest version of TrueNAS Core or TrueNAS Scale.
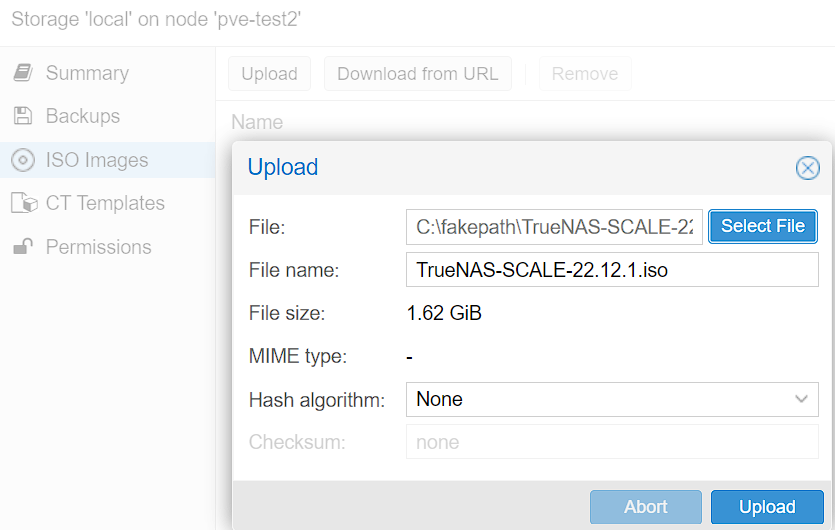
2. After the download finishes, navigate to Proxmox, then upload the ISO image. You can upload the image by selecting Storage, then ISO Images, and finally, Upload.
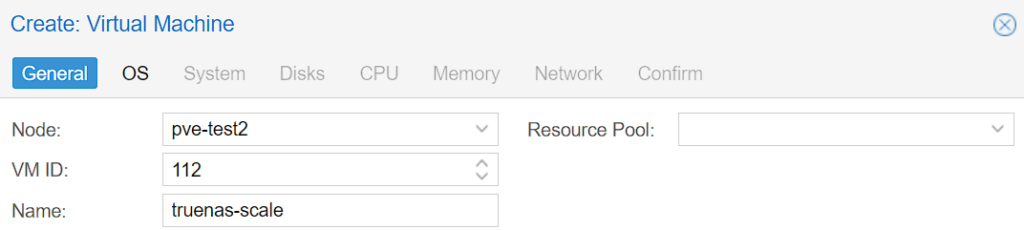
3. In the top right corner, select Create VM, then enter a VM Name.
4. Select the TrueNAS Image, then move on to the System section.

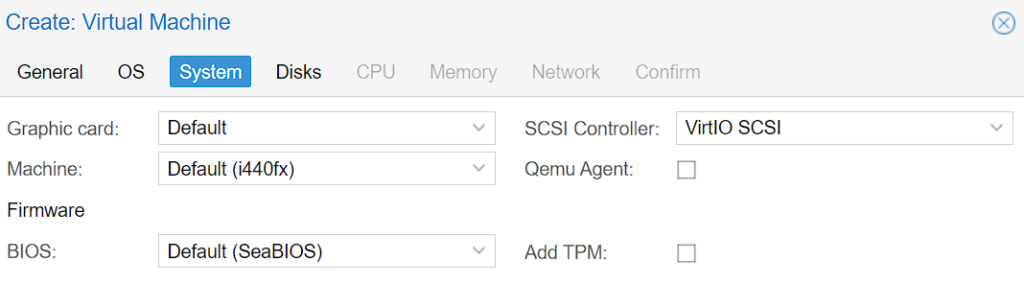
5. Change the SCSI Controller to VirtIO SCSI, then select next.
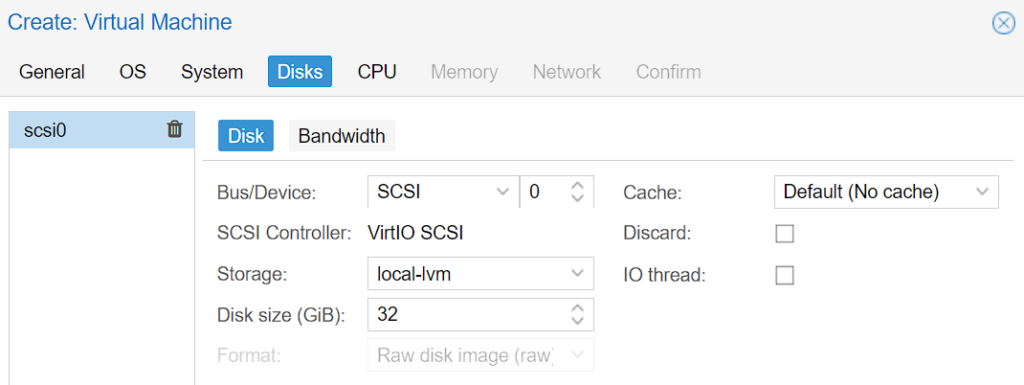
6. Set the disk size to whatever you’d like, with the recommendation for TrueNAS Scale and TrueNAS Core being 16GB. However, you can use as much storage space as you’d like.
NOTE: Keep in mind that this will be for the TrueNAS operating system only.
7. Set the total number of CPU Cores you’d like to use.

8. Set the total Memory you’d like to use with the recommendation for TrueNAS Scale and TrueNAS Core being 8GB. Please keep in mind that ZFS is generally memory hungry, so if you have memory available, I’d recommend at least 16GB.

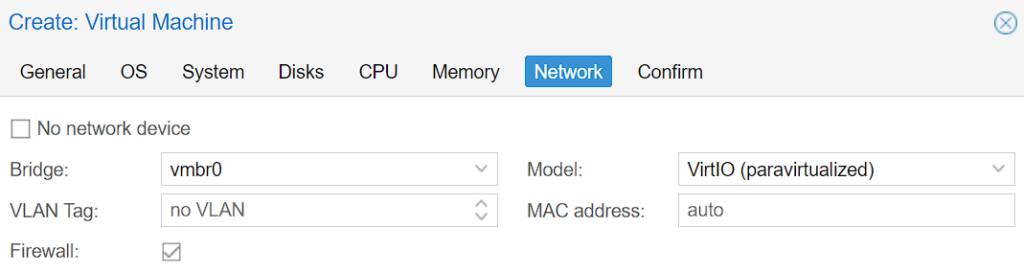
9. Configure the Network Settings section. If you have a PCIe network card (for either 10GbE or just so that TrueNAS uses its own NIC), you can select No Network Device here and then add it at a later step.
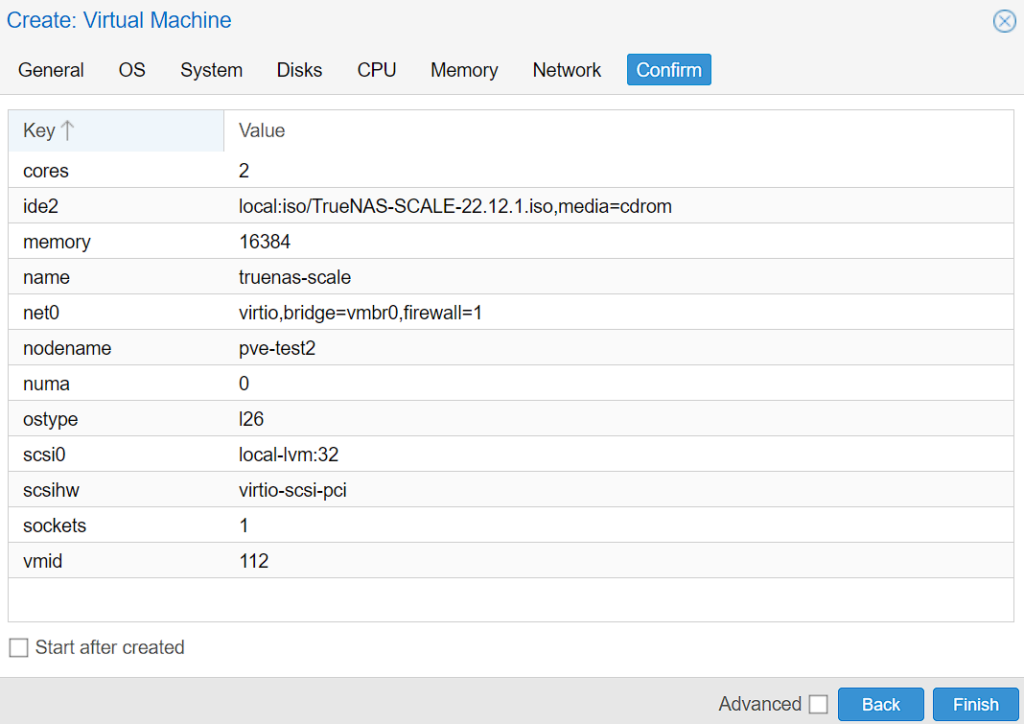
10. Ensure that Start after Created is NOT selected, then confirm the settings by selecting Finish.
Adding Physical Hard Drives to a TrueNAS VM in Proxmox
To configure a storage pool in TrueNAS (which is what will make this a NAS), you’ll need to pass physical hard drives to the VM. There are ultimately two ways that you can add hard disks in Proxmox.
The first is by simply passing the hard disk path which will attach the physical hard disk to the TrueNAS VM. I have an entire tutorial on how you can do this with step-by-step instructions, but the goal is to simply find the full path and add that so that you ensure the correct hard drives are always passed through to the TrueNAS VM.

While the process above will work fine, my recommendation is to purchase a SAS/SATA RAID Controller card. These allow you to plug the SATA hard drives directly into them rather than the motherboard. In Proxmox, you can then pass through the entire PCIe device rather than having to manage individual hard drives.
Something like this SAS/SATA HBA RAID Controller Card will work for most people, but please confirm compatibility before purchasing! I have TrueNAS configured on my production Proxmox system using this exact setup and it’s worked flawlessly.
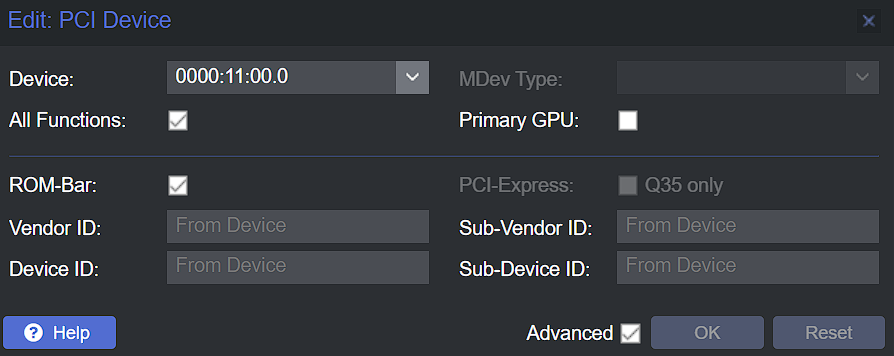
If you do follow this approach, you can add the PCIe device by selecting Hardware, then Add, and finally, PCI Device. Select the correct device, then select All Functions and add it. When starting TrueNAS, the hard drives connected to the PCIe device will automatically display.
After the hard drives have been attached, you can start the virtual machine and run through the TrueNAS installation process! TrueNAS Core and TrueNAS Scale are very similar from a setup perspective, but the overall Proxmox setup will be complete at this point.
Conclusion & Final Thoughts: Installing TrueNAS
This tutorial looked at how to install TrueNAS on Proxmox. The actual setup process of the virtual machine is really no different than other operating systems, but as soon as you get to the hard drive section, it becomes slightly different. From a functionality perspective, they’re very similar as you pass through the physical hard drives or PCIe device, then TrueNAS will see the drives and you’ll be able to configure a storage pool.