In this tutorial, we will look at how to add a disk to an existing pool in TrueNAS.
Before we get started, I want to be clear about one thing right off the bat: if you are attempting to add an individual drive to a ZFS pool, you cannot.
ZFS is entirely different than other filesystems and adding drives isn’t as simple as it is on other NAS operating systems. For example, adding a drive to Unraid is as simple as adding it and making a few configuration changes, whereas TrueNAS (depending on the scenario) is a lot more difficult.
With TrueNAS, you have two real options and we’ll take a look at both below. The first is to add the same number of drives that you currently have. Meaning if you have four drives in a RAIDz1 configuration, you can add another four drives and add a Vdev.
The other (not ideal) option, assuming you have backups of your data is to destroy the pool, then recreate it with the additional drive(s). We will look at both options below.
How to Add a Disk to an Existing Pool in TrueNAS
As mentioned above, if you’re attempting to add an individual drive to an existing ZFS pool, you cannot. We will look at how to add a Vdev, as well as how to destroy a pool and recreate it with the new number of drives (assuming you have backups). Before we do, I want to be clear on one final item:
If your goal is to simply add storage space, you can replace each drive one at a time. Meaning that if you have four, 4TB hard drives using RAIDz1, replace one hard drive with a larger size, wait for it to re-silver, then replace the second hard drive, etc.
You’ll have to do this for all hard drives but will increase the total storage size. Just keep in mind that the process will be slow, but it can be done.
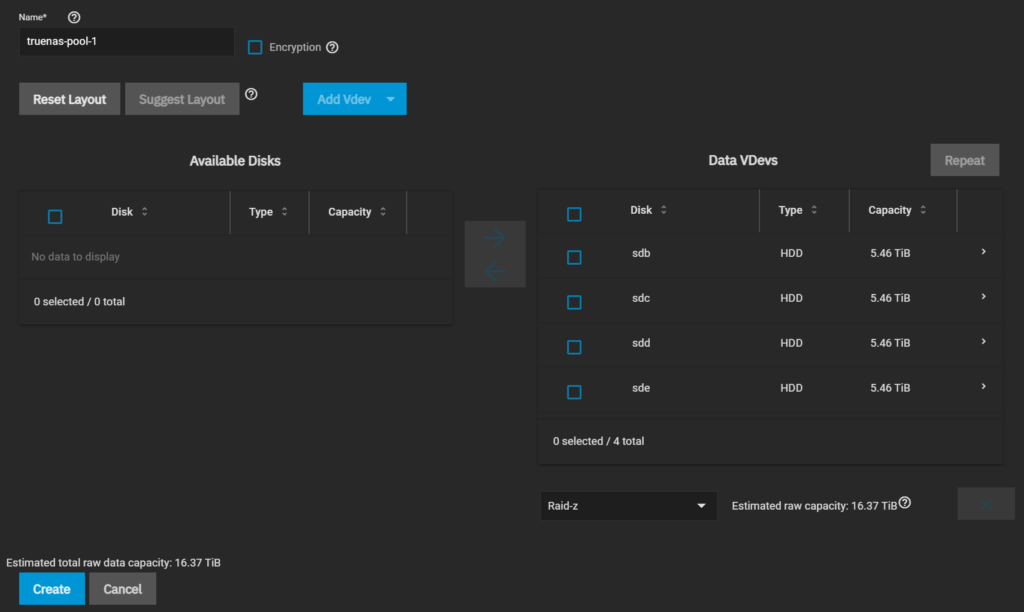
Step 1: Creating a Second Vdev
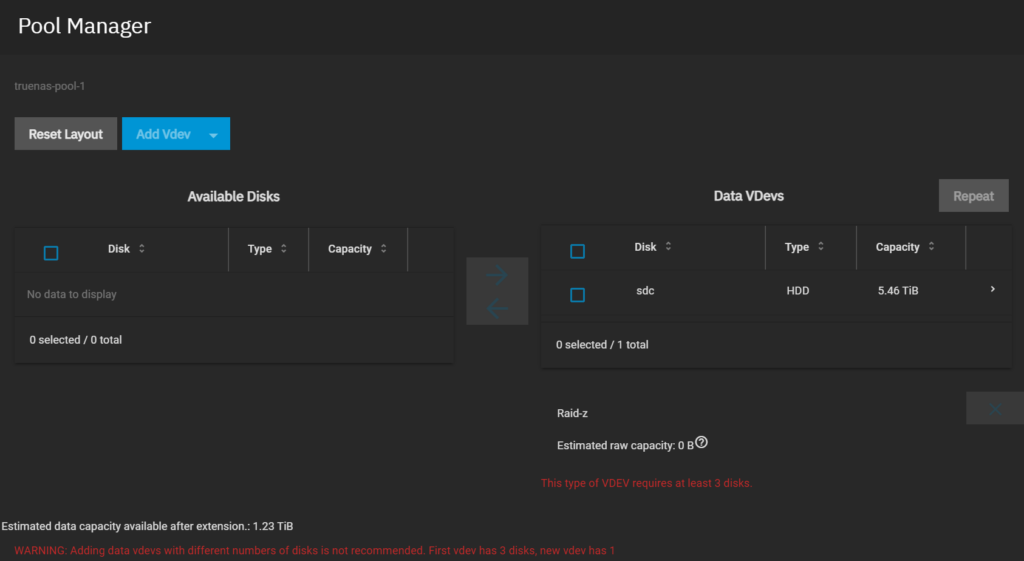
If you plan on adding more hard drives to TrueNAS, it’s generally recommended to add the same number of hard drives that the pool currently has. Meaning that if you have four hard drives in your pool using RAIDz1, you can add four additional drives, create a Vdev and you will have two Vdevs that are both utilizing RAIDz1. TrueNAS will also automatically balance the data between both Vdevs.
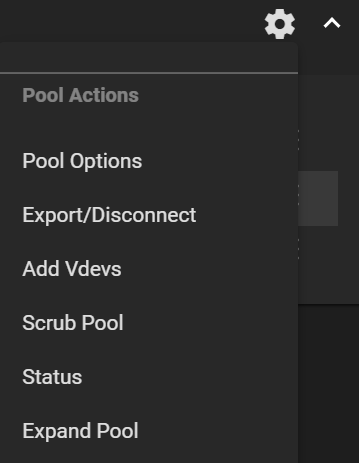
1. Select Storage, navigate to your pool and select the gear icon, then Add Vdevs.
2. Add the hard drives to the second Vdev, then select Add Vdevs. Depending on the RAID type you’re using, it will automatically be selected.
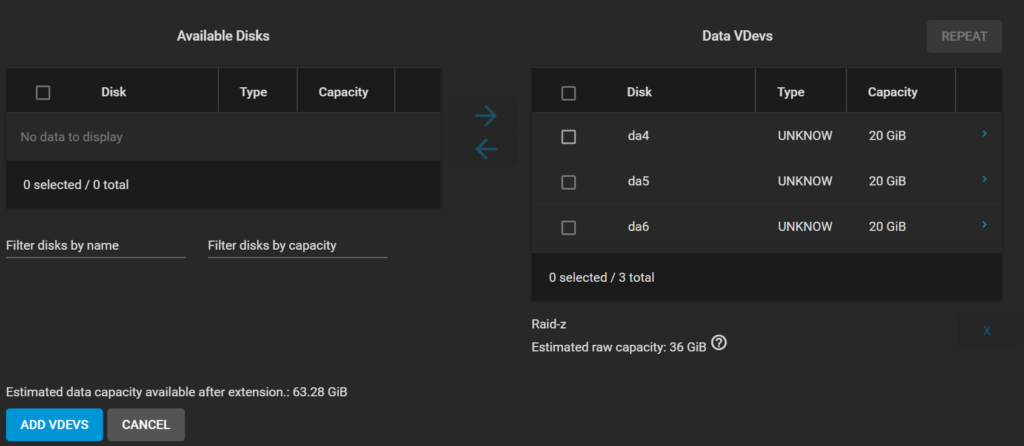
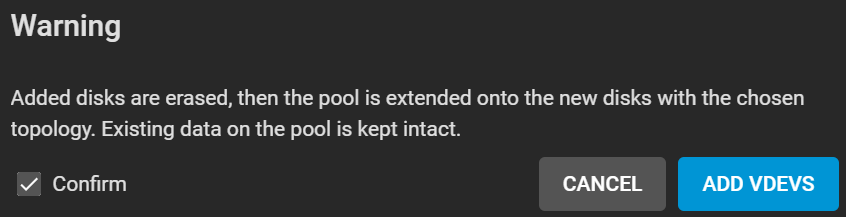
3. If you’d like to continue creating the Vdev, select Confirm, then Add Vdev.
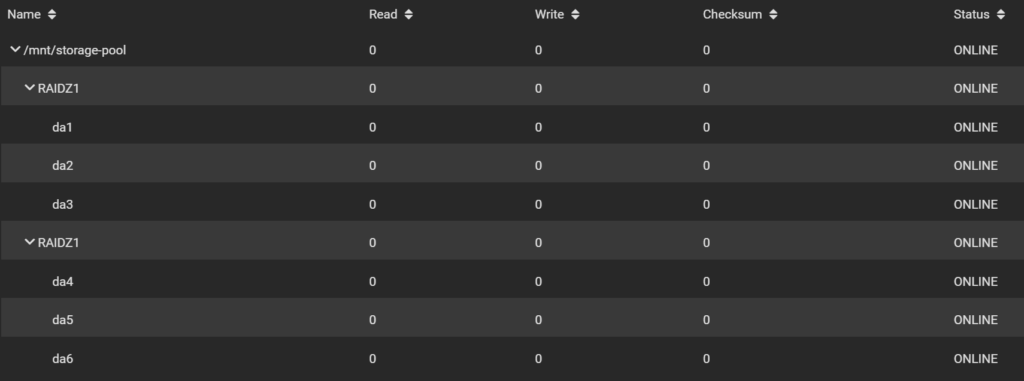
4. If you view the Pool Status, you’ll see both Vdevs!
Step 2: Recreating the Storage Pool
Before proceeding, make sure you have backups of all important data. While not ideal, one way that you can add the new drives without having to add the same number of hard drives currently being utilizes is by destroying and recreating the pool. This is something that can work and while it’s not ideal, it’s sometimes the best option. However, I’d explore all other options before completing this. The OS being used is TrueNAS Scale but it will be very similar in TrueNAS Core.
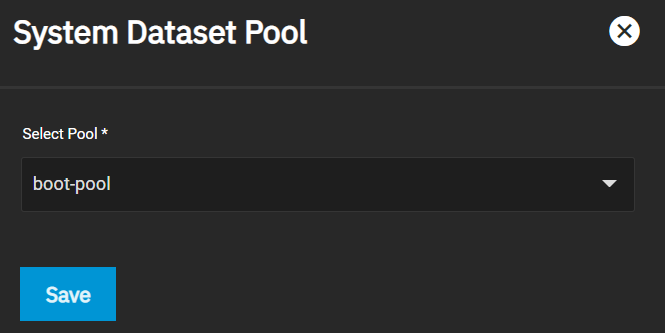
1. Select System Settings, then under System Dataset Pool, change this to your boot pool, and save.
2. If you’re absolutely positive you’d like to proceed, select Confirm, then Continue and Save.

3. Select Storage, then select the gear icon next to your TrueNAS Pool and select Export/Disconnect. In the dialogue, ensure that all options are selected (once again, confirming that you want to delete your data), then select Export/Disconnect. It will take a few minutes to delete your pool.

4. Select Create Pool after the pool has been deleted, add all of your hard drives, select the RAID type you’d like to use, and then select Create.
Please keep in mind that you’re going to experience the exact same issue if you attempt to add an individual drive again at a later time.
Conclusion & Final Thoughts on Adding Drives in TrueNAS
This tutorial looked at how to add a disk to an existing pool in TrueNAS. There are two real ways that you can expand a pool, with simply replacing the existing hard drives with larger hard drives being a legitimate option as well.
The option you should use will depend on the scenario that you have, but you must keep in mind that ZFS does not operate the way that a filesystem like Btrfs does. Simply “adding a drive” isn’t going to work, as ZFS is really designed for adding multiple drives, if necessary.