This tutorial will look at how to set up an iSCSI target on TrueNAS.
Before we look at how to set up an iSCSI Target on TrueNAS, it’s important to understand exactly what iSCSI is and how it works. When you configure iSCSI, it allows you to transport block-level data between an initiating server and a target server. In the case of this tutorial, the target server will be a TrueNAS Scale, but the process will be extremely similar in TrueNAS Core. It’s important to remember that you’ll need to have another server on the other side as an initiator that uses the iSCSI storage.
A common device that can utilize iSCSI is a hypervisor like Proxmox or XCP-ng. Proxmox and XCP-ng allow you to add iSCSI storage which means you can create virtual machines on it and utilize the space. Please be aware that there are many devices you can connect with and the process will be slightly different for each.
How to Set Up an iSCSI Target on TrueNAS
We will look at how to set up an iSCSI Target on TrueNAS Scale below, but as mentioned above, it will be extremely similar on TrueNAS Core.
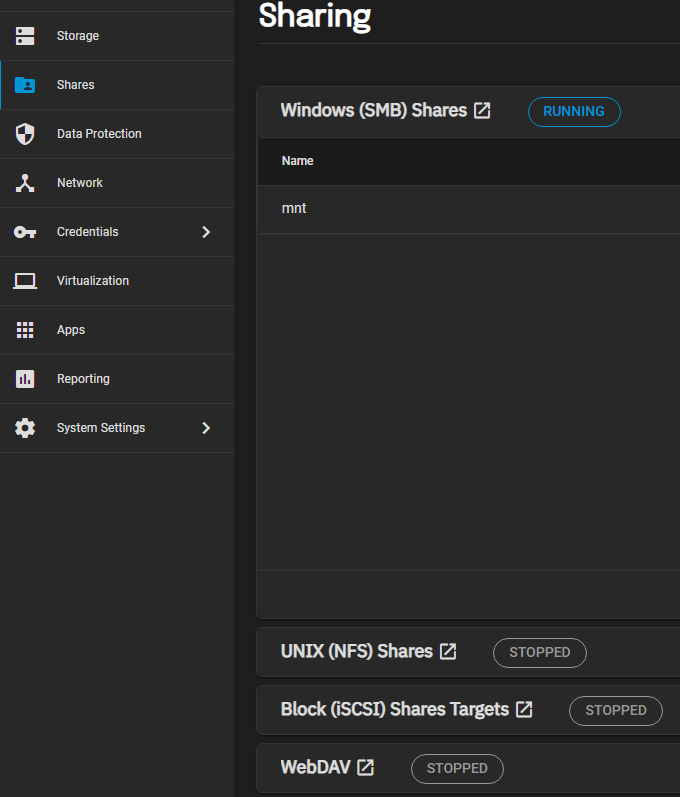
1. Log in to TrueNAS, then select Shares, and Block (iSCSI) Shares Targets.
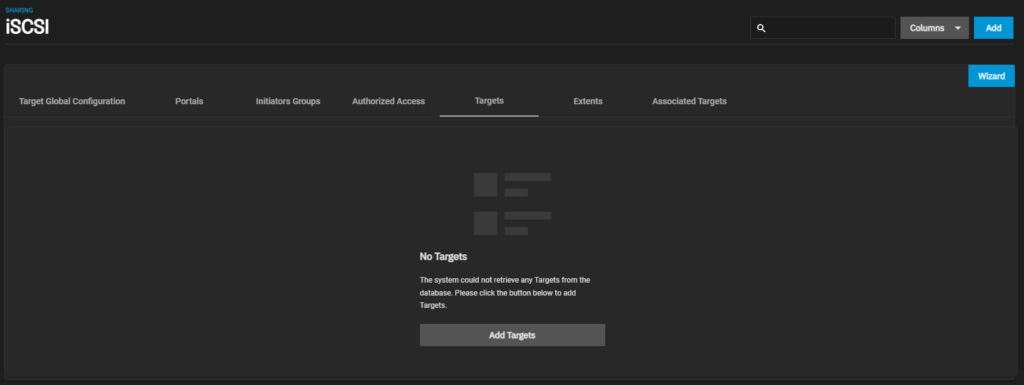
2. In the iSCSI section, select Wizard.
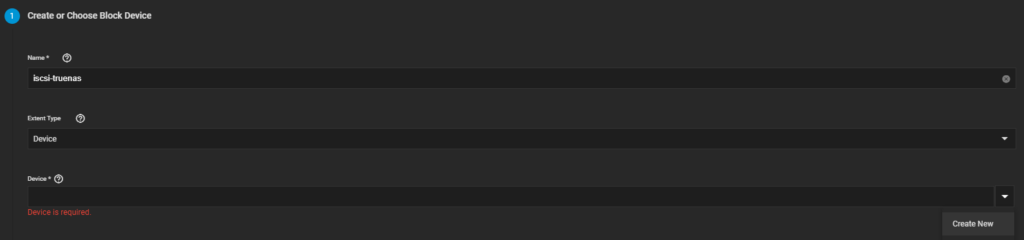
3. There are two required fields that must be configured – name and device. Set the Name to whatever you’d like, then select a Device (if you already created one). If you didn’t already create one, select the Create New button in the dropdown menu.
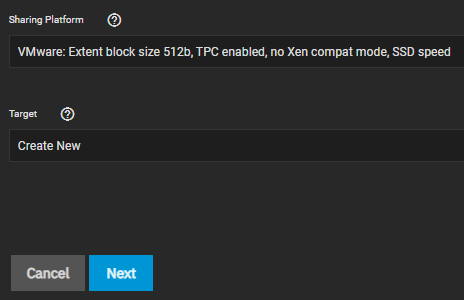
4. After selecting a Device, select the Sharing Platform, then select Next.
NOTE: The Sharing Platform will be dependent on the initiators that will be connecting.
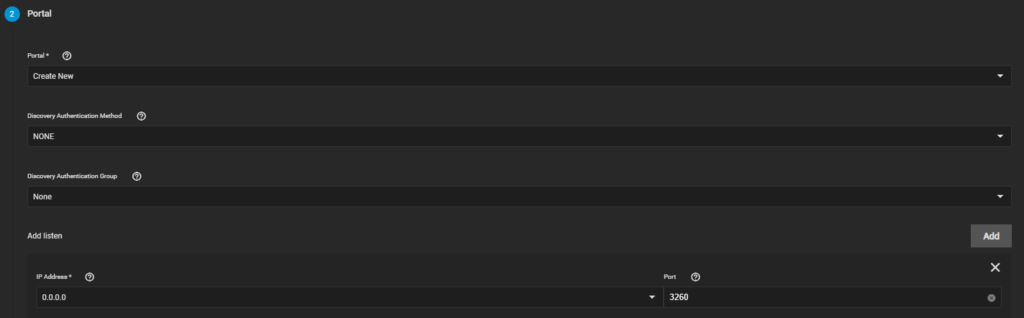
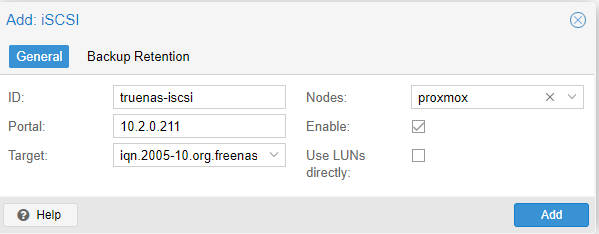
5. Select a Portal or Create New if you don’t have one that exists. This is also the location where you can specify if you’d like to use CHAP Authentication. The final setting that must be configured is the Listen section.
If you have a specific IPv4 Address that you’d like to listen on, you can add it here. However, if you’d like to listen on all interfaces, you can set it as 0.0.0.0. After the settings have been configured, select Next.
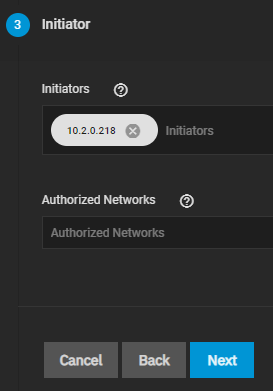
6. You can define specific initiators here by IP address or hostname. If you’d like all initiators to be able to connect, leave these fields blank, then select Next.
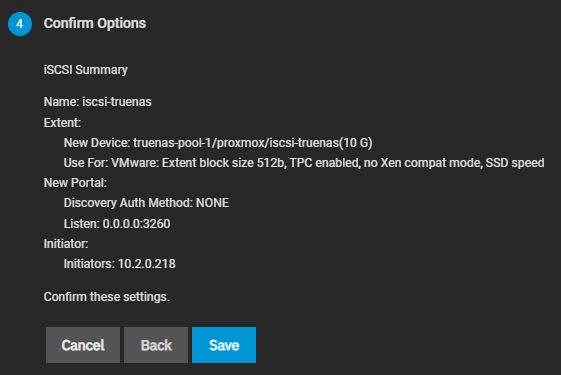
7. Finally, confirm the settings, then select Save. After everything is saved, the iSCSI target will be created!
iSCSI Service on TrueNAS
After everything has been configured for the iSCSI share, we need to start the iSCSI service.
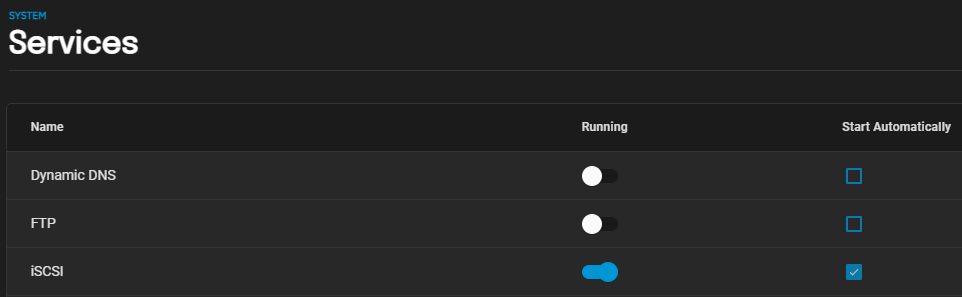
1. Select System Settings, then Services.
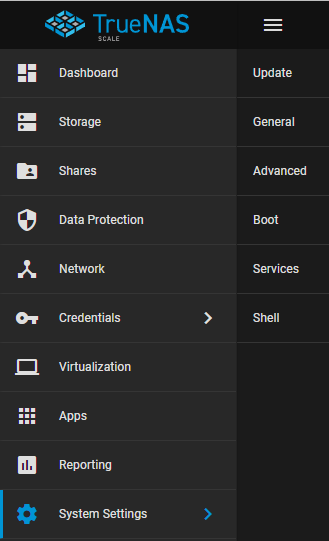
2. Start the iSCSI Service, then select the Start Automatically checkbox so this service starts automatically.
3. After the service is started, if you attempt to connect from an iSCSI Initiator, you should be able to connect!
Conclusion: How to Set Up an iSCSI Target on TrueNAS
This tutorial looked at how to set up an iSCSI Target on TrueNAS. The process for setting up iSCSI on TrueNAS is extremely simple, but you must ensure you’re using the correct authentication in order to get this to properly work. The main benefit of iSCSI is speed, so using it for something like VMs can result in significantly greater performance than something like an NFS or SMB share. Please keep in mind however that iSCSI is entirely different than these file-sharing protocols.