wg-easy is the easiest way to run a WireGuard VPN server with a web UI, all in one Docker container. The current release is v15.4.0 (August 14, 2026), and v15 changed setup completely. WG_HOST and PASSWORD_HASH are gone, the admin account and your public hostname are set in a first-run wizard, and the web UI won’t log you in over plain HTTP unless you allow it.
If you followed an older version of this guide or my old TrueNAS and Unraid ones (both now live on this page), those environment variables don’t work in v15, so install fresh below and bring v14 clients across with the upgrade steps.
What Is wg-easy?
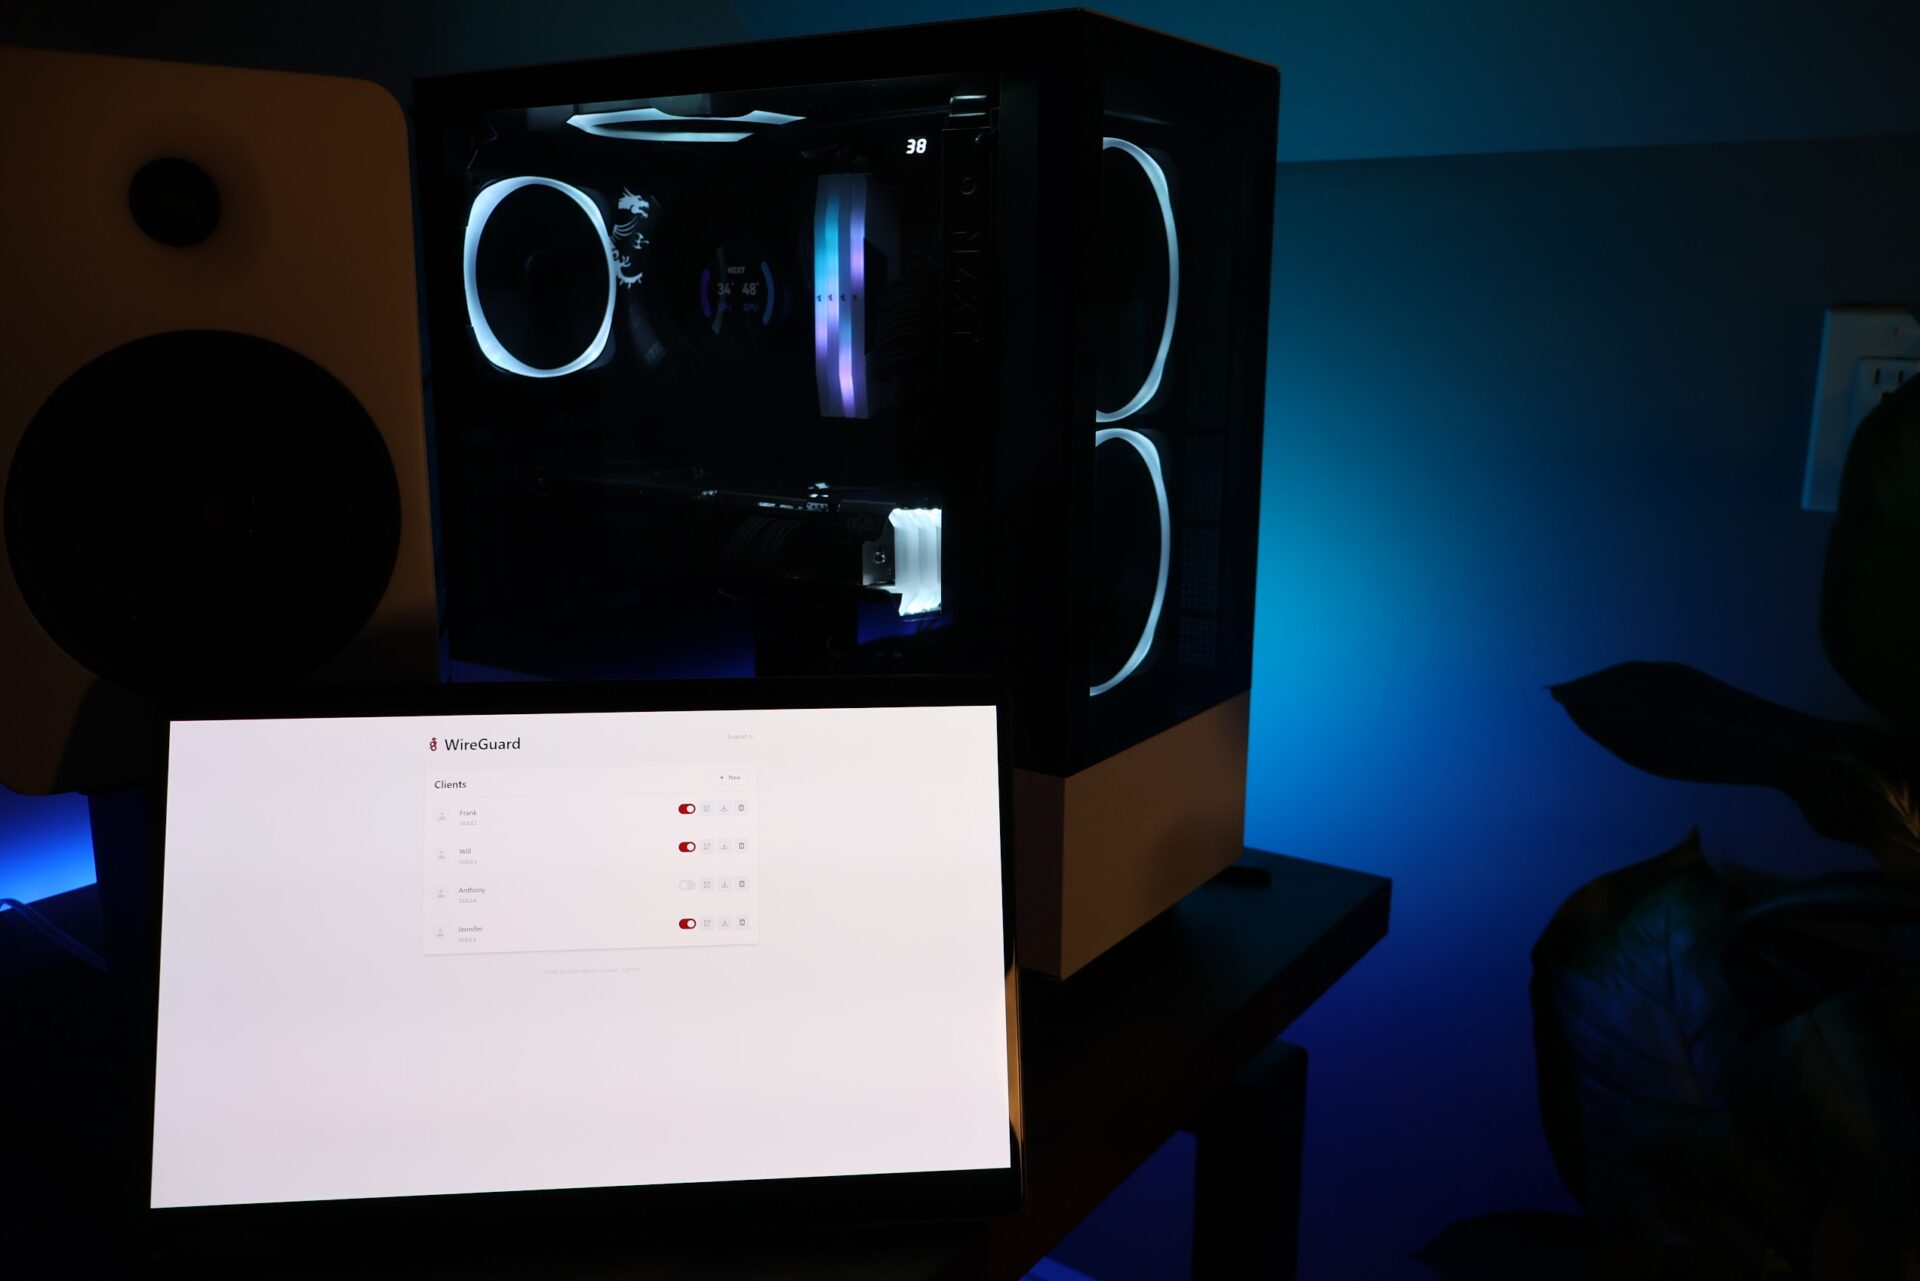
wg-easy is WireGuard plus a web UI where you create, enable and disable clients, show a client’s QR code or download its config file, and watch traffic per client. The current version also has one-time links, client expiration, 2FA and OAuth.
Underneath, it’s the same WireGuard you’d configure by hand, so the real difference is who manages the keys. In my November 2023 low-power home server video (an older wg-easy, on CasaOS), I put it this way: with WireGuard “you have to know what key goes where,” and “with WireGuard Easy it’s insanely simple.”
As I said in my April 2026 video, WireGuard is “fast, lightweight, and the right choice for most people” over OpenVPN, but Tailscale vs. WireGuard covers when Tailscale is the easier pick.
How to Install wg-easy With Docker Compose
The official wg-easy docker compose file runs it in one container on :15, which tracks the newest v15 release. You need a Linux host with Docker and Compose, plus a public IP address or a domain name that points at your network. v15 runs on x86_64 and arm64 only, so armv6 and armv7 devices like a Raspberry Pi on a 32-bit OS can’t run it. If you don’t have Docker yet, install Docker and Portainer first, and a VM on Proxmox works like any other Docker host.
Pin the image to :15 and avoid :latest. As of October 2026, :latest still points at v14 (it’s the same image as :14). An old compose file with :latest gives you the old app.
1. Create a folder for wg-easy and download the official compose file into it.
sudo mkdir -p /etc/docker/containers/wg-easy
sudo curl -o /etc/docker/containers/wg-easy/docker-compose.yml https://raw.githubusercontent.com/wg-easy/wg-easy/master/docker-compose.yml
Here’s the file as of v15.4.0, where the /lib/modules:/lib/modules:ro volume lets the container load the kernel modules WireGuard needs, so don’t remove it.
volumes:
  etc_wireguard:

services:
  wg-easy:
    #environment:
    #  Optional:
    #  - PORT=51821
    #  - HOST=0.0.0.0
    #  - INSECURE=false

    image: ghcr.io/wg-easy/wg-easy:15
    container_name: wg-easy
    networks:
      wg:
        ipv4_address: 10.42.42.42
        ipv6_address: fdcc:ad94:bacf:61a3::2a
    volumes:
      - etc_wireguard:/etc/wireguard
      - /lib/modules:/lib/modules:ro
    ports:
      - "51820:51820/udp"
      - "51821:51821/tcp"
    restart: unless-stopped
    cap_add:
      - NET_ADMIN
      - SYS_MODULE
      # - NET_RAW # ⚠️ Uncomment if using Podman
    sysctls:
      - net.ipv4.ip_forward=1
      - net.ipv4.conf.all.src_valid_mark=1
      - net.ipv6.conf.all.disable_ipv6=0
      - net.ipv6.conf.all.forwarding=1
      - net.ipv6.conf.default.forwarding=1

networks:
  wg:
    driver: bridge
    enable_ipv6: true
    ipam:
      driver: default
      config:
        - subnet: 10.42.42.0/24
        - subnet: fdcc:ad94:bacf:61a3::/64
2. If no reverse proxy gives wg-easy an HTTPS address, open the file with sudo nano /etc/docker/containers/wg-easy/docker-compose.yml, uncomment environment: and the INSECURE line only, and set it to true.
    environment:
      - INSECURE=true
3. Start the container from the same folder.
cd /etc/docker/containers/wg-easy && sudo docker compose up -dTo update, run sudo docker compose pull && sudo docker compose up -d from that folder. The docs say to use up and down, not start and stop.
Running the First-Run Setup Wizard
Open http://HOST_IP:51821 (or your HTTPS address) and the wizard starts.
1. On Welcome to your first setup of wg-easy, select Continue.
2. Enter a Username, Password and Confirm Password, then select Create Account. This is your web UI login.
3. At Do you have an existing setup?, select No.
4. Set Host to your public IP or DDNS hostname (not the server’s LAN IP), leave Port at 51820, and select Continue.
5. On Setup successful, select Sign In.
Creating VPN Clients
1. Select New Client (or New once you have some), enter a Name and an optional Expire Date, then select Create Client.
2. On a phone, select the QR code icon (Show QR Code) and scan it in the WireGuard app. On a laptop, select the download icon and import the file.
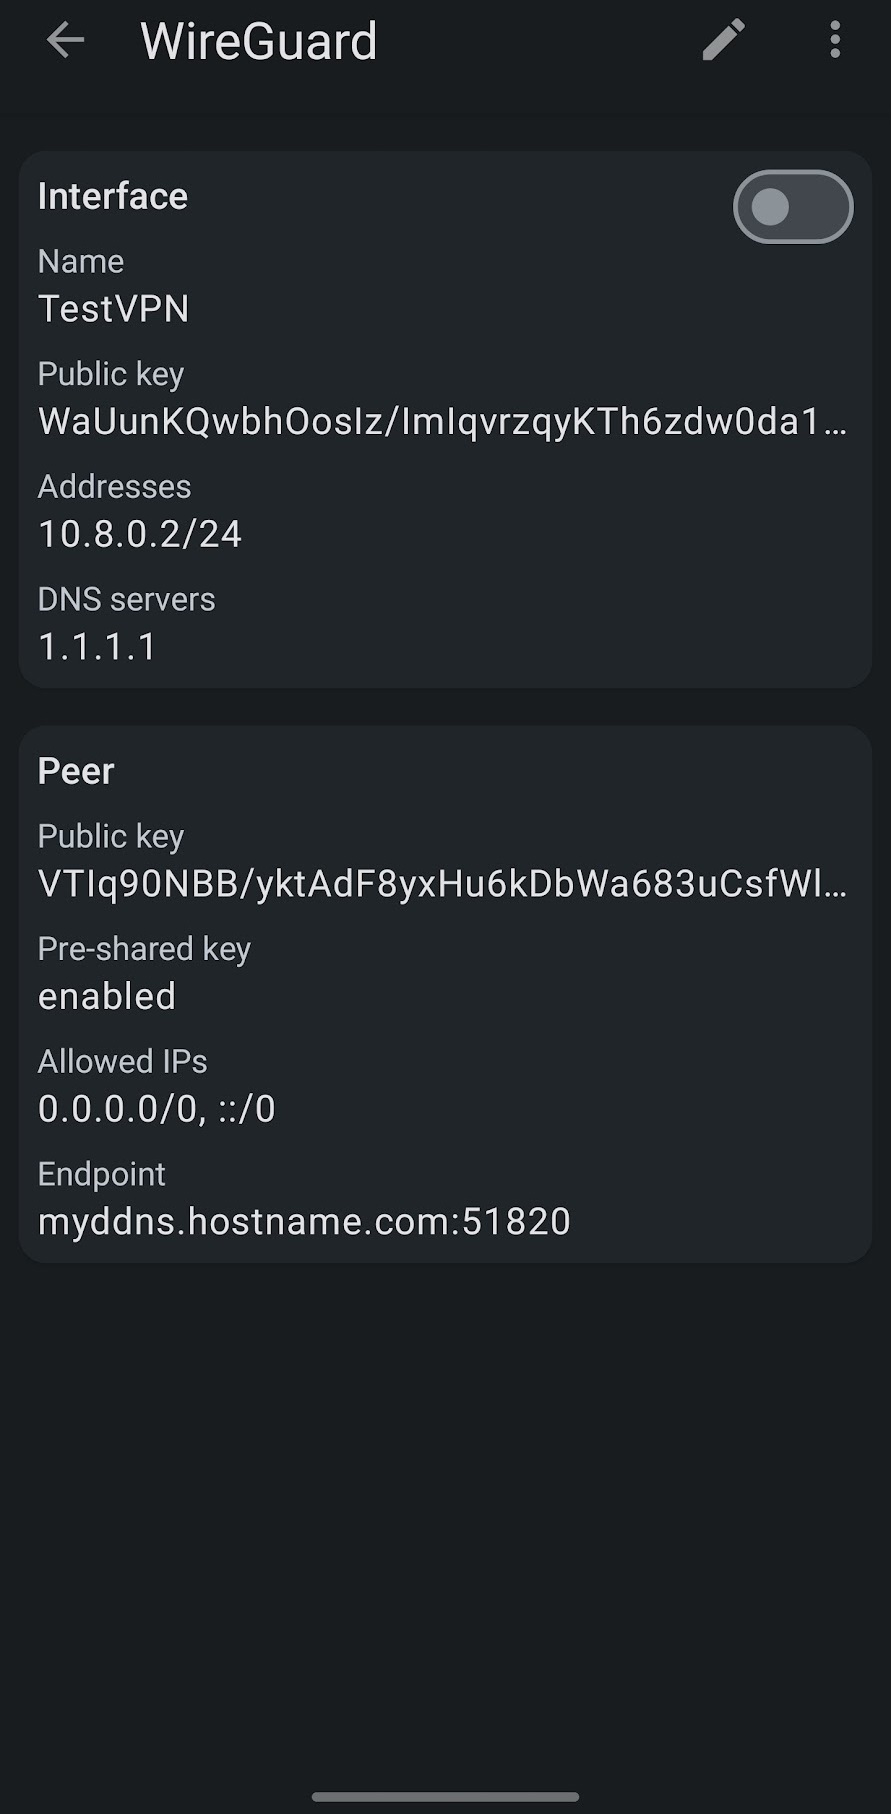
3. Forward UDP 51820 to the Docker host (see the ports section below), then turn off Wi-Fi, connect over cellular, and check that you can reach something on your LAN.
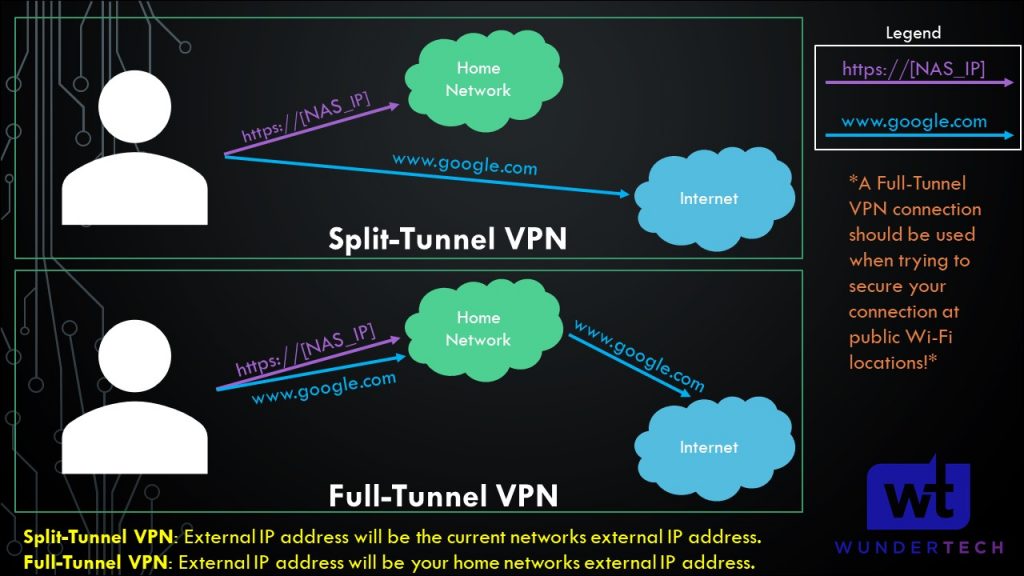
A client’s Allowed IPs decide what goes through the tunnel. New clients get 0.0.0.0/0, ::/0, a full tunnel; for a split tunnel, set your LAN subnet on the client’s page. In my January 2026 UniFi WireGuard video I recommended a full tunnel so your traffic always routes back home, even though it can be slower on public Wi-Fi. Split tunnel vs. full tunnel VPN explains the difference.
A client’s toggle (Disable Client) turns it off without deleting it. v15 has no backup button, so back up the etc_wireguard volume (/etc/wireguard in the container) if you want a copy of your server and clients.
Upgrading From v14 to v15
The wg-easy migration guide covers it:
1. In the old web UI, select Backup to download wg0.json, and keep a copy of your old environment variables.
2. Remove the old container (sudo docker rm -f wg-easy), then start v15 from the compose file above (with INSECURE=true if you use HTTP).
3. In the wizard, answer Yes to Do you have an existing setup? and Upload your wg0.json.
4. Sign in, open Admin Panel, then Config, enter your old WG_HOST as Host and any DNS or Allowed IPs you changed, then select Save.
TrueNAS WireGuard: Installing the wg-easy App
For TrueNAS WireGuard, use the WG Easy app from the apps catalog. As of October 2026 it ships wg-easy 15.4.0 on TrueNAS Community Edition 25.10. TrueNAS Scale was renamed TrueNAS Community Edition in 25.04, and the app is the same on both. If TrueNAS isn’t installed yet, start with setting up TrueNAS Community Edition. This makes TrueNAS the WireGuard server; for TrueNAS as a client, see Tailscale on TrueNAS.
1. Open Apps (on your first visit, choose a pool for apps and select Save), select Discover Apps, search for WG Easy, then select Install.
2. Under WG Easy Configuration, tick Allow insecure connections if you’ll use plain HTTP on your LAN. It’s off by default.
3. Under Network Configuration, leave Host Network on and the WebUI Port at 30058. Under Storage Configuration, set WG Easy Config Storage if you’d like it on a specific dataset, then install the app.
4. On the Installed screen, select the app, then Web UI (http://TRUENAS_IP:30058), run the setup wizard above, and forward UDP 51820 to the TrueNAS IP.
5. With Host Network on, open Admin Panel, then Interface, set Device to your TrueNAS network interface (such as enp2s0), select Save, then Restart Interface and confirm, since the default eth0 usually doesn’t exist on TrueNAS. Then create clients as in Creating VPN Clients.
The app mounts /lib/modules and sets its capabilities for you. With Host Network on, it maps no ports, so WireGuard listens on the host at the wizard’s Port (51820 by default). The 30057 mapping only applies with Host Network off, where host port 30057 goes to the container’s 51820, so forward external UDP 51820 to 30057 and keep the wizard’s Port at 51820.
Unraid WireGuard: The Built-In VPN Manager
Unraid WireGuard doesn’t need wg-easy, because Unraid has its own WireGuard server under Settings, then VPN Manager. As of Unraid 7.3.4 (October 22, 2026), Unraid’s WireGuard docs suggest Tailscale for most users and WireGuard for custom setups. If you want WireGuard itself rather than Tailscale, start here.
1. Select Settings, then VPN Manager, name the tunnel and select Generate Keypair.
2. Set Local endpoint to your DDNS hostname if you have one, and keep the port at 51820 unless it conflicts.
3. Forward UDP 51820 to the server’s LAN IP (or use UPnP under Settings, then Management Access).
4. Select Add Peer, name it, choose Remote access to LAN, select Generate Keypair, then Apply, and toggle Active and enable Autostart. Adding a peer later can briefly disable the tunnel.
5. Select the eye icon and scan the QR code with Create from QR code in the WireGuard app, or download the config file, unzip it and import it.
For short hostnames over the VPN, switch from Basic to Advanced, set Peer DNS server, select Apply and re-import the peer config. .local names won’t work over WireGuard either way.
In my original Unraid guide I said I prefer running WireGuard on my router, but that’s not an option for everyone. If it isn’t, use VPN Manager unless you want wg-easy’s web UI (one-time links and client expiry).
Installing wg-easy on Unraid
There’s no wg-easy app to install from Community Applications. As of October 2026 the only listing is marked “Blacklisted: Unable to be pulled” and points at v14, so you add the container by hand or run the compose file.
The WG_HOST and password step from my original Unraid guide doesn’t apply to v15, because both are now set in the wizard. To add it by hand, open the Docker tab, select Add Container, name it wg-easy, switch to Advanced View (top right) so Extra Parameters shows, and enter the compose file’s values:
- Repository:
ghcr.io/wg-easy/wg-easy:15 - Ports: 51820 (UDP) for WireGuard and 51821 (TCP) for the web UI
- Paths:
/lib/modulesto/lib/modulesread-only, and an appdata folder to/etc/wireguard - Variable:
INSECUREset totrue, only for HTTP on your LAN - Extra Parameters: the capabilities and sysctls below
--cap-add NET_ADMIN --cap-add SYS_MODULE --sysctl net.ipv4.ip_forward=1 --sysctl net.ipv4.conf.all.src_valid_mark=1 --sysctl net.ipv6.conf.all.disable_ipv6=0 --sysctl net.ipv6.conf.all.forwarding=1 --sysctl net.ipv6.conf.default.forwarding=1Then select Apply.
To run the compose file instead, use the Compose Manager Plus plugin (for HTTP, uncomment environment: and the INSECURE line and set it to true). Either way, open http://UNRAID_IP:51821, run the wizard, and forward UDP 51820 to the server.

wg-easy Ports and Port Forwarding
wg-easy uses two ports: 51820/udp is WireGuard, and port 51821 is the web UI (TCP). Your router needs one forward, UDP 51820 to the LAN IP of the wg-easy host, and never the web UI port (51821, or 30058 on TrueNAS), since wg-easy’s docs list only UDP 51820 to open.
As I said in my 2023 video, “I don’t want to downplay it and make it sound easier than it is because you do have to do the port forwarding.” pfSense port forwarding, step by step and port forwarding on UniFi show how on those two.
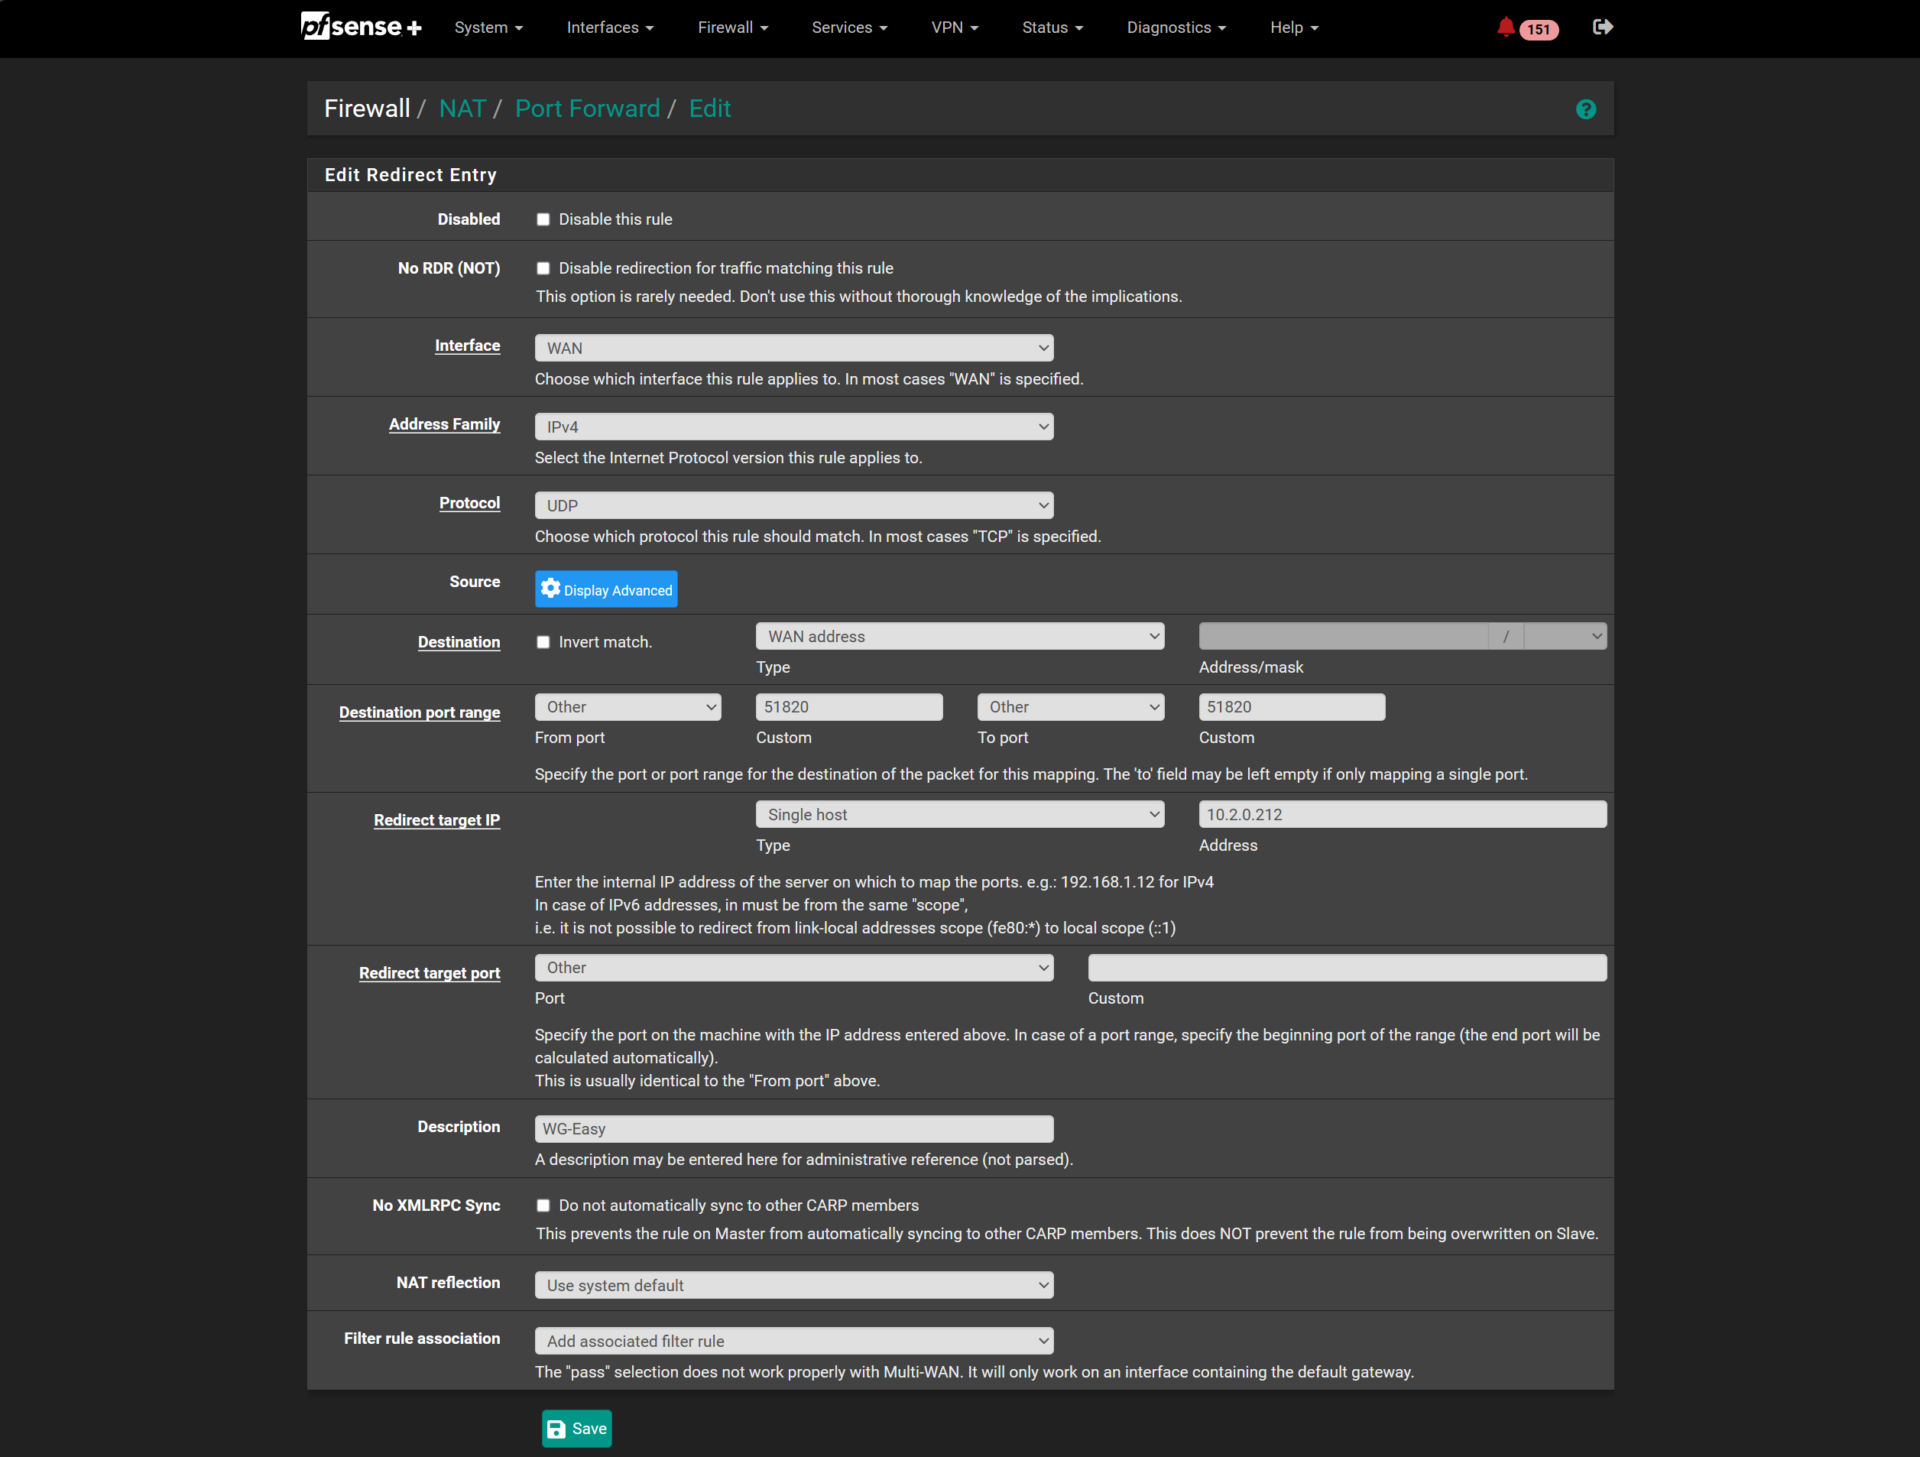
You also need a real public IP, because as I said in my UniFi WireGuard video, if you’re behind double NAT or CGNAT, “this will not work until you fix that.” If you change the port later, change it under both Config and Interface in the Admin Panel, in the forward, and on both sides of the container’s port mapping. If your router can run WireGuard itself (WireGuard on UniFi Cloud Gateways, configuring WireGuard on pfSense and WireGuard on OPNsense cover those), there’s no forward to a separate host.
Troubleshooting wg-easy Login and Connection Problems
“You can’t log in with an insecure connection. Use HTTPS.” This banner shows up over plain HTTP when INSECURE isn’t true, which is the v15 default. The right fix is HTTPS through a reverse proxy, and set up local SSL with Nginx Proxy Manager covers it. INSECURE=true (on TrueNAS, Allow insecure connections) is only for a trusted LAN.
There’s no default password in v15, since the login is the account you created in the wizard. A leftover PASSWORD or PASSWORD_HASH stops v15 with “You are using an invalid Configuration for wg-easy”, so delete it. To reset the password on the Compose install, run this (on Unraid, docker exec -it wg-easy cli db:admin:reset):
cd /etc/docker/containers/wg-easy && sudo docker compose exec -it wg-easy cli db:admin:resetCannot find device “wg0” usually means the WireGuard kernel module isn’t loaded. On a Linux Docker host, run sudo modprobe wireguard, then echo "wireguard" | sudo tee -a /etc/modules so it loads at boot, and keep the compose file’s /lib/modules:/lib/modules:ro mount.
No handshake, or the client won’t connect. Check these in order:
- UDP 51820 is forwarded to the host’s LAN IP and matches the Config Port in wg-easy.
- Host is your public IP or DDNS name, not a LAN IP.
- You’re testing from cellular, and the network you’re on doesn’t use your home LAN’s subnet.
- You downloaded the client config again after changing Host or Port.
A client with no last-seen time hasn’t connected since wg-easy last started. Security changes and nothing here is guaranteed, so keep wg-easy updated and keep its web UI off the internet.