In this tutorial, we’re going to look at how to install the UniFi Controller on a Raspberry Pi.
If you’re using UniFi devices (Switches, Access Points, etc), you will need a controller to manage them all. Certain UniFi devices come preinstalled with the UniFi OS, or the Controller can be added to an existing, non-supported UniFi network with a Cloud Key. However, setting up the UniFi Controller is both a free, and fairly straightforward option.
There are many devices that you can install the UniFi Controller on, however, one of the easiest and cheapest options (if you don’t already have existing hardware) is a Raspberry Pi. In this tutorial, we’ll look at how to install the UniFi Controller on a Raspberry Pi using Docker. Before we do, I want to explain why I think Docker is the best option for the UniFi Controller.
Why Use Docker for the UniFi Controller on a Raspberry Pi?
Technically, you can install the UniFi Controller directly onto the Raspberry Pi operating system which will allow you to manage the controller at the operating system level.
However, running it on Docker is an easier overall solution, as you’ll have an extremely straightforward way to update it, you can quickly back up all of the important configuration files, and you can use the Raspberry Pi for other Docker packages as well.
Not only that, but this allows the configuration to be portable. Rather than having to export and import your UniFi settings through the controller itself, you can move the volume to different devices (any device capable of running Docker), and your UniFi Controller will be up and running in a few minutes.
The downside to this process is that you have to install Docker and Portainer first (Portainer isn’t necessary, but I find it easier to manage). As soon as Docker and Portainer are installed, we can install the UniFi Controller.
Installing Docker and Portainer
1. Ensure that your Raspberry Pi is up to date by running the commands below.
sudo apt update
sudo apt upgrade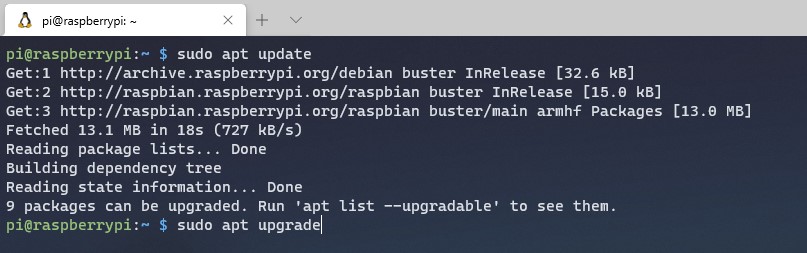
2. The next thing we are going to run is the script to install Docker on our Raspberry Pi. Portainer is a GUI that manages Docker containers, so we need to ensure Docker is installed.
curl -sSL https://get.docker.com | sh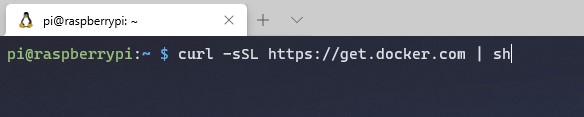
3. After the script completes, we need to give our Pi user account access to Docker, then reboot the Raspberry Pi.
NOTE: If you’re not using the default pi user, you’ll have to substitute your user account below.
sudo usermod -aG docker pi
sudo reboot now
4. After the user has been added, we are going to run a command to download the latest Portainer image for the ARM processor (which is what the Raspberry Pi uses).
sudo docker pull portainer/portainer-ce:linux-arm
5. Our final step is to create a new container that will run Portainer. If you are already using port 9000 on your Raspberry Pi for something else (this is unlikely), you will need to change the ports below.
sudo docker run --restart always -d -p 9000:9000 -p 9443:9443 -v /var/run/docker.sock:/var/run/docker.sock -v portainer_data:/data portainer/portainer-ce:linux-arm
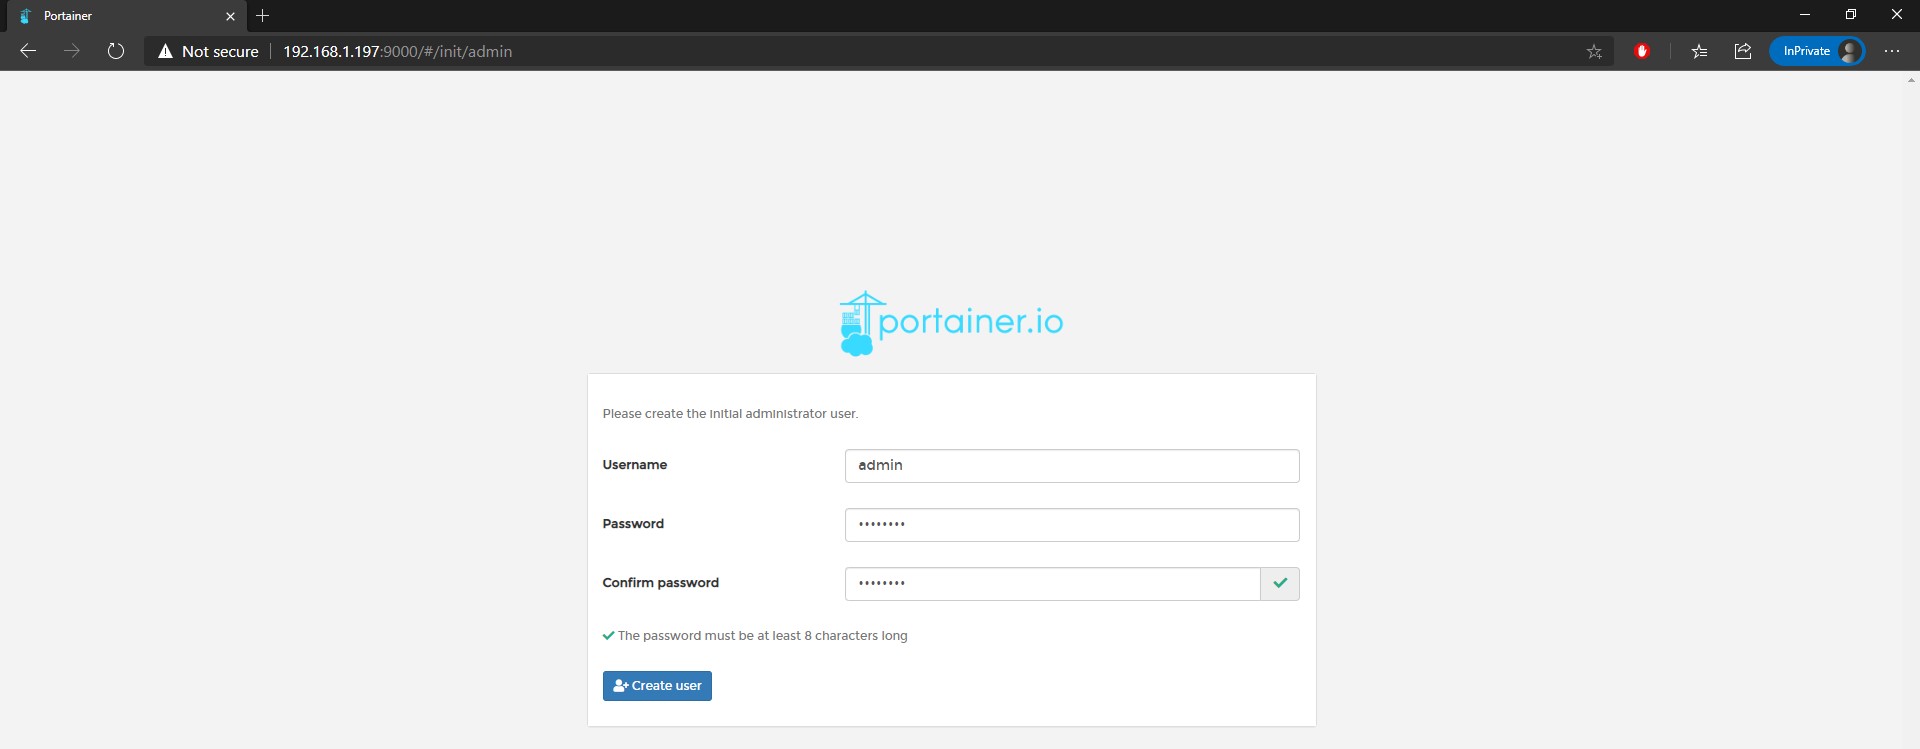
6. You should now be able to navigate to the IP address of your Raspberry Pi and port 9000 to access Portainer. When you get there, create a username and password.
http://[RASPBERRY_PI_IP_ADDRESS]:9000
7. Select Local and Connect.
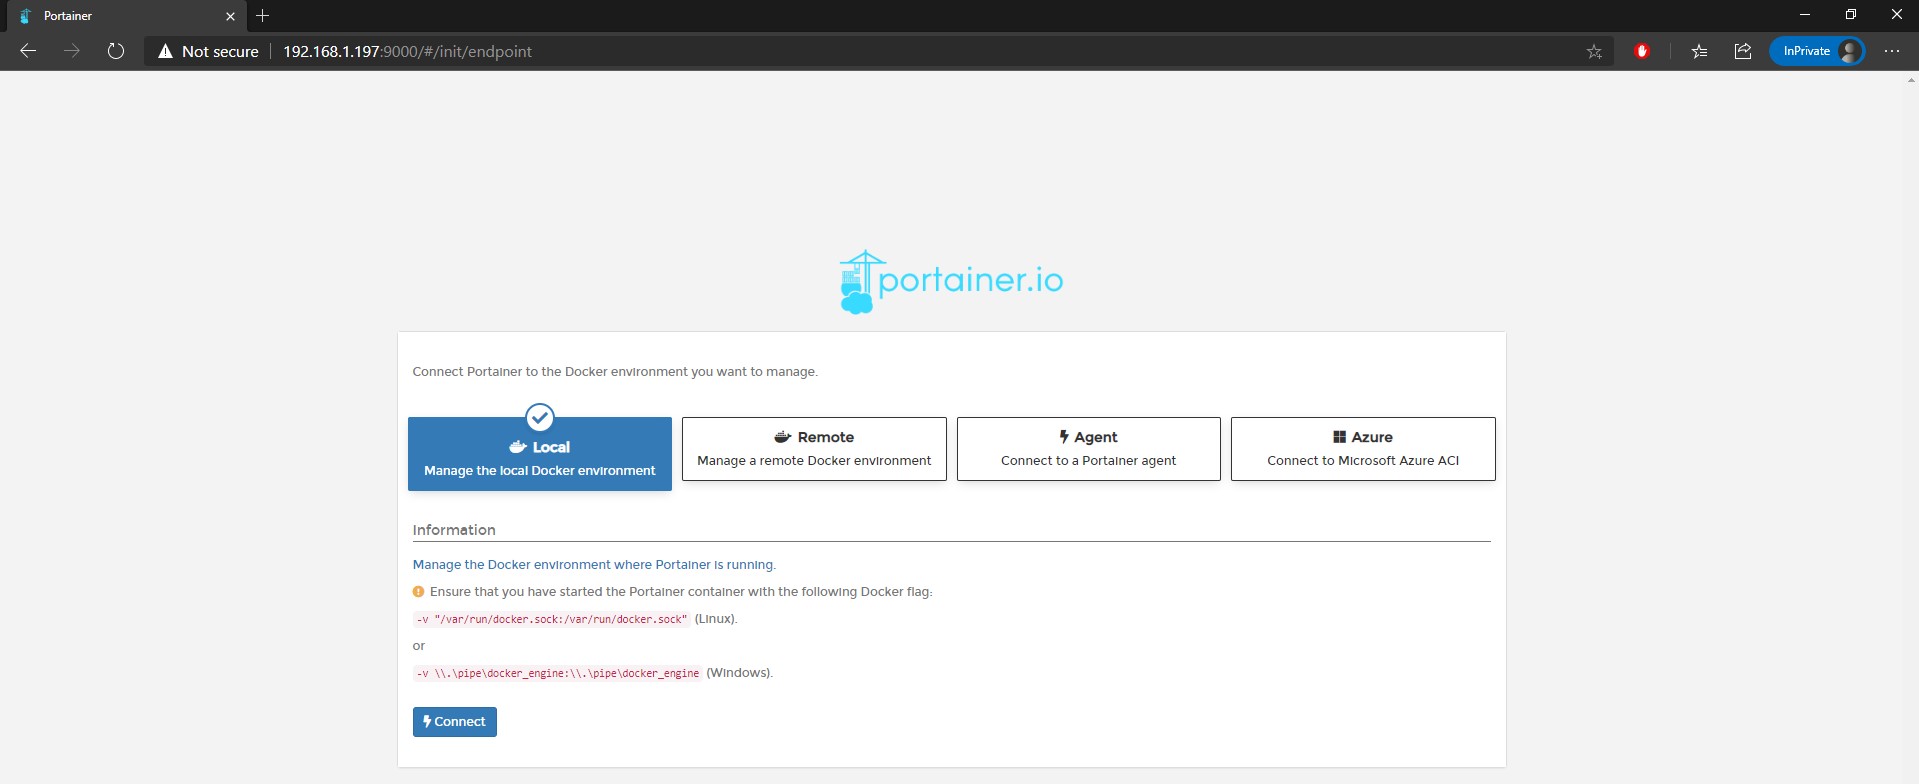
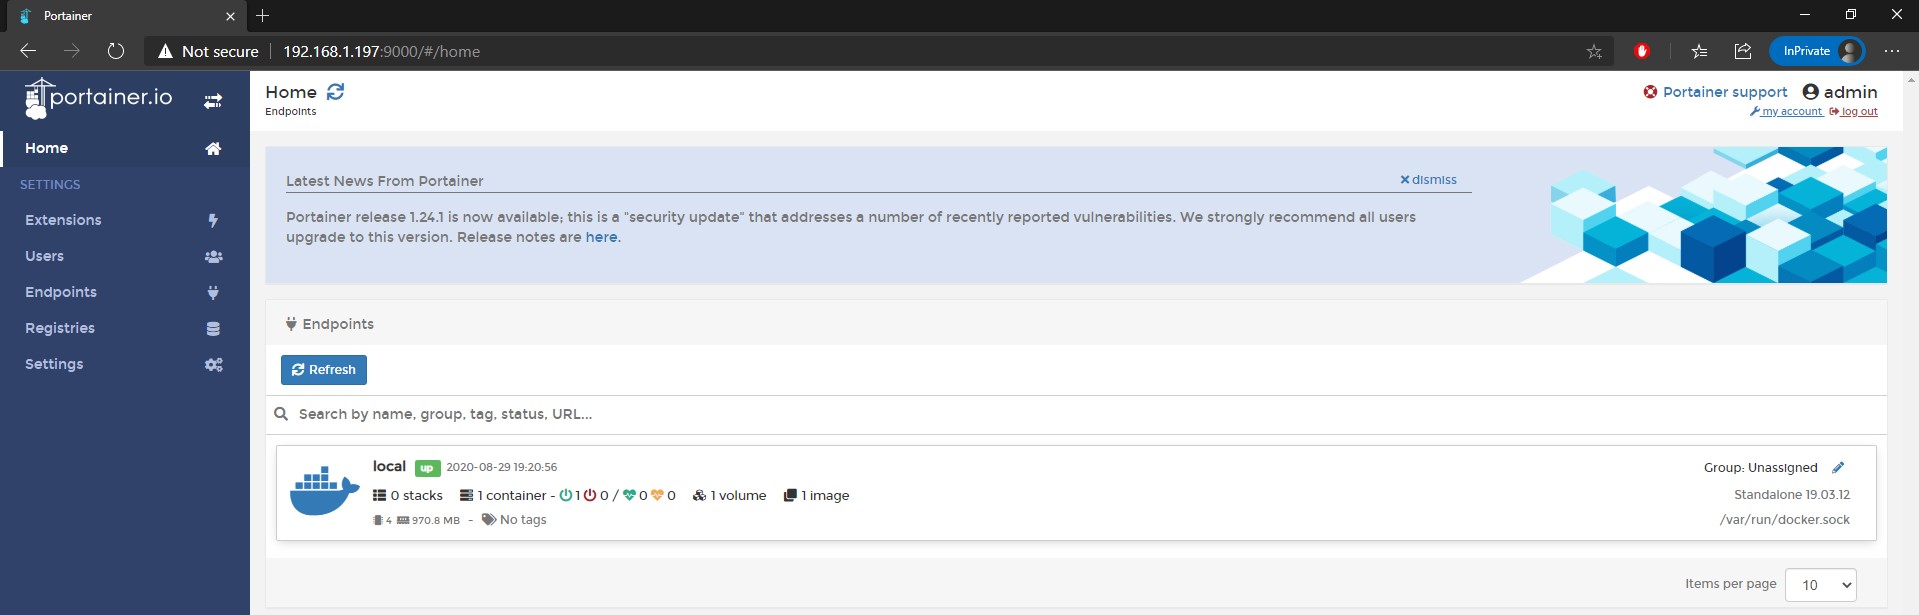
8. You should now be connected to Portainer!
Installing the UniFi Controller on a Raspberry Pi
Now that Docker and Portainer have been configured, we can install the UniFi Controller on a Raspberry Pi by creating a container. Before we do, we’re going to create a directory that will store all of our important container data.
NOTE: If you ever plan to move the UniFi Controller to a different device (or simply want to back it up), you must copy the data in this folder to the new location, then map the volume on the new device to the data.
1. Run the commands below on the Raspberry Pi OS to create a new directory for the UniFi Controller’s data.
cd ~
mkdir unifi-controller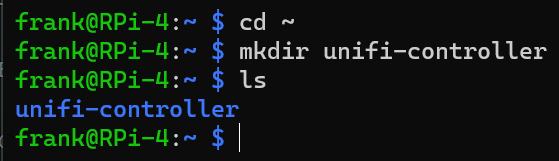
2. Get the full path of the current directory and save it for later.
pwd
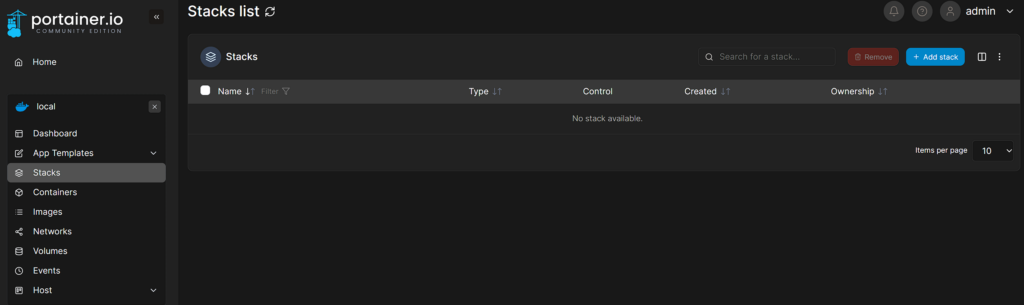
3. Log in to Portainer and select Stacks, then Add Stack.
4. Give the stack a name, then paste the contents below into the editor. You will most likely have to update the timezone, but the rest of the settings can stay as default.
There are other parameters you can use as well if you’d like, but the configuration below should give you a default setup. When you’re done making changes, select Deploy the Stack at the bottom of the screen.
NOTE: You must change the path from /home/frank to the path of your user that we found in step two!
version: "2.1"
services:
  unifi-controller:
    image: lscr.io/linuxserver/unifi-controller:latest
    container_name: unifi-controller
    environment:
      - TZ=America/Detroit
    volumes:
      - /home/frank/unifi-controller/:/config
    ports:
      - 8443:8443
      - 3478:3478/udp
      - 10001:10001/udp
      - 8080:8080
    restart: unless-stopped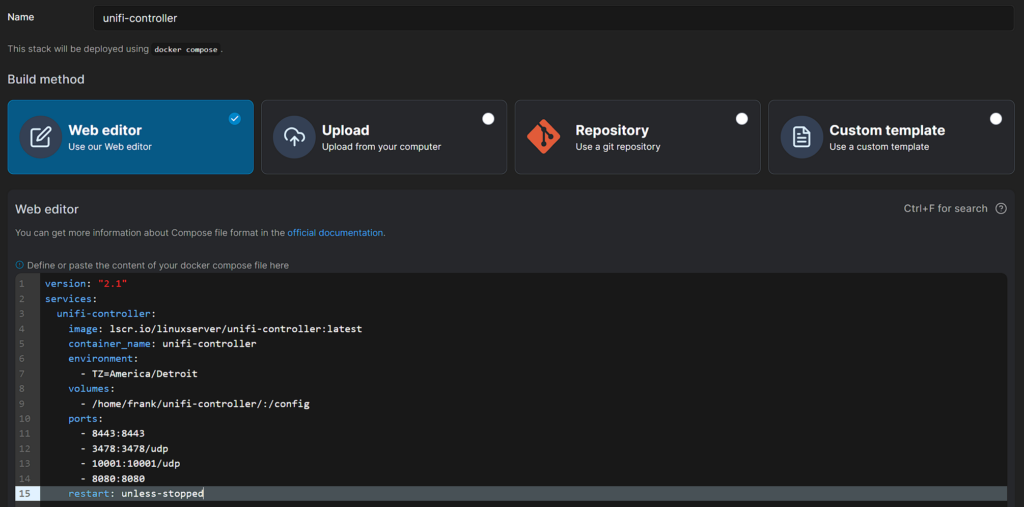
5. It will take a few minutes to deploy the container, but when you’re brought back, you should see the container running in the Containers tab.

Accessing the UniFi Controller
Now that the UniFi Controller has been created in Docker on your Raspberry Pi, you can access it by following the steps below.
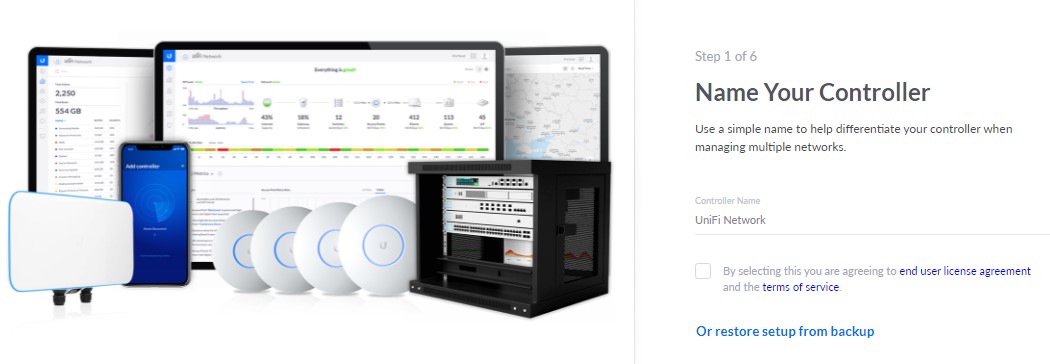
1. Navigate to the IP address of your Raspberry Pi and port 8443 using HTTPS.
https://RASPBERRY_PI_IP:8443
2. Give your controller a name (or restore from a backup if you have a backup), accept the terms of service (if you agree), and select Next.
3. If you’d like to sign in with a Ubiquiti account, you can do that at step 2. This will allow you to access the UniFi Controller using UniFi’s website (or mobile application).
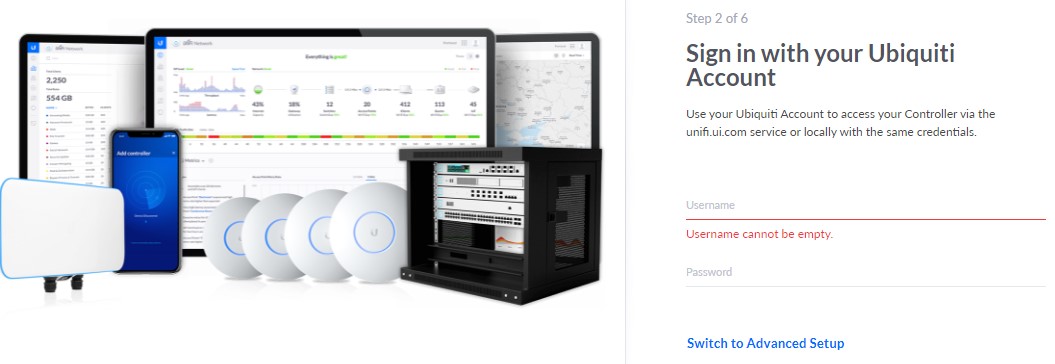
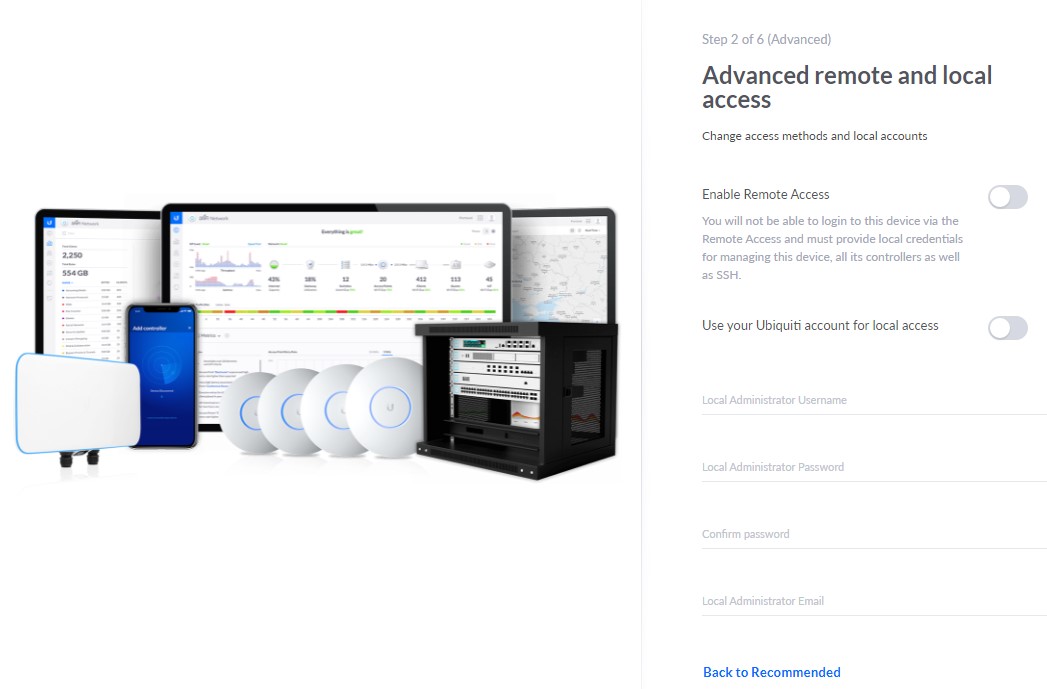
4. If you’d prefer keeping everything local, select Switch to Advanced Setup, uncheck Enable Remote Access and Use your Ubiquiti account for local access, then create a local account.
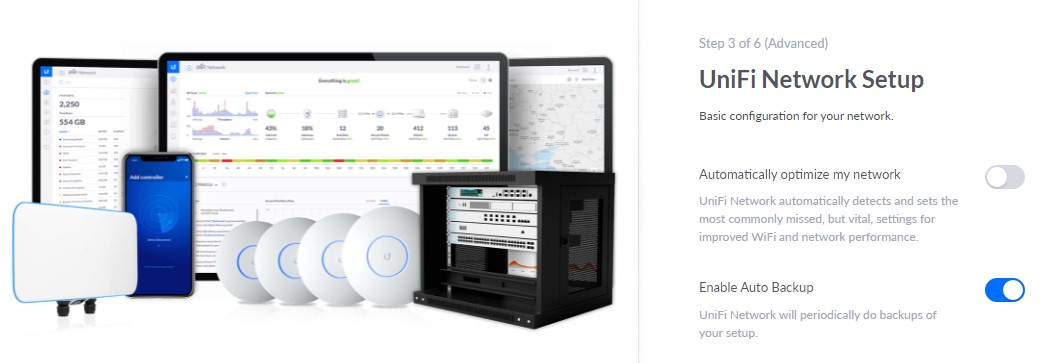
5. Determine if you’d like to enable auto backup and if you’d like your network to be automatically optimized.
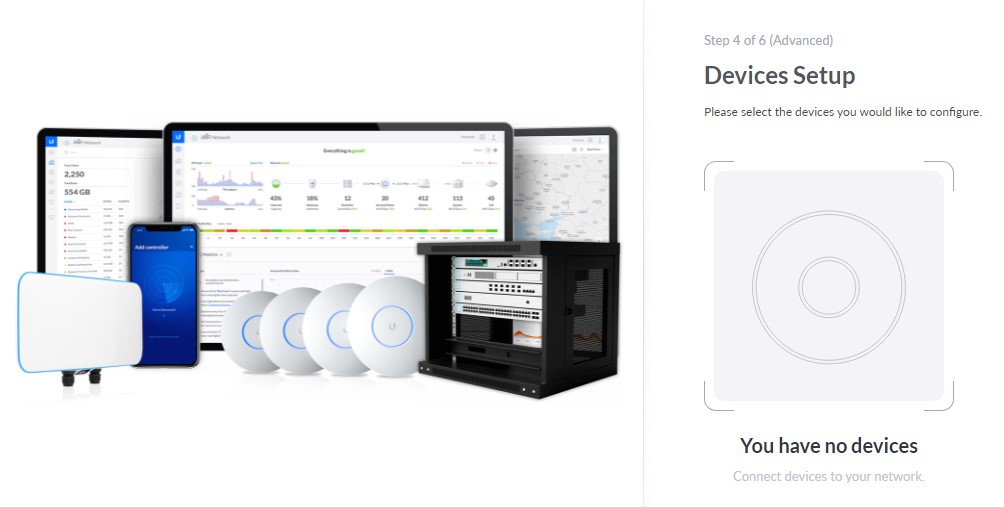
6. This next step will determine the devices that are waiting to be configured. If the devices are already assigned to another UniFi Controller, you will not see any here, but if you haven’t, you should see a list of your devices.
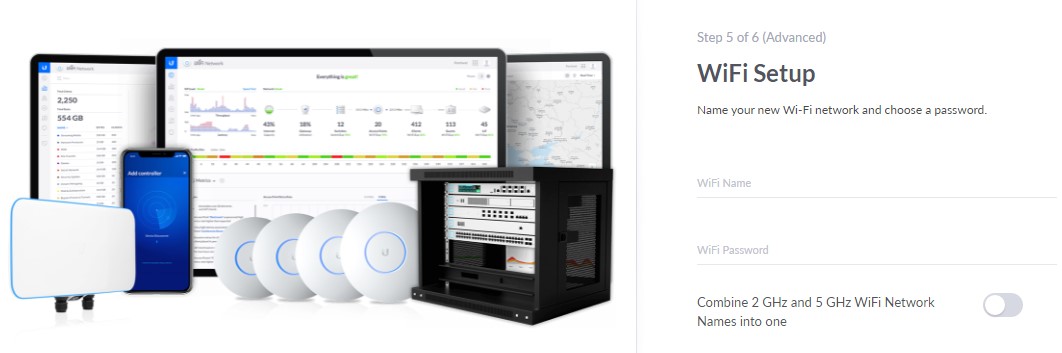
7. If you’re setting up an Access Point or Router + Access Point combo unit (like the UniFi Dream Machine or UniFi Dream Router), you will be able to configure your Wi-Fi settings here.
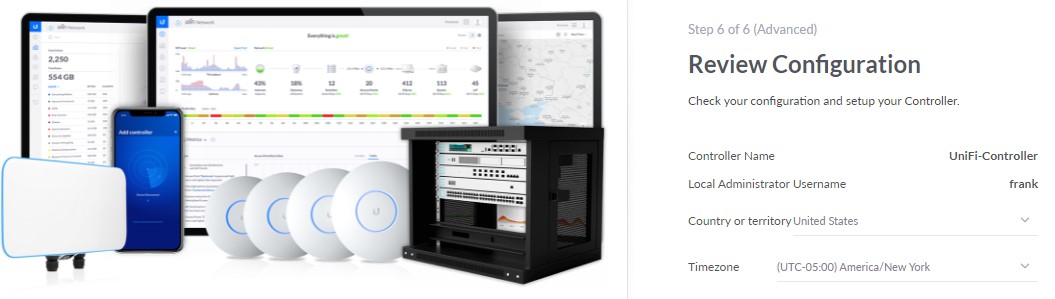
8. Confirm your settings and Finish. The UniFi Controller is now set up!
Conclusion: How to Install the UniFi Controller on a Raspberry Pi
This tutorial looked at how to install the UniFi Controller on a Raspberry Pi. In my opinion, this is the easiest way to install the UniFi Controller on a Raspberry Pi because you will periodically receive updates and this is the best/easiest way to back up the current configuration (in case you run into errors) and also update it.
In summary, all you need to do to back up the container is copy the contents of the unifi-controller folder to a separate folder/device, install the update, then test. If you run into issues, restore the old unifi-controller folder and you’ll be back to the older version!