This tutorial will show how to self-host the Unifi Controller on a Synology NAS.
Certain Unifi devices come preinstalled with the Unifi OS, or it can be added to an existing, non-supported Unifi network by using a Cloud Key. However, it’s incredibly easy to get the Unifi Controller running on a Synology NAS. In my opinion, a Synology NAS is one of the best appliances to run the Unifi Controller on, as it’s generally running 24/7 and can be updated/backed up relatively easily.
I’ve been running the Unifi Controller on my Synology NAS since I started using Unifi networking gear and it’s run flawlessly. The instructions below will bring you through the entire process and show how to self-host the Unifi Controller on a Synology NAS.
1. Instructions – How to Self-Host the Unifi Controller on a Synology NAS
1. Ensure that the Docker package is installed on your Synology NAS.
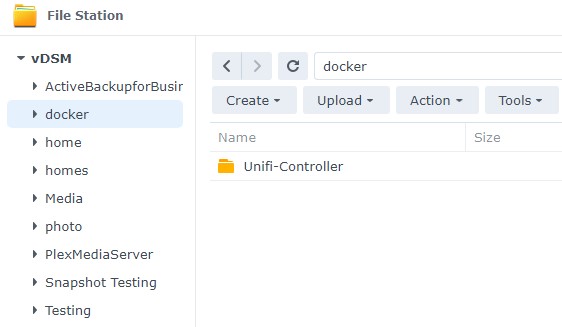
2. Create a subfolder under the Docker folder named Unifi-Controller. We will use this folder at a later step to map our configuration.
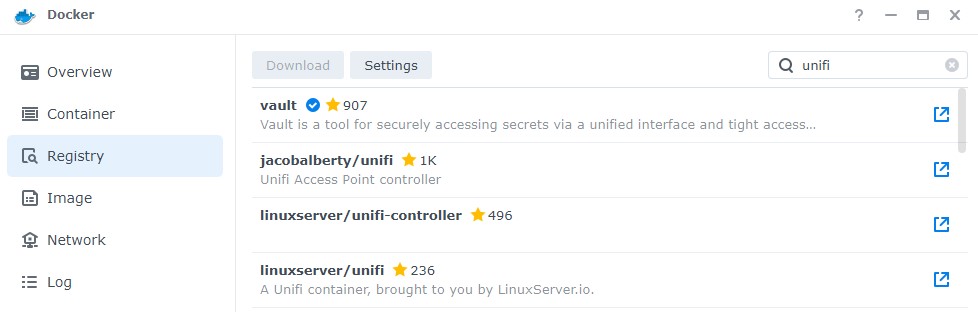
3. Open Docker, select Registry, search for unifi, then download the latest jacobalberty/unifi image.
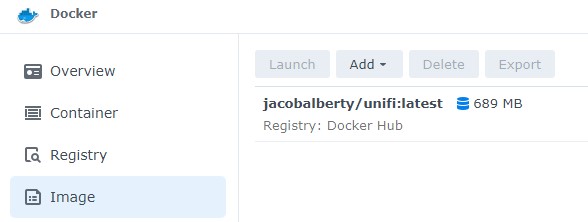
4. After the image is finished downloading, select the Image tab, then double-click the newly downloaded image to create a new container.
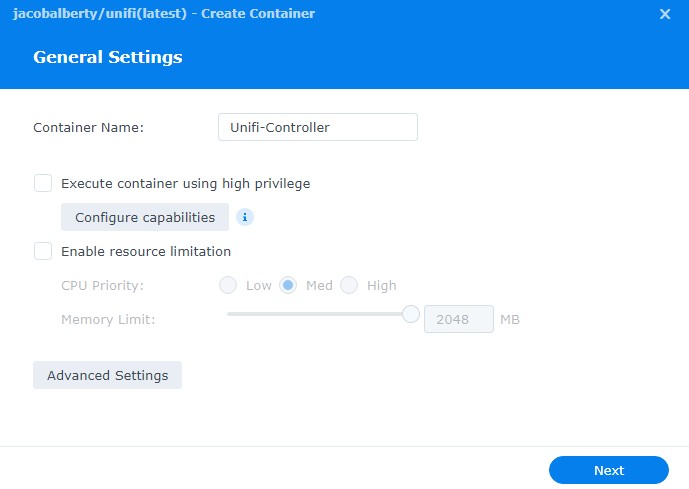
5. Name the container Unifi-Controller, then select Advanced Settings.
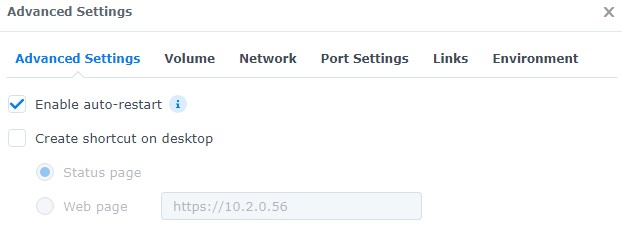
6. Enable auto-restart, then select Volume.
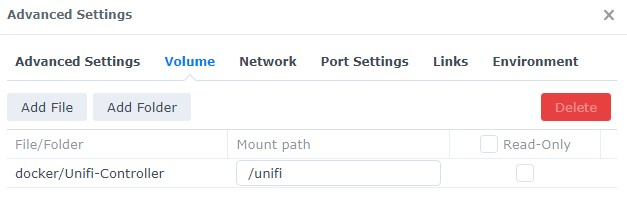
7. Select the Unifi-Controller folder that we created earlier and set the mount path as /unifi.
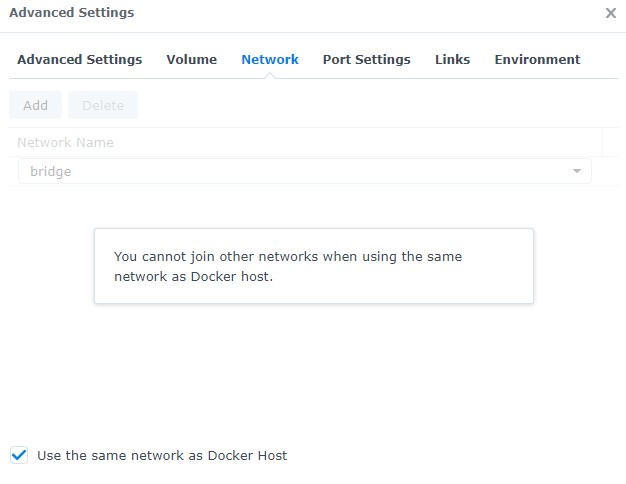
8. In the Network section, select Use the same network as Docker Host.
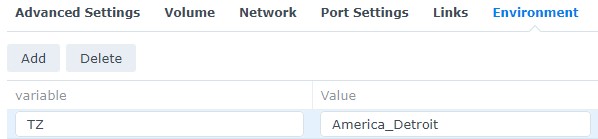
9. Select Environment and add a new environment variable named TZ. Set the value to be your time zone.
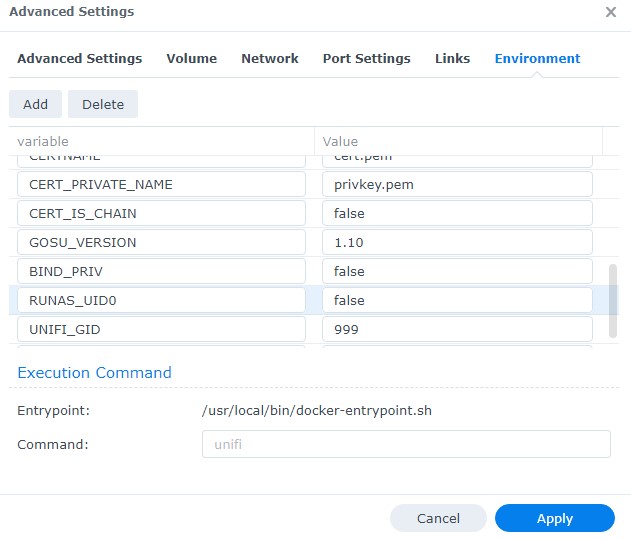
10. Scroll down to see the BIND_PRIV (bind to lower ports) and RUNAS_UID0 (run as root) variables. These are set as true by default, but are not necessary (bind) or suggested (run as root), so set both of these values to false.
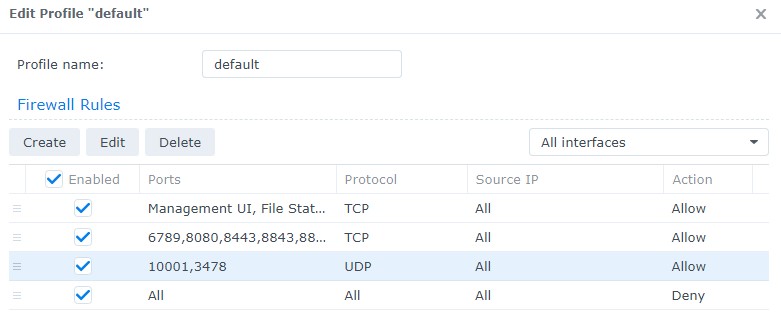
11. Select Apply, then Next to create the container. Give the container a few minutes to install (be patient as it might take some time). If you are using Synology’s Firewall (which is suggested), create a TCP allow rule for port 6789, 8080, 8443, 8843, and 8880. Create a UDP allow rule for port 10001 and 3478.
12. Navigate to the IP address of your Synology NAS and port 8443 using HTTPS. NOTE: If you receive a 404 error, wait a little longer as the container might not be finished setting up.
https://SYNOLOGY_NAS_IP:8443
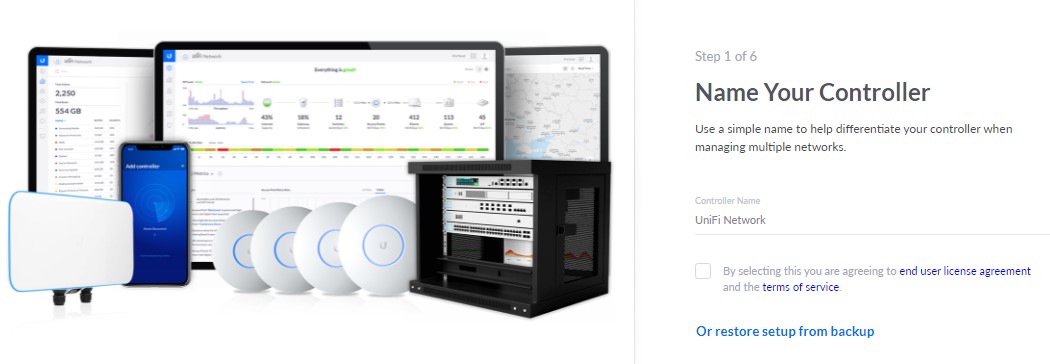
13. Give your controller a name (or restore from a backup if you have a backup), accept the terms of service and select Next.
14. If you’d like to sign in with a Ubiquiti account, you can do that at step 2. This will allow you to access the Unifi Controller using Unifi’s website (or mobile application).
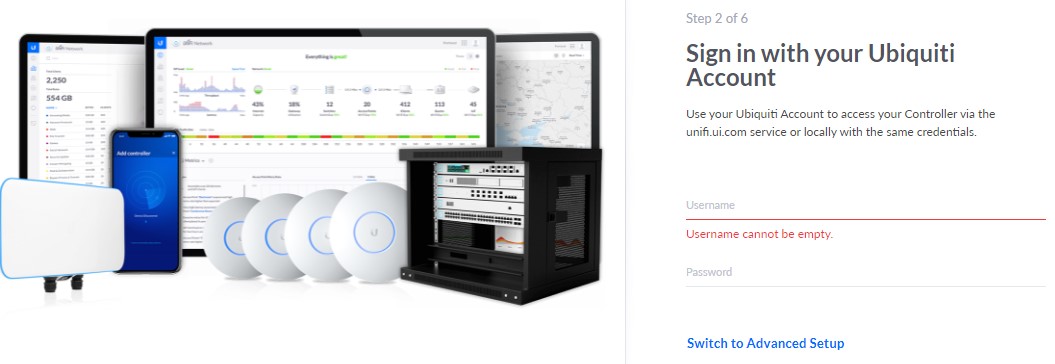
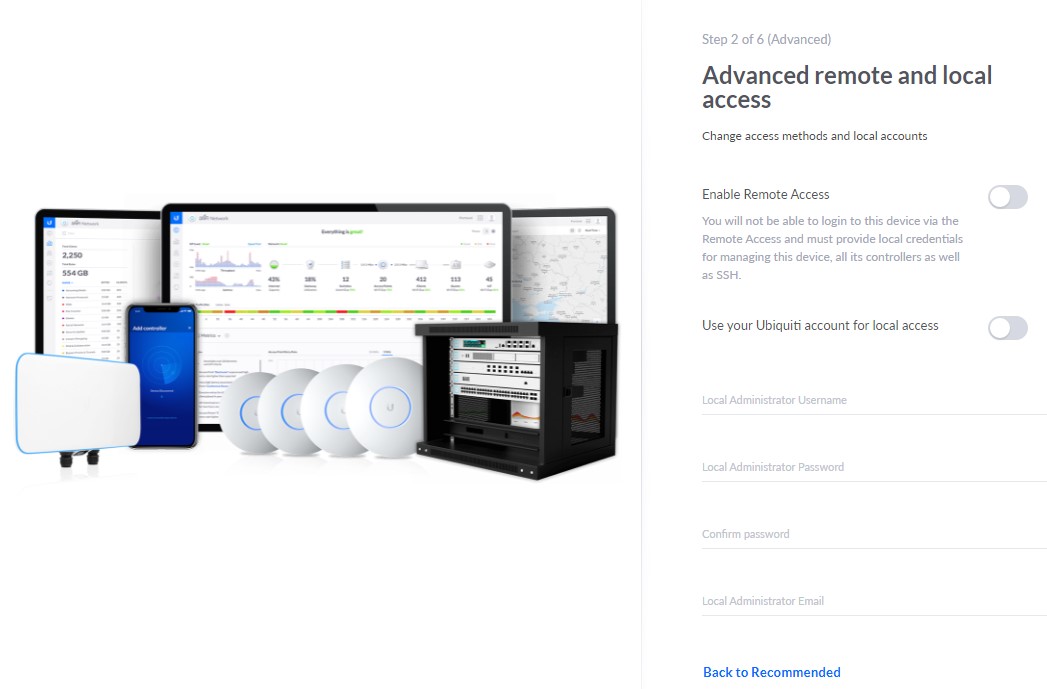
15. If you’d prefer keeping everything local, select Switch to Advanced Setup, uncheck Enable Remote Access and Use your Ubiquiti account for local access, then create a local account.
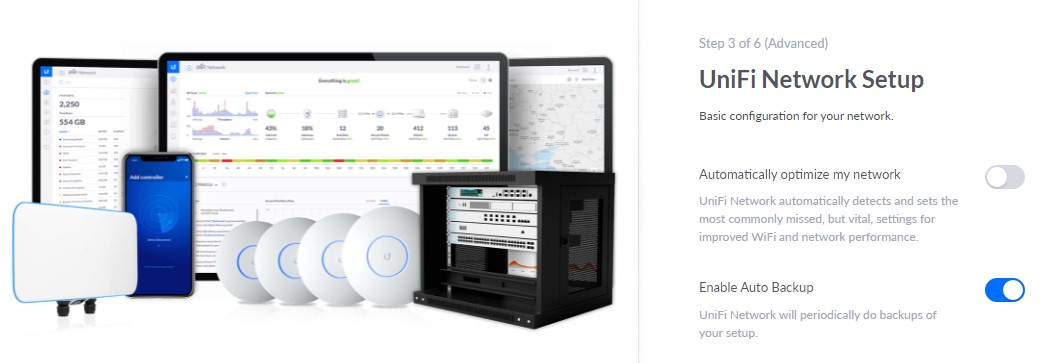
16. Determine if you’d like to enable auto backup and if you’d like your network to be automatically optimized.
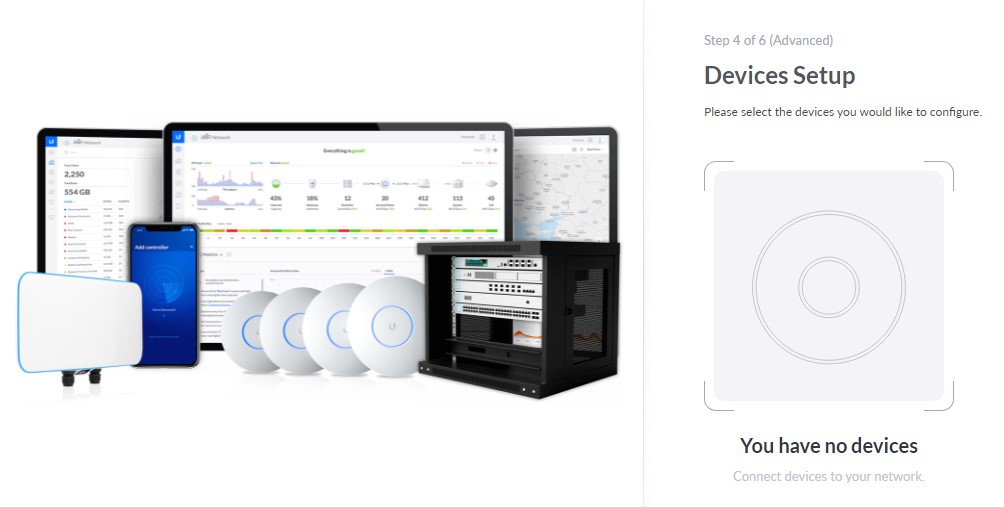
17. This next step will determine the devices that are waiting to be configured. If the devices are already assigned to another Unifi Controller, you will not see any here, but if you haven’t, you should see a list of your devices.
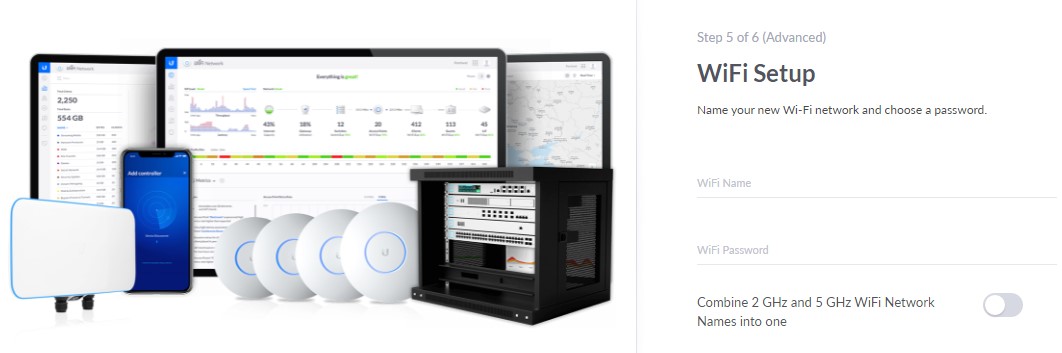
18. If you’re setting up an Access Point or Router + Access Point combo unit (like the Unifi Dream Machine or Unifi Dream Router), you will be able to configure your Wi-Fi settings here.
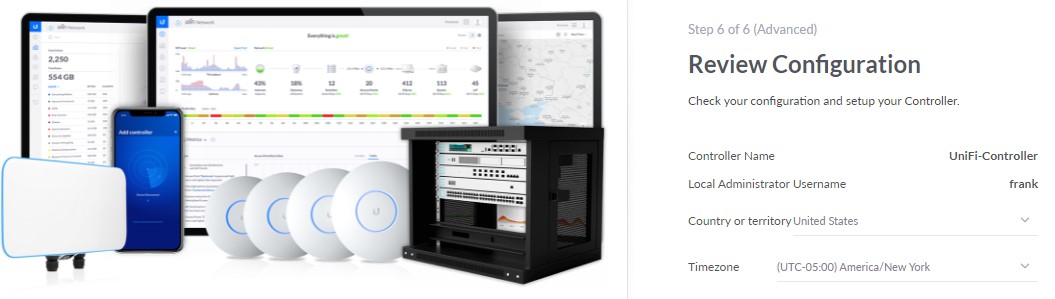
19. Confirm your settings and Finish. The Unifi Controller is now set up!
Conclusion – Self-Host the Unifi Controller on a Synology NAS
This tutorial showed how to self-host the Unifi Controller on a Synology NAS. I have been running the Unifi Controller for a while on my Synology NAS and it’s run flawlessly! It’s important to understand that updates are periodically released, and you should check the container’s release notes to see when you’d like to update your container.
Thanks so much for checking out the tutorial on how to self-host the Unifi Controller on a Synology NAS!