Today we are going to look at how to back up a Docker container.
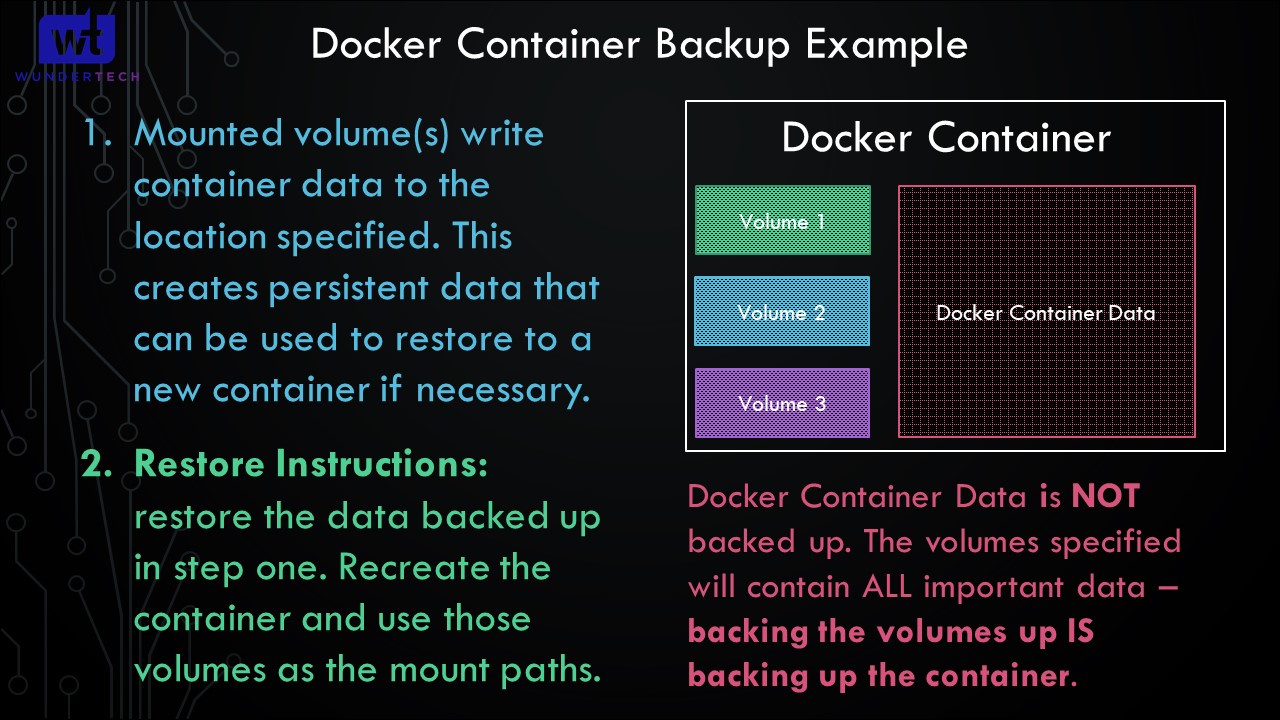
This process is the same for all Docker containers but will be demoed on a Synology NAS as I feel that’s one of the easiest ways to display what’s actually happening. Summing up the process as easily as I can, when you create a docker container, you mount specific volumes (which are basically folders inside of the container) to a local storage location. On a Synology NAS, that’s generally the docker folder (where you store all your data), however, on other devices, it could be a local storage location. This folder contains all the important information for the container and is ultimately what you want to back up.
In the event that you need to restore a docker container, you are NOT restoring a backup. You are restoring the folders that you backed up, recreating the container exactly as it was, then mounting the folder locations to ensure that the container reads your data.
This is more eloquently shown in the video above, but the best way to think about this is by using an overly simplified PC example. If you store all your data in your “Documents” folder, backing up your documents folder will back up all your important information, right? Now if the hard drive was to crash and you were left with nothing but your documents backup, you can reinstall your operating system, restore the documents and you’ll be right back to where you were. In its simplest form, this is how a docker container works. The containers information isn’t necessarily important, but the data that’s personalized for you is.
The screenshots below will walk through the backup and restoration process on a Synology NAS. Please keep in mind that the explanation is in greater detail and potentially clearer in the video above, but I’ll do my best to summarize the information below.
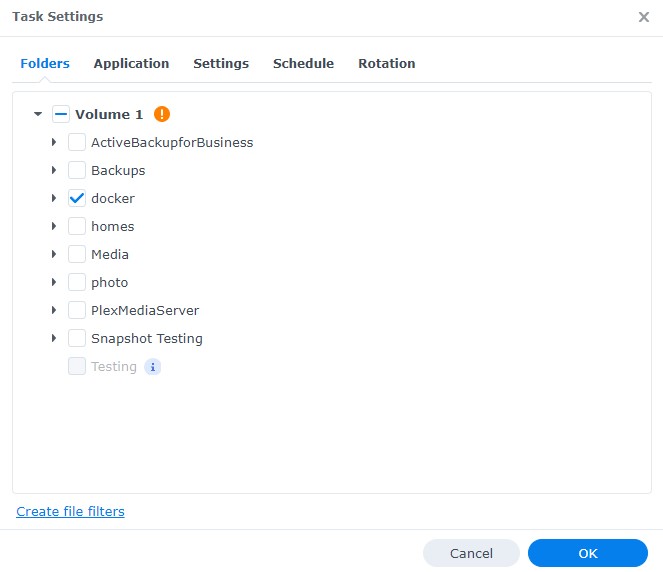
1. How to Back Up a Docker Container
When you create a Docker container, you map specific volumes to local locations. Generally, this is NOT required, but it’s suggested so that you can back up the containers important data. Overall, the container will function as expected without any volume mappings, but it’s in your best interest to take the time to create them so that you can keep your data if you desire.
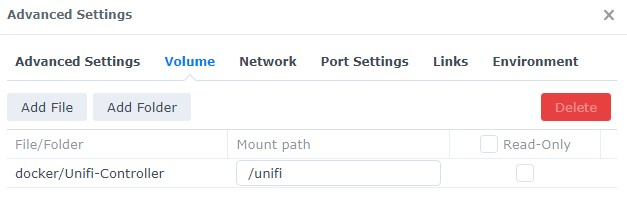
In this example, I’m using the Unifi Controller, but the process holds true for all containers. In the image below, you’ll see that we’re mapping the /unifi location (which is a folder inside of the container) to the docker/Unifi-Controller location on our Synology NAS.
Using a tool like Hyper Backup, we can back up this folder to a cloud destination, separate Synology NAS, or even locally. Please keep in mind that Hyper Backup will not exist on other operating systems, so you’ll have to figure out the best way to back up the volume on the operating system you’re currently using. The key takeaway here is that you want to back up every folder that you mapped in the container.
After you back up the individual folders, you will be able to restore your container to any device capable of running Docker. That’s the true power of Docker – don’t like it running on your NAS? Set up a Linux VM with Docker and you’ll be up and running in no time.
2. How to Restore a Docker Container
In the last step, we looked at how to back up a docker container. It’s important to understand the relationship between your docker container and the volume you map. If there is something in the folder you map, it will read that data. If there isn’t something in that folder, it will create the files on that local storage. The best way to think of this is from a login perspective:
- If you set up a docker container and create a username/password, that username/password will exist in one of the folders you mapped.
- If you delete that folder, you will NOT be able to log in because the username/password doesn’t technically exist.
- If you restore that folder from a backup, you will be able to log in, as the container will read the information that you have in that folder.
With all of this said, how exactly do you restore your data? Well, it’s pretty straight-forward.
- Restore the data to a folder on your local machine (generally using the backup tool, or by migrating the folder to that location).
- Recreate the container using the exact same settings, then map the folder that you just restored to the correct mount point (container folder). Using our Unifi Controller example, that will be the /unifi location. Start the container, and it will automatically read that folder (which contains all of your information), and you’ll be right back to where you started.
NOTE: Please keep in mind that if you’re restoring the data to a location where the Docker container already exists, you should only have to restore the data, then restart the container. It should restart with the settings you had from the backup you restored.
Once you understand how docker containers work, understanding how to back them up and restore them is a breeze. It’s just sometimes difficult to understand exactly how the mount path’s function.
3. Conclusion – How to Back Up a Docker Container
This tutorial showed how to back up a docker container and how to restore it. The process works similarly on all machines and since docker containers are designed to be lightweight and portable, this allows you to easily migrate them to a different device if desired.