I run Home Assistant OS on Proxmox, currently on Proxmox VE 9.1, and it’s one of the first VMs I set up on any new Proxmox host. The install process is a little different from a typical VM because you’re importing a pre-built disk image rather than booting an ISO, so it’s worth knowing the exact steps before you start.
If you haven’t set up Proxmox yet, start with the Proxmox VE installation guide first, then come back here.
VM or LXC for Home Assistant on Proxmox?
Use a VM. The official Home Assistant OS image is designed to run as a virtual machine and gives you full Supervisor support out of the box. That means add-ons, automatic OS updates, and the built-in backup system all work without any extra configuration. If you want to install HACS on Home Assistant, for example, you need Supervisor.
LXC installs exist, but they’re unsupported. Every time Home Assistant OS updates, there’s a real chance something breaks in an LXC setup that you have to fix manually. The VM approach requires more RAM upfront, but it’s significantly less maintenance over time. For a deeper look at the difference between the two container types, see Proxmox Containers (LXC) vs. Virtual Machines.
What You Need Before Starting
- Proxmox VE installed and accessible
- 2 CPU cores and 4 GB RAM available to allocate to the VM (this is the practical minimum for a stable install with add-ons running)
- At least 32 GB of storage for the VM disk — 64 GB is better if you plan to run several add-ons
- Network: the VM will request a DHCP address by default; set up a DHCP reservation on your router before or shortly after first boot if you want a static IP
How to Install Home Assistant on Proxmox
The process has more steps than a typical VM setup because you’re importing a pre-built disk image. Follow these in order.
1. Download the HAOS image.
Go to the Home Assistant downloads page, select Other, and download the KVM/Proxmox (.qcow2) file. Always grab the latest stable release.

2. Rename the file from .qcow2 to .img.
Most operating systems let you rename the extension directly. This rename is required — the qm importdisk command won’t process the file without it. The .qcow2 format is QEMU’s native virtual disk format; it already contains a complete HAOS installation. The extension rename is just to satisfy Proxmox’s import tool.

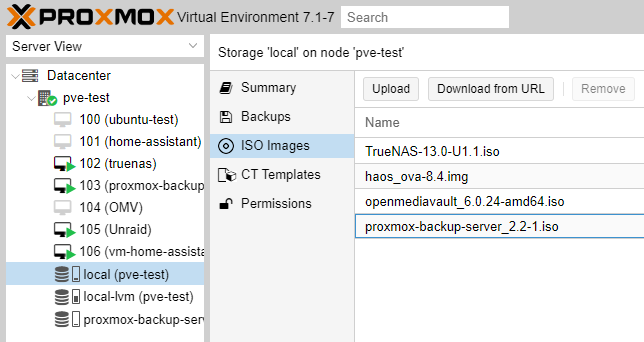
3. Upload the renamed .img file to Proxmox ISO Images storage.
In the Proxmox web UI, navigate to your storage location, select ISO Images, and upload the file. If your ISOs are stored in a non-default location, take note of the full path — you’ll need it in step 11.
4. Select Create VM in the top-right corner and give the VM a name.
Something like homeassistant works. Leave the General tab settings at their defaults and select Next.
5. In the OS tab, select “Do not use any media.”
You’re not installing from an ISO, so no media source is needed.
6. In the System tab, check QEMU Agent.
This allows Proxmox to communicate with the VM for status reporting and graceful shutdowns. Set Machine to Default (i440fx) unless you have a specific reason to use q35.
7. In the Disks tab, delete the default scsi0 disk.
Click the trash icon to remove it. You should have no disks listed at this point, which is correct. The HAOS disk gets imported separately.
8. In the CPU tab, set Cores to 2.
Leave the type as Default unless you need a specific CPU type.
9. In the Memory tab, enter 4096 MB.
4 GB is the practical minimum for a stable HAOS install with add-ons running. Allocate more if your host has the headroom.
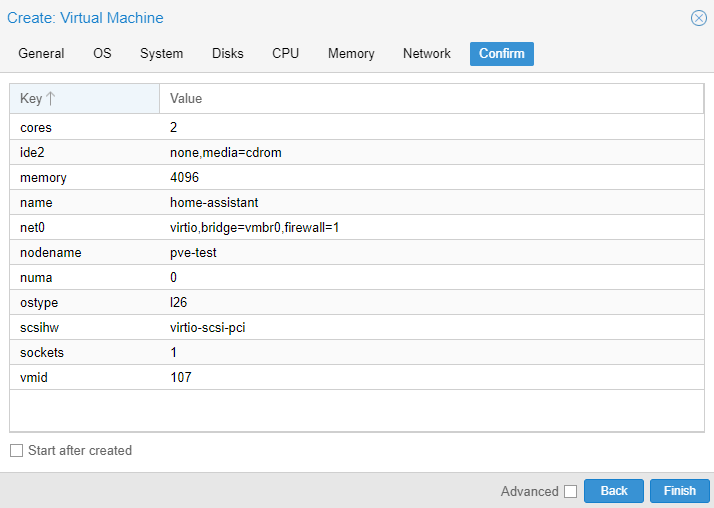
10. On the Confirm tab, uncheck “Start after created,” then select Finish.
11. Import the HAOS disk image using the Proxmox shell.
Open the Proxmox shell and run the command below. Replace <VMID> with the VM ID assigned in the previous step, update the filename to match the version you downloaded, and replace <STORAGE_LOCATION> with your storage name (for example, local-lvm or local).
qm importdisk <VMID> /var/lib/vz/template/iso/haos_ova-<VERSION>.img <STORAGE_LOCATION>If you uploaded to an alternate storage path, adjust the path in the command accordingly.

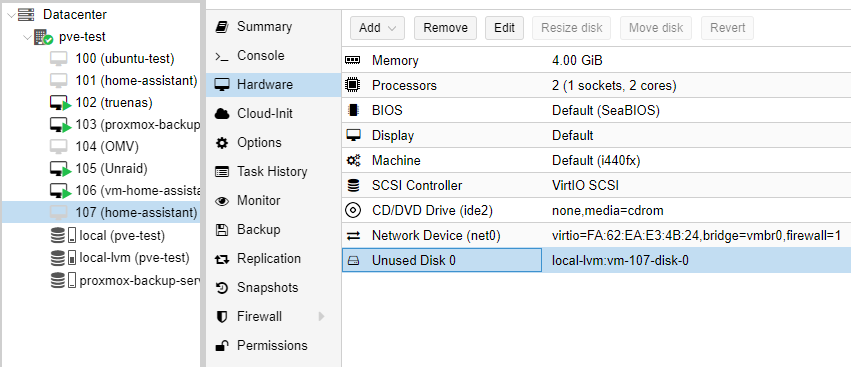
12. Find the imported disk in the VM’s Hardware tab.
Select the VM in the Proxmox sidebar, go to Hardware, and look for Unused Disk 0. Double-click it to edit.
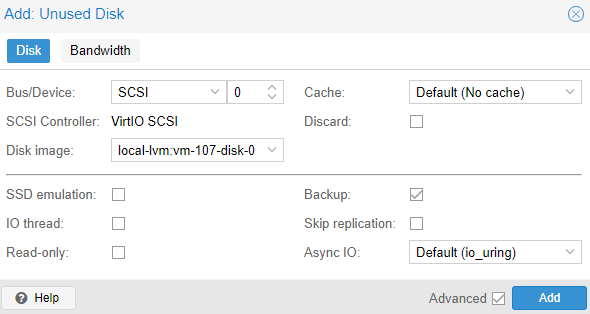
13. Select Add to attach the disk to the VM.
Leave the bus/device as SCSI and the settings at their defaults. Select Add.
14. Add an EFI disk.
Still in the Hardware tab, select Add → EFI Disk. Choose your storage location, uncheck Pre-Enroll Keys, and select OK.

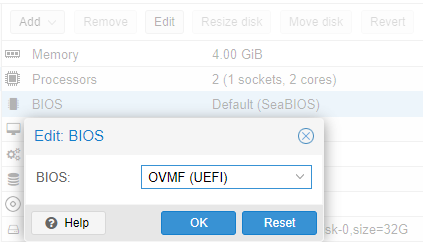
15. Set the BIOS to OVMF (UEFI).
In the Hardware tab, find the BIOS row and select Edit. Change it from SeaBIOS to OVMF (UEFI). Select OK. Add the EFI disk before changing this setting. If the EFI disk is missing when you switch to OVMF, the VM will fail to start.
16. Fix the boot order.
Go to Options → Boot Order. Uncheck ide2 and net0, then check scsi0. Select OK.
17. Start the VM.
Select the VM and click Start. Open the console. After a few minutes, HAOS will finish booting and display the assigned IP address. You can then reach it at:
http://homeassistant.local:8123If that doesn’t resolve, use the IP address shown in the console.
After First Boot
Navigate to the IP address on port 8123 to complete onboarding. The first boot takes a few minutes while HAOS configures itself.
Three things worth doing right after setup: Set a DHCP reservation for the Home Assistant VM on your router so the IP doesn’t change. Enable automatic backups under Settings → System → Backups. Check for updates under Settings → System → Updates — Home Assistant OS, Supervisor, and Core can all update independently.
Once it’s running, you might also want to look at how to access Home Assistant remotely or set up Node-RED on Home Assistant for more advanced automation.
Troubleshooting
The VM boots but Home Assistant doesn’t load.
Give it 3 to 5 minutes on first boot. HAOS does a significant amount of setup on the initial start. If it still doesn’t load after that, check the console output for errors.
The qm importdisk command fails.
Check that the file path is correct and the filename matches the version you downloaded exactly, including the version number. Also confirm the storage name matches what’s listed in Proxmox under Datacenter → Storage.
Home Assistant is unreachable after setting a static IP.
If you changed the IP inside Home Assistant’s network settings rather than via a DHCP reservation, point your browser to the new IP. HAOS does not fall back to the old address.
The VM won’t start after changing BIOS to OVMF.
The EFI disk must be added before you switch to OVMF. If it’s missing, add it from the Hardware tab, then try starting the VM again.
You want to resize the VM disk later.
Shut down the VM, increase the disk size in Proxmox, then resize the partition inside HAOS. The Proxmox-side change alone isn’t enough — you need to expand the partition inside the guest as well.
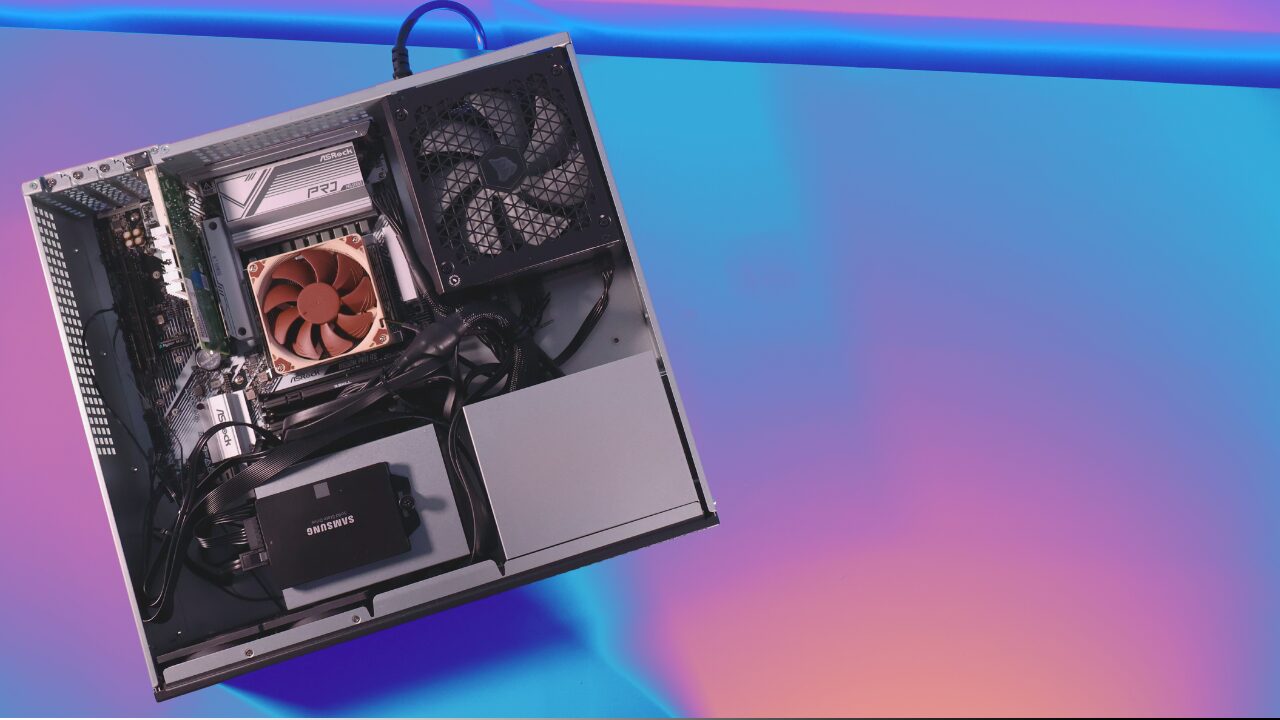
I’ve been running Home Assistant OS as a Proxmox VM for a while now and it’s held up well. The VM approach does use more RAM than an LXC install would, but you get a fully supported setup that just works across updates, and that trade-off is worth it. If you’re running a small Proxmox host, something like a mini PC with an Intel N100 handles it without any issues.