Today we are going to take a look at how to install Emby on a Raspberry Pi.
Emby is a home media server that will allow you to stream your digital media to client devices. I am going to assume that if you’re going to run Emby on a Raspberry Pi, you probably will be hooking up an external hard drive with your media on it.
If you’re storing that data on a PC or NAS, you probably want to just run Emby there (if it’s an option). Please feel free to check out my tutorial on how to install Emby on a Synology NAS if you think you’d prefer running it there!
You can also check out our tutorial on how to run Jellyfin on a Raspberry Pi if you’d prefer running the open-source program!
1. How to Install Emby on a Raspberry Pi
1. First, we will create a directory where the external hard drive can mount when our Raspberry Pi is booted.
sudo mkdir /mnt/media
2. Run the command below to get the list of hard drives that we have attached to our Raspberry Pi.
sudo fdisk -l
3. Find your external hard drive in this list. Run the command below and copy the UUID of the external hard drive.
sudo blkid

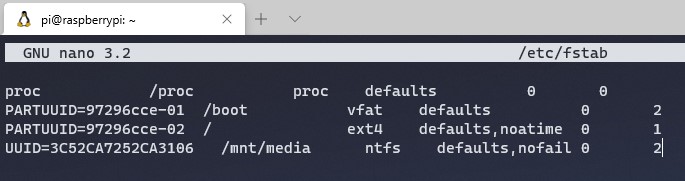
4. Run this command to edit the fstab file.
sudo nano /etc/fstab
5. Enter in the line exactly as shown (add your UUID and drive type) below and write out the file by pressing CTRL + O when complete.
NOTE: You must “tab” between each block of text (each space below). It is also important to note that the “nofail” parameter allows you to boot the Raspberry Pi without the external hard drive attached – if this doesn’t exist, your Raspberry Pi will throw an error when the external hard drive is not connected and won’t boot.
UUID=[the UUID of your external hard drive] /mnt/media [drive type] defaults,nofail 0 2
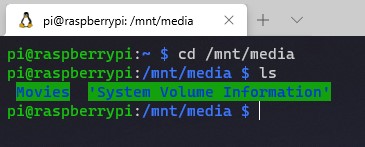
6. Reboot your Raspberry Pi. When it boots back up, navigate to the folder that we mounted using the commands below and you should see your external hard drives files.
cd /mnt/media
7. We will be installing this application using Docker and Portainer. If you haven’t installed Docker and Portainer on your Raspberry Pi yet, please follow these instructions first.
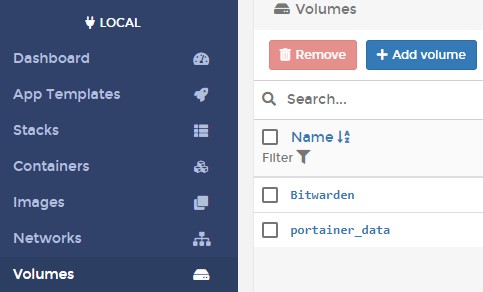
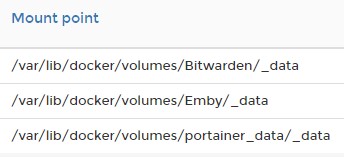
8. Select Volumes and then Add Volume.
9. Give the volume the name Emby and then Create the volume.
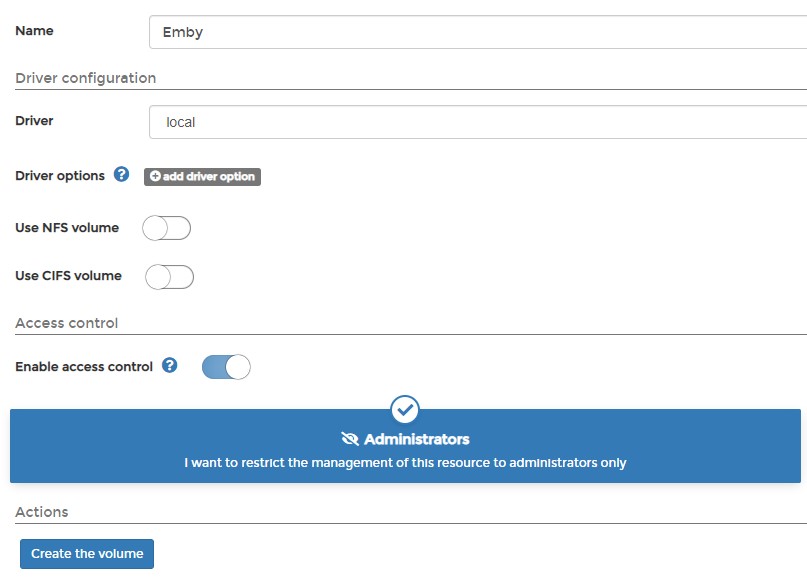
10. Take note of the Emby Mount Point as we will need it for our next step.
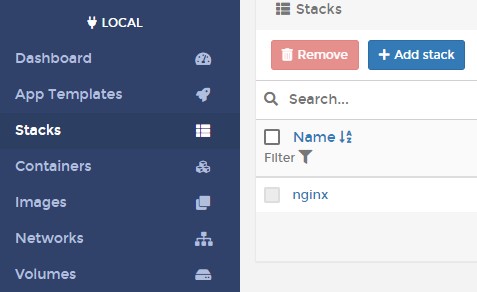
11. Select Stacks and then Add Stack.
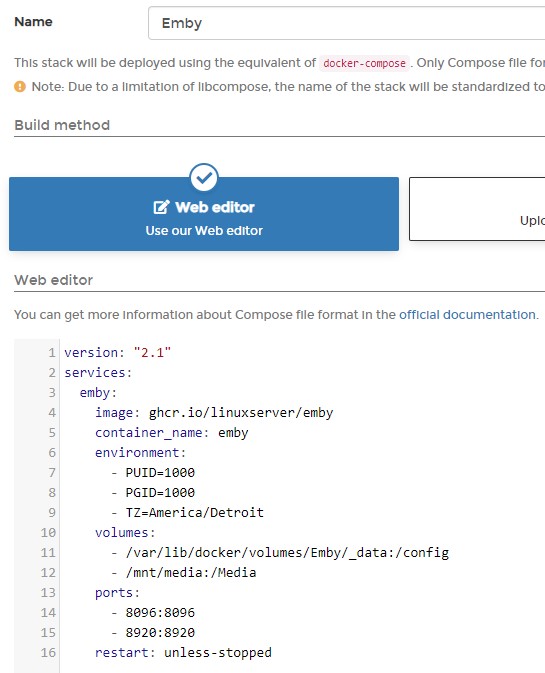
12. Give the container a name and then paste the stack below. Be sure to update the items in pink to reflect your time zone and the local path to your config folder and media folders.
Feel free to change the PUID and GUID if you’d like, but these are the default values for the pi user. Select Deploy the stack when you’re finished.
version: "2.1"
services:
  emby:
    image: ghcr.io/linuxserver/emby
    container_name: emby
    environment:
      - PUID=1000
      - PGID=1000
      - TZ=America/Detroit
    volumes:
      - /var/lib/docker/volumes/Emby/_data:/config
      - /mnt/media:/Media
    ports:
      - 8096:8096
      - 8920:8920
    restart: unless-stopped
13. The container will create. When it’s finished, you can access it by navigating to the IP address of your Raspberry Pi and port 8096.
http://[RASPBERRY_PI_IP]:8096
2. Emby Setup
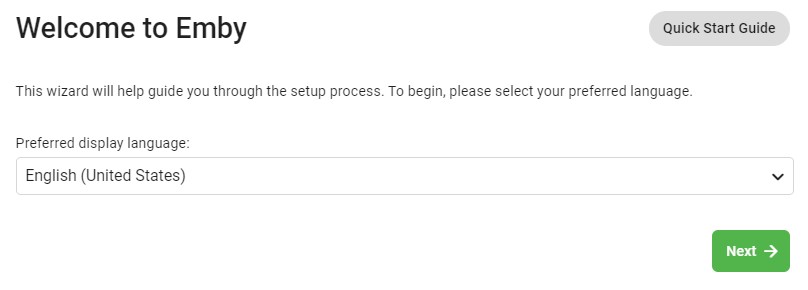
1. Select your preferred language and proceed.
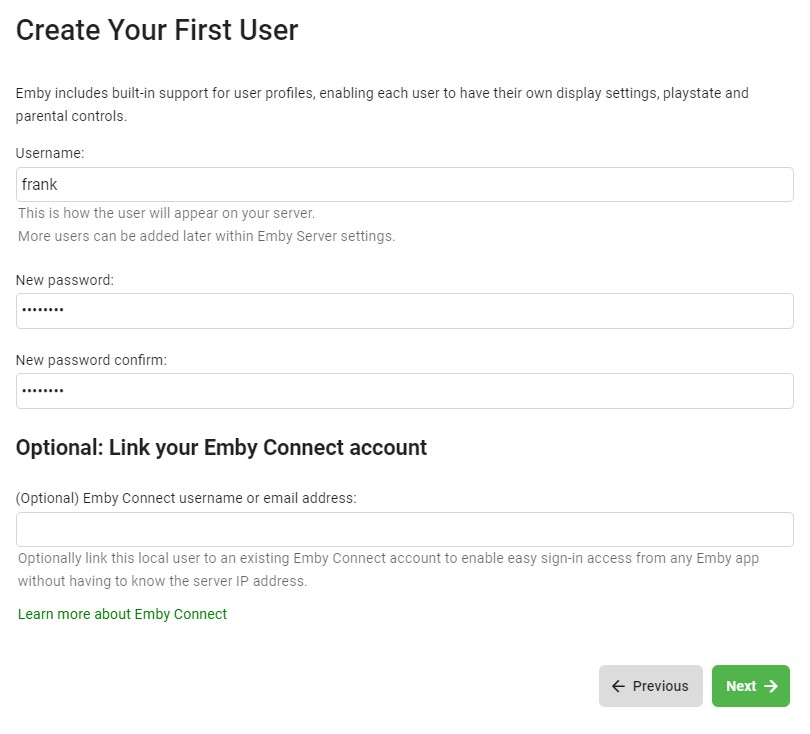
2. Create your user account.
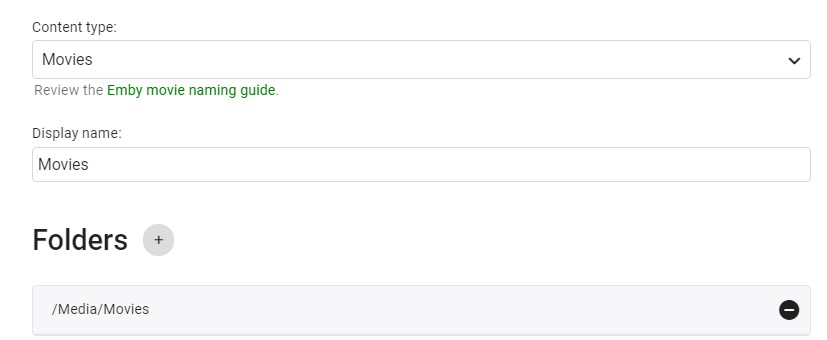
3. Select your Content Type, then add the folders that we mapped earlier. You will have to do this for each content type.
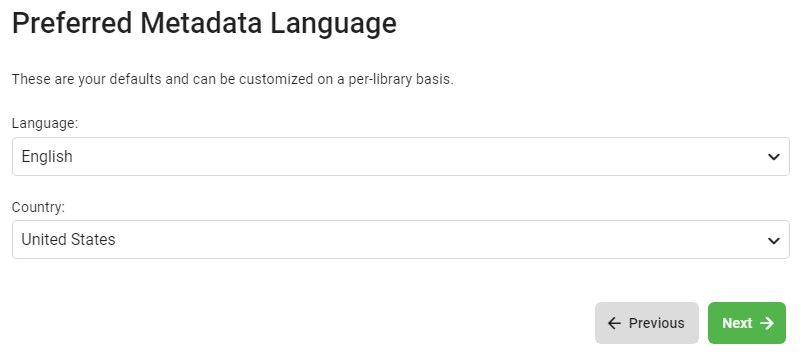
4. Select your Metadata language.
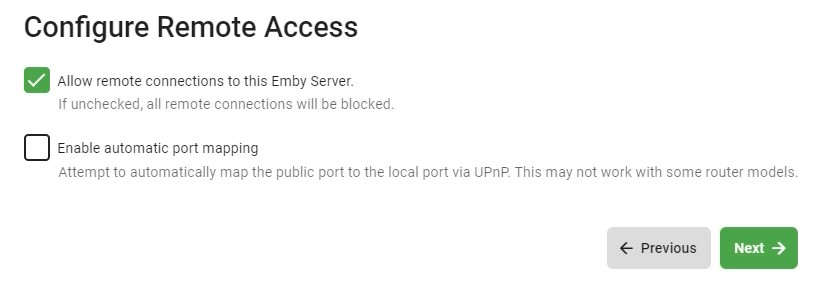
5. Configure Remote Access as you’d like. I normally disable UPnP as I don’t want any applications opening ports on my router.
6. Accept the Terms of Service, then Finish! You will be able to login using the username and password you defined, and your media library will start to sync!
7. If you’d like to expose this outside of your local network, please check out my tutorial on Nginx Proxy Manager which will allow you to securely expose it!
3. Conclusion – How to Install Emby on a Raspberry Pi
This tutorial looked at how to install Emby on a Raspberry Pi. Setting up Emby on a Raspberry Pi isn’t too bad thanks to Portainer. Installing stacks is super easy thanks to stacks, and Emby is a great alternative to Plex and Jellyfin.