In this tutorial, we’re going to look at how to install Jellyfin on Proxmox with Hardware Acceleration. This process will utilize an LXC container for Jellyfin on Proxmox which will keep its resource usage extremely low.
Just keep in mind that if you want hardware acceleration working, you must have a CPU with an iGPU. Generally, Intel processors are going to be your best bet in this area, and is what I’ll be using to demo this.
How to Install Jellyfin on Proxmox
To install Jellyfin on Proxmox with hardware acceleration, we basically have three total steps we have to follow. The first will configure the container that we’ll use to run our Jellyfin server. Next, we have to configure our Proxmox host with the correct iGPU drivers and permissions, and finally, we have to connect our Jellyfin container to the external storage where our media exists.
Configuring the Jellyfin LXC Container
These steps will install configure the LXC container we’ll use to install Jellyfin on Proxmox.
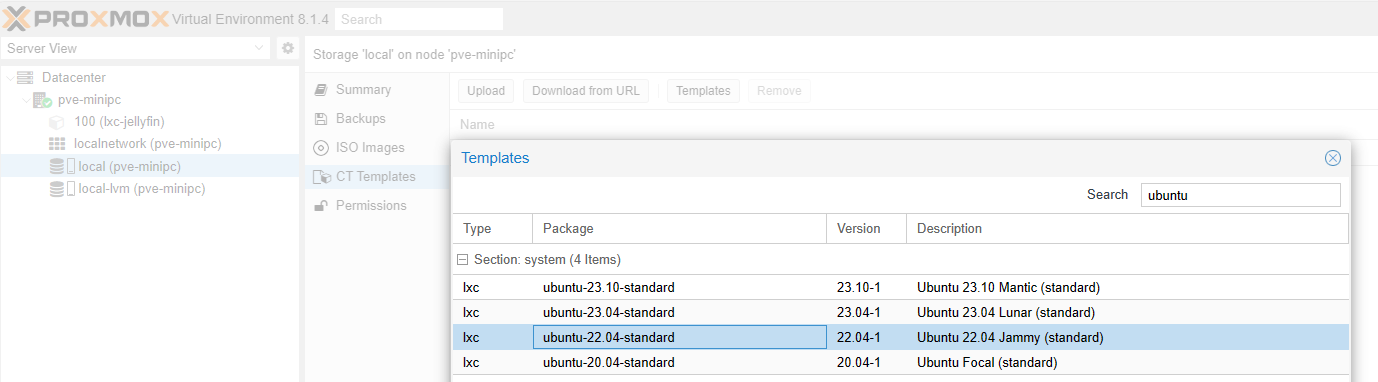
1. Select the local storage, then CT Templates, then Templates, and search for and download the ubuntu-22.04-standard LXC container template.
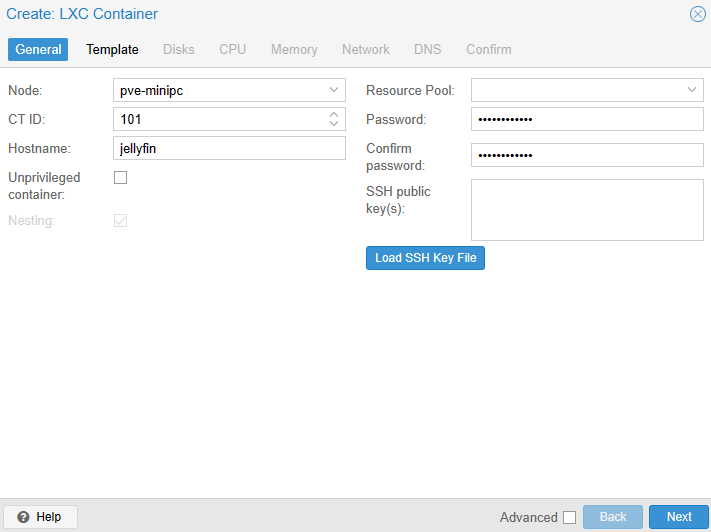
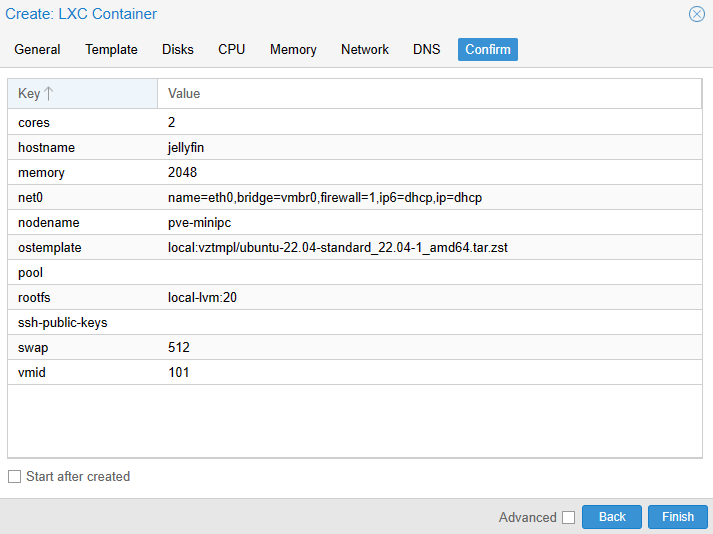
2. Select Create CT in the top right of Proxmox to create a new container. Give the container a hostname, enter a password, and uncheck Unprivileged Container.
3. In the Template section, select the Ubuntu template.
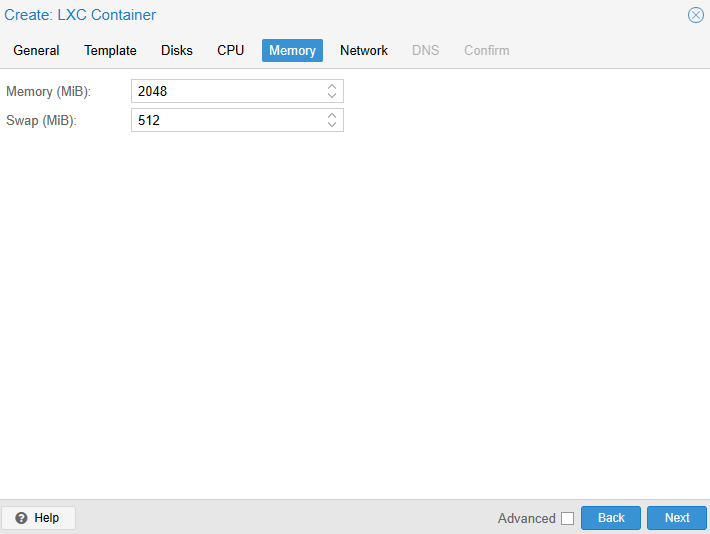
4. Set a total disk size, CPU, and Memory. For reference, I am using 20GB, 2 CPU Cores, and 2GB of Memory.
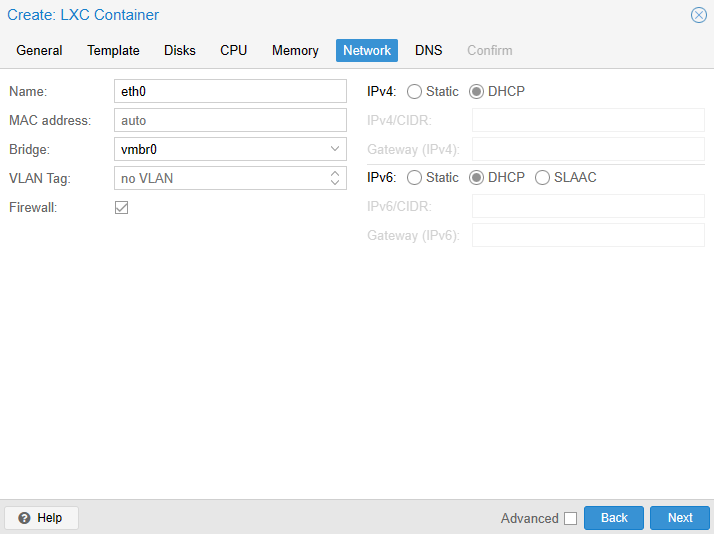
5. In the Network tab, set IPv4 and IPv6 to DHCP (unless you want to use a static IP address – generally, I set static IP addresses on my DHCP server).
6. Select Finish and make sure the Container doesn’t start after creation.
Proxmox Host iGPU Drivers & Modifications
The container for Jellyfin on Proxmox is configured, but we need to make a few host changes first. This is going to be the most difficult part as the drivers you need to install will depend on the type of CPU and iGPU you’re using.
For the most part, you just have to ensure that the drivers are installed and if they are, you’ll have access to your iGPU for Jellyfin on Proxmox. We’ll install a package that will tell you if it is or isn’t working before you proceed.
1. Access the Shell on your Proxmox host and run the commands below to install a few of the packages we’ll need:

vainfo: This package will test to ensure the GPU drivers are installed and functioning properly.
apt install vainfo -yIntel Drivers: First, we’ll add the non-free repository to add the Intel drivers needed, then install the Intel iGPU drivers. Keep in mind that if you aren’t using an Intel CPU (or even possibly if you’re using an older/newer Intel CPU than I am), this step might be different for you.
apt install software-properties-common -y
add-apt-repository -y non-free
apt install intel-media-va-driver-non-free -y
2. Now that both are installed, run the command below to confirm the GPU drivers are installed properly. If they are, you should see a bunch of supported profiles and entrypoints.
vainfo
3. Next, we have to modify our LXC container (Jellyfin) to pass through the iGPU from the host to the container. Run the command below substituting your Container ID (you can see it in the Proxmox host – mine is 100).
nano /etc/pve/lxc/[ID].conf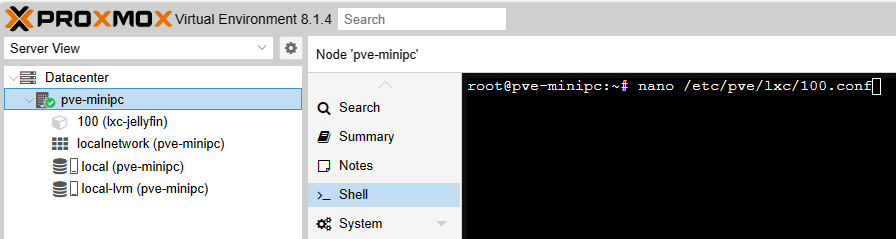
4. At the bottom of the LXC Container’s config file, add the four lines below. These will pass the iGPU to the Container.
lxc.cgroup2.devices.allow: c 226:0 rwm
lxc.cgroup2.devices.allow: c 226:128 rwm
lxc.mount.entry: /dev/dri/renderD128 dev/dri/renderD128 none bind,optional,create=file
lxc.hook.pre-start: sh -c "chown 0:108 /dev/dri/renderD128"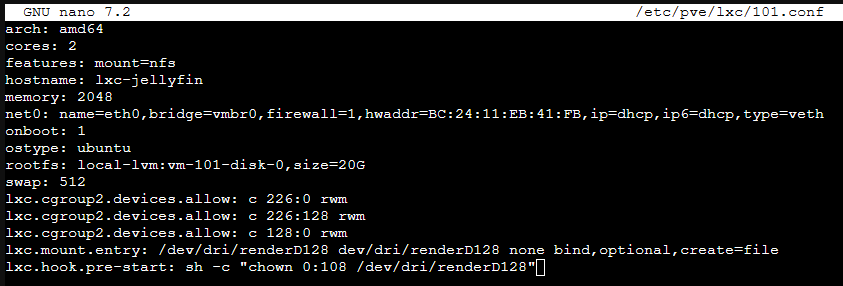
Installing Jellyfin & Passing Through Media
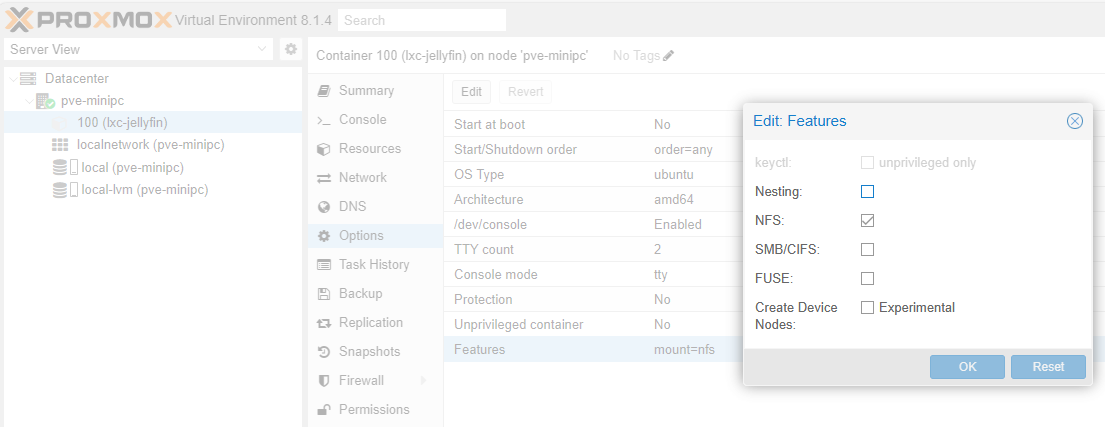
Before we can install Jellyfin on Proxmox, there’s one final step we have to do. Edit the features (Container > Options > Features > Edit) and enable NFS or SMB/CIFS. This option is only required if you’ll be passing through media from an external server. I’ll be using NFS for this tutorial.
1. After those changes have been made, start the container and login with the root user and the password you specified. Then, run the command below to update the operating system.
apt update && apt upgrade -y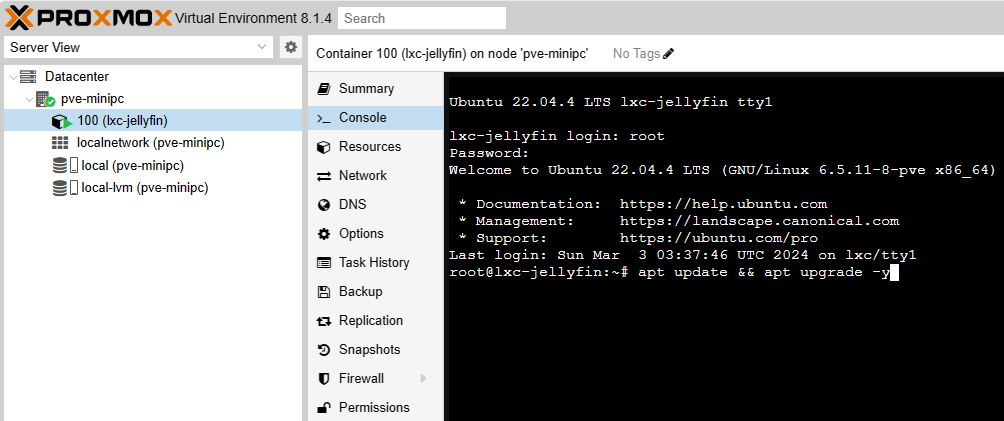
2. After the system is updated, we are going to run a few commands to ensure that the iGPU is passed through to the container. Running this command should return the same results as it did on the host.
apt install vainfo -y
vainfo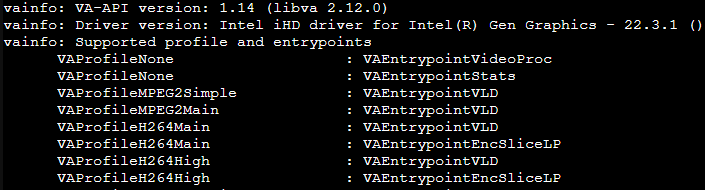
3. Next, we’re going to use a script provided by Jellyfin to install the application. They have a few more…manual options you can use on their website if you’d like.
This will install Jellyfin. Note that you’ll have to press ENTER to continue with the script.
apt install curl -y
curl https://repo.jellyfin.org/install-debuntu.sh | bashNow that Jellyfin on Proxmox is installed, we will have to mount our media. This can be done by either using an NFS or SMB share, but I’ll be utilizing a Synology NAS and an NFS share in this step.
1. Configure the proper NFS permissions for the folder that you’d like to share with your Jellyfin server. If you have to find the IP address of the LXC container, you can run the commands below to access it.
apt install net-tools -y
ifconfig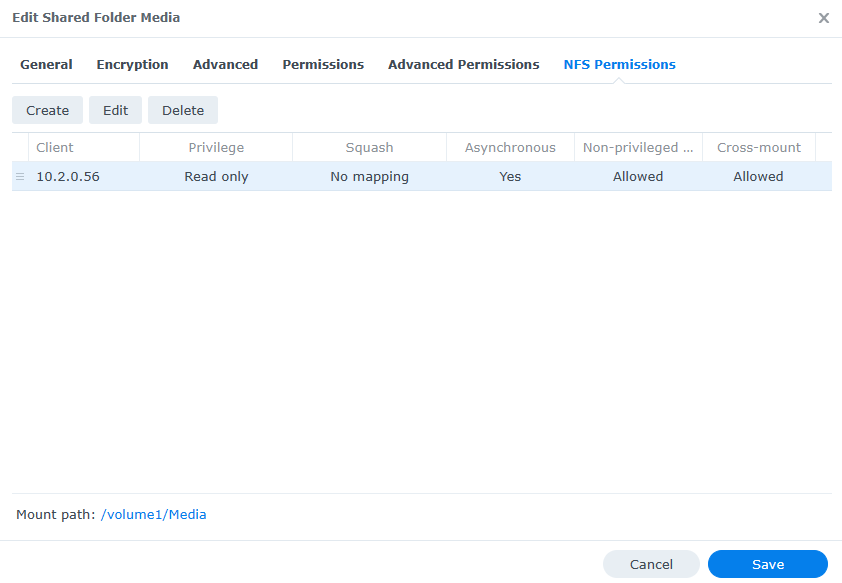
2. Run the commands below to create a directory where your media will exist and install the NFS tools.
mkdir /Media
apt install nfs-common -y
3. Next, mount the media to the /Media folder we created and ensure that it works as expected.
NOTE: This step will be different for you depending on where the data will exist, but it lives in the /volume1/Media folder on my Synology NAS.
mount [IP_ADDRESS]:[FOLDER_LOCATION] /Media
4. If this works as expected, you should be able to list the files in the /Media folder and return your media.
NOTE: You must have a static IP address for your container to ensure the NFS permissions persist.
ls /Media5. Finally, we’ll edit our fstab file to ensure the NFS share mounts on boot.
nano /etc/fstab6. In this file, you’ll have to enter your NFS path, as well as the folder location it should mount to.
NFS_MOUNT /Media nfs defaults 0 0
7. As long as this is done properly, you can reboot the container and you should see the media mounted on boot!
Configuring the Jellyfin Application
Now that Jellyfin is configured and our media has been mounted, we can configure the application. Access Jellyfin by navigating to the IP address of the LXC Container and port 8096.
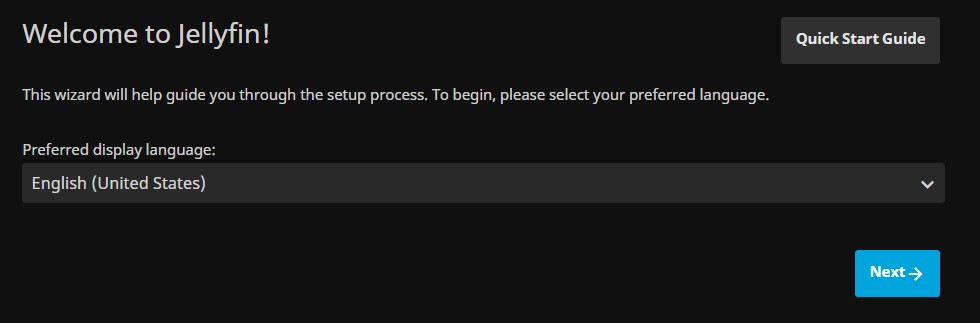
http://[LXC_IP]:80962. You will be brought to the default Jellyfin page. Pick your language, then select Next.
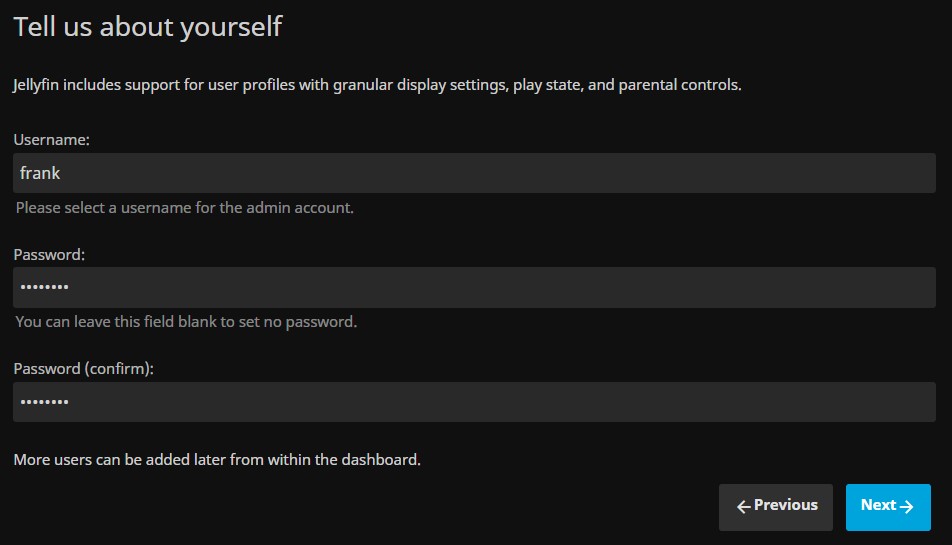
3. Enter a username and password, then select Next.
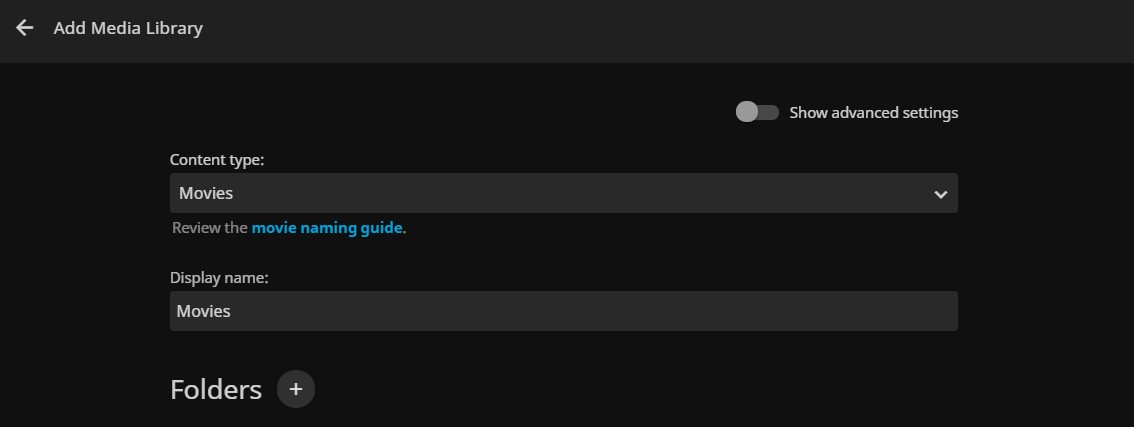
4. You will now need to enter your media libraries. Select Add Media Library, enter the content type, and then add a new folder.
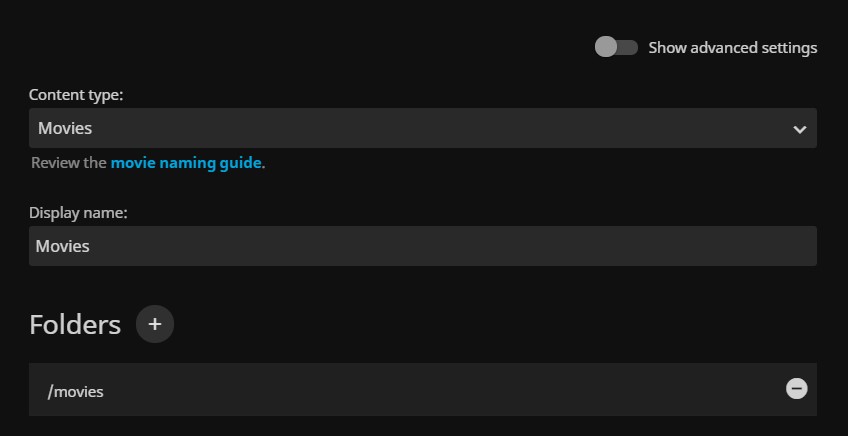
5. In this section, you will need to select the folder that you added earlier (in our case, /Media – the screenshot below is old). This will be completely user-specific, but you need to map the content type to the top-level folder that holds your media.
This means that the Movies content type should be mapped to the Movies folder. Edit any additional settings that you’d like and select Ok. You’ll have to complete this step for all of your Media types.
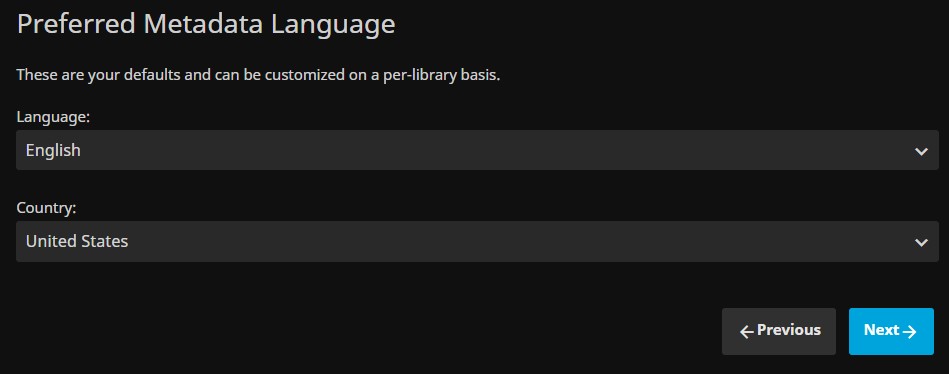
6. Select your preferred metadata settings, then select Next.
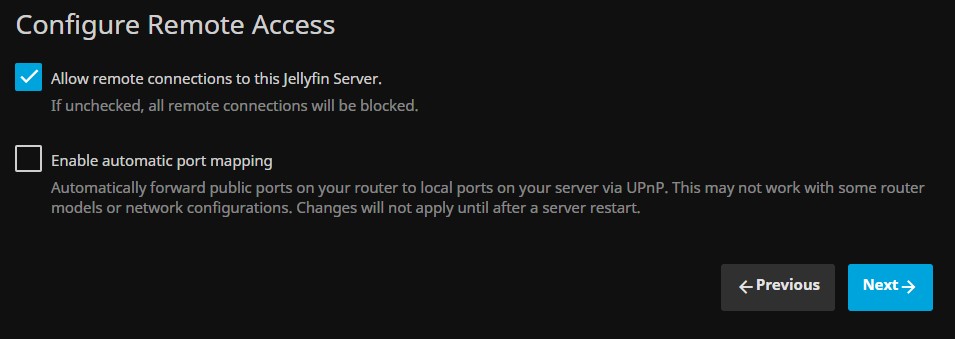
7. Configure your remote access settings. I highly suggest that you keep the second UPnP option deselected, as UPnP is an overall security risk.
If you’d like to access your data remotely, I suggest that you use a VPN like OpenVPN, WireGuard, or Tailscale, or port forwarding (potentially with a reverse proxy) if that’s not possible.
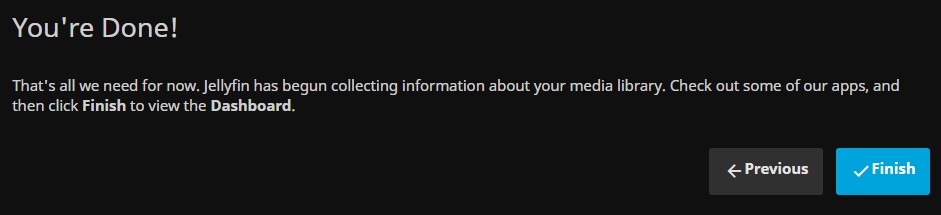
8. Select Finish. The setup process is now complete!
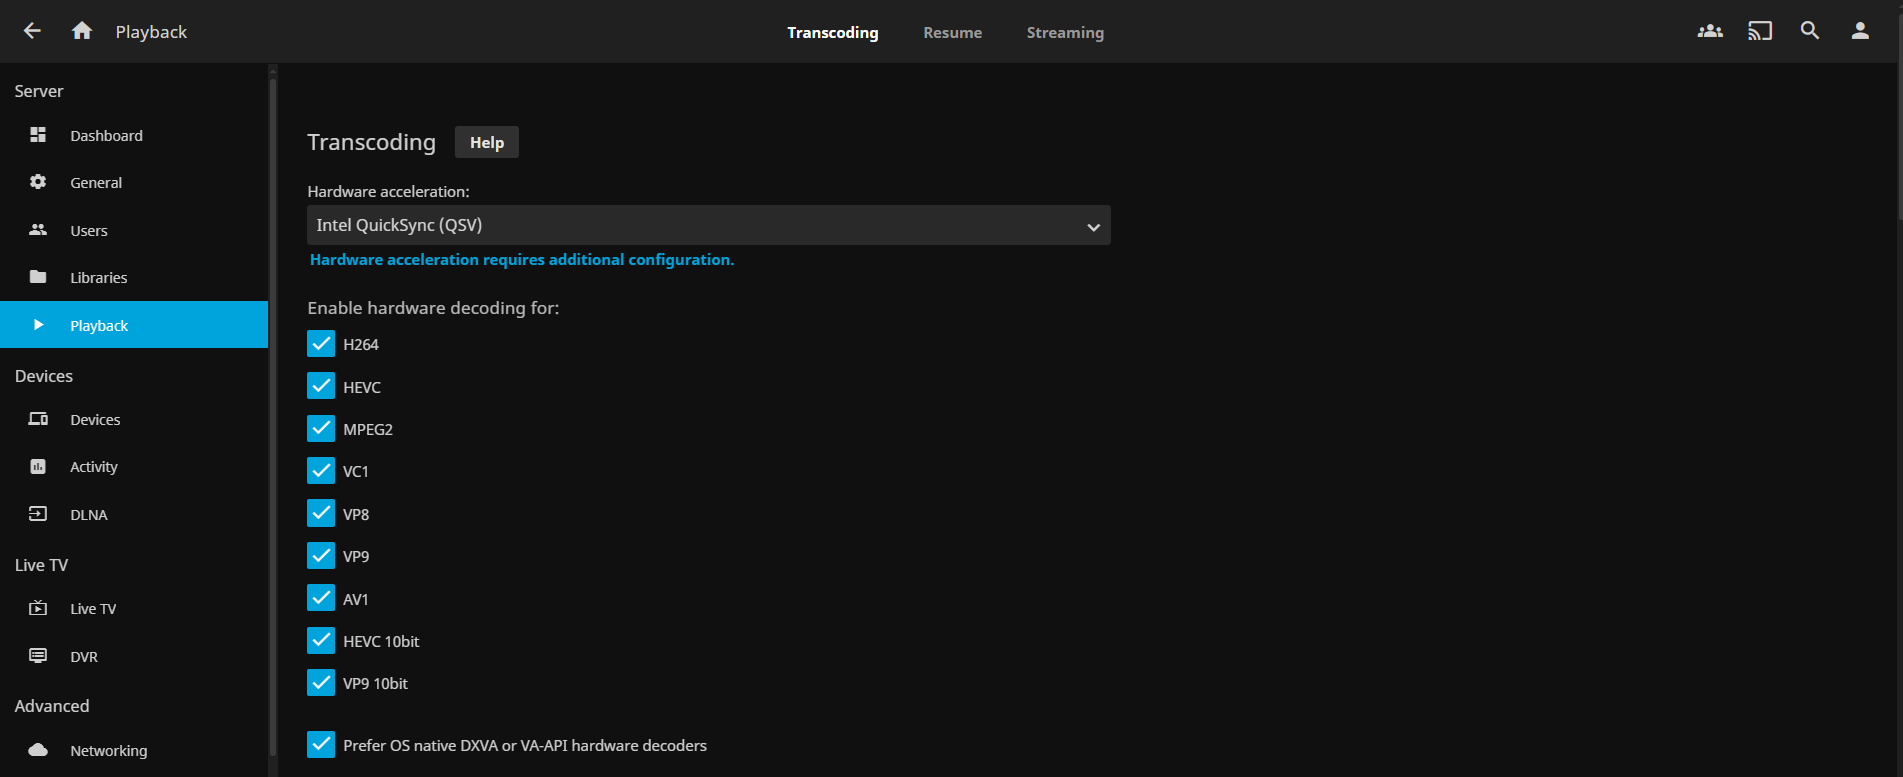
9. Finally, we need to configure Hardware Acceleration for Jellyfin on Proxmox. Select the Person Icon in the top right, then Dashboard (under Administration), Playback, and change Hardware Acceleration to Intel QuickSync (if you’re using an Intel CPU), check off the hardware acceleration options, and Save at the bottom.
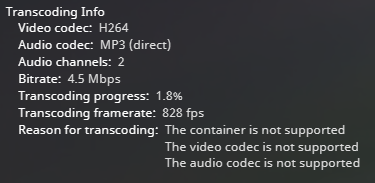
10. You can test hardware acceleration by playing a video, selecting the gear icon in the bottom right and Playback Info. If the Transcoding is working, you should see info in the Transcoding Info screen.
NOTE: Not all videos will transcode, and generally, you do not want to transcode if you don’t have to. Though there are many factors as to why a video file has to be transcoded. However, this is the best setup if you do have to transcode a file.
Troubleshooting Hardware Transcoding
If you run into an issue with hardware transcoding, you might have a permission issue with passing through the GPU. This solution to this problem was found in this Reddit thread.
In the Jellyfin LXC Container, run this command to get the group ID of the render group. In mine, the ID is 108.
getent group render
If yours is different, you must update this line in the LXC configuration file. Run the command below to open the file.
nano /etc/pve/lxc/[ID].confUpdate this line and replace 108 with the ID of your render group. Save the file, reboot, and the hardware acceleration should work.
lxc.hook.pre-start: sh -c "chown 0:108 /dev/dri/renderD128"Conclusion & Final Thoughts on Proxmox + Jellyfin
This tutorial looked at how to configure Jellyfin on Proxmox with Hardware Acceleration. If you’re using a Proxmox host that has an iGPU and you’re interested in running a media server, this is a great place to run it. The performance is great and it uses minimal resources. This is the new home for my Jellyfin server and will be staying here for a while.