In this tutorial, we’ll look at how to configure WebDAV on a Synology NAS.
If you configure WebDAV, you’ll be able to access your Synology NAS files from an external location. With that said, you need to be comfortable and able (also, willing) to port forward as a WebDAV Server requires it.
It’s also important to ensure that WebDAV makes sense for your workflow and requirements. If your goal is to transfer a file, temporarily using SFTP or another form of file transfer (like Synology Drive + Synology QuickConnect) might make the most sense. An even better option would be to utilize a VPN.
However, if you want to access your Shared Folders from an external location, WebDAV might make the most sense.
How to Configure WebDAV on a Synology NAS
The steps below will explain how to configure WebDAV on a Synology NAS.
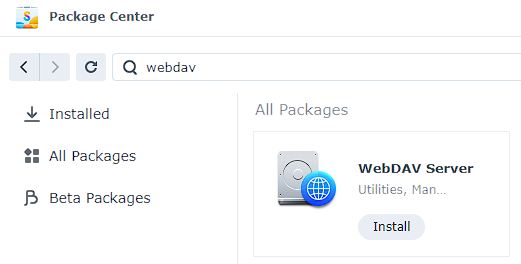
1. To configure WebDAV, you first have to download the WebDAV Server package from the Package Center.
2. After it’s done installing, open the package, then select Enable HTTPS. I would recommend that you do not enable HTTP as the credentials sent with the request will be sent in plain text (where it’s encrypted with HTTPS).
The default port for WebDAV HTTPS is 5006, but I’d recommend changing this to something different – it doesn’t matter what, but it should be different than 5006.

3. At this point, the WebDAV Server is fully configured, but we’ll take it one step further by creating a WebDAV user.
User Account for WebDAV
Since configuring a WebDAV Server will allow you to access your files from a separate server, you might be working with someone who should have rights to individual shared folders (or simply want to separate them).
In this case, you can create a separate user account and ensure the account has access to only the shared folders that it needs to access.
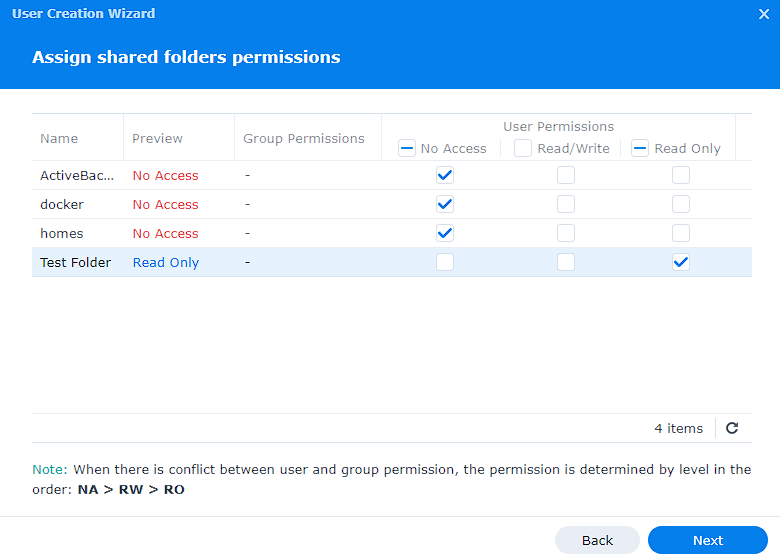
1. Open the Control Panel, select User & Group, then Create. Enter the information, then ensure that you select No Access on all folders that you do not want the user account to access.
Then, either select Read/Write or Read Only depending on the permission the user should have to the shared folders that you do want them to access.
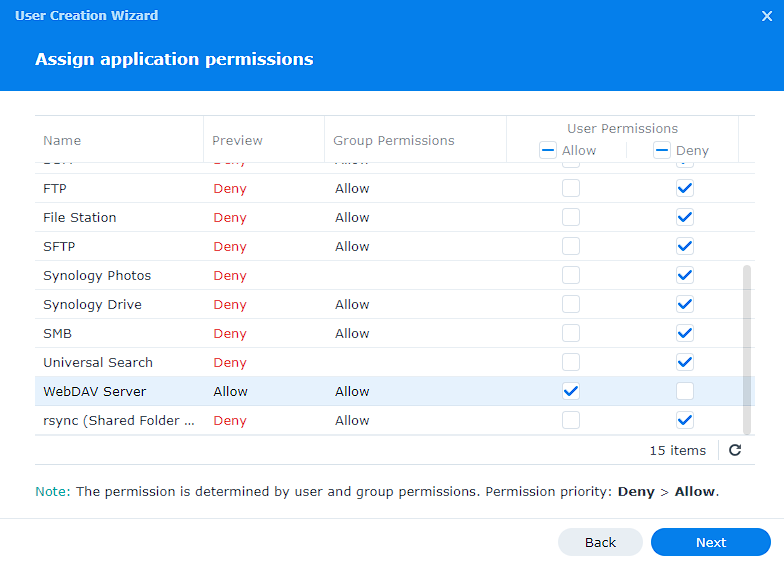
2. In the Applications section, Deny All permission except for WebDAV.
3. Create the user and move to the next step!
Remote Access for a WebDAV Server
Before you can access the WebDAV Server remotely, you need to set up a DDNS hostname or domain name that will point back to your external IP address. If you’re going to use a domain name, you might want to consider using a reverse proxy to avoid having to port forward anything other than TCP port 443.
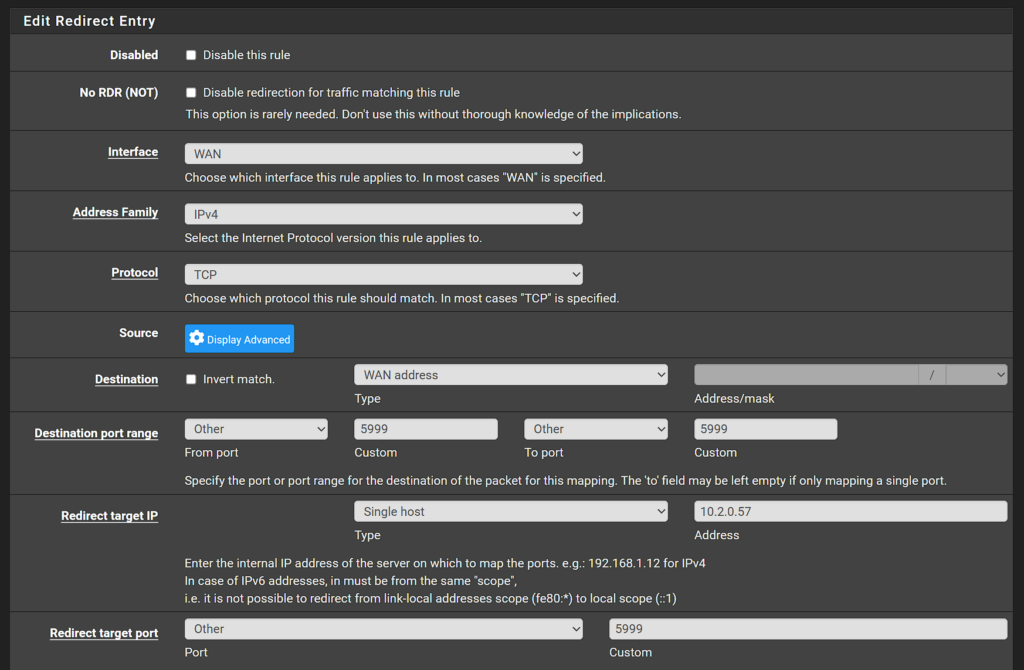
If you are not using a reverse proxy and plan on using a DDNS hostname and port, you’ll also have to port forward TCP Port 5999 (or whatever you’re using) for the WebDAV Server.
Example Port Forward using pfSense
Certificate and Firewall Setup
The last step before testing is to get a valid SSL certificate (since we’re using HTTPS). If you are using DDNS, you should have a valid SSL certificate already (skip to step 3 if you do), but if you’re not, you can follow the steps below.
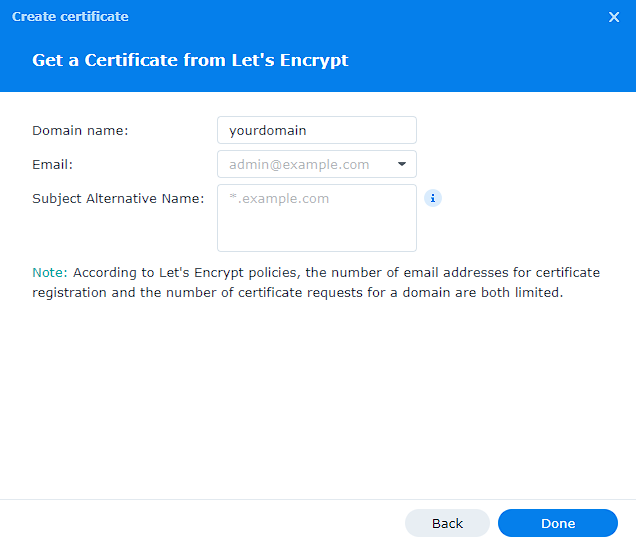
1. Open the Control Panel, select Security, then Certificates and Add a new certificate.
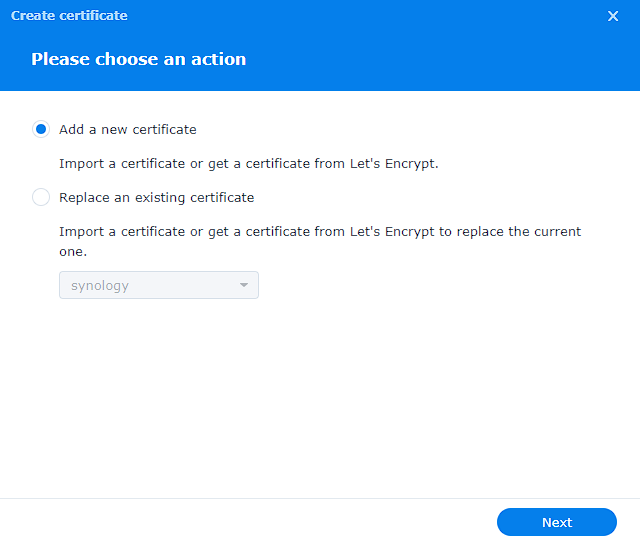
2. Then select Get a Certificate from Let’s Encrypt, and enter the domain name and a valid email address. You can then get select Done.
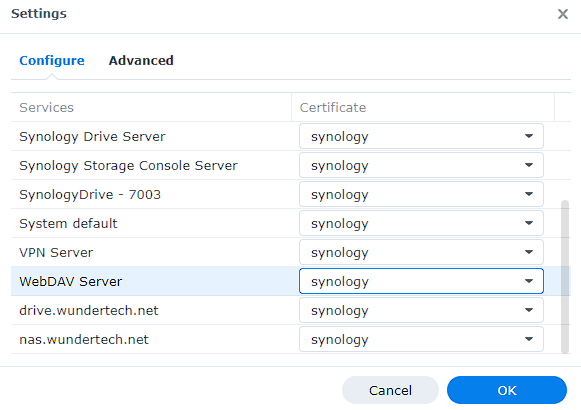
3. Finally, select Settings and change the certificate from synology to the Let’s Encrypt certificate you just got next to WebDAV Server.
4. An overall recommendation (though not mandatory) is to limit the WebDAV Server to a specific IP address (or range of IP addresses) so that the WebDAV Server isn’t accessible by everyone.
This requires you to configure Synology’s Firewall, but is an extremely helpful (and potentially necessary) step.
Testing the WebDAV Server
If you’ve completed the DDNS/Domain Name and port forwarding section, you should now be able to connect to your WebDAV Server from an outside network (note, outside network – this won’t work locally). Finally, select Add a New Certificate.
Windows Setup
On Windows, you can Map a Network Drive, and then enter the full address and port. You can then connect with the WebDAV user you created (or a different account).
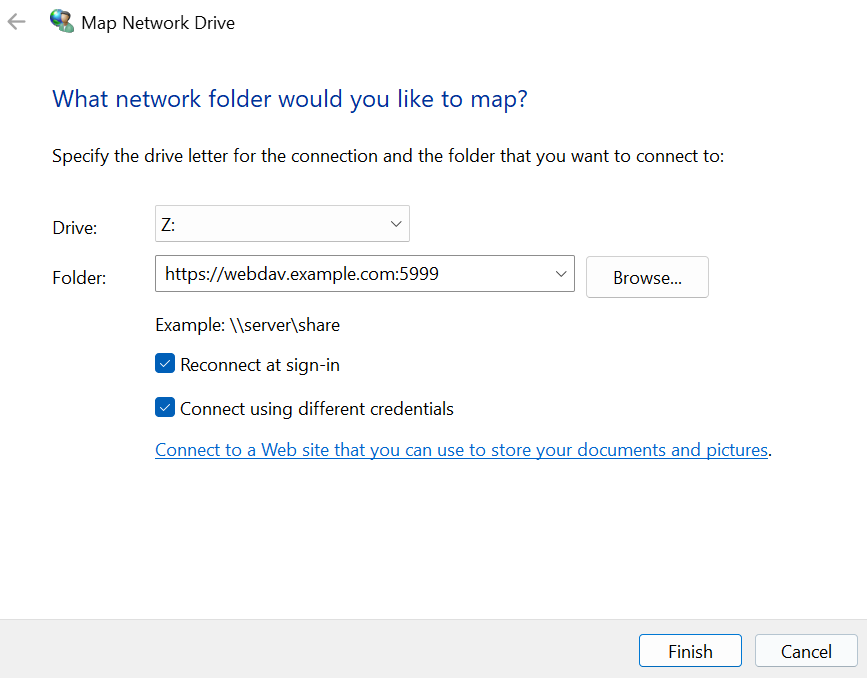
The mapped drive will connect and you’ll be able to access it!

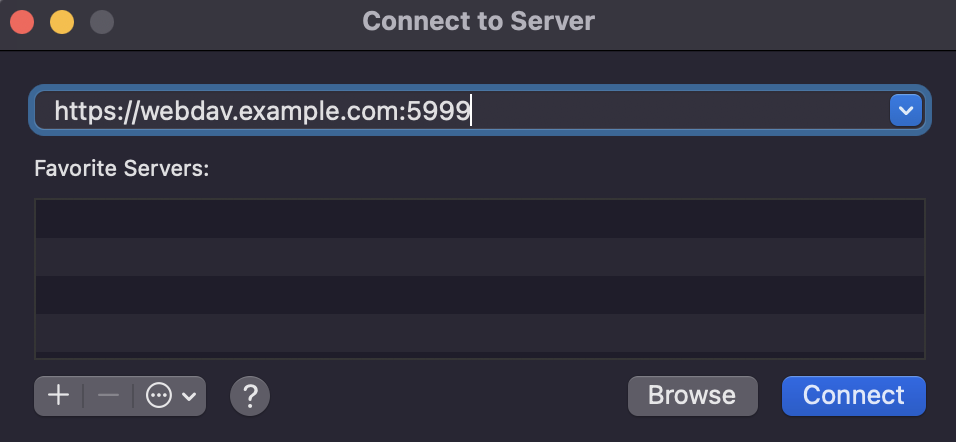
Mac Setup
On macOS, press Command + K to connect to a server, then type in the web address and port. You’ll then have to enter the credentials to connect!
Conclusion: How to Configure WebDAV on a Synology NAS
This tutorial looked at how to configure WebDAV on a Synology NAS. For the most part, there are unique situations where configuring a WebDAV Server makes sense. In almost all cases, you should consider limiting the scope down to a set of IP addresses to ensure the server isn’t accessible to everyone.
Another best practice is to create a specific WebDAV User so that you can’t connect using any other NAS user account (just make sure to revoke access on the other user accounts).