This tutorial will look at how to use a Synology NAS as a Reverse Proxy Server. If you’re exposing any services on your network, using a reverse proxy is a great way to increase security and performance. A reverse proxy allows you to forward client requests to different web servers.
What is a Reverse Proxy?
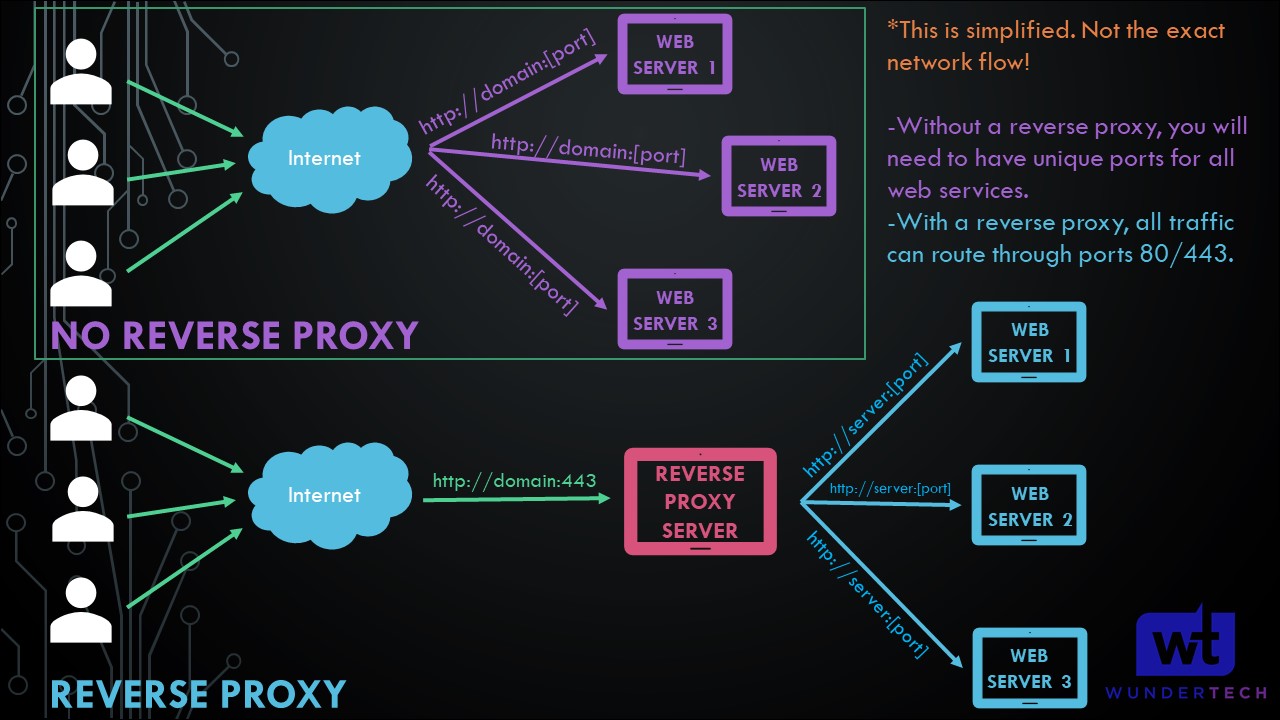
In layman’s terms, you only have to expose one server (using ports 80/443) and will be able to expose as many web services as you’d like. This is an example of the network flow of a reverse proxy (simplified):
This video explains how to use a Synology NAS as a Reverse Proxy Server in DSM 6, though it’s extremely similar in DSM 7.
Prerequisites for Configuring a Reverse Proxy Server
We will look at how to use a Synology NAS as a Reverse Proxy Server below, but please be advised that you’ll have to run this process for each web server you’d like to expose.
In order for your Synology NAS to function as a Reverse Proxy server, you must port forward TCP Ports 80 and 443 to your Synology NAS. This will be different for each router, but you must be able to port forward in order to use the Reverse Proxy.
To be clear before we proceed, after setting up a reverse proxy on a NAS, that service will be exposed outside of your local network.

Domain Name Setup
In order to use a reverse proxy properly, you must have some sort of domain name pointing to your local network. This can be a DDNS hostname, or if you own your own domain, an A/CNAME record (which can be paired with something like Cloudflare if desired).

After you set up the DDNS hostname or A/CNAME record, you can move on to the Synology Reverse Proxy setup in DSM.
How to Use a Synology NAS as a Reverse Proxy Server
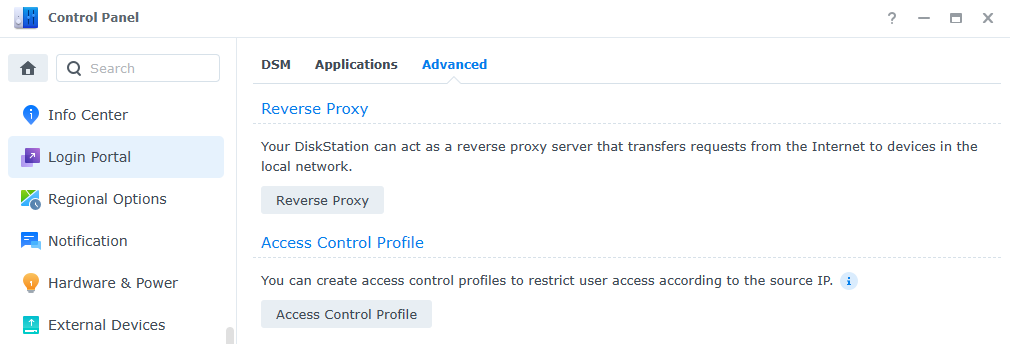
1. To Access the Reverse Proxy section in DSM 7, open the Control Panel, select Login Portal, then Advanced. Inside the Advanced section, select Reverse Proxy.
2. Select Create to create a new item. As mentioned above, you will have to create one item for each web server that you’d like to expose. You will have to modify the settings below, but we’ll look at each option.
Reverse Proxy Settings
Reverse Proxy Name: The name of the reverse proxy (for your reference).
Source
The source is what you’ll use when accessing this web server from outside of your local network, meaning the domain name, protocol, and port you’ll use from outside of your local network.
Protocol: HTTPS – this will ensure that HTTPS is always used. We will pair this with a certificate later.
Hostname: The domain name or DDNS hostname you are using.
Port: 443 (for HTTPS)
Finally, ensure that Enable HSTS is selected and ignore the Access Control Profile for now. We will look at this later.
Destination
Protocol: HTTP or HTTPS – this will be based on the web service you’re exposing. Using Synology DSM as an example, you can use HTTP and port 5000 or HTTPS and port 5001 (default ports). The key is that you must use the correct protocol based on the web service being specified.
Hostname: The hostname or IP address of the local server. Using DSM as the example, this can be localhost or the IP address of your Synology NAS. Generally, you’ll enter a static local IP address here.
Port: The port that the local web server is using. As mentioned above and using the default Synology DSM ports as an example, if you select HTTP, you’ll use port 5000 and if you select HTTPS, you’ll use 5001.

The rest of the settings can stay default, however, there are unique cases where you may have to add custom headers or modify the advanced settings.
If you’re using Synology’s Firewall, make sure that you create an allow rule for ports 80/443.
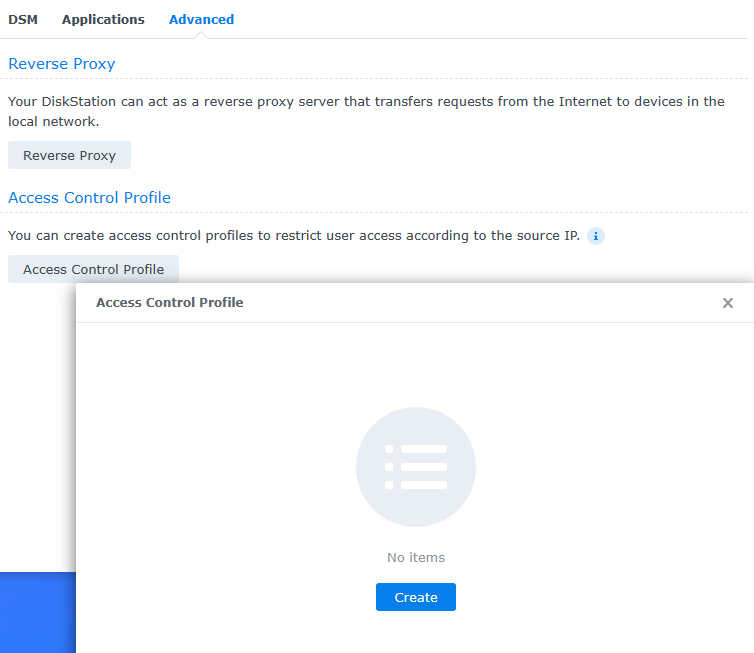
Access Control Profiles for Reverse Proxy Rules
After configuring a reverse proxy, you may want to limit access to a specific IP address or subnet. This will ensure that only the IP addresses specified will be able to access the reverse proxy this profile is assigned to.
Please keep in mind that this is not required and you may want to skip this section depending on your requirements.
1. Select Access Control Profile, then select Create.
2. The IP addresses that you’d like to allow must be added at the top, with a deny all rule added at the bottom that will block all other IP addresses.
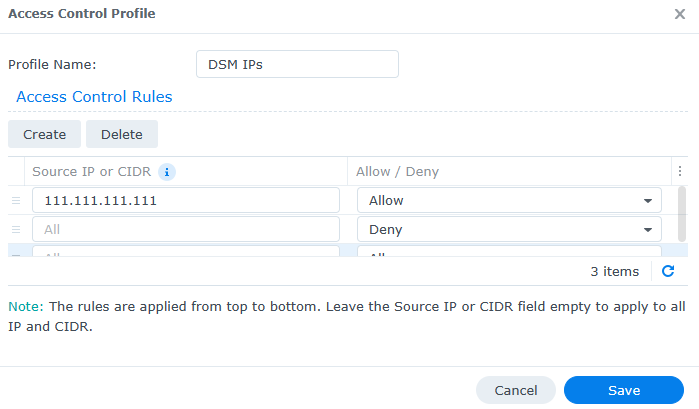
3. If you edit any existing reverse proxy rules, you can specify this access control profile and only the IP addresses specified will be allowed access.

Let’s Encrypt Certificate Setup for Reverse Proxies
Now that the reverse proxy is set up, we will need to create and assign an SSL certificate using Let’s Encrypt.
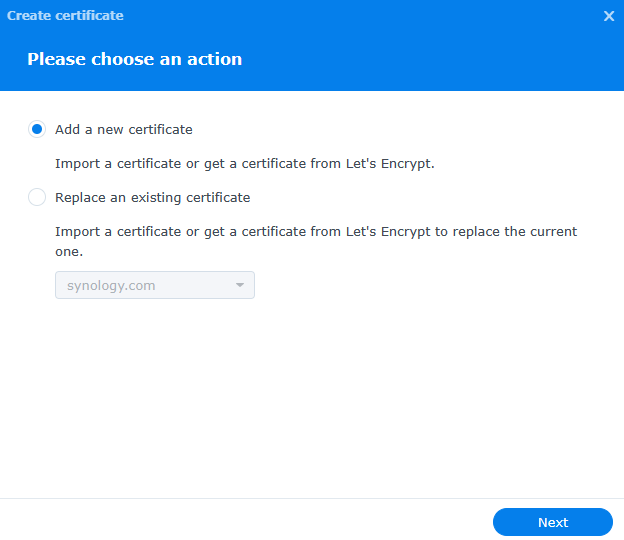
1. Navigate to the Control Panel, then Security, then Certificate. Select Add.

2. Select add a new certificate, then select Next.
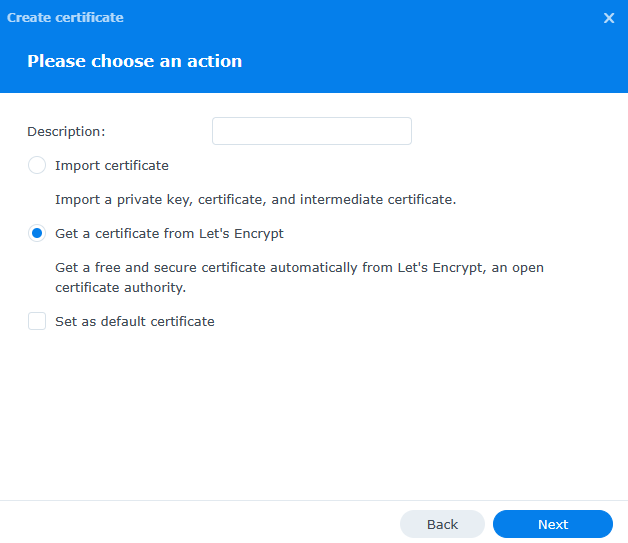
3. Select Get a certificate from Let’s Encrypt, then select Next.
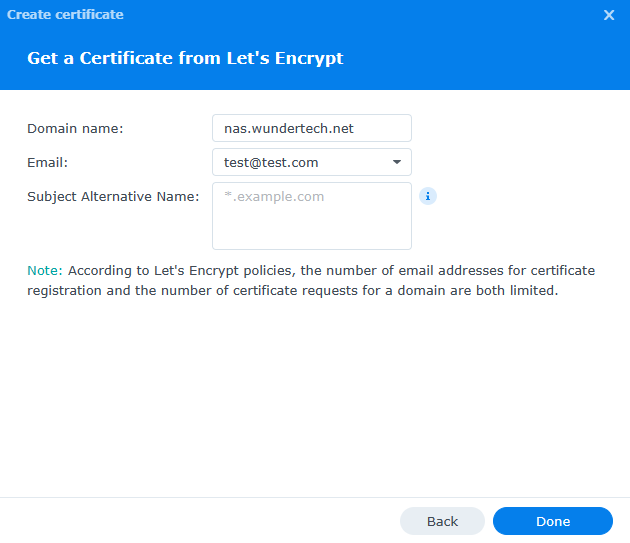
4. Under the domain name, enter the hostname you used in the Source section of the Synology reverse proxy setup. Enter your email and select Apply to create the certificate.
5. After the certificate has been created, select Settings.
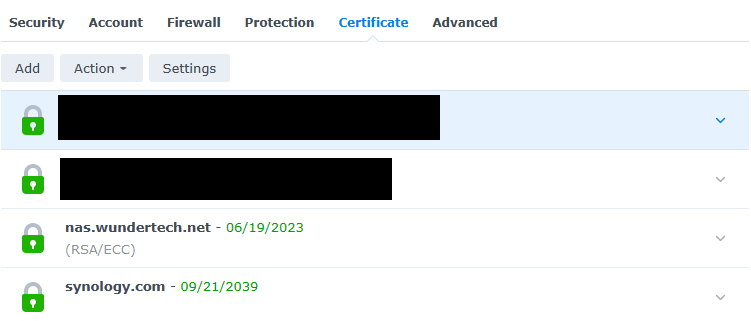
6. Ensure that the Reverse Proxy Hostname is listed, then select the certificate that you just created.
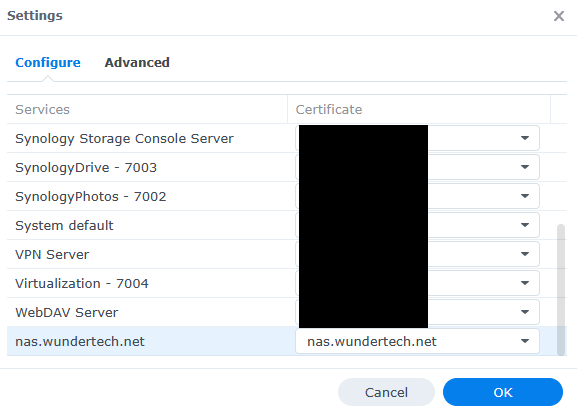
7. The certificate has been created, is assigned to the reverse proxy, and will auto-renew moving forward! You should now be able to access the server and it should have a valid SSL certificate.
Conclusion & Final Thoughts: Synology Reverse Proxy
This tutorial looked at how to use a Synology NAS as a Reverse Proxy Server. In general, if you’re exposing services on your local network, using a reverse proxy is extremely beneficial as you’re ensuring that two total ports (80/443) can be open while exposing as many different web services as you’d like. You can also limit access, and securely expose insecure (HTTP) web services.