In this tutorial, we will look at how to set up the firewall on a Synology NAS.
When you set up a Synology NAS, the firewall is a feature that many disregard. The firewall on a Synology NAS will monitor traffic to and from the device. Based on the rules specified, traffic will either be permitted or blocked.
This allows you to effectively manage exactly what should and should not be permitted and gives you confidence that anything that’s not permitted will immediately be blocked.
This tutorial will explain how to set up the firewall on a Synology NAS, but I highly suggest you watch the video above on how to set up the firewall on a Synology NAS as it’s explained in great detail. This is one step that you can use towards securing your Synology NAS.
1. How to Set Up the FIrewall on a Synology NAS
The actual setup process for the firewall is extremely straightforward and is just a checkbox. However, actually configuring the firewall is where it gets slightly more complicated.
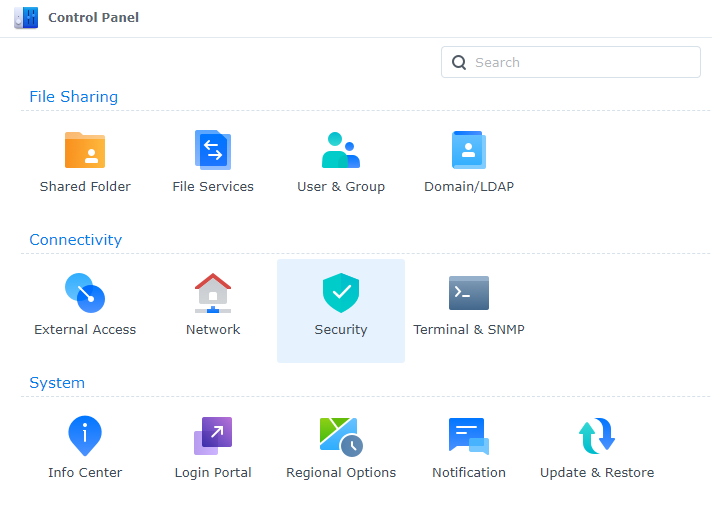
1. Open the Control Panel and select Security.
2. Select Firewall, then select Enable Firewall and Apply the settings.
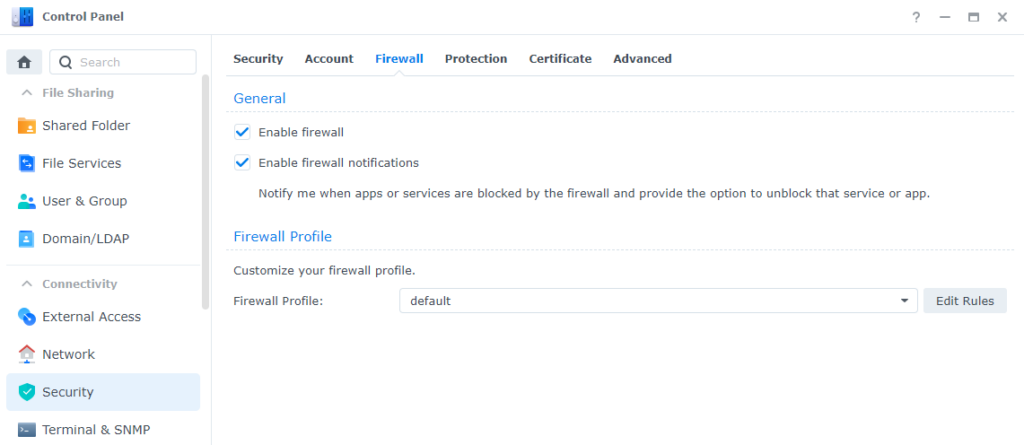
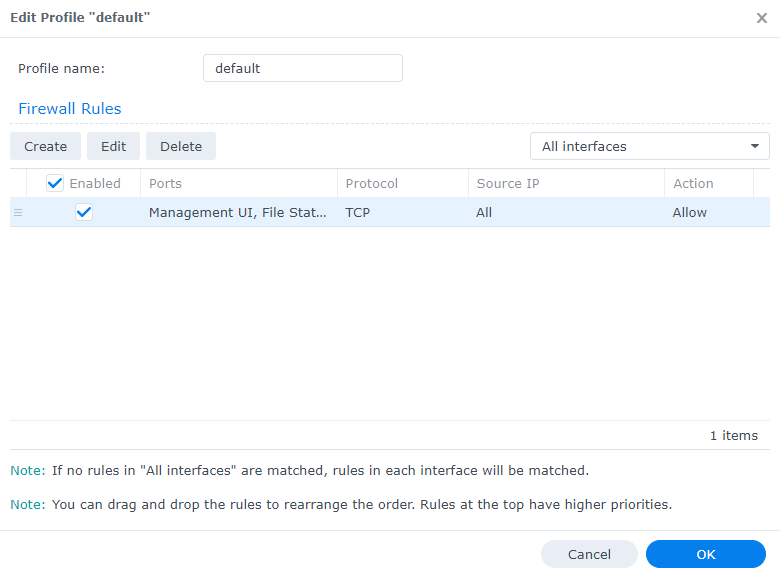
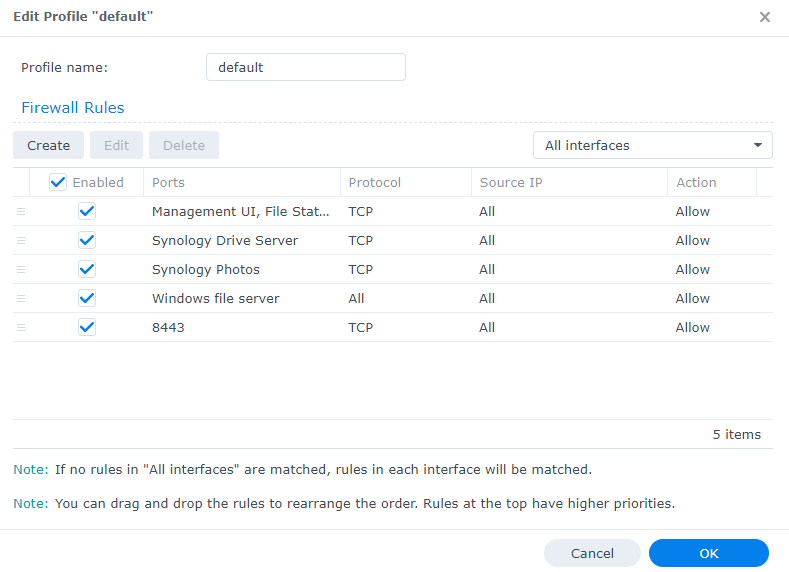
3. The default firewall profile will be used, but you can create multiple firewall profiles if you’d like by using the dropdown menu. When you’d like to modify the current firewall profile, select Edit Rules.

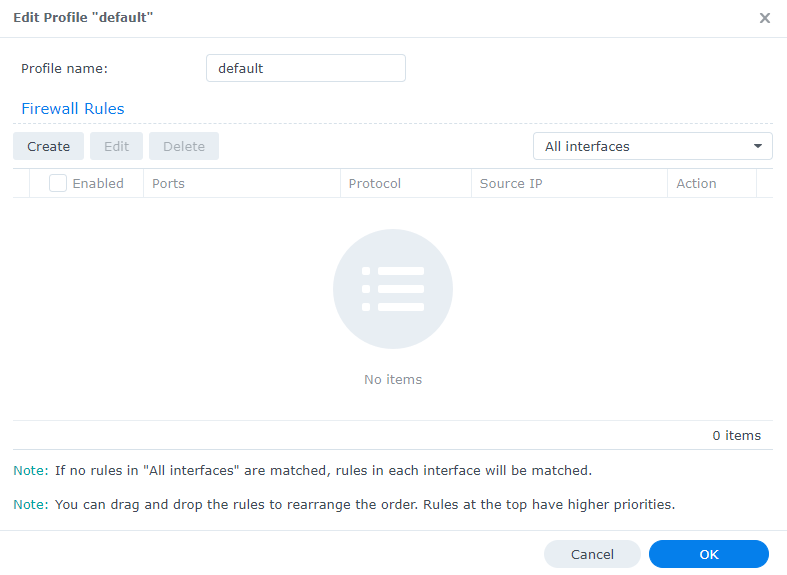
4. You’ll be brought to a blank firewall page. One thing to take note of is that by default, you’ll modify the rules for All Interfaces. If you’d like to modify the rules for a specific interface, use the dropdown menu.
2. Creating Firewall Rules
Now that you’re at the firewall section, you need to create your allow/deny rules. The first thing that you need to do is create a firewall rule so that you can access DSM. If you do not create this rule, you risk locking yourself out of your NAS.
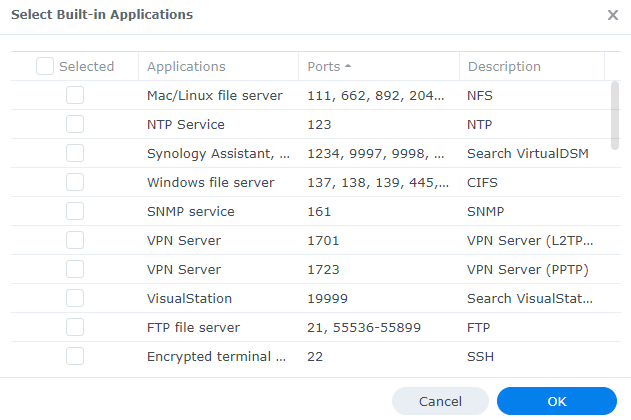
1. Select Create to create a new firewall rule, then choose select from a list of built-in applications.
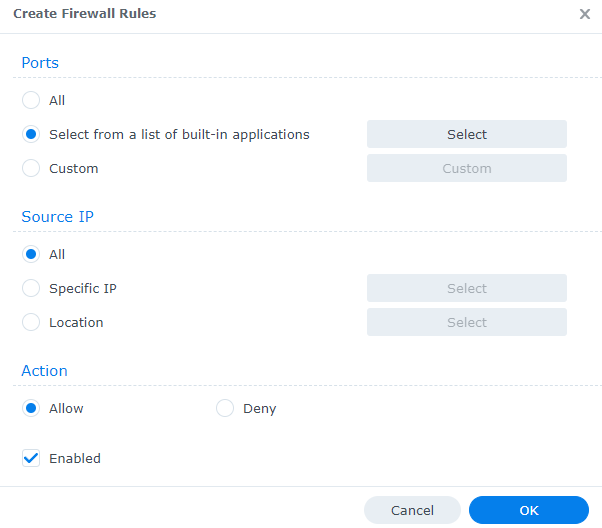
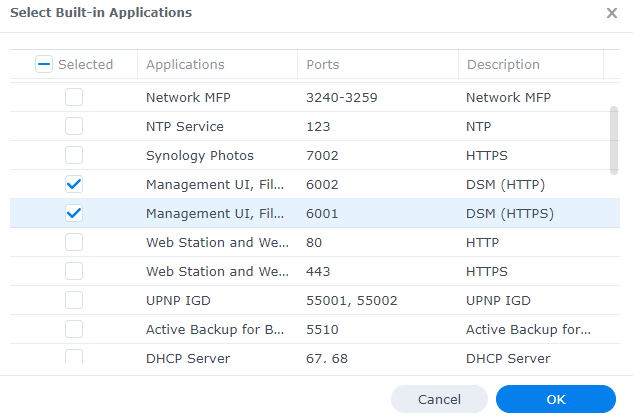
2. Select the Management UI for both DSM HTTP/HTTPS ports, leave all other settings as the default and then select OK to create the rule.
3. By default, this will create a rule that allows all users from all IP addresses to access DSM. However, since the DSM port is not port forwarded (and shouldn’t be outside of specific scenarios), you’re only allowing everyone from your local network to access DSM.
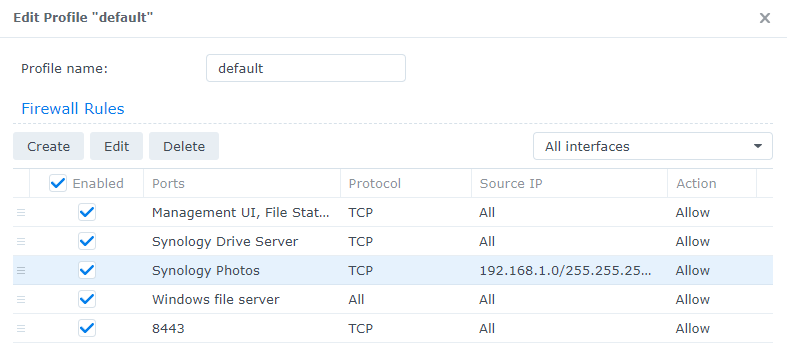
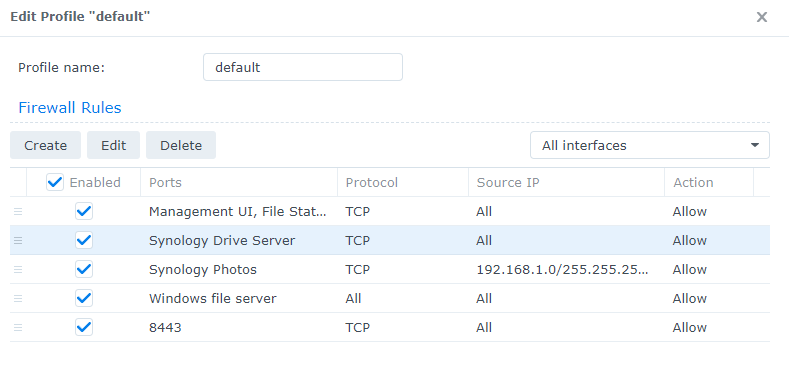
4. Create firewall rules for each of your services. Common services that people use are Synology Photos, Synology Drive Server, VPN Server, SSH, and especially file-sharing services (SMB, NFS, CIFS).
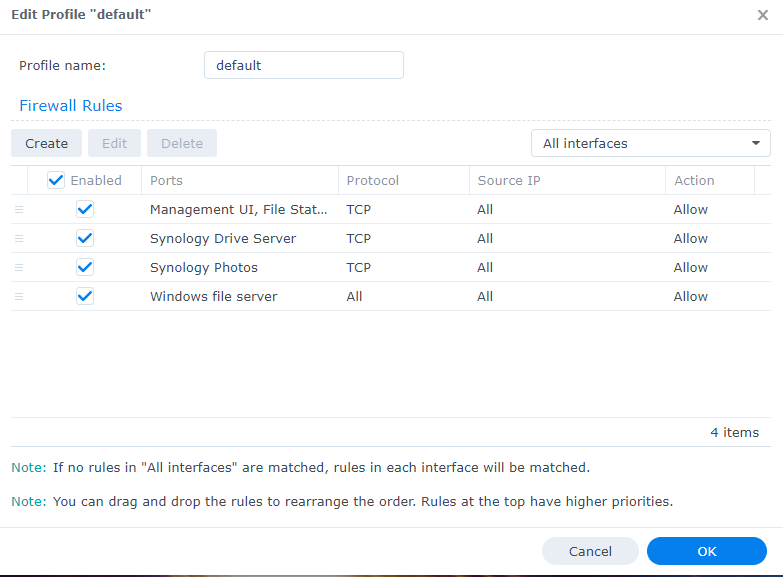
You’ll have to create firewall rules for every single service. You can group them in an individual rule if you’d like, but this limits the customization you can do in further steps, so I generally recommend creating an individual firewall rule for each service.
NOTE: The default SMB port is 445 which can be allowed by using the Windows File Server application.
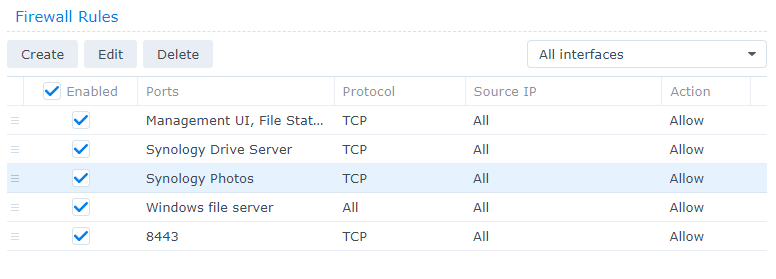
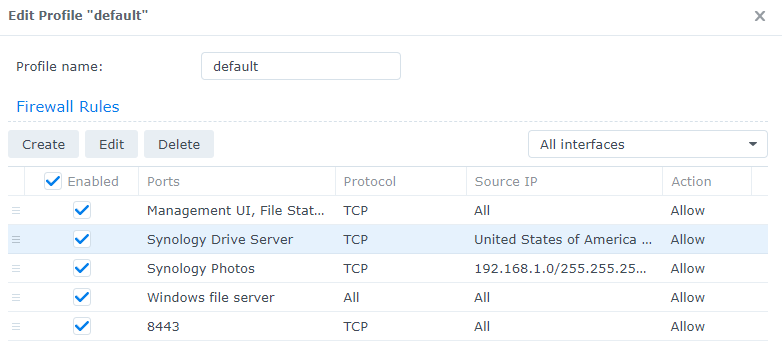
5. You should now have a list of all of the services that should be accessible on your Synology NAS.
2.1 Creating Firewall Rules for Custom Ports
By default, installed applications will be listed in the select from a list of built-in applications list, however, as you start to create custom services on applications like Docker, you’ll have to open custom ports.
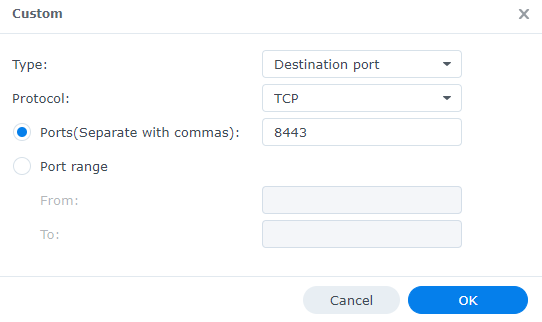
1. To create a custom port rule, create a new firewall rule, then select Custom.
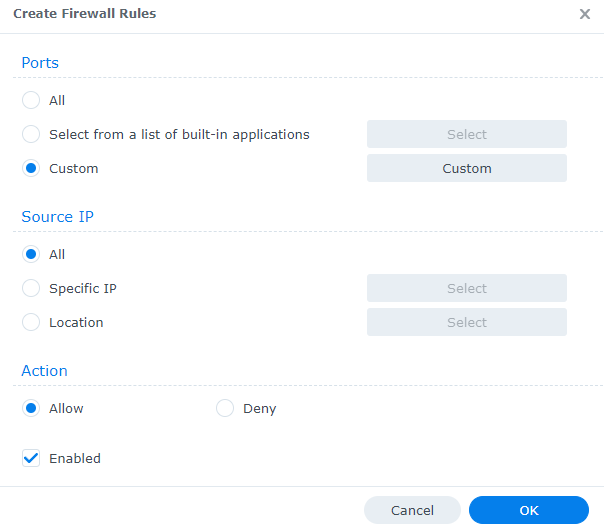
2. Leave the Type as Destination Port, then change the Protocol to TCP, UDP, ICMP, IGMP, or All. Enter the port(s) that you’d like to open or select a port range.
NOTE: You’ll generally be creating TCP/UDP rules.
3. Your custom port rules will now exist in the list that we have been creating.
2.2 Limiting Access
The rules we’ve created up to this point will allow anyone that has access to your Synology NAS to access the NAS on those ports. However, you can modify individual rules to limit access further by following the instructions below.
2.2.1 Limiting Access to IP Addresses, Subnets, or Ranges
1. Edit a firewall rule that you already created.
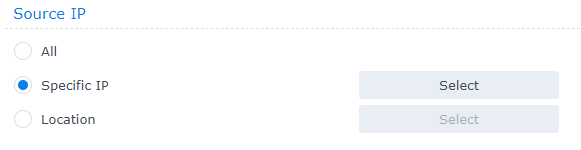
2. In the Source IP section, there are two options you can use to limit access. Specific IP and Location. Select Specific IP, then Select.
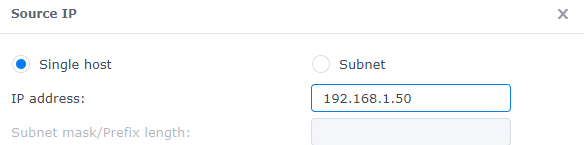
3. At this screen, you’ll have three options that you can use: single host, subnet, and IP range.
- Single Host: An individual IP address. Use this option if you want a single IP address to access your Synology NAS for this specific service/port.
- Subnet: You can limit access to an entire subnet if you’d like by using the subnet mask/prefix length. You can use this cheat sheet to determine the netmask you will have to use.

- IP Range: You can limit access to an IP range if you’d like by using the from and to fields.
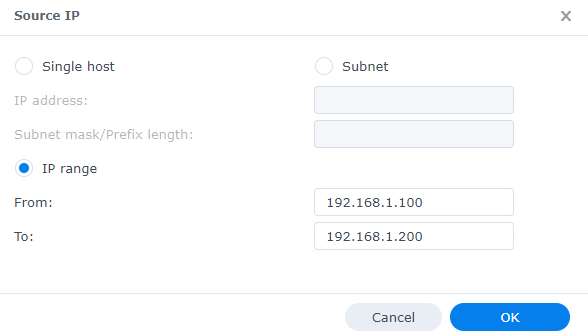
4. The Source IP will update to the IP address, subnet, or IP range that you entered.
2.2.2 Limiting Access to a Location
It’s extremely important to understand that if you limit access to a certain country or multiple countries, you’ll only be able to access them externally and your internal network will be blocked on that port.
For this reason, if you use this functionality, create a second firewall rule that allows access to your local network using step 2.2.1 above.
1. Edit a firewall rule that you already created.
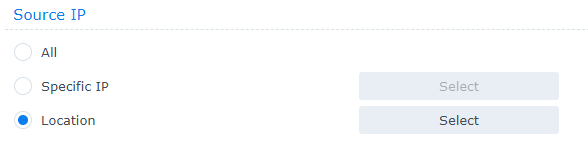
2. In the Source IP section, there are two options you can use to limit access. Specific IP and Location. Select Location, then Select.
3. Select the location(s) that you’d like to limit access to, then select OK to save the rule.
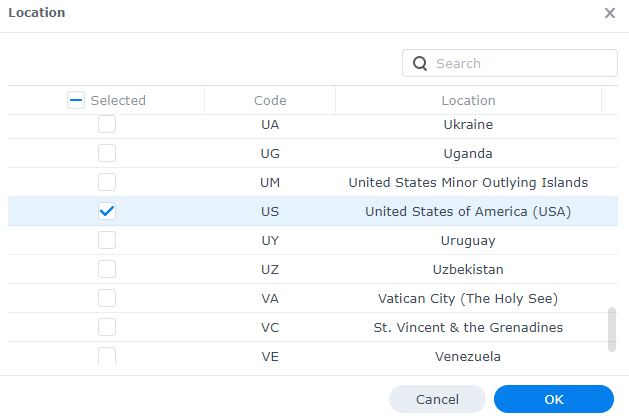
4. The Source IP will update to the country or countries that you selected.
3. Block All Rule
This section is extremely important. The rules that we created above will allow traffic, but without a block all rule, all traffic will be permitted.
I will reiterate that point due to its importance. If you do not create a block all rule, no traffic will be blocked and all traffic will be permitted (as if you weren’t using the firewall).
To block traffic, we will be using a block all firewall rule. The block all rule is placed at the very bottom of the firewall rules and should be your last rule.
The reason is that traffic is permitted from top to bottom. When you’re trying to access a service, the rules will start from the top, check each and every rule in order from top to bottom, and if traffic is not permitted, it will be blocked by the final firewall rule. This is explained in detail in the YouTube video above.
1. Create a Deny All rule.
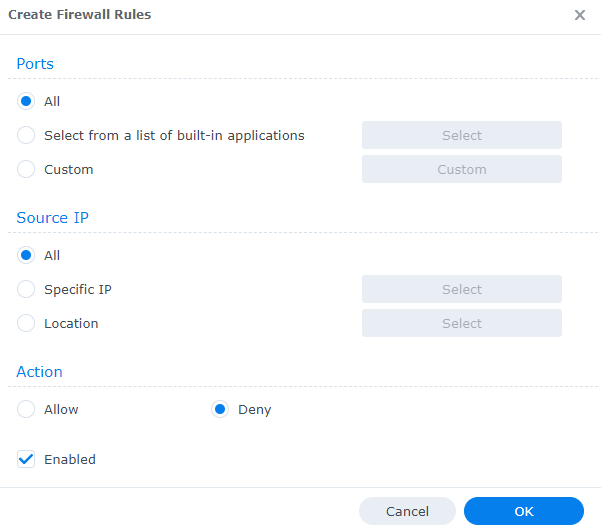
2. Ensure that the Deny All rule is at the bottom of all firewall rules.
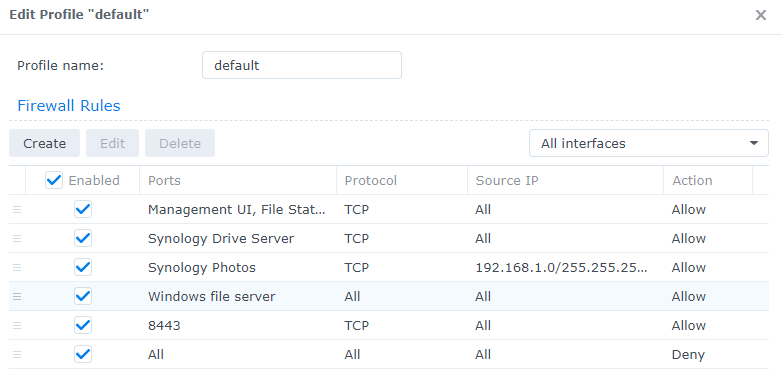
3. This will ensure that if the service is not permitted, it will be blocked by the final rule. Once again, without this rule, all traffic will be permitted.
This is also the first time that you can lock yourself out of DSM and/or specific services, so make sure that a DSM allow rule has been created before applying these settings.
4. Conclusion & Final Thoughts
This tutorial looked at how to set up the firewall on a Synology NAS. This is something that most people should set up, especially if you’re exposing anything on your NAS to the outside internet. Please be careful, as you must ensure that you allow access to DSM in order to continue accessing it (as well as any other services).