Today we are going to look at how to set up link aggregation on a Synology NAS.
Before looking at how to set up link aggregation on a Synology NAS, we’re going to look at what link aggregation is. This will also allow you to determine if you’d prefer using SMB Multi-Channel (which, unlike link aggregation, will increase throughput speeds).
What is Link Aggregation (LACP)?
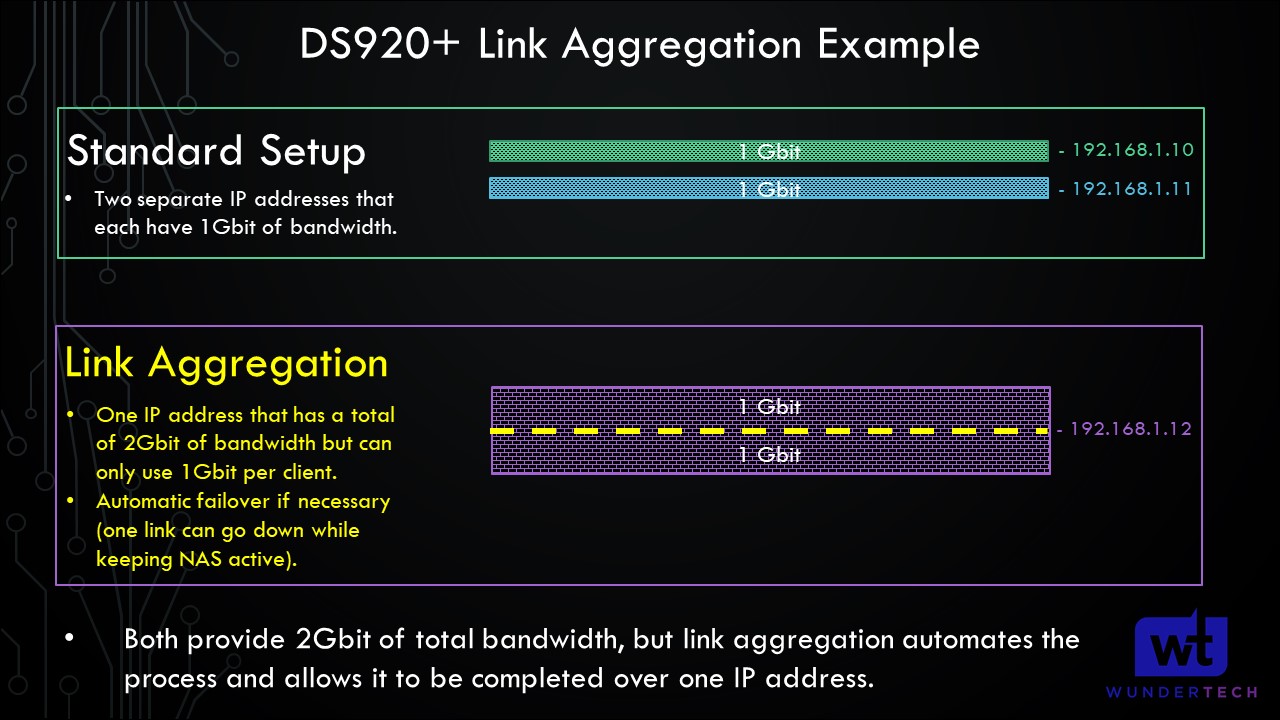
Link Aggregation (LACP) will allow you to increase the bandwidth TO and FROM your Synology NAS. In summary, this will allow more clients to send data to and from your NAS without decreased performance. To be clear, this will not double the network speed for a single client.
Link Aggregation simply opens more “channels” to and from your NAS. For example, if you have two PCs connecting to your NAS, each client will receive a maximum of 1Gbit of local network speeds as opposed to 500Mbit. There is also the added benefit of redundancy, as a single failure will automatically allow the device to fail over to the other network port, keeping your NAS up and running.
Here is a quick image using a DS920+ as an example explaining how link aggregation works:
A few disclaimers before we get started:
- Please keep in mind that a switch supporting link aggregation (generally, managed switches) is required for this setup. I unfortunately cannot account for every switch, so you’ll have to determine how to set up link aggregation on the switch that you’re using before proceeding. In this example, I will be using the Unifi Controller with a managed Unifi switch.
- You must have both network cables plugged into your NAS and the same switch.
- If you’re interested in having increased throughput speeds, consider implementing SMB Multi-Channel instead of link aggregation.
How to Set Up Link Aggregation on a Synology NAS
Follow the steps below to configure link aggregation on a Synology NAS.
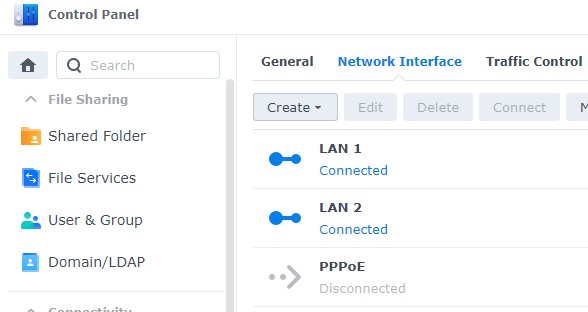
1. On your Synology NAS, open the Control Panel and select Network, then Network Interface. You should see the total number of network cables plugged in, with a local IP address next to each of them.
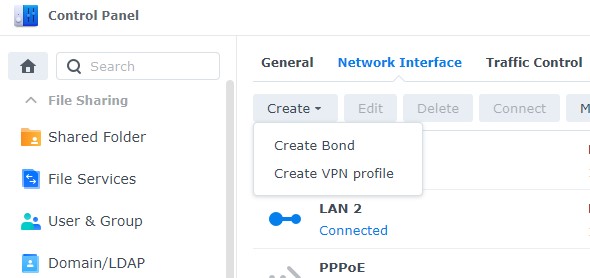
2. Select Create then select Create Bond.
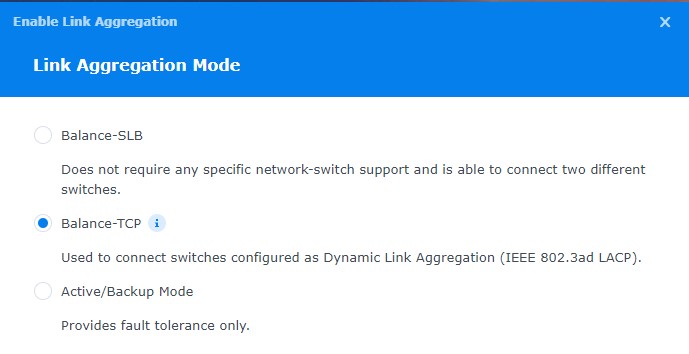
3. Select Balance-TCP and then select Next.
NOTE: Once again, you must ensure that you have a switch capable of link aggregation if you’d like to use this.
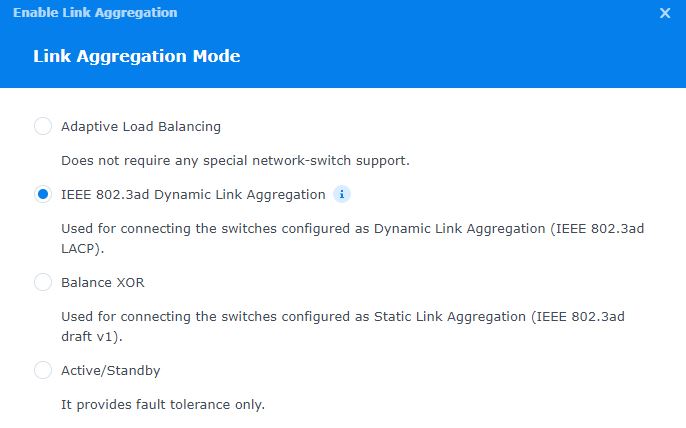
If you don’t see the Balance-TCP option, you will see the screen below and it’s because you have Open vSwitch disabled. Select IEEE 802.3ad Dynamic Link Aggregation and proceed.
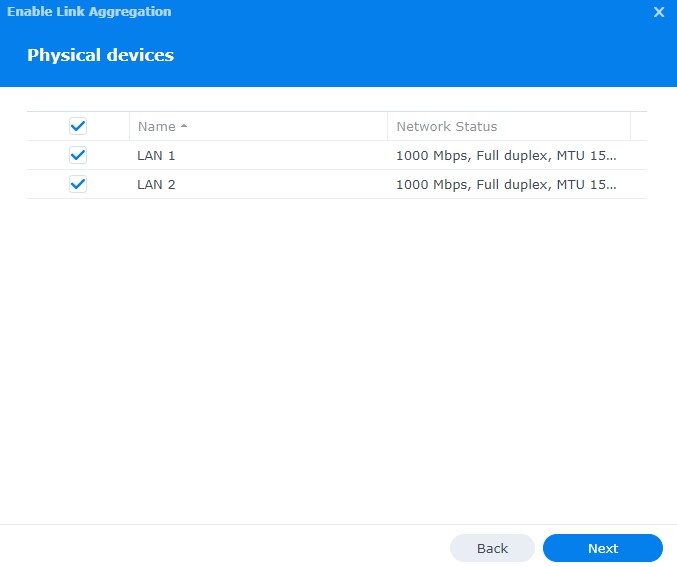
4. Select all physical network interfaces that you’d like to create a bond for and select Next.
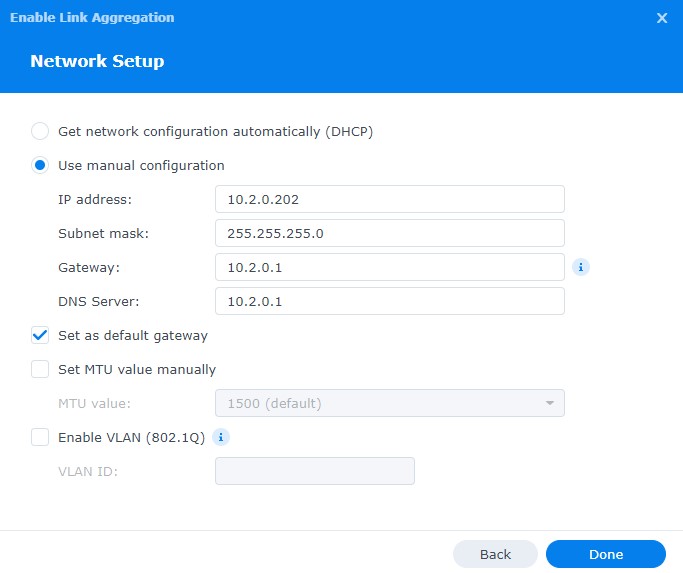
5. At this point, you can decide to use DHCP or use the manual configuration. In general, I suggest creating a static DHCP lease on your router, but not all users have that option. In that case, a manual configuration is fine. When you’re finished, select Done.
Please keep in mind that if you’re unable to create the aggregation on your switch, you will be locked out of your NAS and forced to reset it.
If you’re hosting the software (like a Unifi controller) on this NAS as well, you will be unable to access that and will lock yourself out.
If you do get to that point or lock yourself out for any reason, please follow these steps to reset your NAS (using mode one).
You will receive a message stating that the services will be disabled on the bonded interface. Select Yes to proceed.

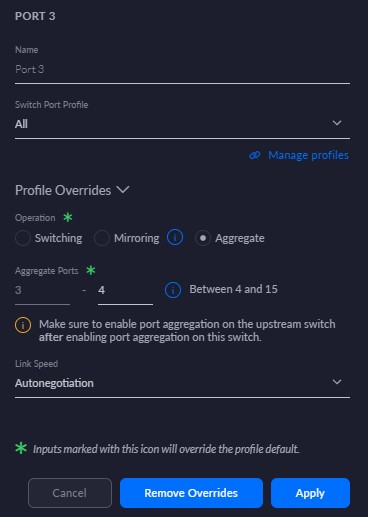
6. At this point, you need to create the aggregation on your switch. As stated earlier, I am using the Unifi controller and I created link aggregation on ports 3 and 4 (which is where my NAS is plugged in).
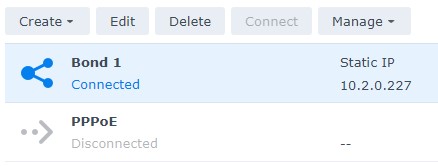
The steps you need to take will be slightly different based on the switch you’re using, but after the aggregation is created, you will be able to access your NAS on the IP address you selected. When you log back in, you’ll see the bond interface created in the Network Interface section of the Control Panel!
7. That’s it! Your NAS will now have all the benefits of link aggregation and automatically failover if necessary.
Conclusion & Final Thoughts on LACP
This tutorial showed how to set up link aggregation on a Synology NAS. Link aggregation is AMAZING for small businesses or users who have multiple people (or devices) accessing their NAS routinely. In cases like this, you’re going to double or quadruple (NAS devices with four network ports) the bandwidth to and from your NAS.