In this article, we’ll look at how to configure Twingate on a Synology NAS. Twingate is a Zero Trust Network, which means that each request gets verified before it actually leaves the device. There are a ton of different controls available, and if you’re using something like Tailscale, you might want to consider Twingate for the granular controls it offers.
Twingate runs natively on Synology NAS devices utilizing Container Manager and is extremely easy to set up thanks to Docker Compose. We’ll take a look at the steps on how to configure Twingate on a Synology NAS below, but before we do, let’s look at the differences between a Zero Trust Network and a traditional VPN.
How Does Twingate Differ from a VPN?
With traditional VPNs like OpenVPN and WireGuard, configuration is done on an individual server with client devices connecting to that server. Each client must have their own configuration file (OpenVPN) or keys (WireGuard), and as long as they match what the server is expecting, access is granted to the specific resource(s) allowed.
Twingate is totally different – in a good way. Rather than configuring a server and utilizing port forwarding (which isn’t required for Twingate), you configure a Connector and manage it through a Controller (the Twingate website). After configuring the Connector, you can expose an entire network, individual devices, or even limit the scope to an individual device on a specific port!
This is incredibly powerful and puts the controls in your hands. Rather than fiddling with complex firewalls, you can simply configure access lists which will ensure that specific users can access specific devices. We’ll take a look at that in greater detail later.
Configuring a User Account & Network for Twingate
Before you can actually configure the Connector, you have to create an account for Twingate and you’ll also create a Network name. The Network name will be used in the Docker Compose file we create later, so make a note of it!
Keep in mind that the creation process will ask you for a business name, but this is not required. Twingate Starter (up to 5 total users and 10 remote networks) is entirely free, though you may be interested in upgrading to the Teams or Business plan when you see how powerful Twingate is.
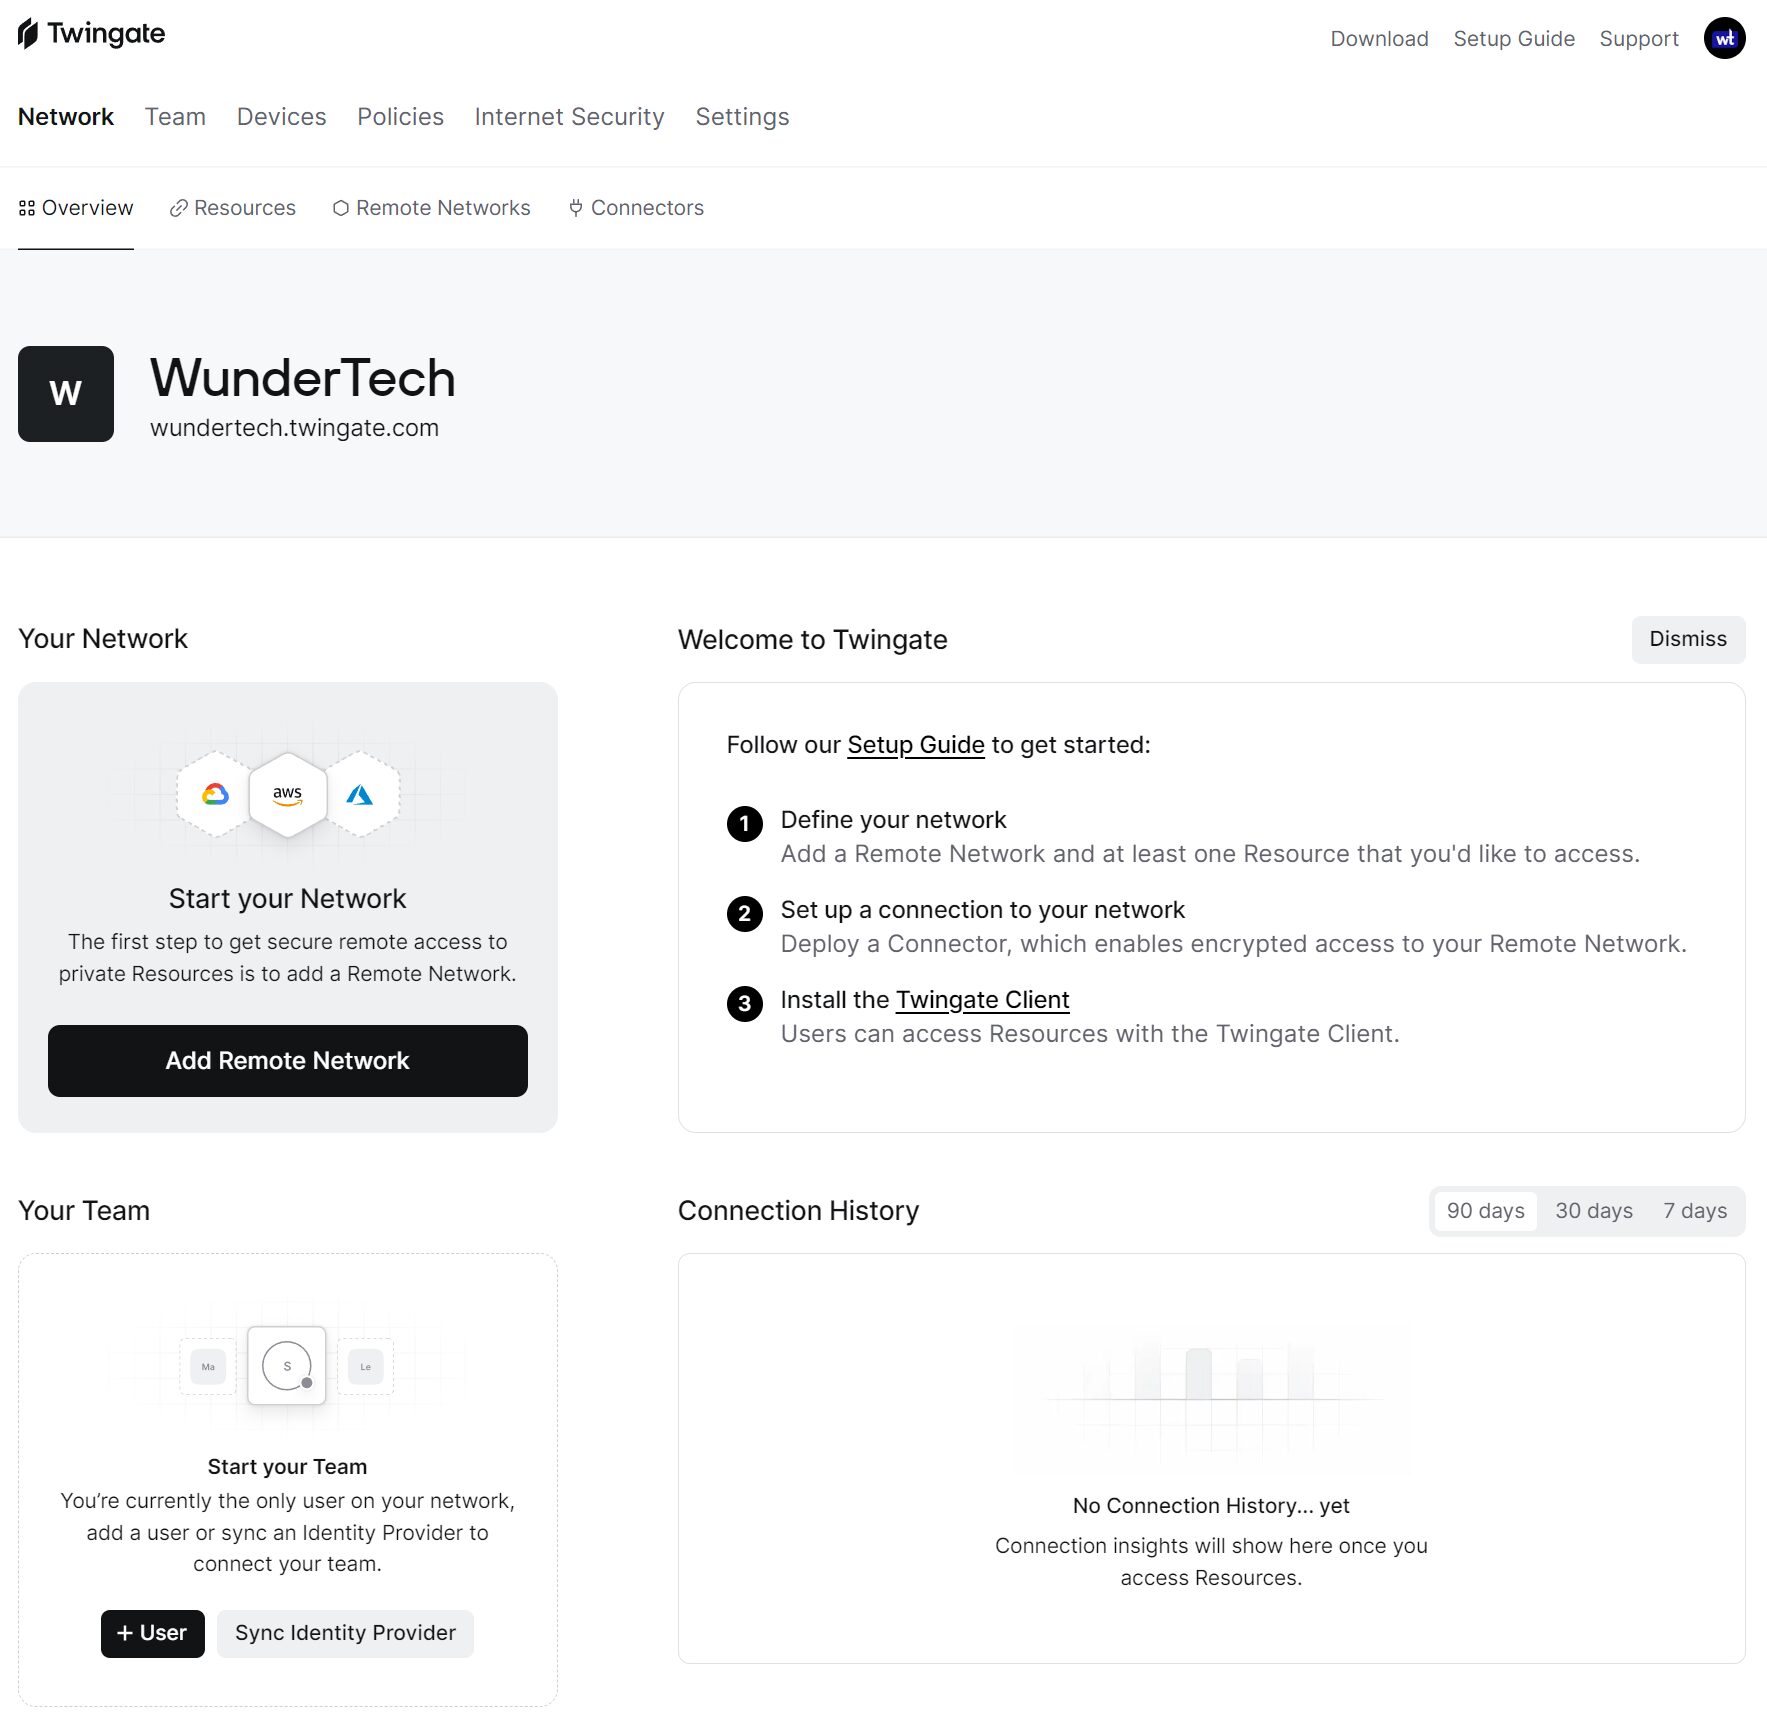
After you create your user account, you’ll be able to access the Twingate Controller which is where we’ll manage our environment.
1. Select Add Remote Network to create our network.
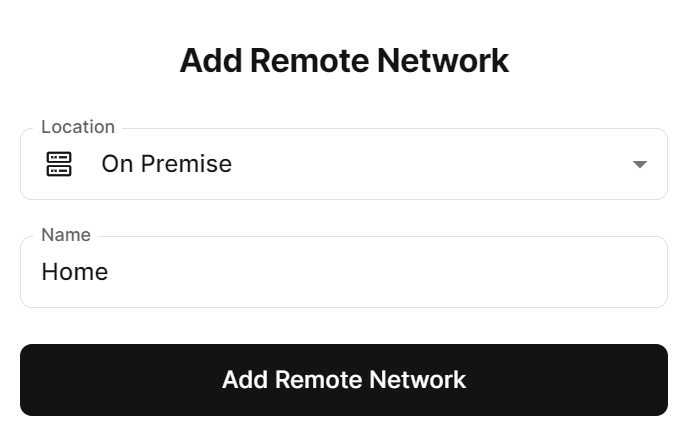
2. Select On Premise and give the remote network a Name.
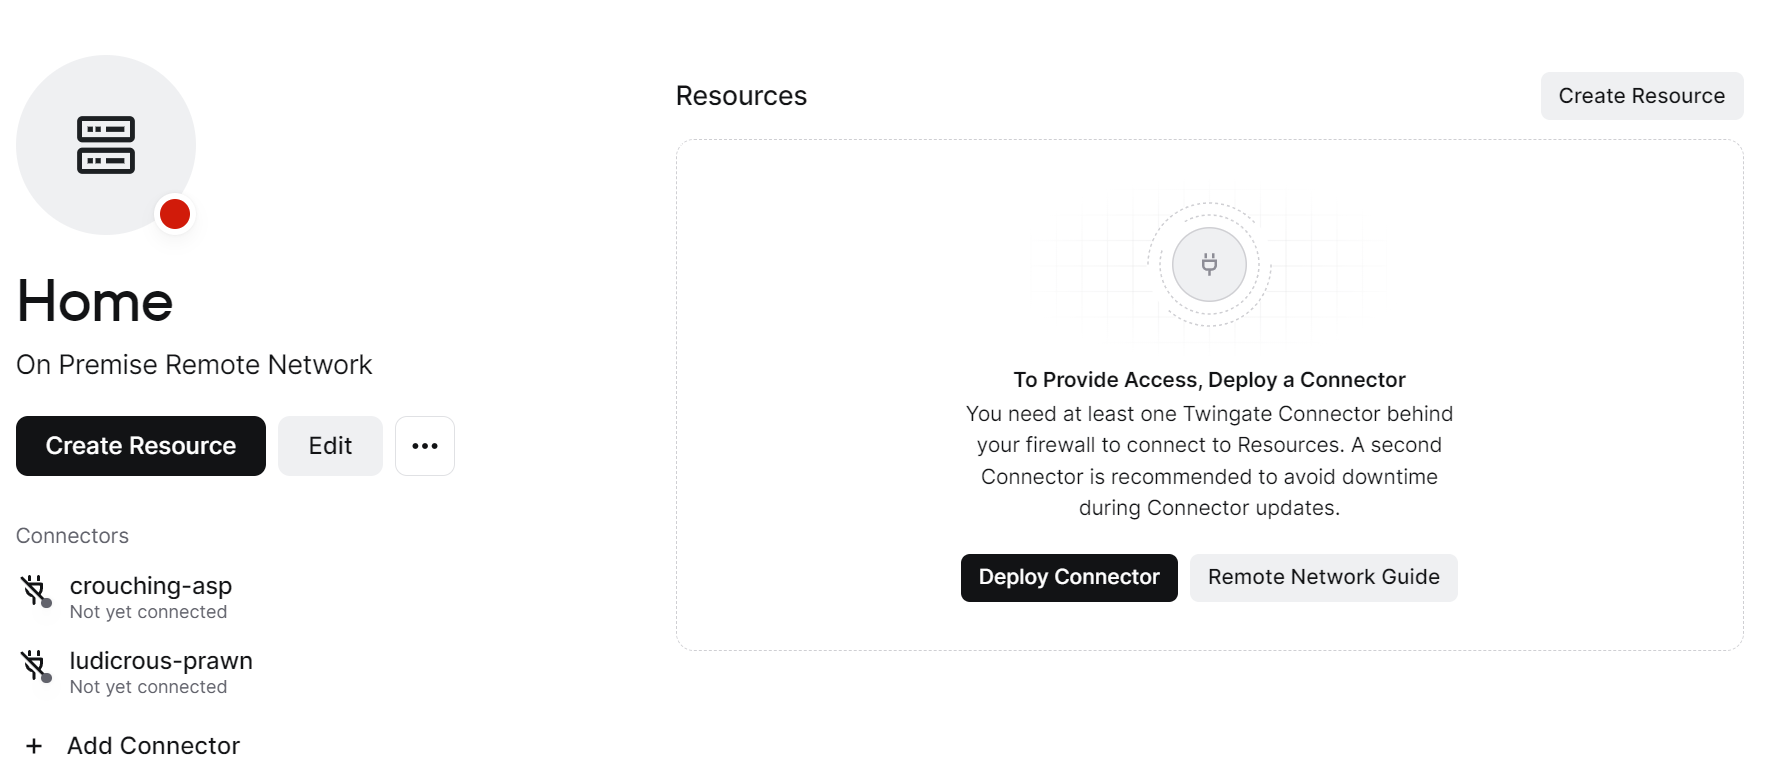
3. After the Remote Network has been created, select the Remote Network and then the Remote Network name (it will be a second page).
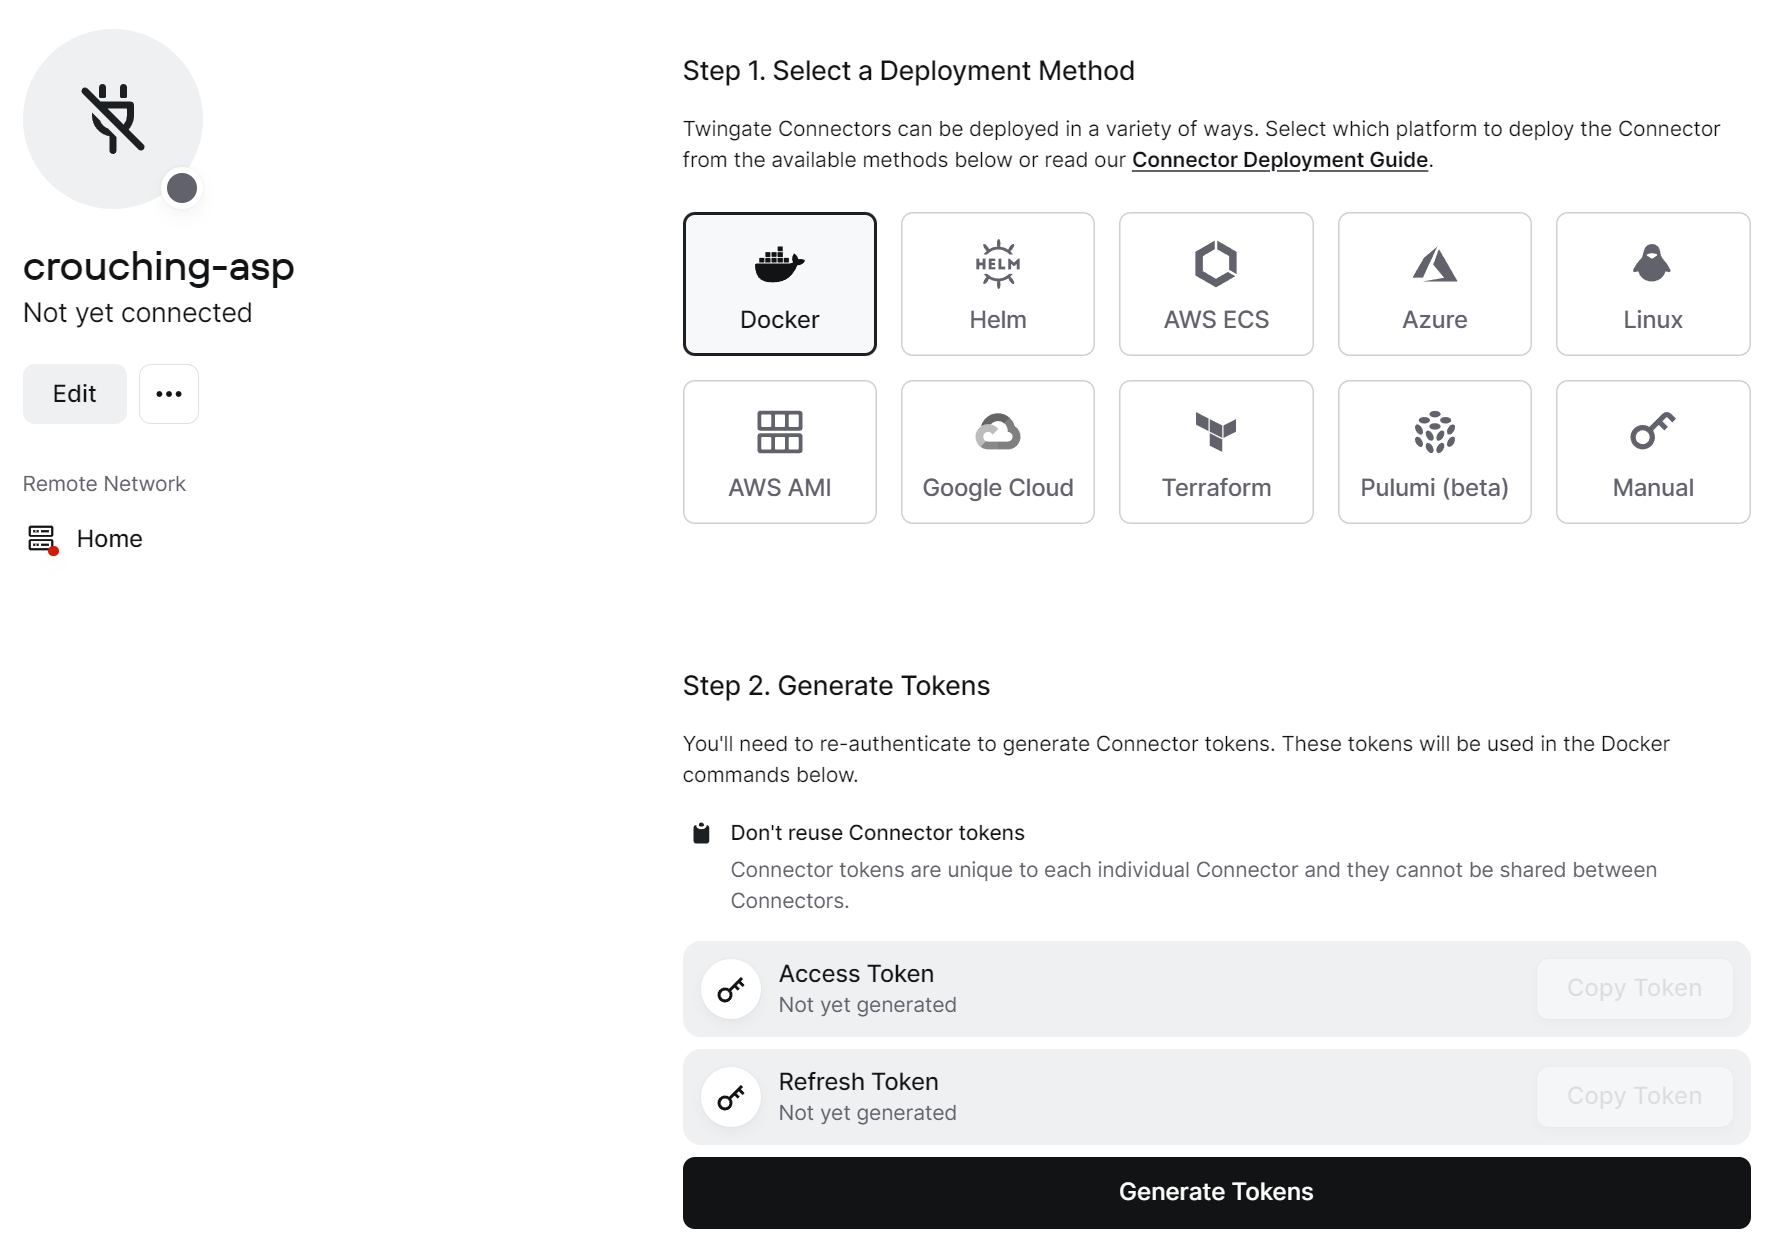
4. Select the Deploy Connector button so that we can create our Docker Container on our Synology NAS.
5. Select Docker and then select Generate Tokens. You will have to authenticate (for security purposes), but after you do, the tokens will appear. Copy both Tokens as we will need them for our Docker Compose file in the next step.
How to Configure Twingate on a Synology NAS
We’ll take a look at the steps below to configure Twingate on a Synology NAS.
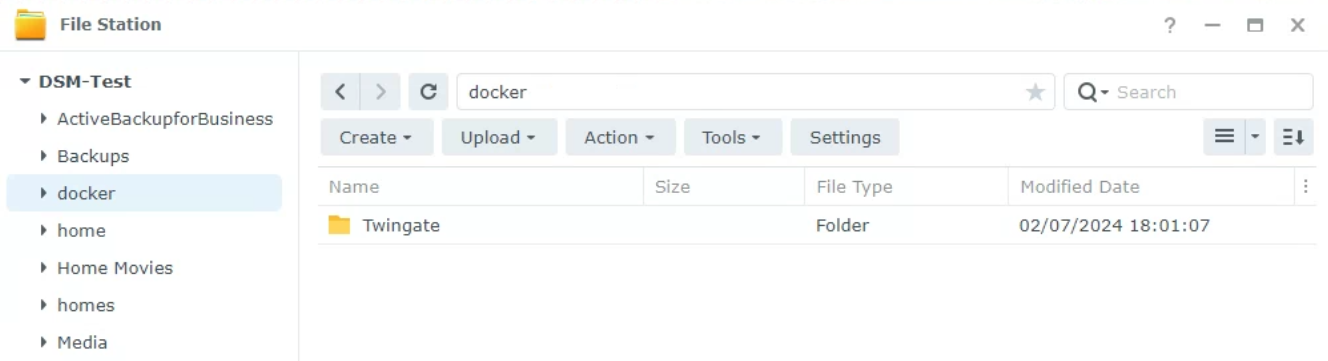
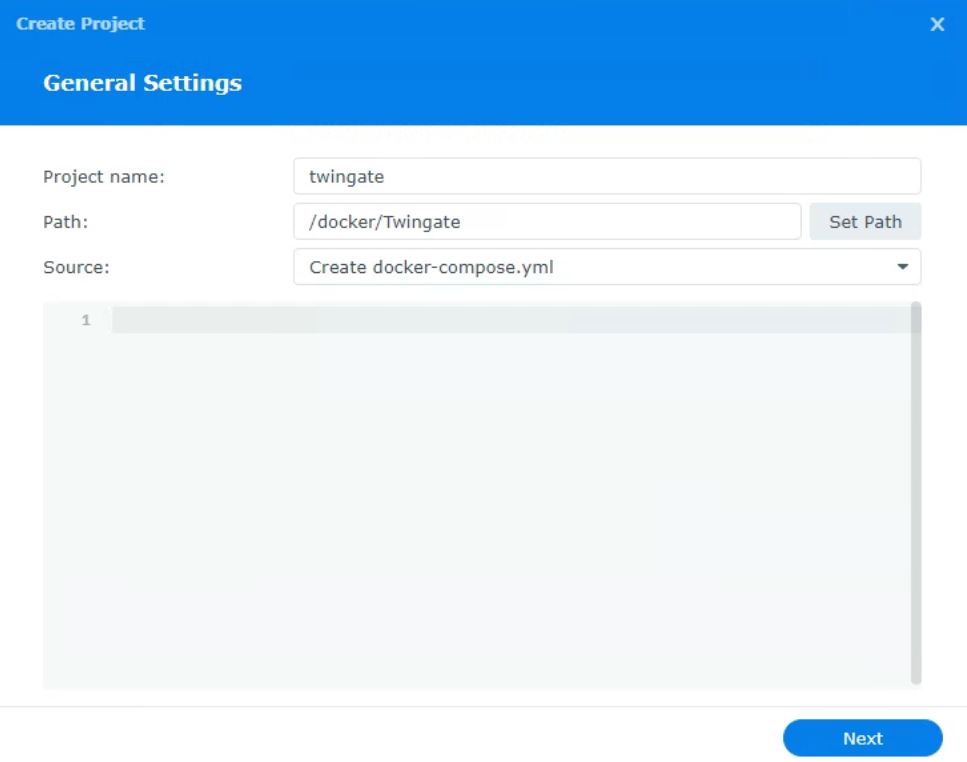
1. Ensure that Container Manager is installed and open File Station. Create a new folder under the Docker folder named Twingate.
2. Open Container Manager. Select the Project tab, then Create to create a new container. In the Project Name section, enter twingate, then select Set Path and select the folder we created in the last step. In the Source section, select Create docker-compose.yml.
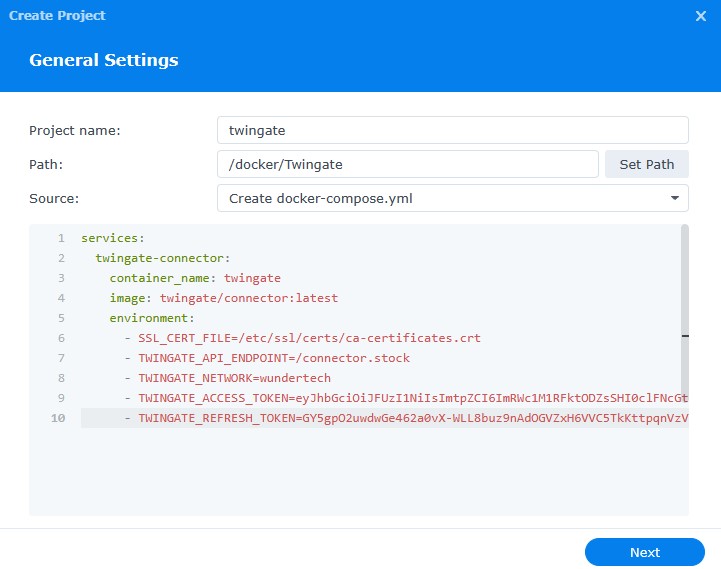
3. Paste the Docker Compose file below but add your Network Name (step 2 in the Configuring a User Account & Network for Twingate steps above), the Access Token, and the Refresh Token.
services:
  twingate-connector:
    container_name: twingate
    image: twingate/connector:latest
    environment:
      - TWINGATE_NETWORK=<TENANT NAME>
      - TWINGATE_ACCESS_TOKEN=<ACCESS TOKEN>
      - TWINGATE_REFRESH_TOKEN=<REFRESH TOKEN>
NOTE: Due to an error with Synology’s Container Manager, the Container may be reported as unhealthy if you don’t use the exact Docker Compose file above. The screenshot below uses an old Docker Compose file where the error might occur.
If you’ve used the Docker Compose file below, check to see if the Connector is green in the Twingate Controller. If it is, everything is working as expected. If you’d like, you can edit the Docker Compose file and match the format above (removing the SSL_CERT_FILE and TWINGATE_API_ENDPOINT) lines, and the error will go away.
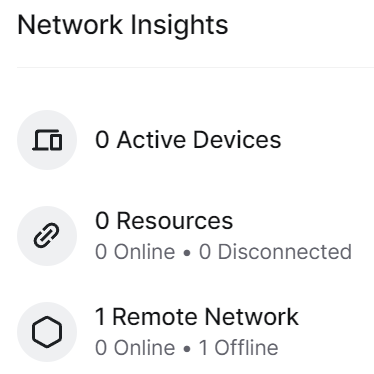
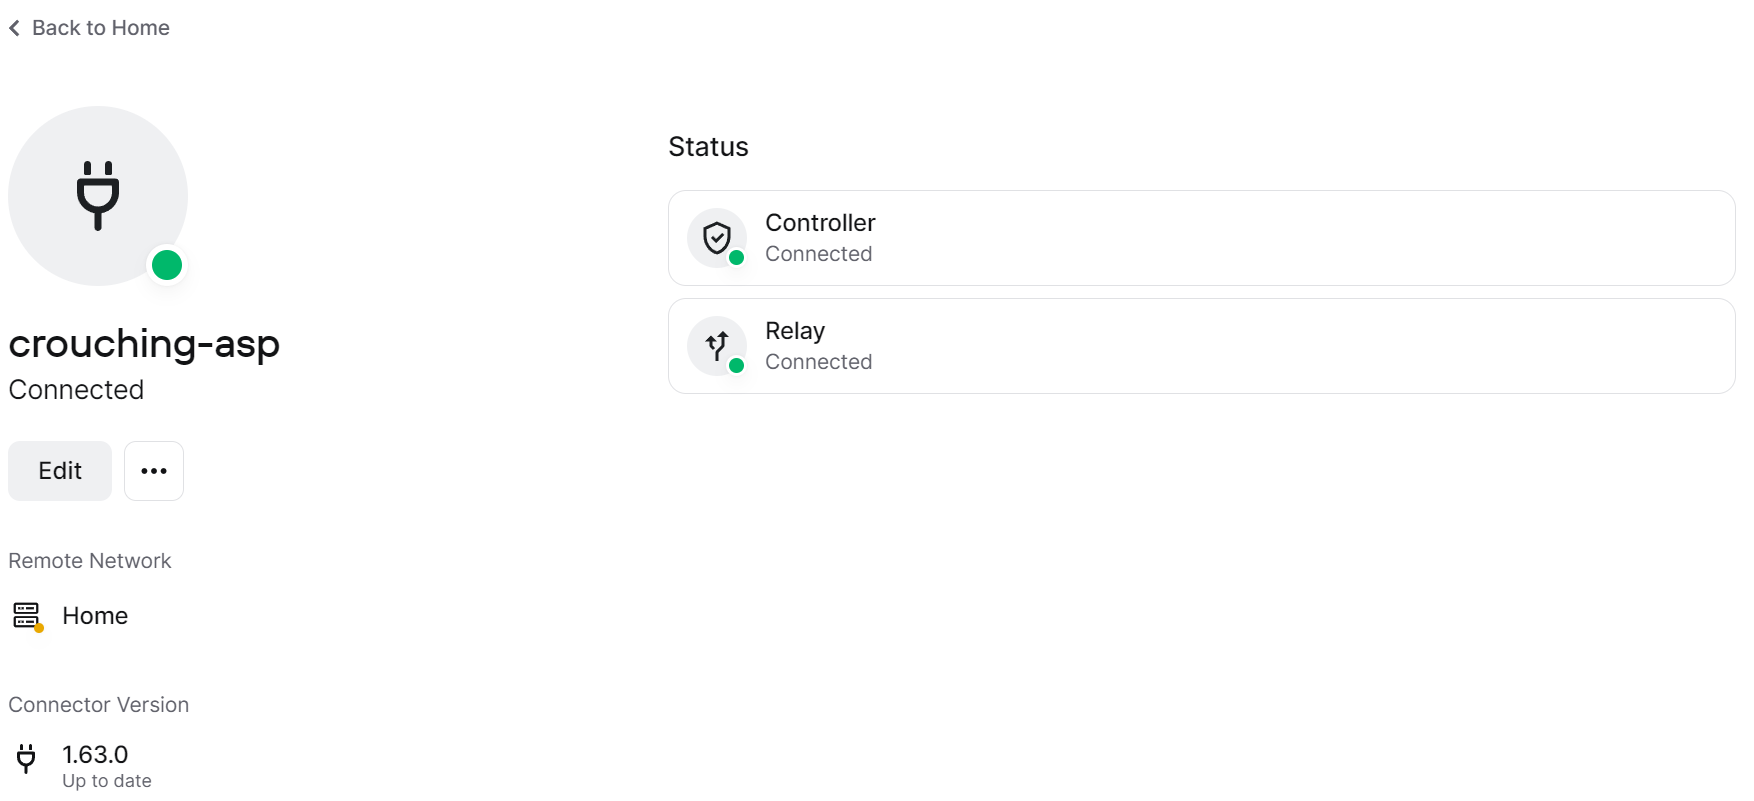
5. After the information has been entered, select Next and create the container (no other settings have to be changed). After the Twingate Connector is configured, the container should be running in the Container tab of Container Manager, and if you log back into the Twingate Controller, you’ll see that the status of the Remote Network has been updated!
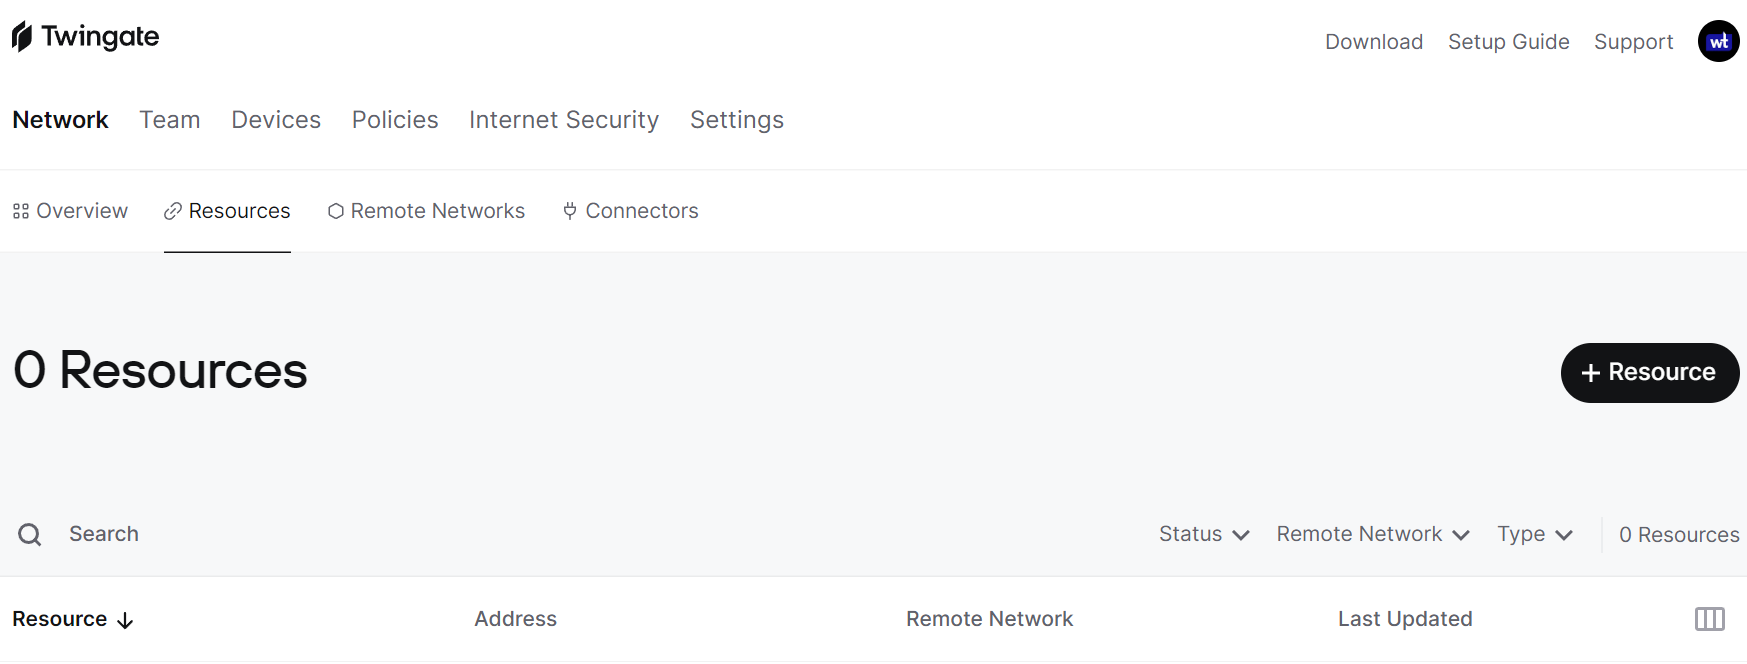
Creating a Resource to Access Remotely
Now that the Connector(s) have been configured, we can add a resource so that we can access it remotely.
1. Select the Resources tab and select +Resource.
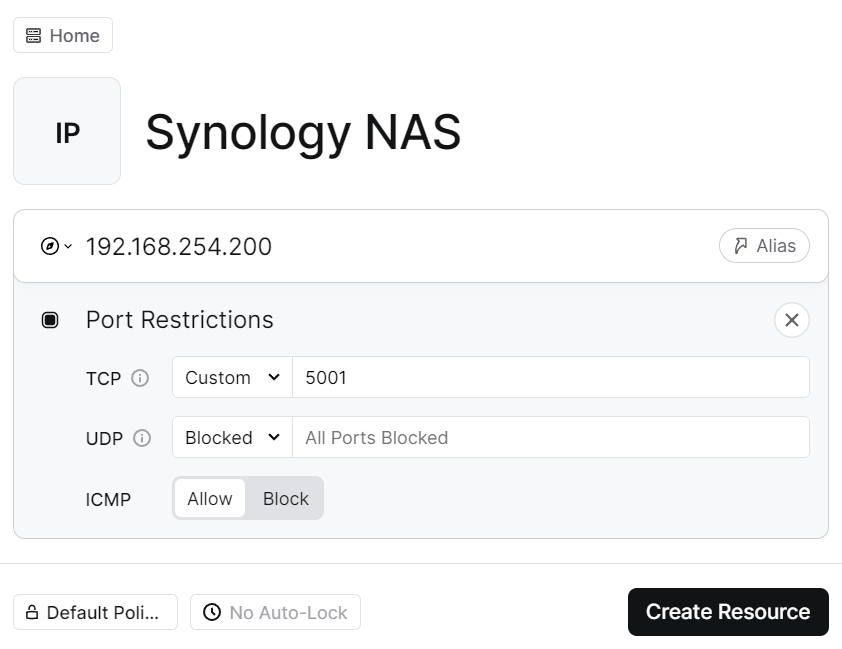
2. Select a Network (top left icon). Add a label, then the domain name or IP address. From there, you can select ports and limit traffic to individual ports (separated by a comma) for TCP or UDP (you do not have to do this if you want to be able to access the resource using all ports).
You can also allow or block ICMP. When you’re done with everything, select Create Resource.
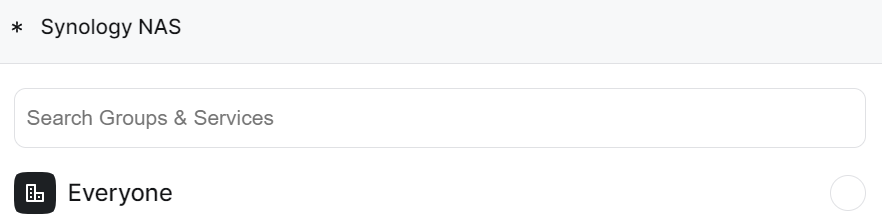
3. Select the Groups that can access this resource. If you’d like to limit access to a specific group, you can do it by either creating the group in advance or editing the resource after creation.
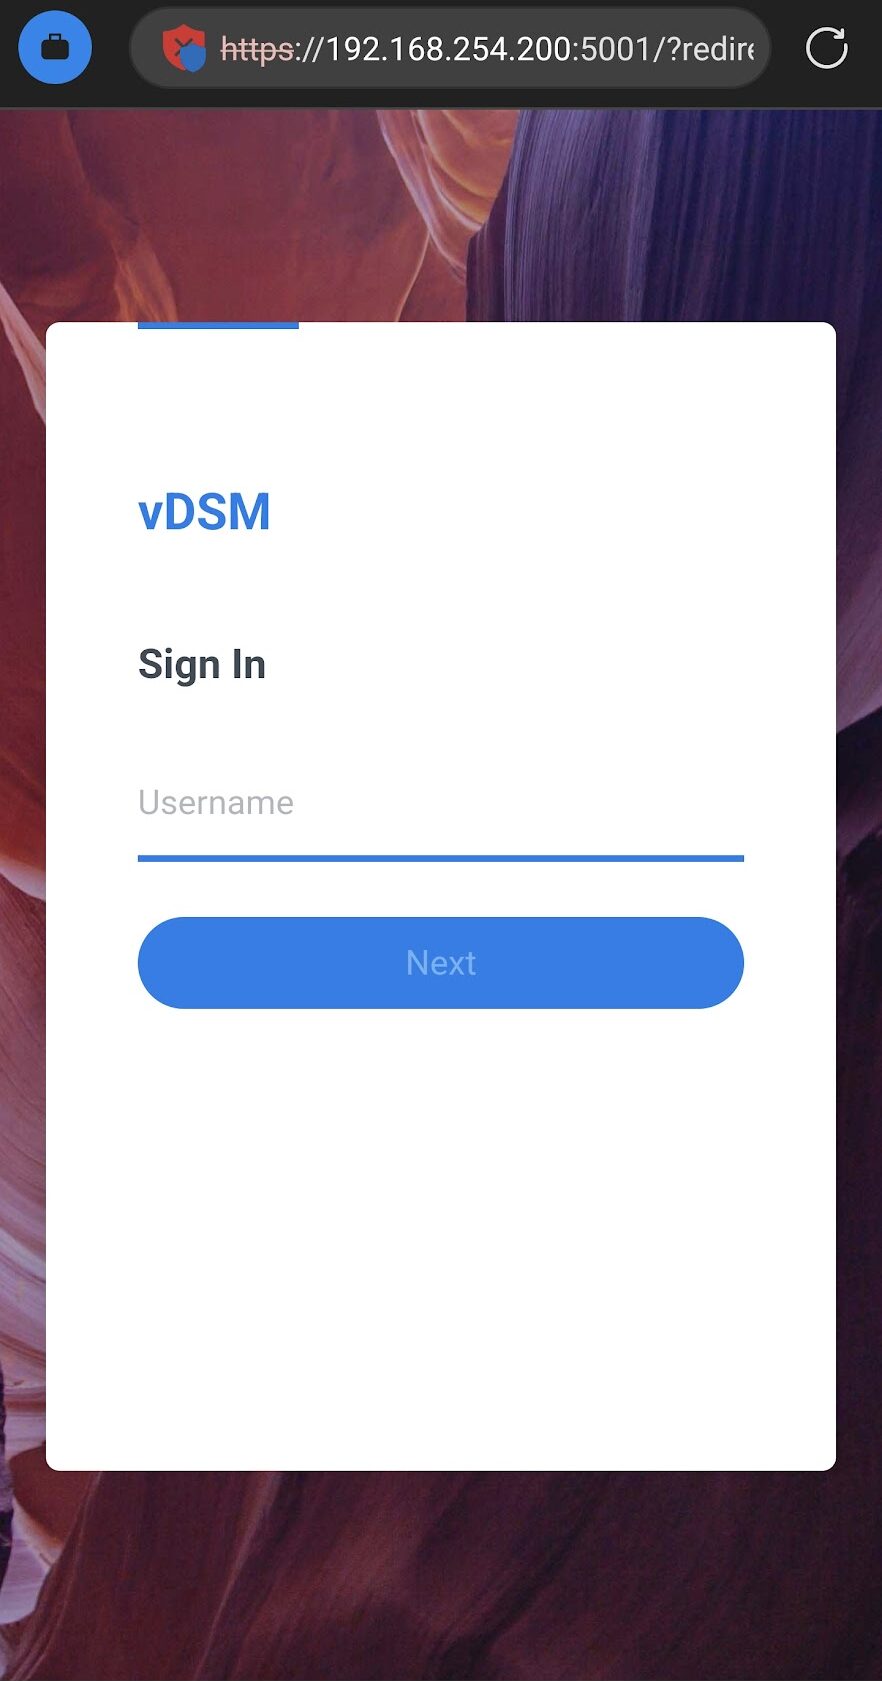
4. At this point, the resource is connected and can be accessed on that specific IP address + port on other devices connected to Twingate.
Connecting to a Resource from a Separate Device
Now that the resources have been added, you have to download the Twingate application on a separate client device and connect to it. As soon as you’re connected, you should be able to access the local IP address and port that you defined for the resource and access the service(s).
- Make sure that you are on an external network to ensure the connection works.
- You will only be able to access the resource on the designated port defined (if you altered it), and if you’re part of a group that has access to the resource.
- If you disconnect from Twingate, you will not be able to access the resource again until you reconnect.
Additional Features of Twingate
There are some really cool features of Twingate that are important to mention.
- You can configure a second Connector for high availability (though you should do it on a separate device). This means that if your Synology NAS ever restarts or goes offline, you’ll still have a connection back through that second Connector. This provides redundancy and can be extremely helpful when remote if a device goes down without your knowledge.
- If you are hosting multiple devices at different locations, you can create additional Remote Networks so that you can access all devices through Twingate.
- Multiple groups can be created with various different users to create granular permissions to specific resources.
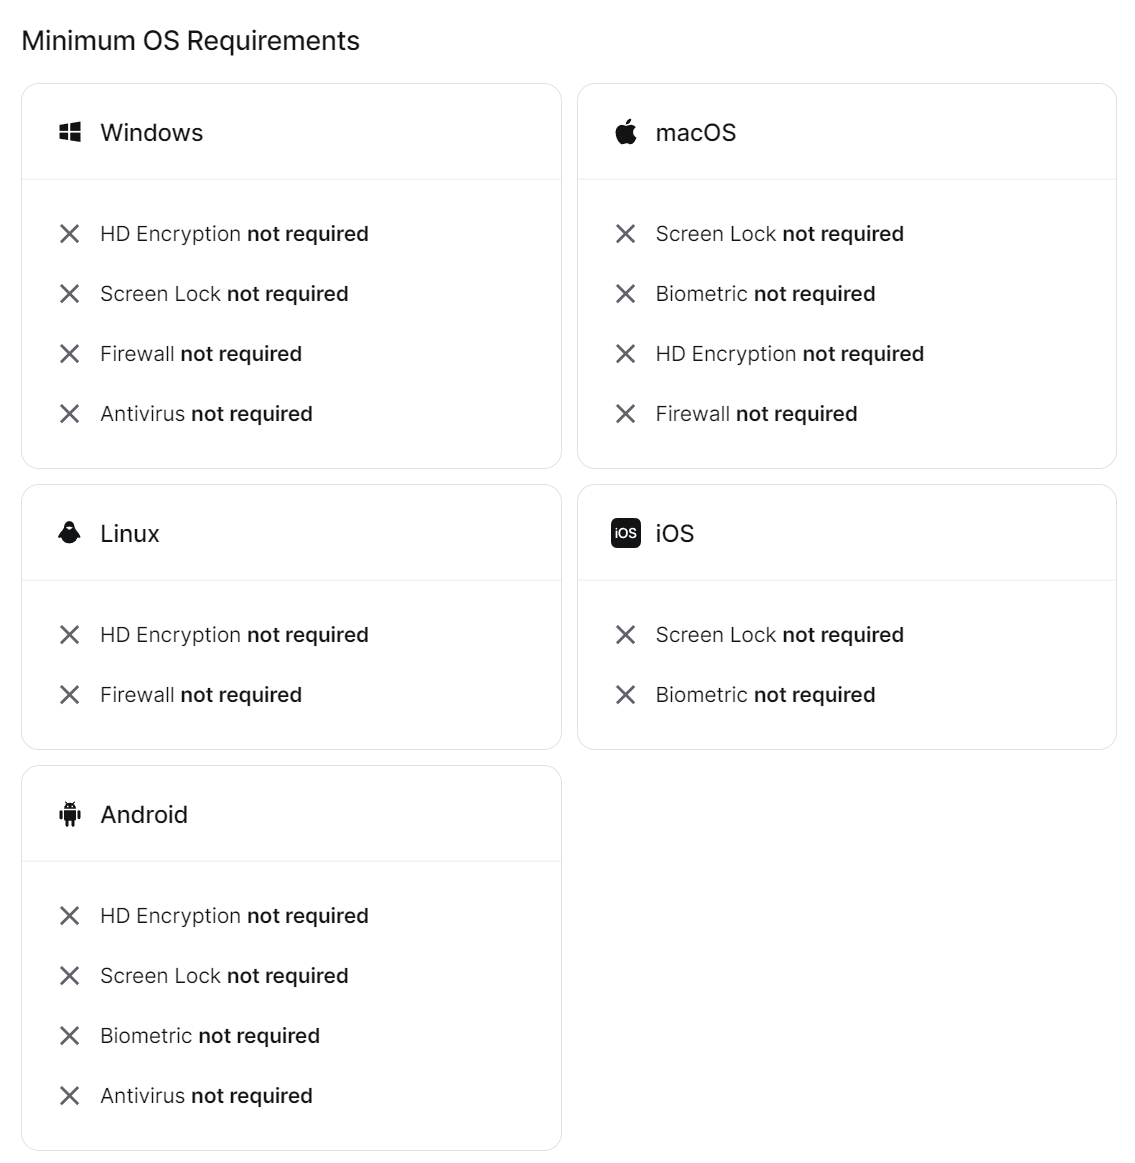
- In the Security section (Devices > Security), you can ensure that client devices attempting to connect to resources must have certain security features enabled.
These features really distinguish Twingate from other services and highlight the key features and benefits that Zero Trust Networking provides over traditional VPNs. Outside of the initial Docker Container configuration, everything is managed through a great web interface without a lot of the confusion that self-hosted VPNs often suffer from.
Final Thoughts & Conclusion
For business teams and even home users, Twingate on a Synology NAS offers unique functionality that can drastically improve your connectivity to and from outside networks. I keep falling back to the point that things that might seem simple like high availability can have a massive impact on your usage. Hosting a Twingate Connector on your Synology NAS is a straightforward process that offers a ton of flexibility and controls.