Today we are going to look at how you can back up and restore a Windows PC to a Synology NAS using Active Backup for Business.
Active Backup for Business is a great tool that allows you to manage bare-metal and file-level backups quickly and easily. I will be upfront and say that there are individuals who would prefer using a product from a backup-specific company like Veeam, but that’s not to say that this is a bad product. It’s just to say that other products exist as well.
If you’d like to back up a Linux PC, you can do that as well with Active Backup for Business. You can also back up macOS devices (though many prefer using Time Machine for this).
Active Backup for Business has a lot of functionality that we will not be going over today, but I will be creating future tutorials that highlight a lot of those features so stay tuned!
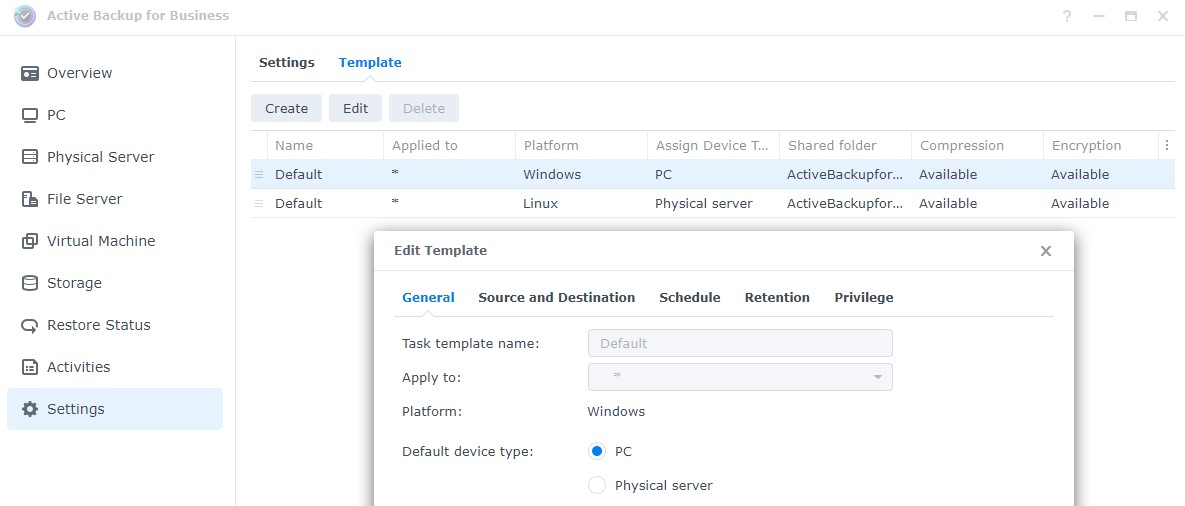
1. Install Active Backup for Business & Setup Templates for Windows PC’s
1. Your NAS must support the BTRFS filesystem to run Active Backup for Business. Ensure that your NAS is compatible before continuing (compatible models are listed at the bottom).
2. The Active Backup for Business tool is available in the package center. To get this to work, it must be downloaded and activated. When you first try and sign in, you will be asked to activate the product. Sign in to your Synology account and the product will be activated.
3. By default, a Windows template will exist which will allow you to specify how you’d like the data, schedules, and retention to be managed. You do not have to configure this, but if you’d like to manage all of your systems on a template-level, you can adjust these settings. To change them, select Settings, then Edit the Windows template. Change any of the settings you’d like before proceeding!
2. Active Backup for Business Agent Installation (Windows PC)
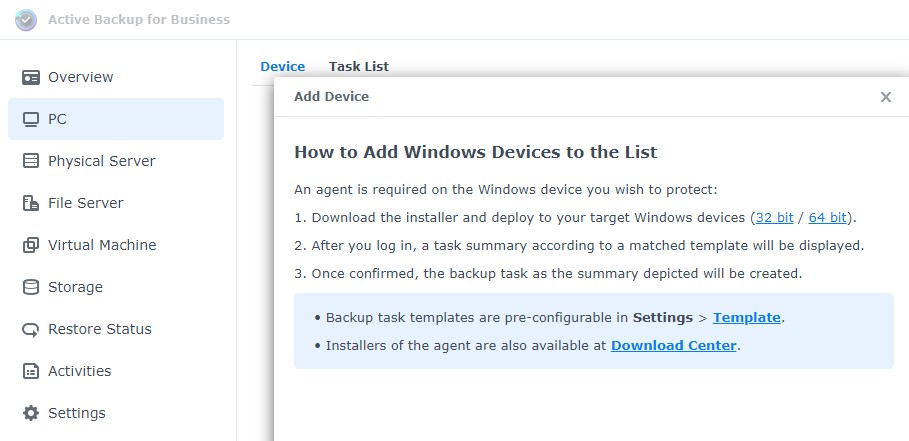
1. Launch Active Backup for Business, select PC, then Add Device. You will receive a popup informing you that an agent is required to add the machine. Download the correct version (32 bit or 64 bit). You can also find the install file in Synology’s Download Center.
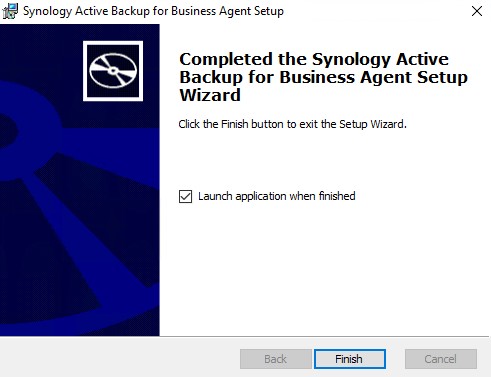
2. Run the Installer and launch the application when it’s finished.
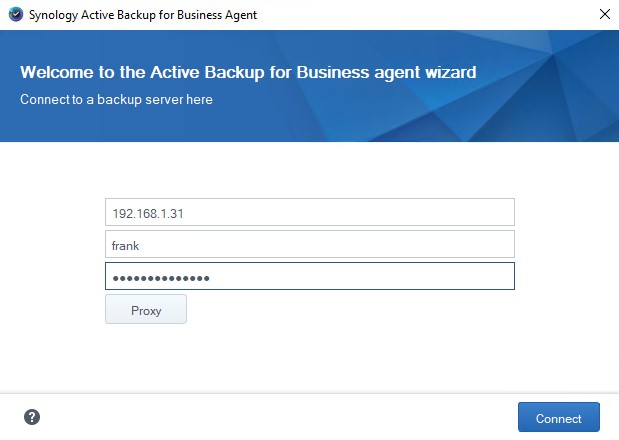
3. Enter the IP address of your Synology NAS, username, and password. If you receive a message stating that the SSL certificate is not trusted, Proceed Anyway.
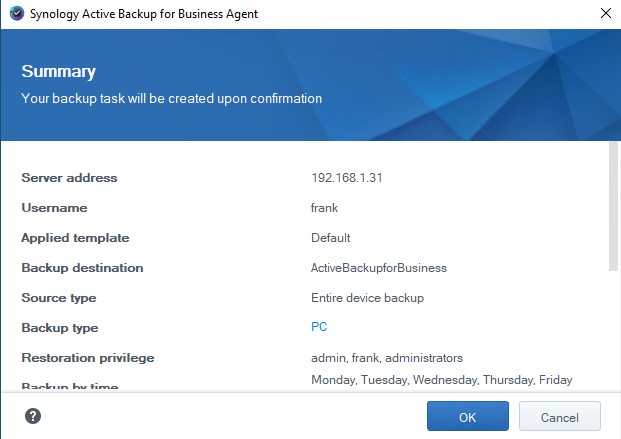
4. The default template that was configured above will be used automatically. This can be changed if you’d like. For now, select OK.
5. The agent will now be connected to the machine and can be managed through the DSM Web Portal!
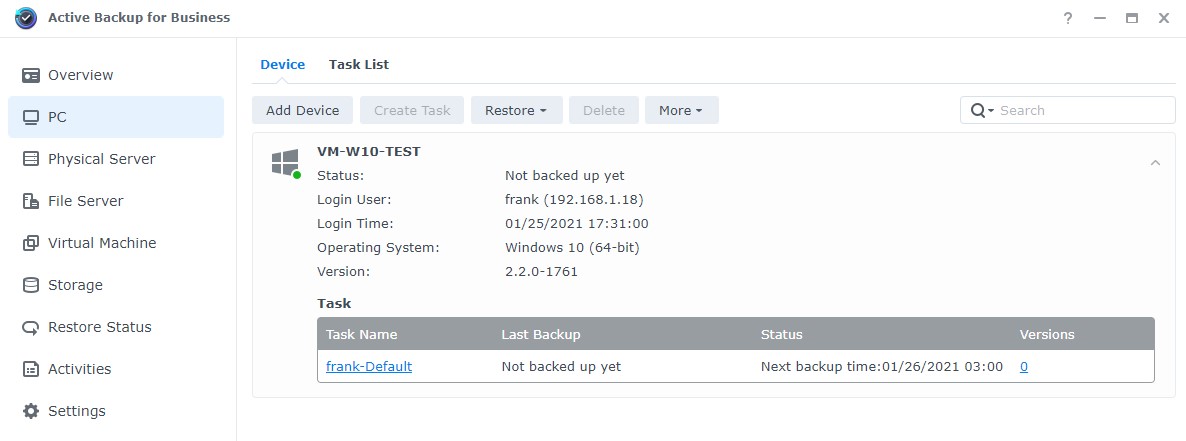
6. If you’d like to edit the individual task associated with this machine, select Task List, then Edit the task. One trick to keep in mind is that if the machine is not on for the scheduled backup time, you can back up the device by the Startup event with an 18-hour backup interval, which will back up the machine every day it’s turned on.

7. If you’d like to manually back up the machine, select Back Up and the system will start to back up.

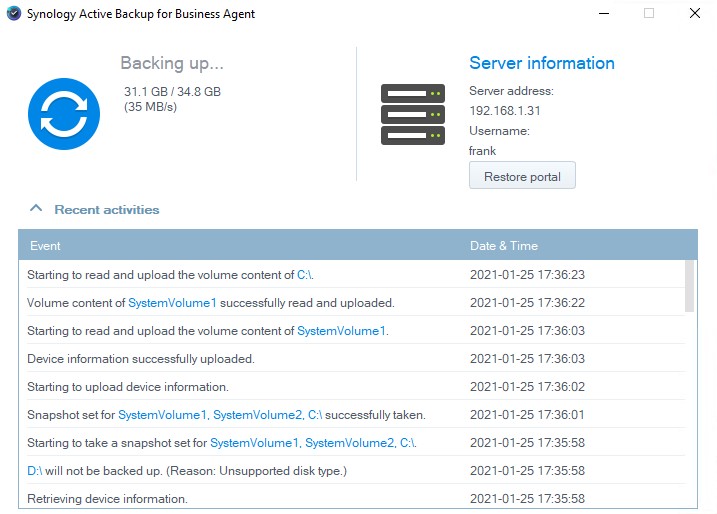
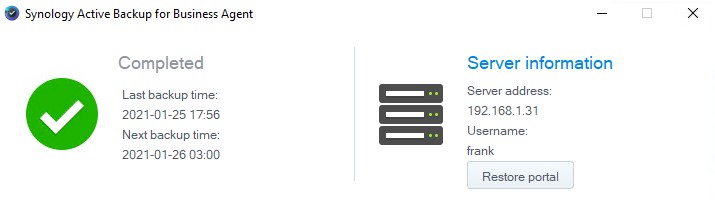
This is how the agent will look on the Windows machine.
3. Restoring Individual Files
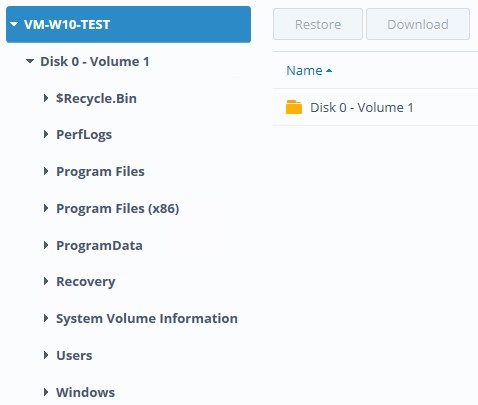
By default, you will be able to restore individual files using the Active Backup for Business web portal. It’s an easy to use tool that can be accessed from its icon inside of DSM, or by accessing the restore portal from the Synology Active Backup for Business Agent.
You can then navigate the backup and either download individual files or restore them directly to the machine. Version history will also exist at the bottom.
4. Bare Metal Restore
Unlike other backup options, Active Backup for Business allows you to complete a bare-metal backup, To summarize that as easily as I can, it allows you to restore your system to a different hard drive (or your current hard drive) in its exact state. Meaning the operating system as it exists as the time of the backup can be restored on a different machine. This is done by downloading and booting from restore media. If this sounds confusing, I highly suggest watching the video above as I try and break it down a little further there.
You should probably create recovery media before you need the recovery media. I would advise creating the USB stick or ISO image now.
4.1 How to Create Recovery Media – Active Backup For Business Windows Restore
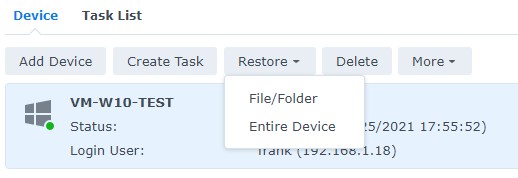
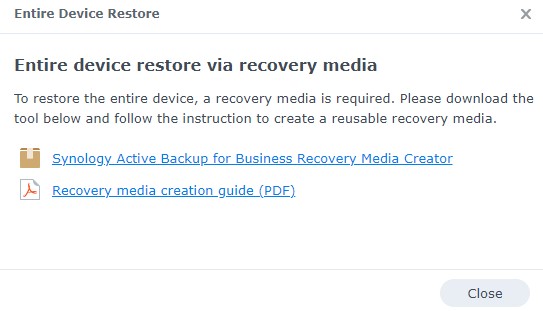
1. To download the restore media, open Active Backup for Business, highlight the machine, and select Restore, then Entire Device.
2. Download the Synology Active Backup for Business Recovery Media Creator.
3. A zip file will download – extract the zip file, then run the launch-creator.

4. You will be asked to create USB media or an ISO image. This will depend on the device that you’re restoring to. Select Create to create the media.

5. If you receive a popup stating that the Windows ADK is required, select Download.
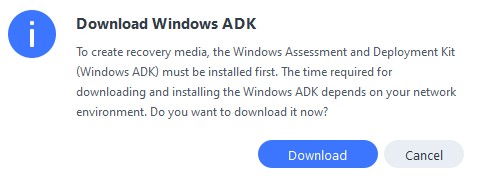
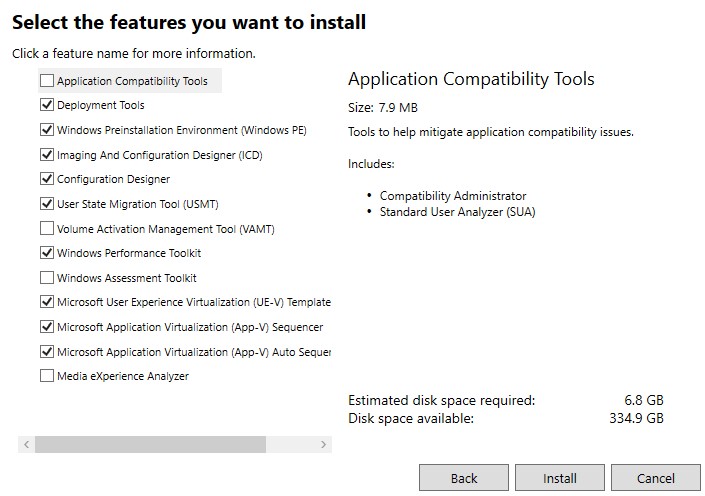
Follow the install instructions (the default Windows ADK settings are fine) to finish installing the tool. You will then be able to create the recovery media.
6. When the file is done creating, you will have either a USB stick or an ISO image that can be used to restore your NAS!
4.2 Completing a Bare-Metal Restore
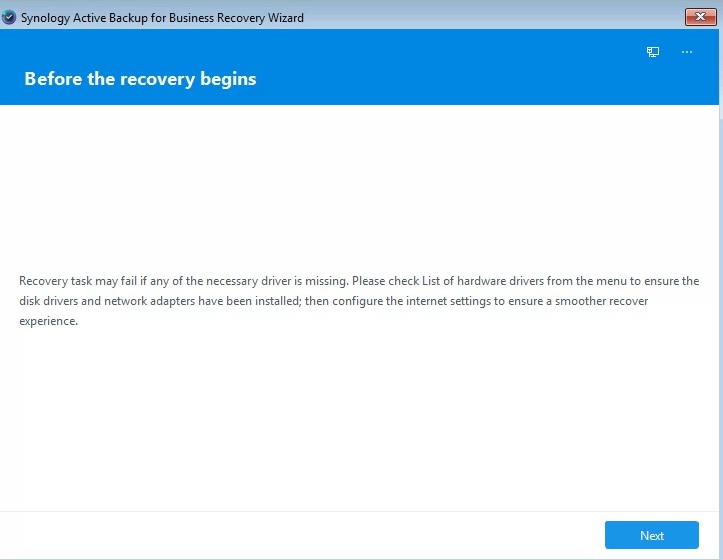
1. To complete a bare-metal restore, you will have to boot from the USB (or ISO if you’re running a Virtual Machine). This will allow you to restore your entire operating system if you’d like!
2. To start the recovery process, select Next.
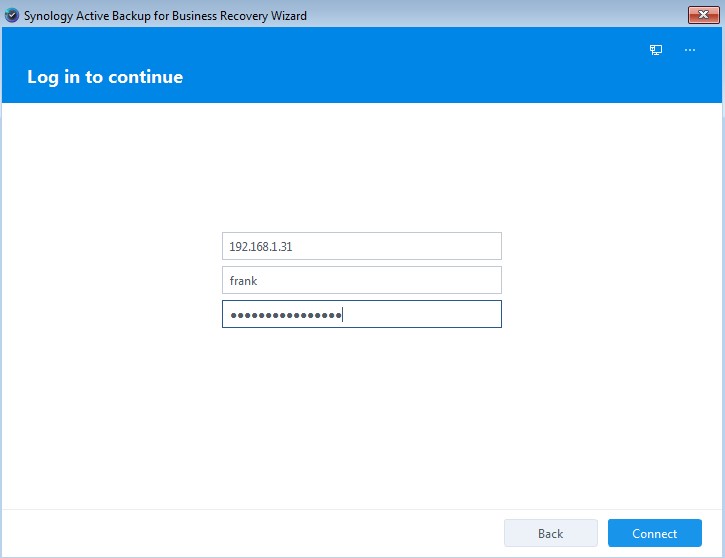
3. Enter in the NAS IP address and your Username and Password. If you get an error that the certificate isn’t valid, select Proceed.
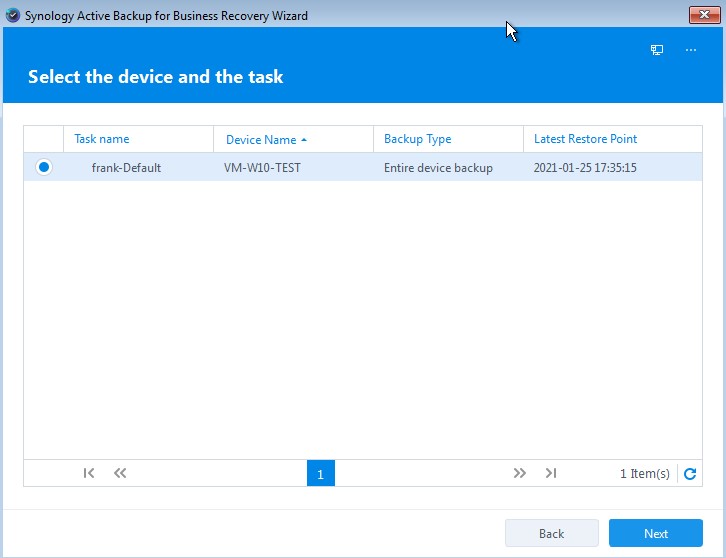
4. Select the backup that you’d like to restore from.
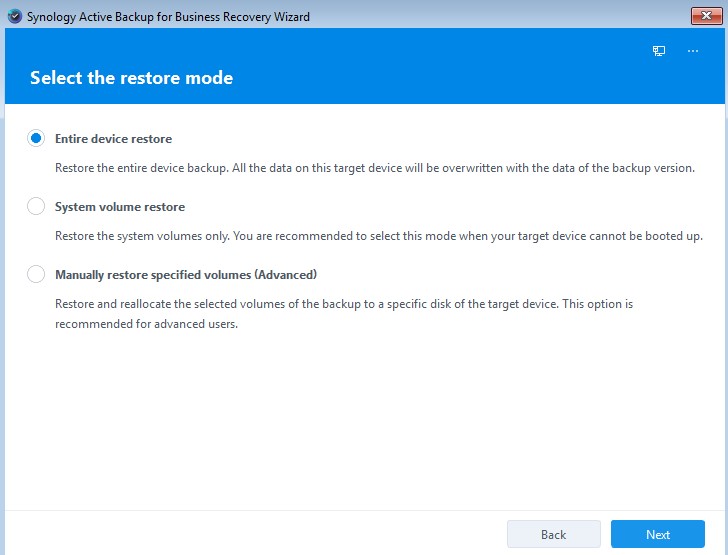
5. Select whether you’d like to restore the entire device, system volume, or the manual restore process. I am going to restore the entire device.
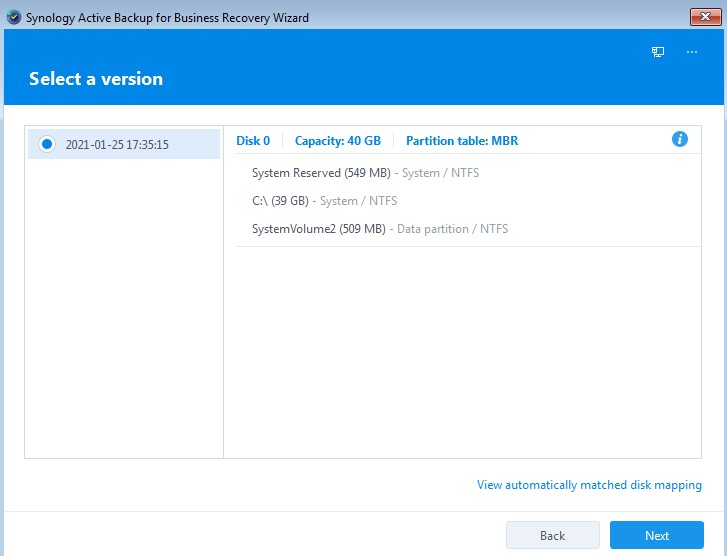
6. Select the version you’d like to restore from.
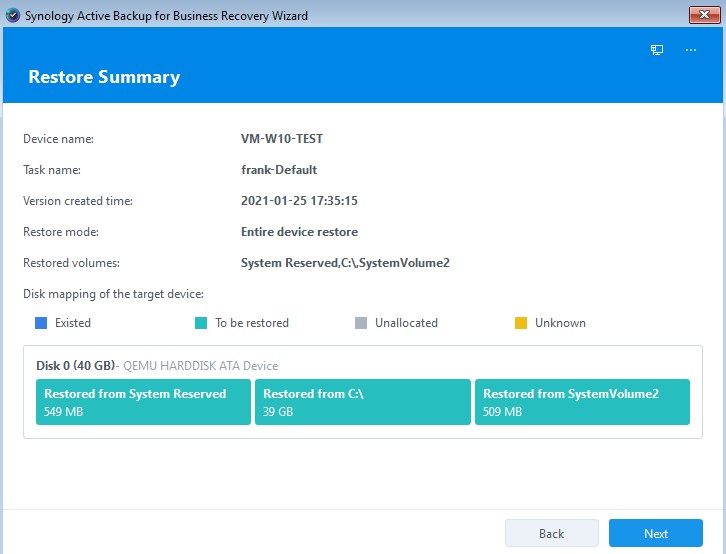
7. Validate that everything looks correct, then select Next.
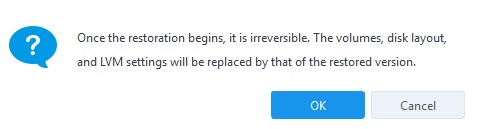
8. You will be informed that the restoration process is irreversible. If you would like to proceed, select OK.
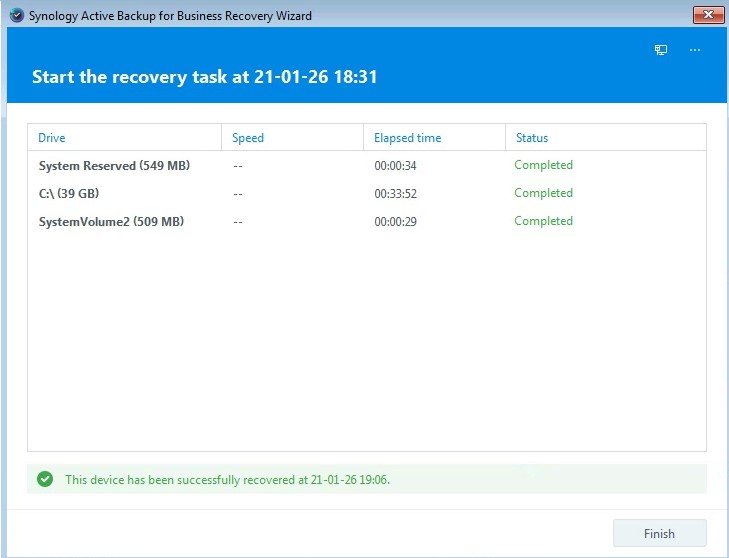
9. The restore process will now begin! The size of the data will determine how long the restoration process will take.

10. You will be informed when the process is finished. Select Finish to proceed. You will be asked to remove the recovery media and restart. Select Restart or Turn Off and remove the recovery media. After you’re done restarting, your system will be restored!
5. Conclusion
I’ve been using Active Backup for Business to back up my Windows machines to my NAS for over a year and I’ve been very happy with it. It does exactly what I need, I’m able to centrally manage all of my systems and I can tell from a quick dashboard that they’re successfully backing up!
If your backups are running slow, it could be from local network performance. Check your internal network speeds using a tool like iPerf3.
Stay tuned for more Active Backup for Business tutorials. This application is fairly in-depth, and I hope to go over it fully over the next few weeks!