In this tutorial, we’re going to take a look at how to run a speed test on a Synology NAS with iPerf3.
We’re going to be using iPerf3 because it’s a tool that conducts a speed test between local devices and a Synology NAS. This tool will allow you to test the speed at which you can transfer (upload and download) data between your Synology NAS and local devices (laptops, PCs, etc).
iPerf3 conducts the speed test by testing the maximum achievable bandwidth that you’ll be able to receive for local network transfers between a client device and a server device.
This is especially important for a Synology NAS because you’re constantly transferring data back and forth from client devices. Without having a baseline of what you should be receiving, you won’t be able to verify if you’re running into any issues.
This will also allow you to verify that everything is set up properly if you decide to upgrade to a 10Gb network infrastructure in the future.
The tutorial below uses the new version of Docker, installed on DSM 7.1. It also displays how to run a local network speed test, which is the correct, and most important way to run a speed test on a Synology.
1. How to Run a Speed Test on a Synology NAS with iPerf3
We’ll be setting up iPerf3 using Docker to run a speed test on a Synology NAS between local devices. This is extremely easy to do and will allow you to turn on/off the docker container whenever you would like to test network connectivity.
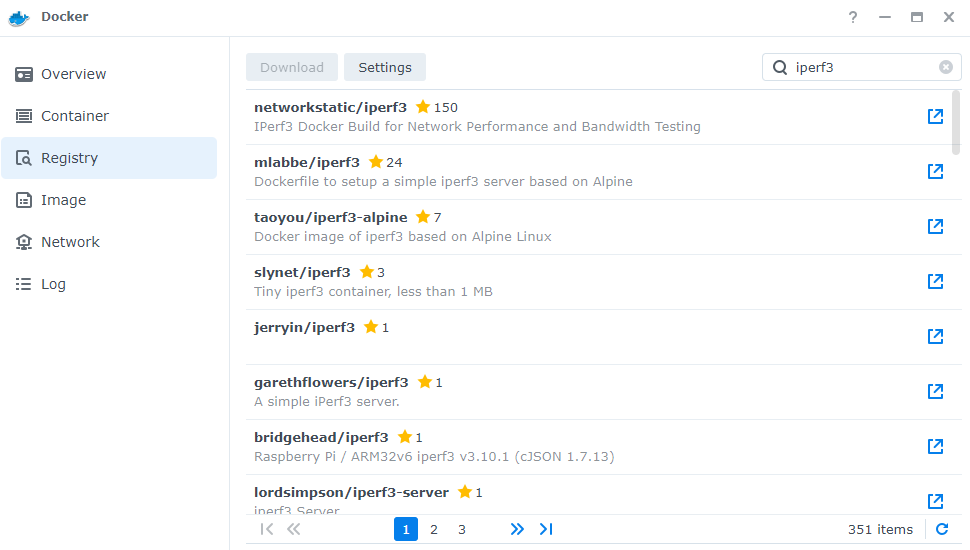
1. Open Docker and select Registry. Search for iPerf3 and download the latest networkstatic/iperf3 image by double-clicking it.
2. When it’s done downloading, double-click the container under the Image tab to create a new container.

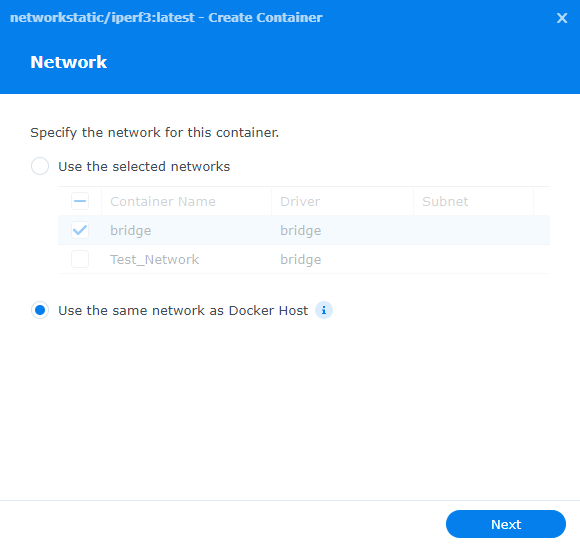
3. Select Use the same network as Docker Host and select Next.
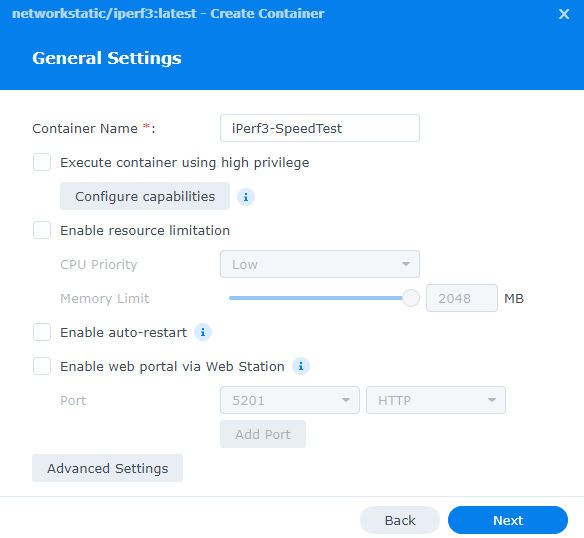
4. Give the container a name, then select Advanced Settings.
NOTE: I keep the container disabled unless I want to use it, but if you always want it running, select Enable auto-restart.
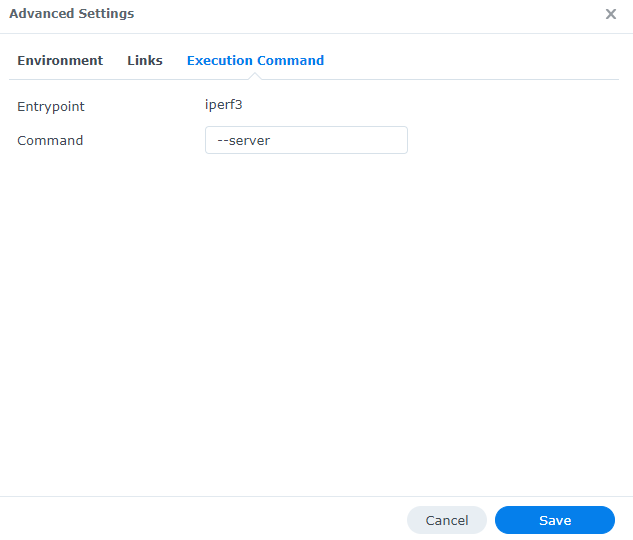
5. Under Execution Command, enter the information below in the Command section.
--server
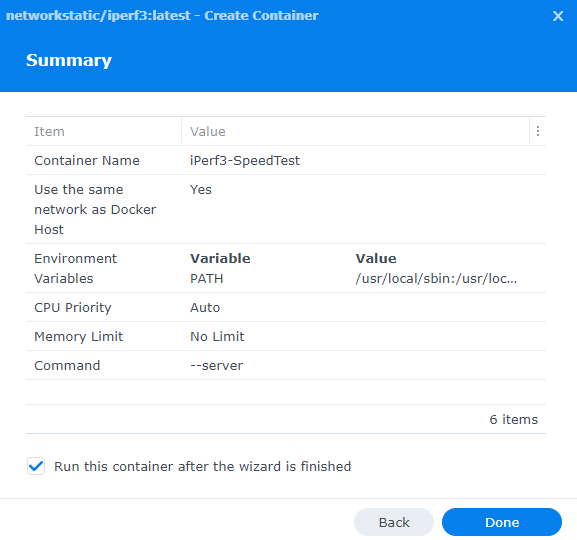
6. All other settings can stay as default. Select Next until you can select Done to create the container.
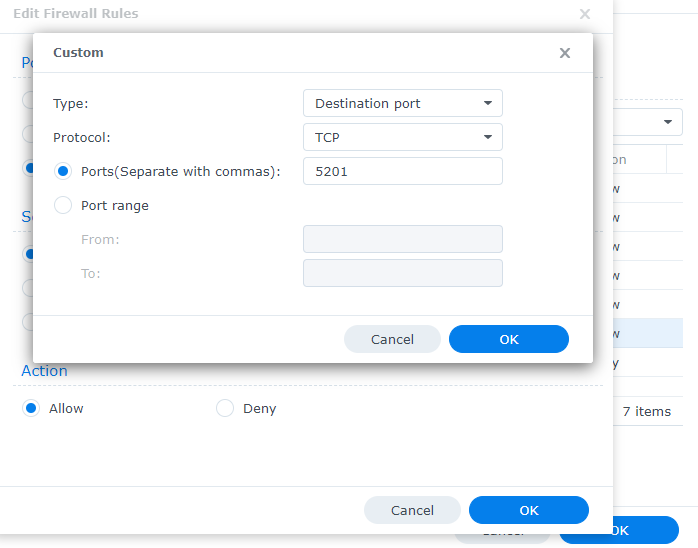
7. If you’re using Synology’s Firewall, set up an allow rule for TCP Port 5201.
8. After the container is started, the Synology will be listening as the iPerf3 server. This means that you can use another device as a client to test the connection speeds. This will test the local network transfer speeds between the client device and the server device (Synology NAS).
2. Running a Speed Test on a Synology NAS with iPerf3 Client Devices
To set up an iPerf3 client, you’ll have to download the package on the correct operating system. The iPerf website has a bunch of versions of the installer that you can download and install.
2.1 Raspberry Pi/Debian Client Setup
To install iPerf3 on a Raspberry Pi, run the install command below. Please keep in mind that this install command should work properly for all debian-based Linux distributions.
sudo apt install iperf3 -y
1. After iPerf3 is downloaded and installed, you can run the command below to test the local network transfer speeds.
iperf3 -c [SYNOLOGY_NAS_IP]
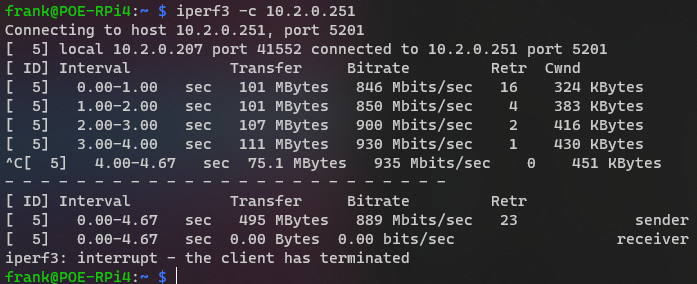
2. You’ll see that I am getting around 100-110 MB/s from a wired Raspberry Pi to a wired Synology NAS, both using gigabit NIC’s. These are right around the speeds that I’d expect.
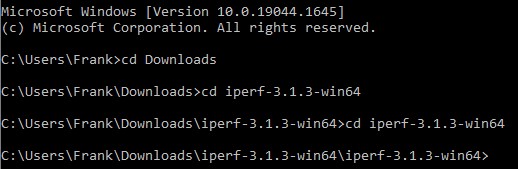
2.2 Windows PC Client Settings
1. Download the iPerf3 Windows EXE file and navigate to the folder location using the command prompt.
2. Run the command below to test the local network transfer speeds from your Windows PC to your Synology NAS.
NOTE: Make sure you are in the folder directory where the iperf3.exe file is.
iperf3.exe -c [SYNOLOGY_NAS_IP]
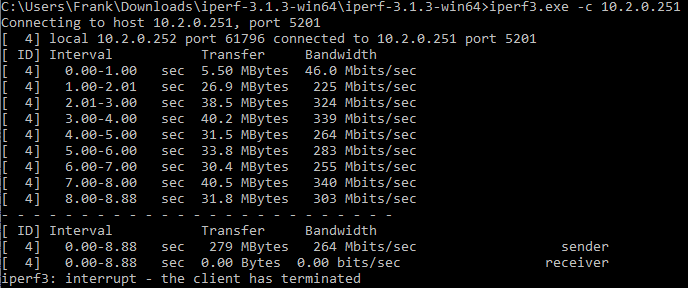
You’ll see that I’m getting around 30-40 MB/s of local network transfer speeds. This is because I’m on a wireless connection and my local network transfer speeds are significantly less than they would be if I was on a wired connection.
It’s not ideal but it is expected for my home network and the speeds I’ve come to expect.
3. Conclusion – How to Run a Speed Test on a Synology NAS with iPerf3
This tutorial looked at how to run a speed test on a Synology NAS with iPerf3. This tool allows you to run a speed test on a Synology NAS by testing the upload and download speeds of client devices. Even if you don’t think that you’re running into performance issues, it doesn’t hurt to get a baseline of your local network speeds. This will help you troubleshoot any issues (if they happen to arise) with transfer speeds.