Today we are going to look at how to set up Nginx Proxy Manager on a Synology NAS.
If you’re exposing any services on your network, using a reverse proxy is a great way to increase security and performance. A reverse proxy is a server that sits in front of your web servers and forwards client requests to the web servers. In layman’s terms, you only have to expose one server (using ports 80/443) and will be able to expose as many web services as you want.
This is an example of the network flow of a reverse proxy (simplified):

Please keep in mind that this is an alternative to Synology’s Application Portal where you can set up a Reverse Proxy. If your intentions are to only create a reverse proxy, you might want to use that instead, as there is no configuration necessary (other than the reverse proxy settings)!
1. Setup Instructions – Nginx Proxy Manager Synology NAS
This tutorial will utilize a Synology NAS and Docker. Since Nginx Proxy Manager uses a database, we will need to install two different containers. One for our database and one for Nginx Proxy Manager. By default, Synology uses ports 80 and 443 so using our host network interface isn’t ideal. For this reason, we will create a macvlan network interface (in Docker) that will allow us to bypass this port conflict.
1. Install Docker from Synology’s Package Center.
2. We need to create a few folders that we will be mapping our Docker containers. By default, the Docker package will create a folder named docker after it’s finished installing. Inside of this folder, we are going to create a folder named mariadb and nginx-proxy.

3. Inside of the nginx-proxy folder, create two sub-folders named data and letsencrypt.

4. Create and upload a file named config.json to the nginx-proxy folder. This file must contain the contents below. Ensure that you change SYNOLOGY_NAS_IP to the IP Address of your Synology NAS!
{
   "database": {
   "engine": "mysql",
   "host": "SYNOLOGY_NAS_IP",
   "name": "nginxproxymanager",
   "user": "nginxproxymanager",
   "password": "nginxproxymanager",
   "port": 3306
  }
}
5. The folder setup is complete!
1.1 Macvlan & Bridge Docker Network Interface Setup
1. Ensure you can SSH into your Synology NAS. Open Control Panel, select Terminal & SNMP, and Enable SSH service. If you are using Synology’s Firewall, ensure that you allow port 22 traffic. I created a video on how to SSH into your Synology NAS if you have any problems.
2. SSH into your Synology NAS using your favorite SSH tool.
3. We need to create a Docker macvlan network interface. First, we need to determine what network interfaces currently exist (on your Synology NAS) and note down the adapter name. To do this, run the command below and note down the network interface name that has your Synology NAS’s IP address (in this example, mine is eth0).
ifconfig
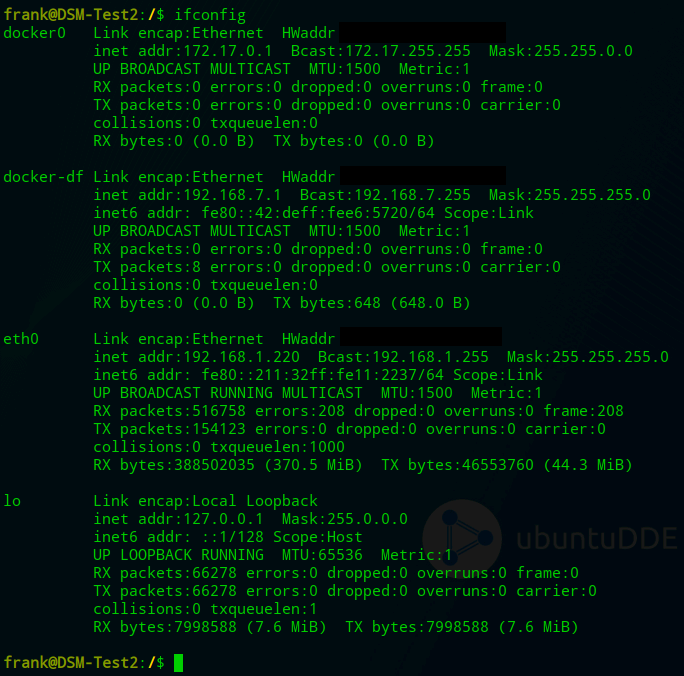
4. Next, you need to run the command below while substituting the correct subnet (most are 192.168.1.0/24 or 192.168.0.0/24 by default). You also need to pick an IP address that you’d like to use that’s not currently in use. I will be using 192.168.1.198. NOTE: npm_network will be the name of the network (you can substitute this as you’d like).
sudo docker network create -d macvlan -o parent=eth0 --subnet=192.168.1.0/24 --gateway=192.168.1.1 --ip-range=192.168.1.198/32 npm_network

5. Our network is now created. We can now exit our SSH session and disable it in DSM (if you won’t be using it). If you are disabling it and created a firewall rule for it, you should inactivate the firewall rule as well.
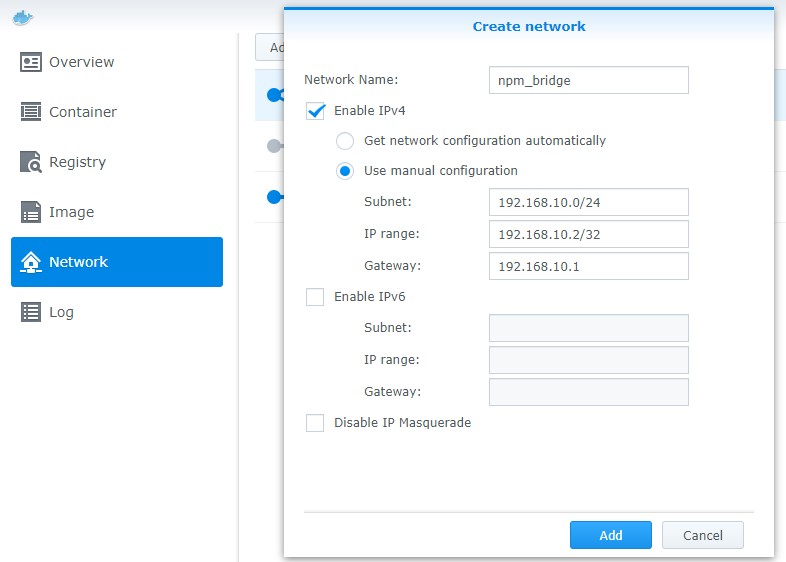
6. Next, we need to create a bridge network. This is what will allow our host (NAS) to communicate with our Nginx Proxy Manager container. Open Docker and navigate to the Network section. Select Add and enter a subnet that’s not currently in use. The IP address of the bridge I am creating will be 192.168.10.2.
7. Both network interfaces have now been set up!
1.2 MariaDB Install and Configuration
Nginx Proxy Manager requires a database to be set up in order for it to work properly. While Synology offers a MariaDB package, I like to separate it out by creating a second Docker container for the database only.
1. Open Docker, navigate to the Registry, and search for MariaDB. Download the latest version of MariaDB.

2. After the image has finished downloading, navigate to the Image section, and double click mariadb to set up a new container.
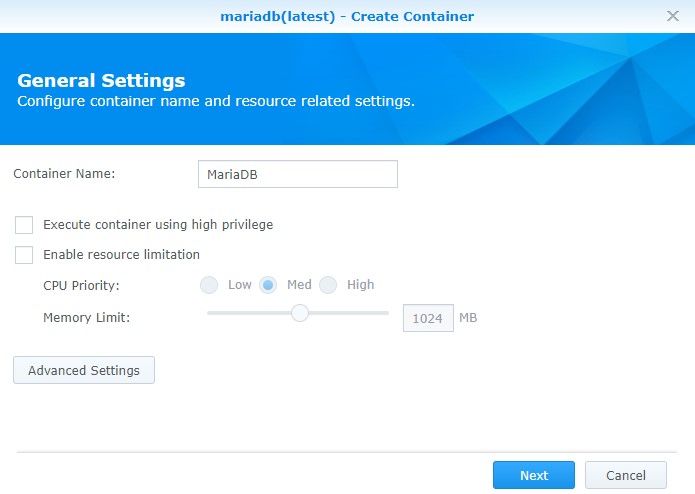
3. Give the container a name and then select Advanced Settings.
4. Select Enable auto-restart.

5. In the Volume section, select Add Folder and then select the mariadb folder we created earlier. In the Mount Path section, type /var/lib/mysql.

6. In the Port Settings section, change the Local Port to 3306. NOTE: If you have to use something other than 3306 as the port, you need to update the config.json file we created earlier.

7. In the Environment section, we need to create four variables. These variables are what will store our root password, database name, username, and password. NOTE: if you don’t want to use the values below (nginxproxymanager), you can change this to whatever you’d like. Just ensure that you update the config.json file that we created earlier with the new information.
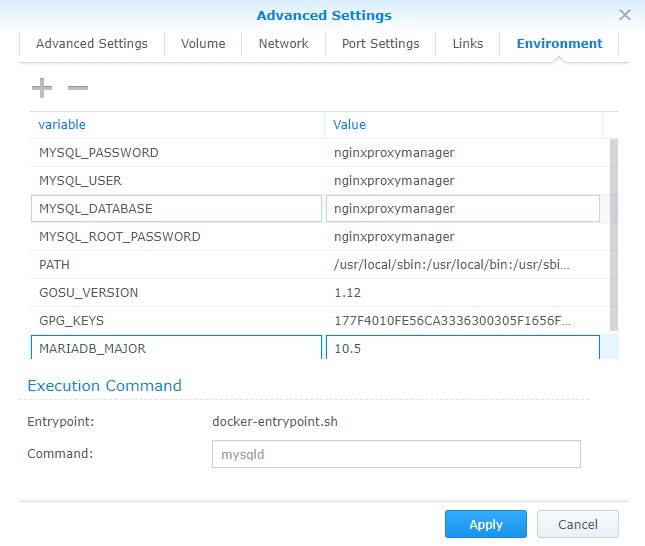
8. Select Apply and create the container. The database has now been created!
1.3 Firewall Setup – Nginx Proxy Manager Synology NAS
Since we are using a macvlan network interface, there are no firewall rules that we need to set up for Nginx Proxy Manager. However, the MariaDB container is using the host network interface and for that reason, needs a firewall rule to allow traffic. If you haven’t set up Synology’s firewall, I created a tutorial on how you can do it (and suggest that you do).
1. Open the Control Panel, select Security, then Firewall. Select Edit Rules and add an allow rule for port 3306. NOTE: If you are using a different port in the config.json file that we created above, you will need to use that port instead of 3306.

1.4 Nginx Proxy Manager Container Setup – Synology NAS
1. Open Docker, navigate to the Registry, and search for nginx-proxy-manager. Download the latest version of jc21/nginx-proxy-manager.

2. After the image has finished downloading, navigate to the Image section and double click jc21/nginx-proxy-manager to set up a new container.

3. Give the container a name and select Advanced Settings.
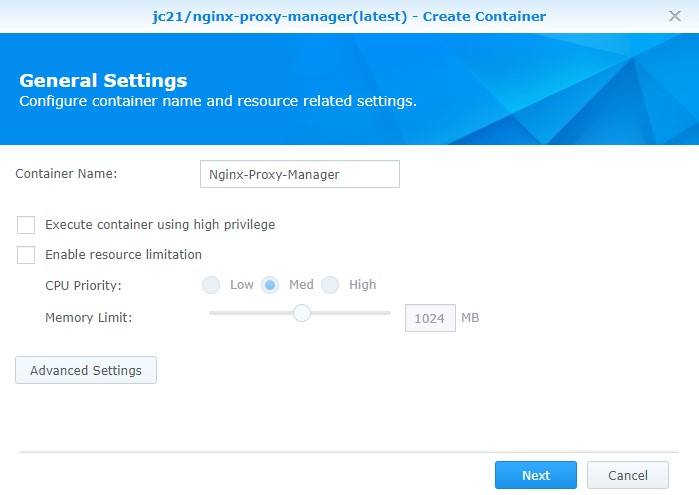
4. Select Enable auto-restart.

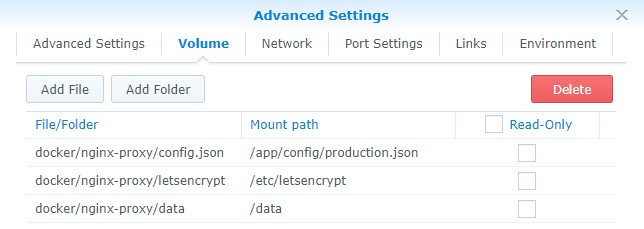
5. In the Volume section, we need to create two folder mappings and one file mapping. Select Add Folder and add the data folder and add the mount path /data. Next, select the letsencrypt folder and add the mount path /etc/letsencrypt. Select Add File and select the config.json file we created earlier with the mount path /app/config/production.json.
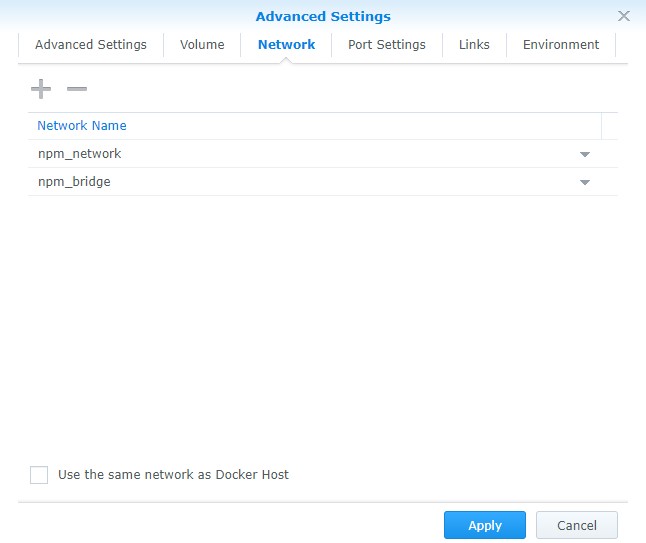
6. Under Network, add the npm_network and npm_bridge networks and remove bridge.
7. Match the Port Settings to be like the image below. If you are using 4443, 8080, or 8081 for anything, you can change the ports to something not currently being used.
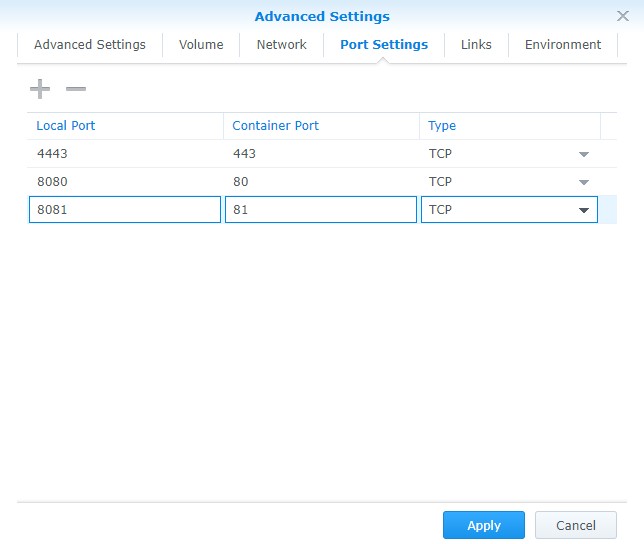
8. Select Apply and create the container! Give the container a few minutes and you should be able to access the web admin portal through the npm_network IP address and port 81!
http://[npm_network]:81
2. Nginx Proxy Manager Setup – Synology NAS
1. Login with the email address admin@example.com and password changeme.
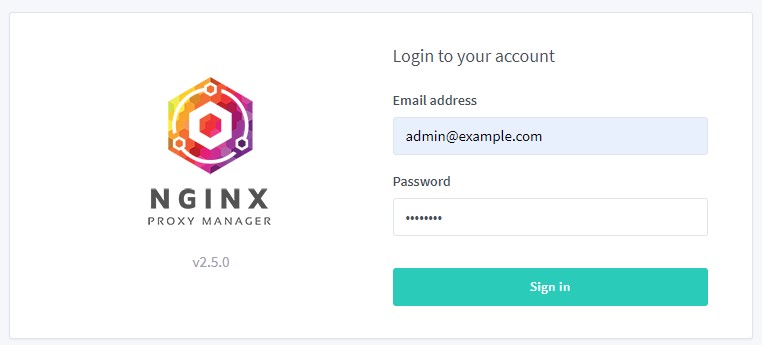
2. When prompted, change your name and email address, then set up your password.
3. Nginx Proxy Manager is now set up! Ensure that you port forward ports 80 and 443 on your router to the macvlan network we created above.
BAD GATEWAY ERROR
Certain people are experiencing “bad gateway” errors when they try and login . After troubleshooting this for a while (and a few helpful suggestions in the comments), there are really two ways to fix this:
1. If your NAS has multiple NIC’s and you have multiple IP addresses assigned to it, in the “config.json” file, enter the other IP address of your NAS.
2. Keep the default docker bridge network interface connected to both containers and use that IP address in the config.json file.
3. Using Nginx Proxy Manager
Now that we set up Nginx Proxy Manager, it’s important to know how to use it! I created a tutorial that you can follow that will show you how to expose Plex and setup an SSL certificate. The tutorial is fairly straight forward, but highlights how you can expose practically any web server quickly, easily, and securely!
4. Conclusion: Nginx Proxy Manager
This was a fairly complex tutorial, but I am hoping that it’s broken down enough to be easily understood. It’s not normal that you need to set up two different Docker containers to get one container to work, but in my opinion, this is the best way to get Nginx Proxy Manager working on a Synology NAS.
Thank you for reading the tutorial. If you have any questions, please leave them in the comments!


