In this tutorial, we are going to look at how to set up Pi-hole on a Synology NAS using Container Manager and a macvlan network interface. This is the preferred option since ports 80, 443, and 53 can be blocked on the NAS for other Synology packages.
What is Pi-hole?
Pi-hole is a network-wide ad blocker that functions at the DNS level. Every DNS request that comes in is either allowed or blocked based on the ad lists configured in Pi-hole. I’ve used Pi-hole for years (and even have an advanced setup guide for it), but it’s one of the easiest and best ways to block ads and increase privacy and security.
I ran Pi-hole on my Synology NAS for close to ~5 years with no problems, and it’s a great location to run it since most NAS devices are online 24/7.
How to Set Up Pi-hole on a Synology NAS
Before we configure the container for Pi-hole, we need to create a few folders, which we’ll mount the container volumes (this is where the important data for the container is stored).
Creating a Folder for the Pi-hole Configuration Files
1. Install Container Manager from Synology’s Package Center. This will automatically create a docker shared folder on your NAS.
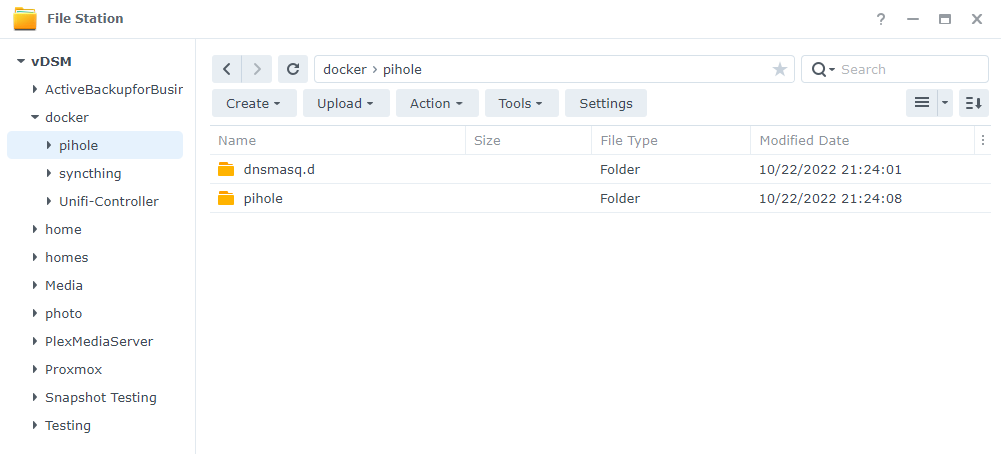
2. There are two folders that we will map our Docker image to that we need to create. Inside of the docker folder, we are going to create a folder named pihole.
Inside that folder, we are going to create two subfolders named pihole and dnsmasq.d.
Creating the Pi-hole Container
We will be utilizing a Docker Compose file to create the entire container for Pi-hole.
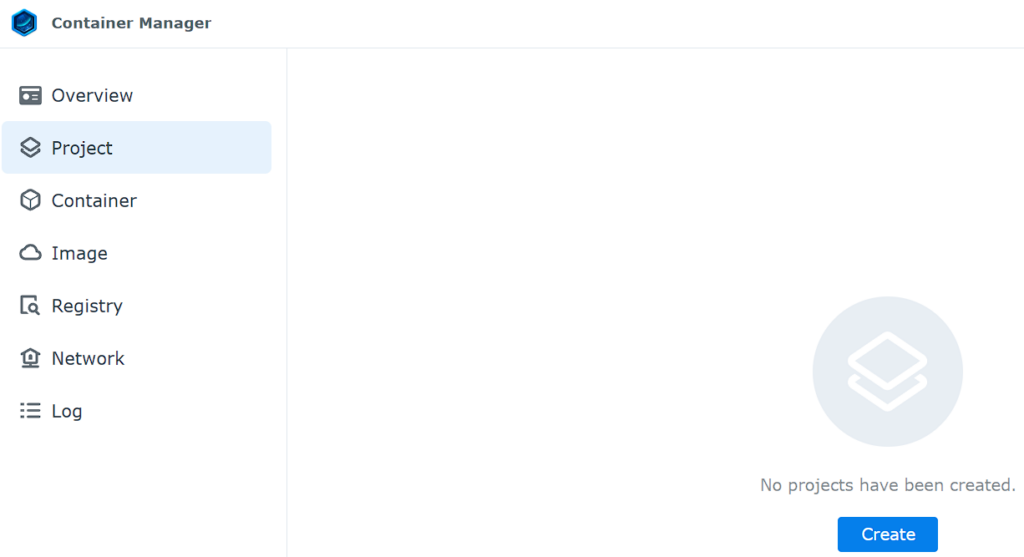
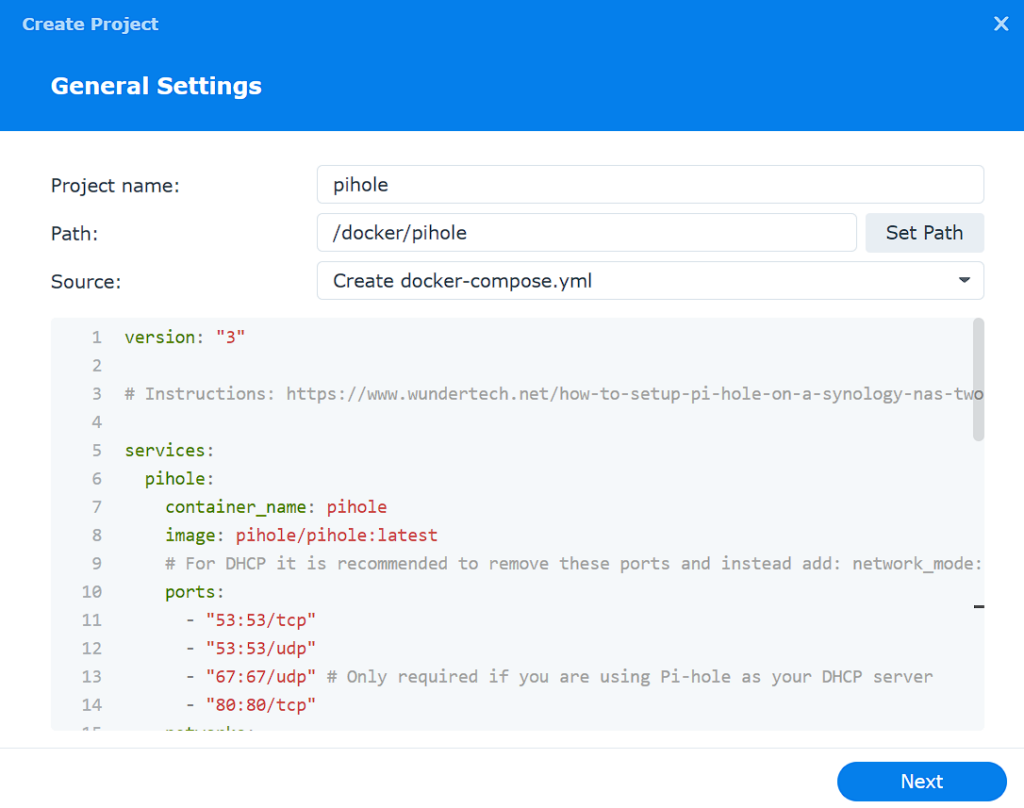
1. Open Container Manager, select Project, then Create.
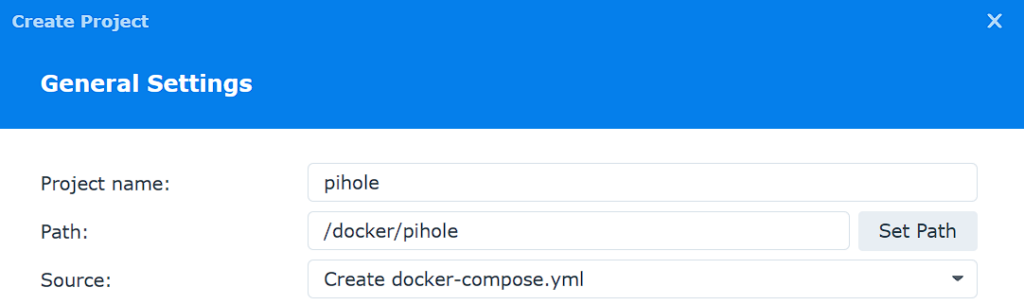
2. Enter pihole as the Project Name, then select the pihole folder and select Create docker-compose.yml.
3. There are a few changes you might have to make to the Docker Compose file before creating it:
The interface name (eth0 below) might need to be updated. You can get this by connecting to your NAS through SSH, and running the command below:
ifconfigSubstitute your subnet, as well as the IP address you’d like to use for Pi-hole (192.168.1.198).

Take the interface name related to your IP (eth0 and 192.168.1.220 is the IP address of the NAS in the image above) and substitute it in the Docker Compose file below. Update the FTLCONF_webserver_api_password and TZ as well.
version: "3"
services:
pihole:
container_name: pihole
image: pihole/pihole:latest
ports:
- "53:53/tcp"
- "53:53/udp"
- "67:67/udp"
- "80:80/tcp"
networks:
ph_network:
ipv4_address: 192.168.1.198
priority: 1000
ph_bridge:
ipv4_address: 192.168.100.2
priority: 900
environment:
TZ: 'America/Chicago'
FTLCONF_webserver_api_password: 'password'
DNSMASQ_LISTENING: local
volumes:
- '/volume1/docker/pihole/pihole:/etc/pihole'
- '/volume1/docker/pihole/dnsmasq.d:/etc/dnsmasq.d'
cap_add:
- NET_ADMIN
restart: unless-stopped
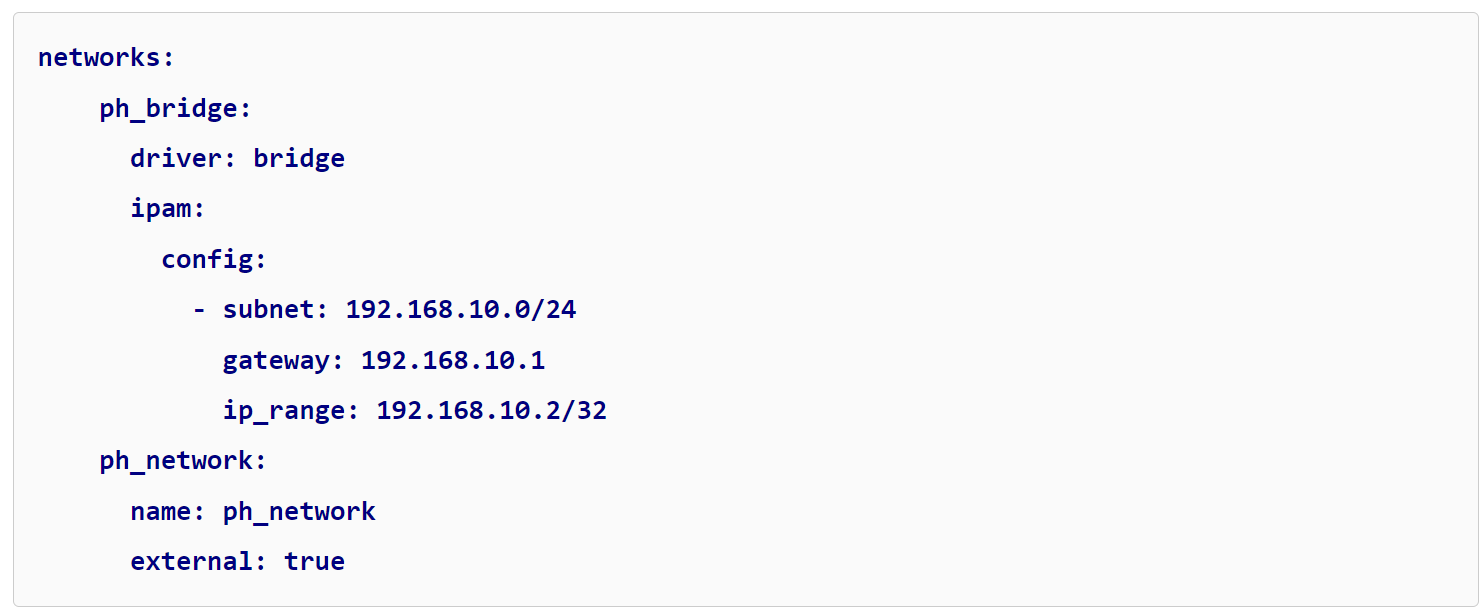
networks:
ph_bridge:
driver: bridge
ipam:
config:
- subnet: 192.168.100.0/24
gateway: 192.168.100.1
ip_range: 192.168.100.2/32
ph_network:
name: ph_network
driver: macvlan
driver_opts:
parent: eth0
ipam:
config:
- subnet: 192.168.1.0/24
ip_range: 192.168.1.0/24
gateway: 192.168.1.14. Add the Docker Compose file above with your changes to the editor, and select Next, then Done to create the container.
Accessing the Pi-hole Admin Interface
Pi-hole can be accessed by using the IP address of your macvlan network interface and the password specified above!
http://[ph_network_IP_ADDRESS]/admin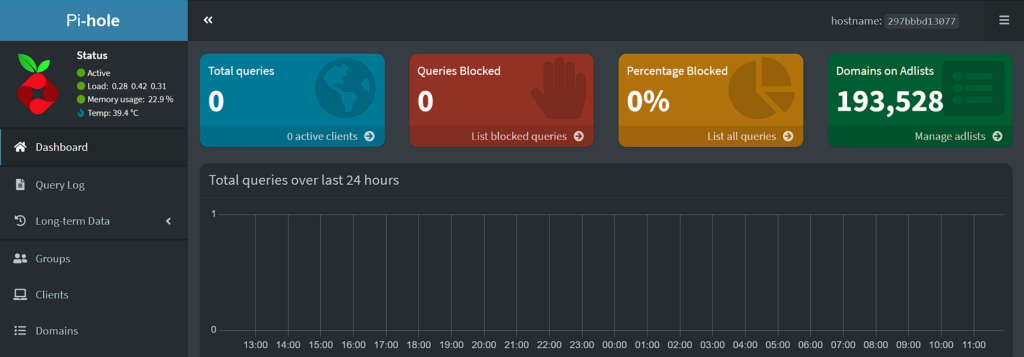
From here, you can start to use and customize Pi-hole.
Updating the DNS Server to Utilize Pi-hole for Ad-blocking
Now that the setup is complete for Pi-hole, we need to point our clients to our new Pi-hole DNS server. There are two main ways to do this:
- Point your router’s DNS server to the IP address of Pi-hole (any device connected will use Pi-hole as its DNS server).
- Point each client to the Pi-hole IP. This is helpful if you only want certain clients to use Pi-hole as a DNS server.
I point my router’s DNS servers to the Pi-hole server as I want to ensure every device connects to it. This is different for every router, so you might research where it is on your device.
Synology NAS Pi-hole Communication (Bridge Network Interface)
If you want to connect directly from the NAS to the Pi-hole container (for DNS), you MUST use the Bridge network interface created in the Docker Compose file. The NAS cannot communicate with the container on the macvlan network interface, but can on the bridge network interface (which is why we created it).
The IP address in this tutorial is 192.168.10.2. If you use this IP address from the NAS directly (and only the NAS), you will be able to use Pi-hole as the DNS server.