In this tutorial, we will look at how to set up Syncthing on a Synology NAS.
Syncthing is an application that continuously synchronizes files from two different devices. This means that when a file changes on your Synology NAS, it will automatically sync to the secondary device that was defined. This is extremely powerful as it allows you to sync files from your Synology NAS to a different location, or even use your Synology NAS as a destination for synchronization tasks.
Please keep in mind that Syncthing is a sync tool, which means that files are synced between two locations. This is an important thing to remember as you can indirectly delete a file and it will be synced to the other location. For this reason, you should always take backups of your important files!
How to Set Up Syncthing on a Synology NAS
Before we actually look at how to set up Syncthing on a Synology NAS, we need to get our UID and GID for the Docker container.
1. Ensure you can SSH into your Synology NAS. You can learn how to SSH into your Synology NAS here.
2. When we create our Syncthing container, we need to specify the PUID and GUID in order for the container (Syncthing) to access the data on our Synology NAS. You will have to run the command below and substitute the correct username.
NOTE: You must ensure that the user/group has read/write permission to the folder(s) on your Synology NAS that you want to use with Syncthing. We will look at this in detail in a later step.
id [USERNAME]

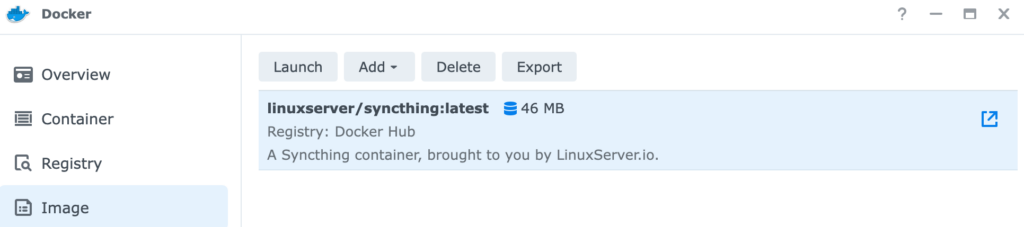
3. Open Docker, select Registry, then search for Syncthing and download the latest linuxserver/syncthing image.

4. After the image finishes downloading, double-click it to create a new container.
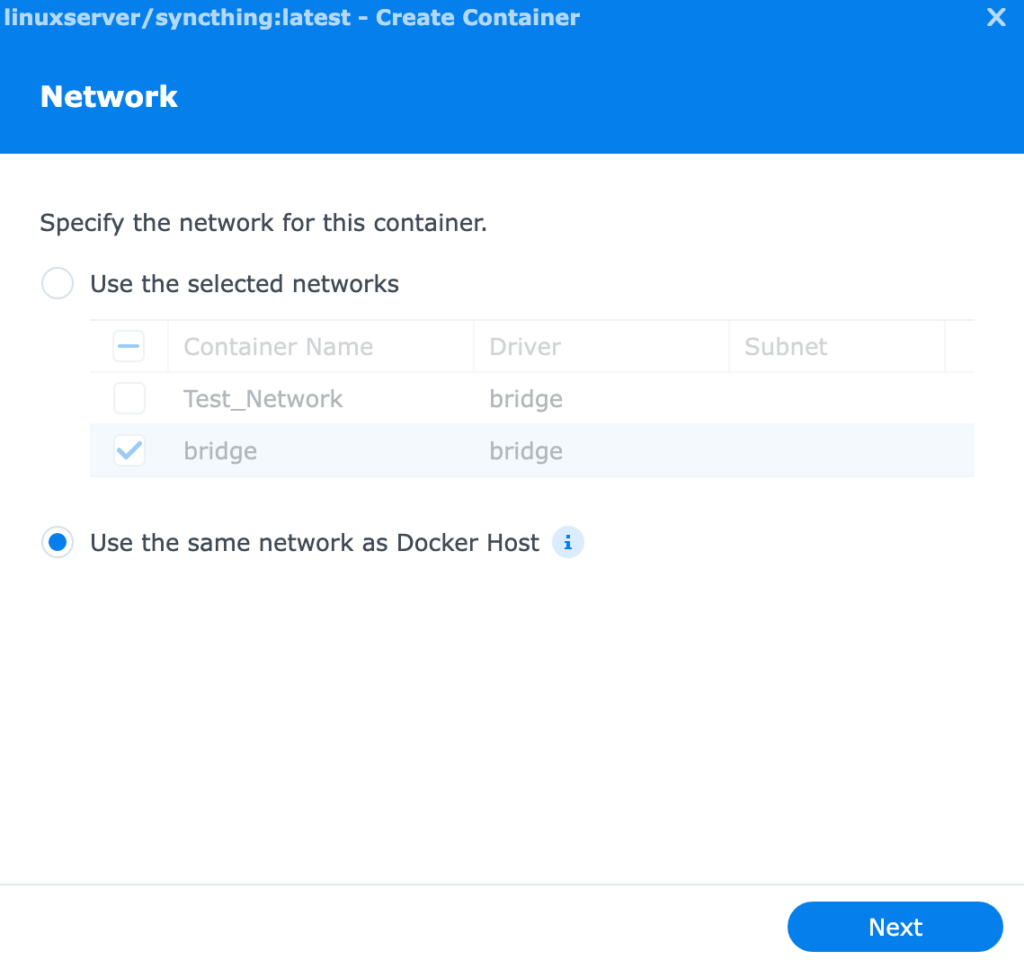
4. Change the network to use the same network as Docker host, then select next.
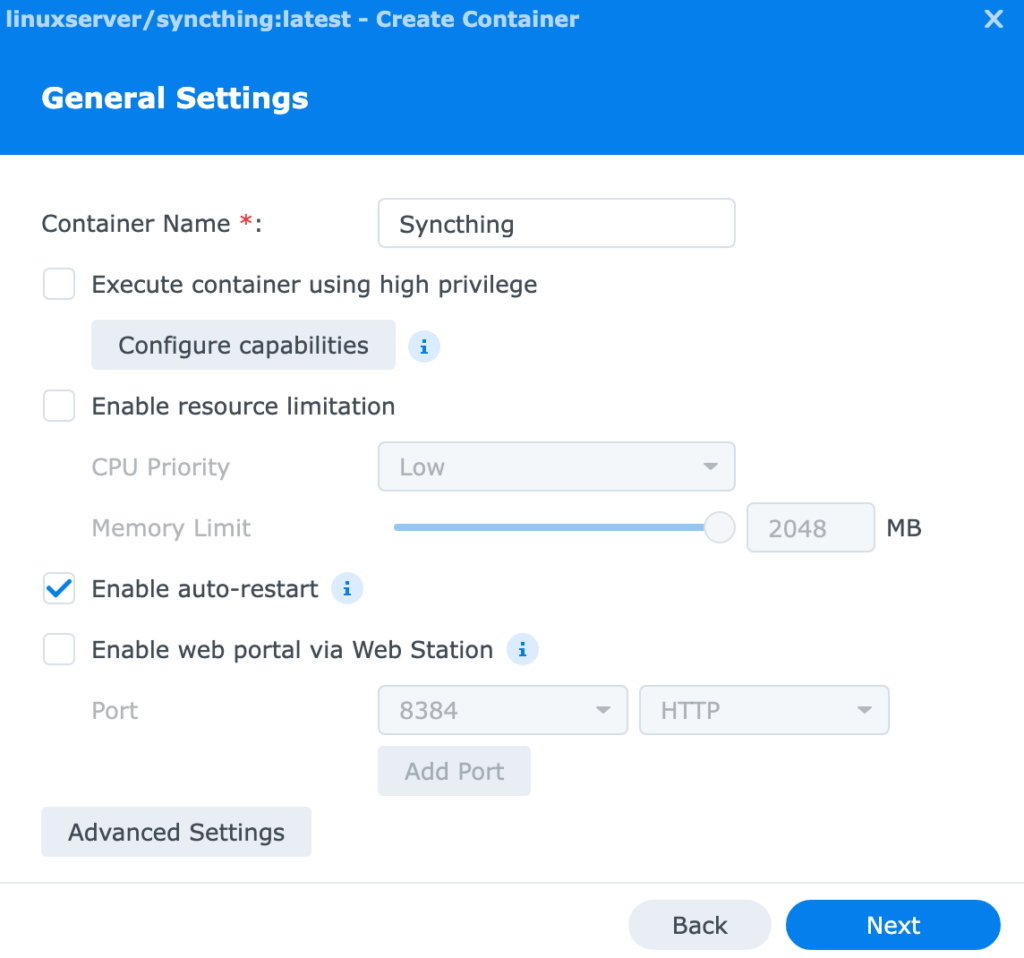
5. Change the Container Name to Syncthing, enable auto-restart, then select Advanced Settings.
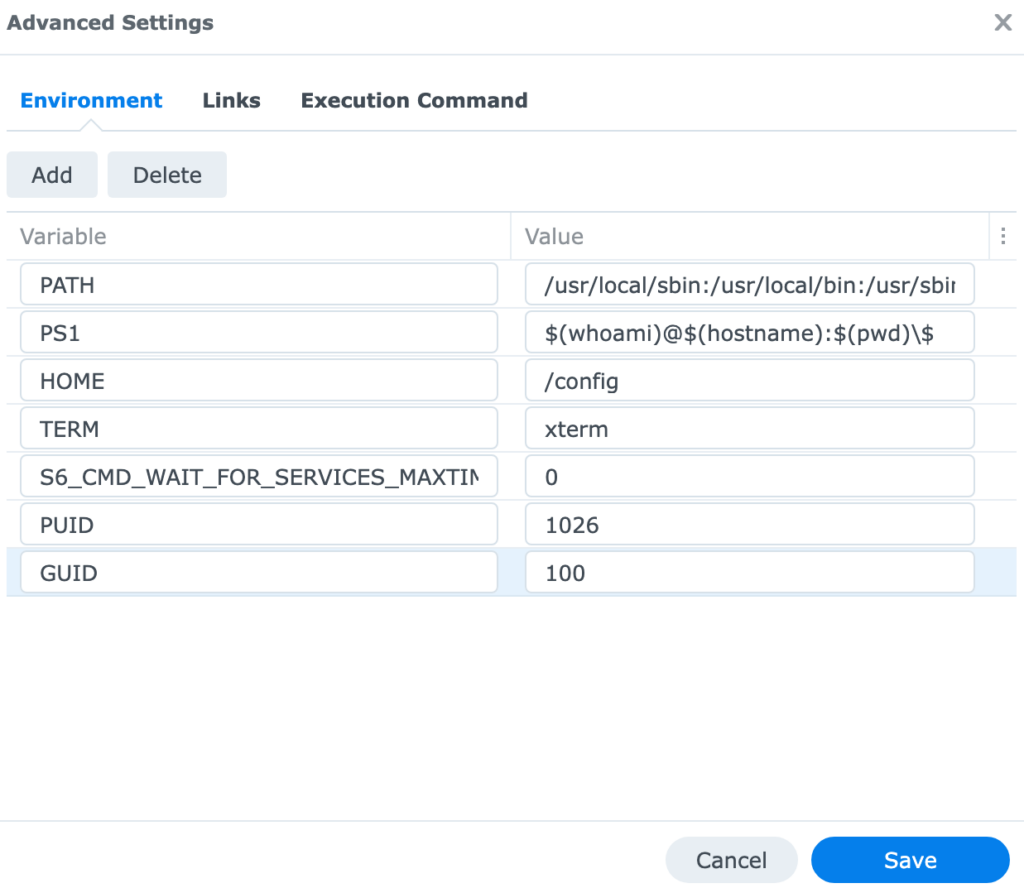
6. Create two environment variables named PUID and GUID which should be populated with the values found in step two above. As mentioned before, this user and group must have access to the shared folders that you’d like Syncthing to be able to access. When you’re done adding them, select Save, then select Next.
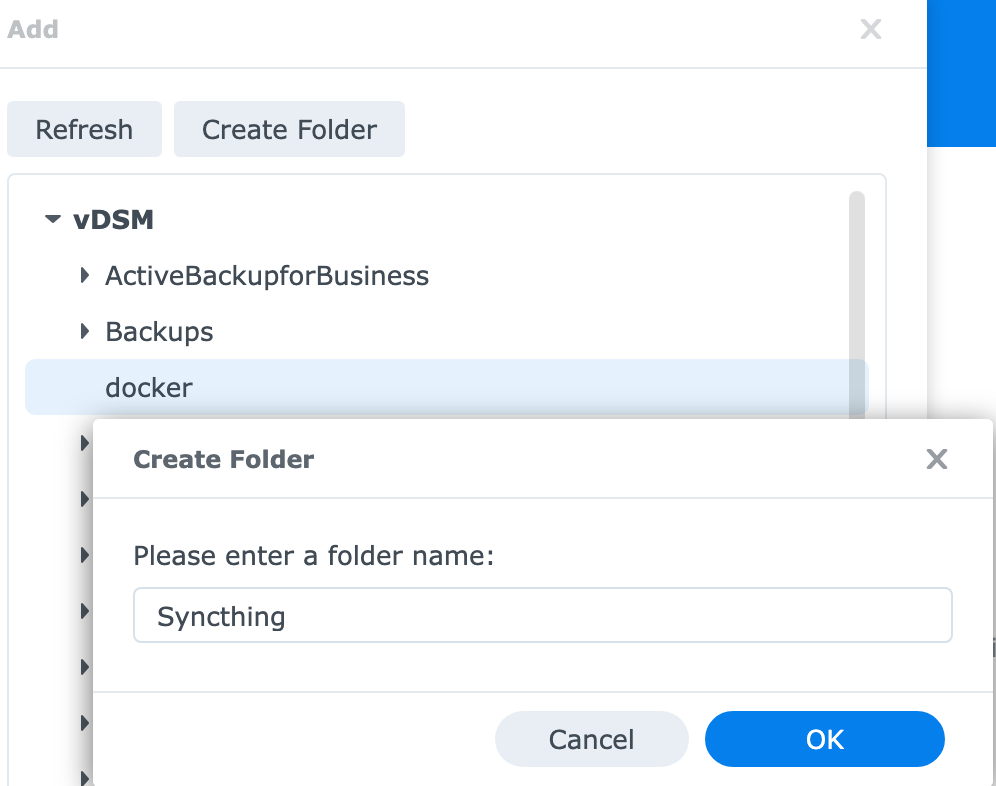
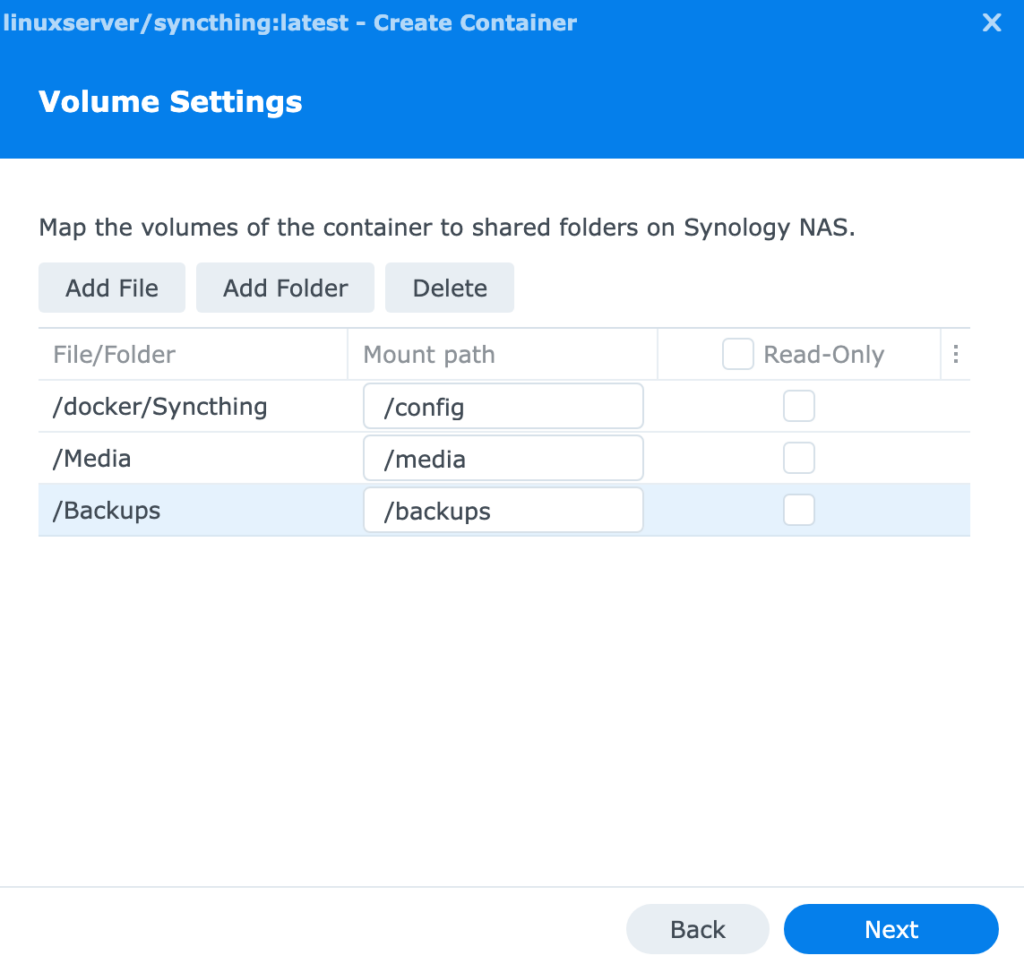
7. At the next screen, select Add Folder, then select the Create Folder button under Docker and create a folder named Syncthing. Set the mount path as /config for this folder (screenshot in the next step).
8. Add each shared folder that you’d like to access through Syncthing. The Mount Path name can be the name of the folder. Select Next.
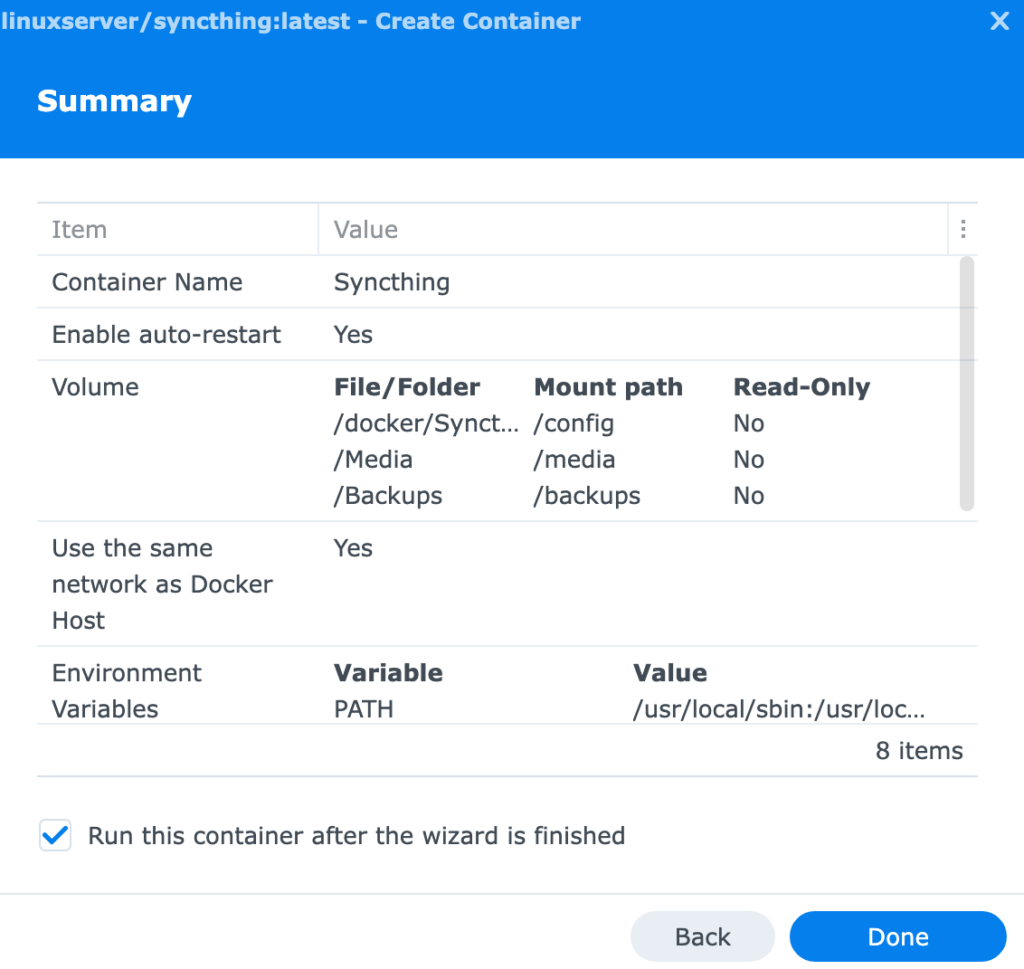
9. If everything looks good, select Done to create the container!
10. After the container starts up, you can access it using the URL below (substituting your Synology NAS IP address).
NOTE: If you’re using Synology’s Firewall, create an allow rule for TCP ports 8384 and 22000, as well as UDP ports 22000 and 21027.
https://[SYNOLGY_NAS_IP]:8384
Syncthing is extremely finicking when it comes to permissions. To avoid all of this, you can run the container as root, however, that’s generally not recommended. There are a few things that you must be aware of before moving on to the configuration of Syncthing.
1. The PUID and GUID of the user set above must have permission to each shared folder that you mounted. This means that if you used your personal user account and the “users” group (PGID 100), the “users” group must have read/write permission to the folder as well.
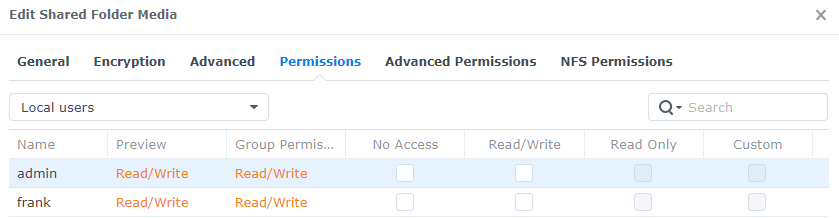
2. If the recycle bin is enabled on the shared folder, it will have a #recycle folder inside of it. By default, only administrators have permission to this folder, but Syncthing will throw an error if the user account doesn’t have permission to it.

To get around this, edit the shared folder in the Control Panel, then uncheck the restrict access to administrators only option and save.
This will allow users to see what’s inside of the Shared Folder, so if you do not want all users to have permission to the recycle bin, skip down to the next section and do not do this.
The user that you set above must have permission to the #recycle folder, but that doesn’t mean that all users must. The option above gives all users in the “users” group permission to the recycle bin.
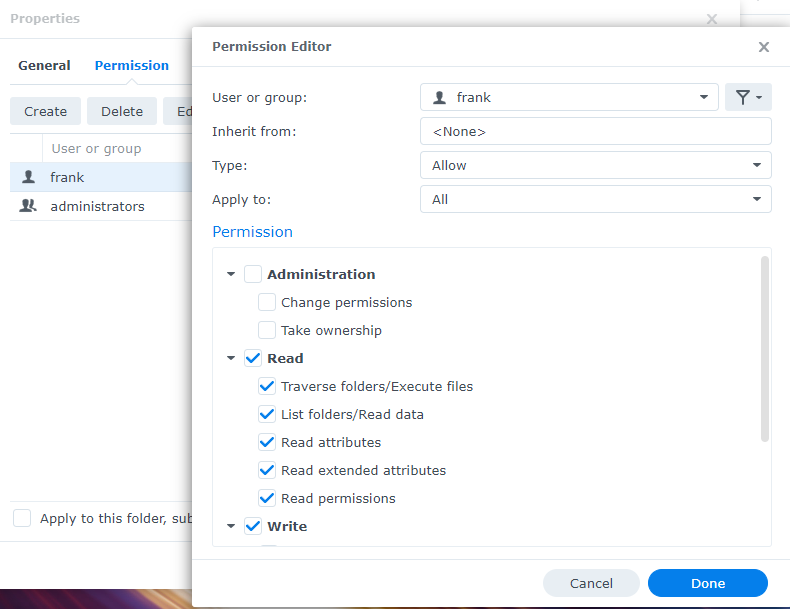
If you’d rather only give permission to an individual user, open the Shared Folder in File Station and right-click the #recycle folder, then select Properties.
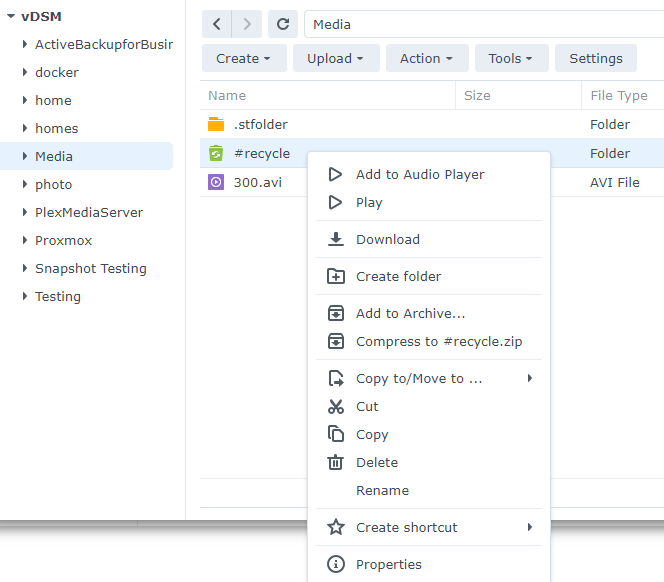
Select Permission, then Create. From there, you can select the user and then give read and write permission to the #recycle folder. The error will be gone in Syncthing!
Syncthing Configuration
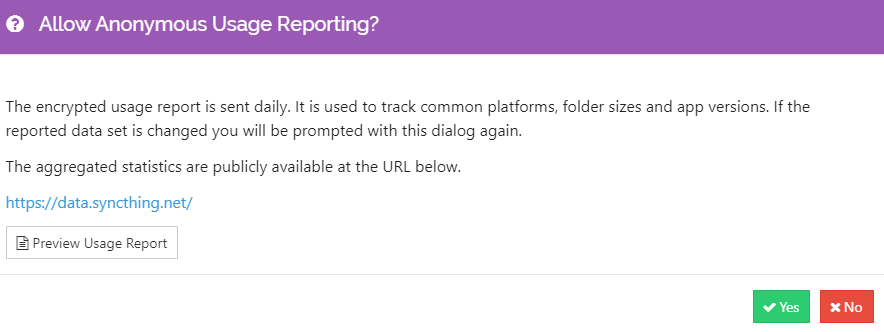
1. When you first navigate to the website, you’ll be asked to share anonymous usage. You can select yes or no depending on which you’d prefer.
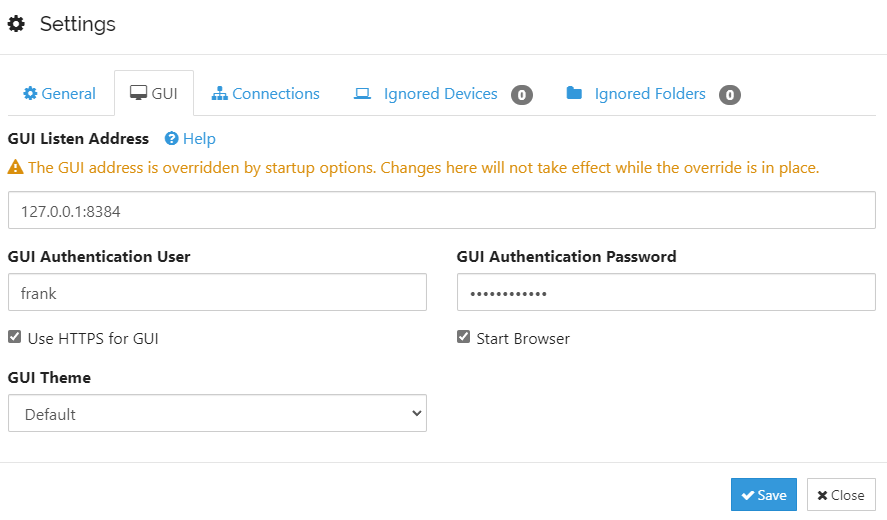
2. The next thing we’ll have to do is set a username and password for the Syncthing GUI. Select Settings in the Danger section.
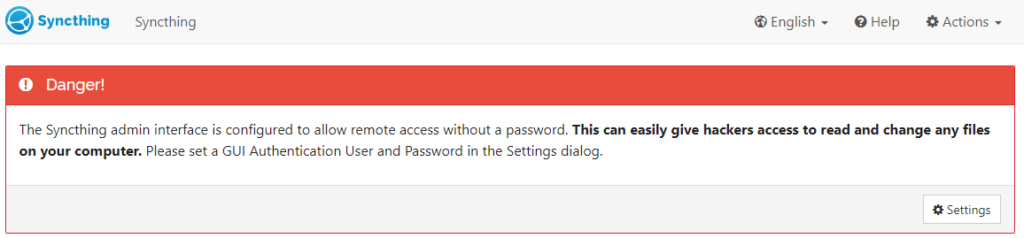
3. Select GUI, then set a GUI Authentication User and GUI Authentication Password, then Save. After you save, you’ll be prompted to enter the username and password.
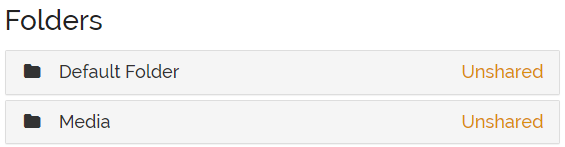
4. You can now select Add Folder in Syncthing, enter a Folder Label and Folder Path (the path will be what we specified above in the mount path), then Save.
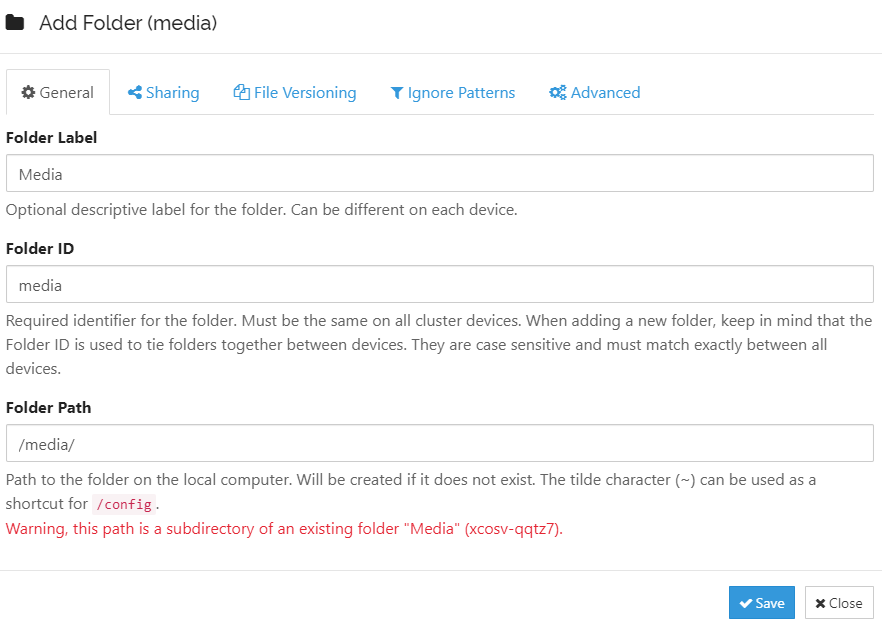
5. If the permissions are set properly, the folder will be labeled as Unshared. You can now sync this folder with a separate Syncthing server!
Conclusion & Final Thoughts
This tutorial looked at how to set up Syncthing on a Synology NAS. Syncthing runs really well on a Synology NAS, but the permissions configured in the container and on the NAS are very important. If you don’t have the permissions configured properly, you’re going to get a bunch of errors in Syncthing. It’s easy to set the container up to use the root user and avoid all of these issues, but you generally shouldn’t run containers as root unless you absolutely must.