In this tutorial, we will look at how to replace a failed drive on a Synology NAS.
When a hard drive fails on a Synology NAS (or any NAS for that matter), it’s a pretty stressful situation because the redundancy that you have may be entirely gone or at minimum, degraded. In situations like this, it’s best to replace the failing hard drive as quickly as possible so that you can repair the RAID array and get back to a point where the NAS is functioning properly.
There is a specific process that should be followed when looking at how to replace a failed drive on a Synology NAS (this applies to hard drives that are failing as well). If you need to purchase a new hard drive, please check out our recommended NAS hard drives!
How to Replace a Failed Hard Drive on a Synology NAS
We will look at how to replace a failed hard drive on a Synology NAS below. When a hard drive begins failing or has entirely failed, you will be notified in various places – however, it’s best to set up notifications to ensure that you’re emailed about it in case you don’t log in to the system. The drive below reported bad sectors when the recent S.M.A.R.T test was run.
1. Log in to DSM and open the Storage Manager. There are three total locations that will show you the exact hard drive that is having an issue and you will be informed that you should replace the drive as soon as possible. The first is when you open the Storage Manager.
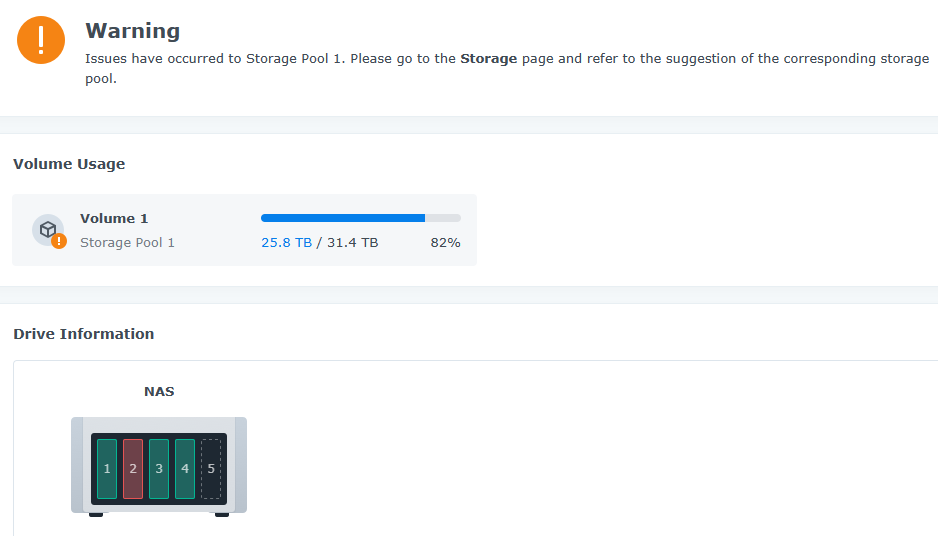
In the Storage Pool section, you will also see the drive that is failing.

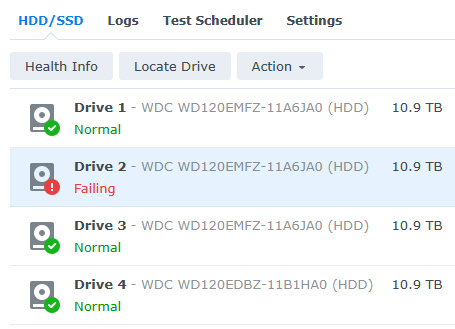
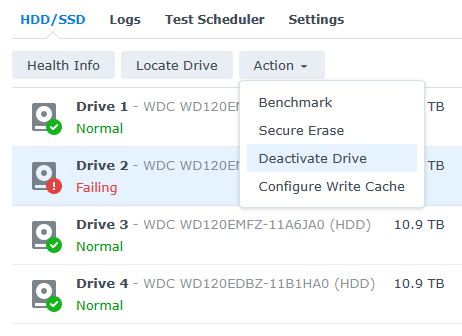
Finally, in the HDD/SSD section, you’ll see the drive that is failing.
2. When you are ready to replace the failing drive, navigate to the HDD/SSD section in the Storage Manager, select the drive, then Action, and finally, Deactivate Drive.
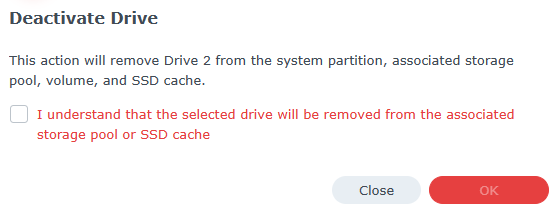
3. You will receive a message stating that the drive will be removed from the storage pool. If you’d like to proceed, select the checkbox and then select OK. After the hard drive is deactivated, the storage pool will enter a degraded state (and the NAS will beep) – this is normal.
After a few seconds, the drive will be fully deactivated. After it’s deactivated, remove the hard drive from your Synology NAS (make sure you select the correct hard drive) and add the new hard drive.
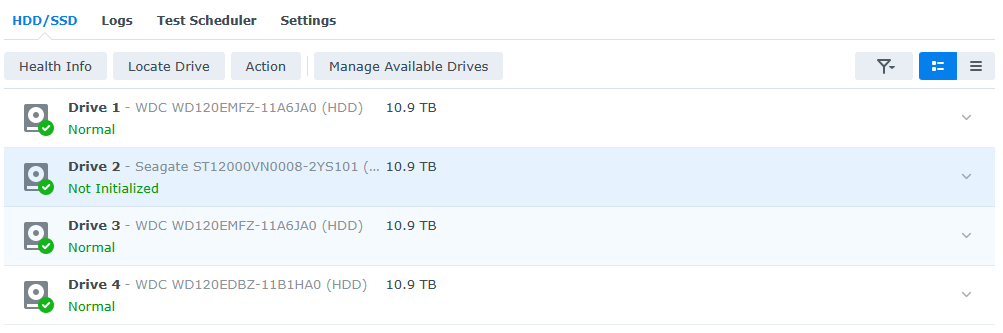
4. You will see the new hard drive added to the NAS and it will be in a Not Initialized state. The screenshot below shows how it should look.
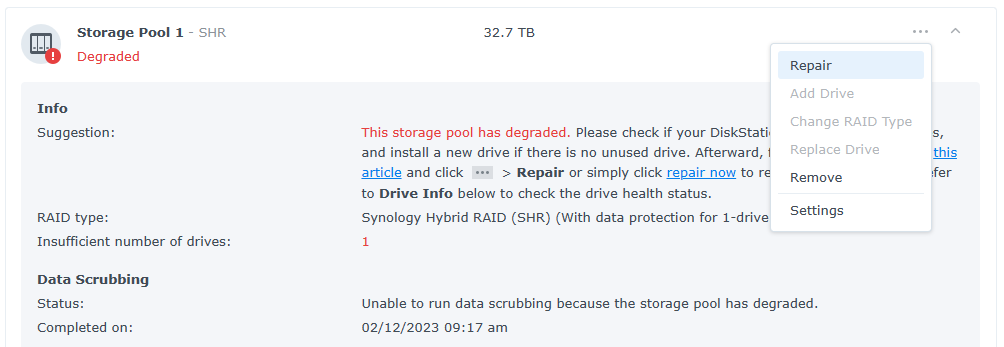
5. Open the Storage Pool where you’d like the hard drive added, select the three ellipses, then Repair.
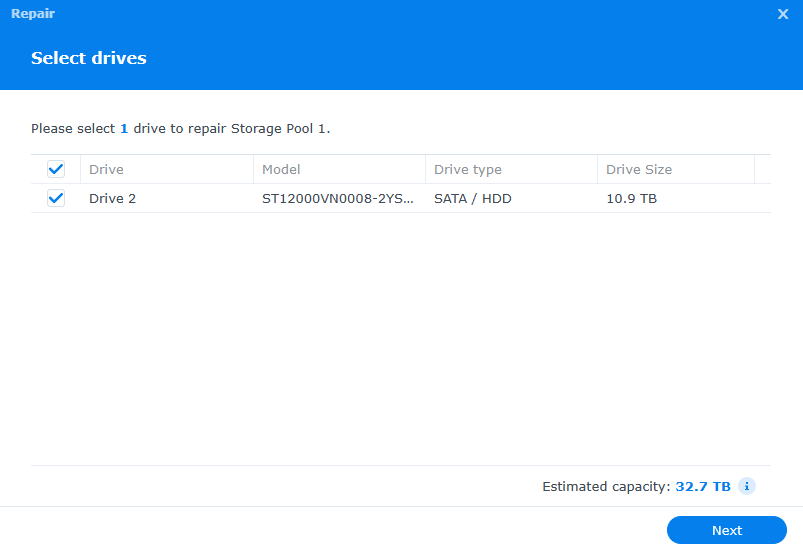
6. After selecting repair, you should see the new drive that you added. Select the hard drive, then select Next.
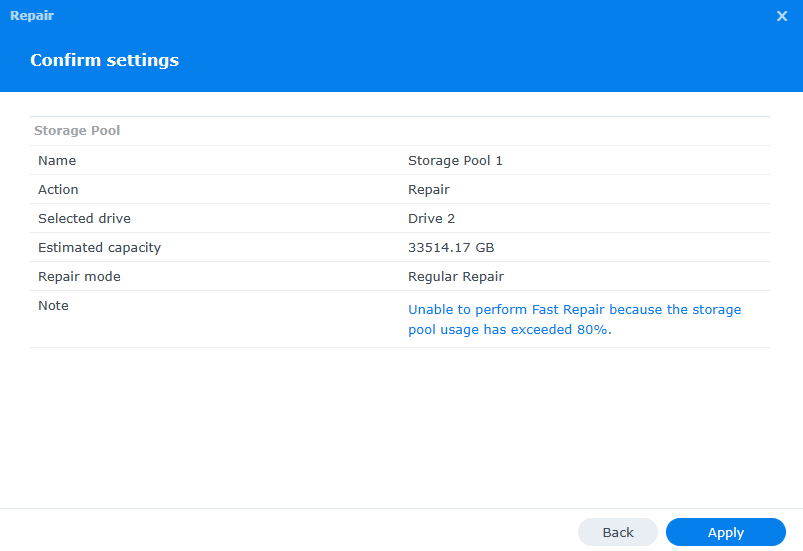
7. Confirm the information is accurate, then select Apply.
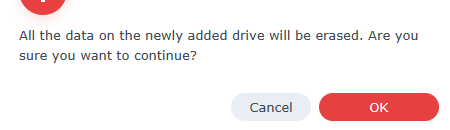
8. You will receive a message stating that the newly added hard drive will be replaced. If you are comfortable proceeding, select OK.
NOTE: All information on this hard drive will be lost, so only select OK if you are ready to add this hard drive to the storage pool.
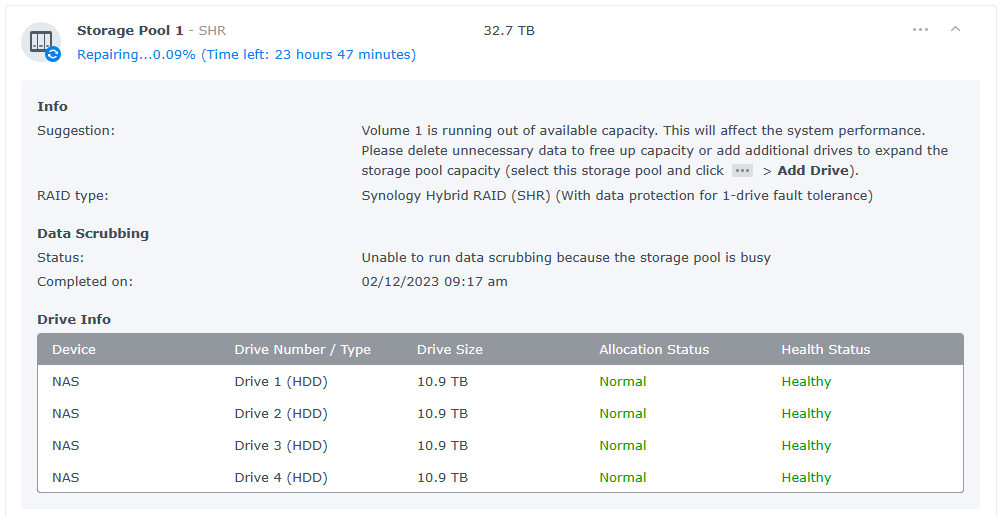
9. The storage pool will now begin to initialize and repair.
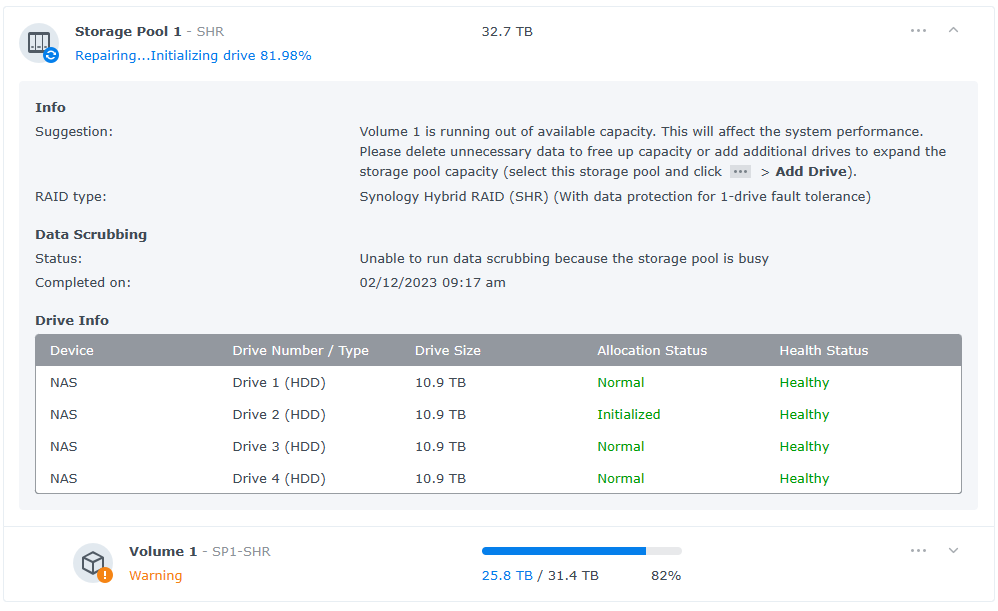
10. As soon as it’s finished (depending on how much data you have, this can be a 24+ hour process), your storage pool will be back to normal and the storage pool will no longer be in a degraded state!
Conclusion: How to Replace a Failed Drive on a Synology NAS
This tutorial looked at how to replace a failed drive on a Synology NAS. Overall, it’s in your best interest to replace a failed or failing hard drive as soon as it occurs. This limits risk overall and will allow the RAID array to rebuild with the new hard drive. The process on the NAS is extremely straightforward, but I do recommend running an extended S.M.A.R.T test as soon as the RAID array is repaired (if you can’t do it before) so that you’re sure the new hard drive doesn’t have issues as well.
Thanks for checking out the tutorial on how to replace a failed drive on a Synology NAS. If you have any questions on how to replace a failed drive on a Synology NAS, please leave them in the comments!