In this tutorial, we will look at how to use Rsync on a Synology NAS.
Rsync is a tool that can be used to sync files from one location to another. This tutorial will look at how to use Rsync on a Synology NAS from a general perspective, using a Linux device to show the process. After the initial Rsync job finishes, future backups are incremental (as opposed to full). For this reason, the initial backup will take significantly longer than subsequent backups.
The process below will look at how to use Rsync on a Synology NAS with Linux as the example, but please be aware that there are many devices you can utilize Rsync on!
How to Use Rsync on a Synology NAS
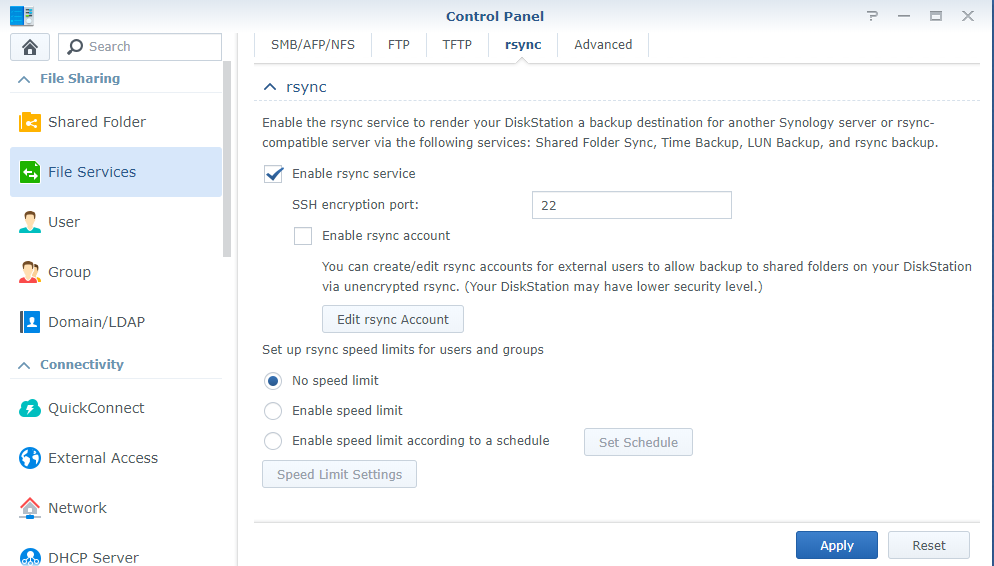
1. Log in to DSM, open the Control Panel, select File Services and ensure that enable rsync service is selected.
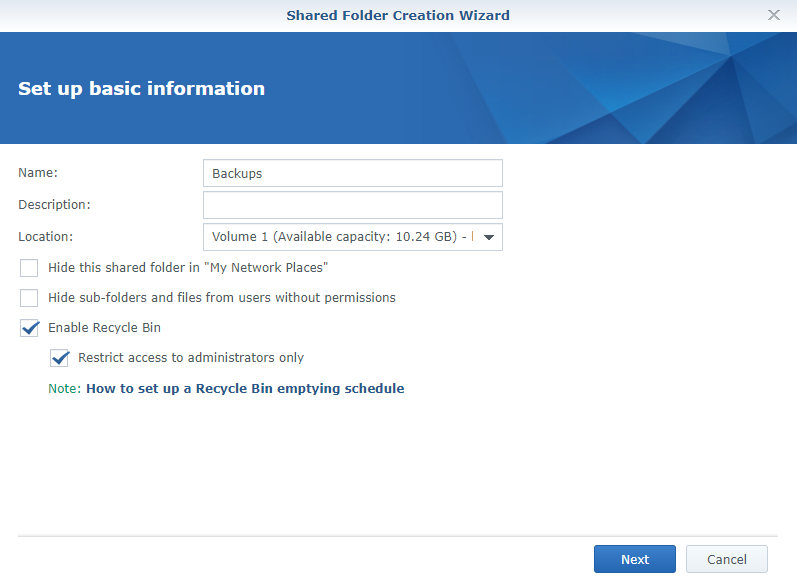
2. Create a Backups shared folder (you can use whatever name you’d like, or can utilize one that already exists) and note the volume number (you will need this later).
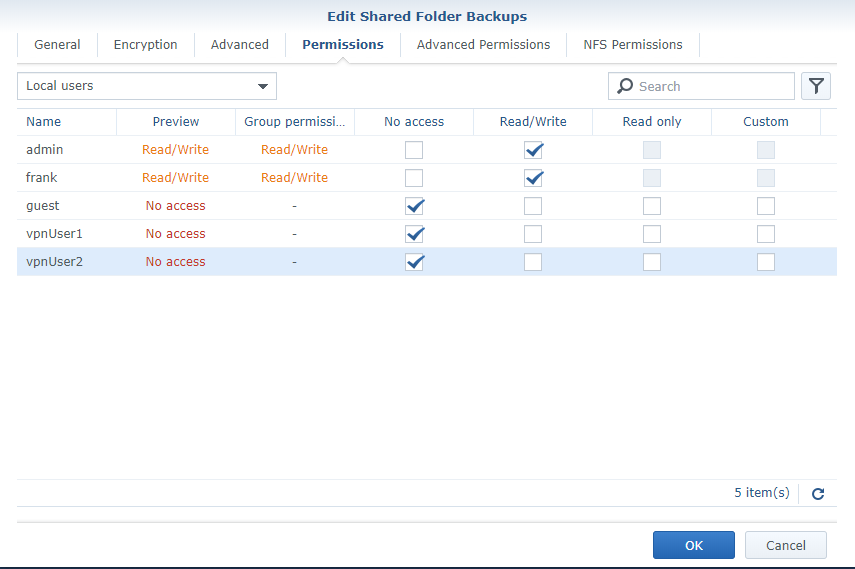
3. Ensure that the user account you will be authenticating with has read/write access to the shared folder.
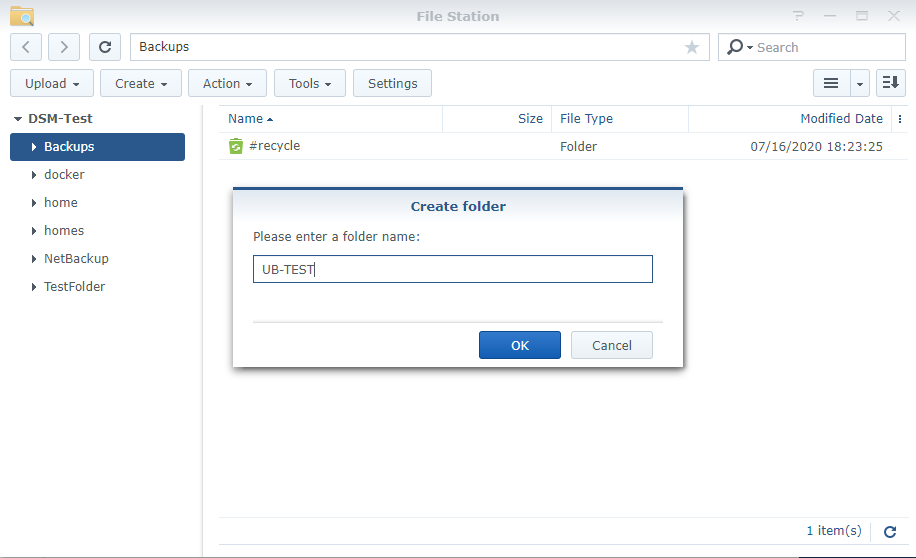
4. Create a subfolder in the shared folder with the name of the PC that you will be backing up (if you don’t want to back up directly to the root folder).
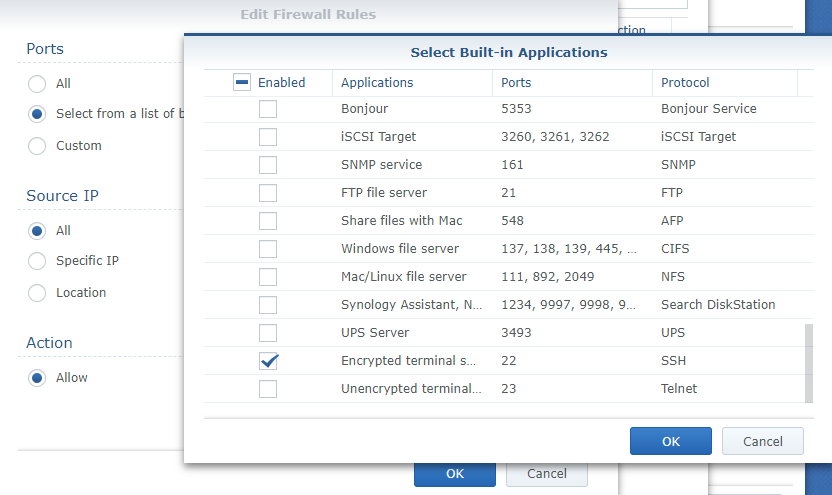
5. If your firewall is enabled, create a firewall rule that opens port 22 for SSH.
NOTE: you can secure this one step further if you’d like by only opening port 22 traffic to internal IP addresses (use your internal IP address range). This rule must be above any “deny” rules that exist.
6. Log in to your Linux PC (or whatever device you’ll be using) and open Terminal. At this point, we will begin to construct our Rsync command. Many different parameters can be added to a Rsync command, but in this tutorial, we will back up our entire Linux hard drive to our Backups device subfolder on our Synology NAS. The Rsync command will be constructed as follows:
sudo rsync -avnx / [USERNAME]@[NAS IP ADDRESS]:/[NAS VOLUME]/Backups/[DEVICE NAME]
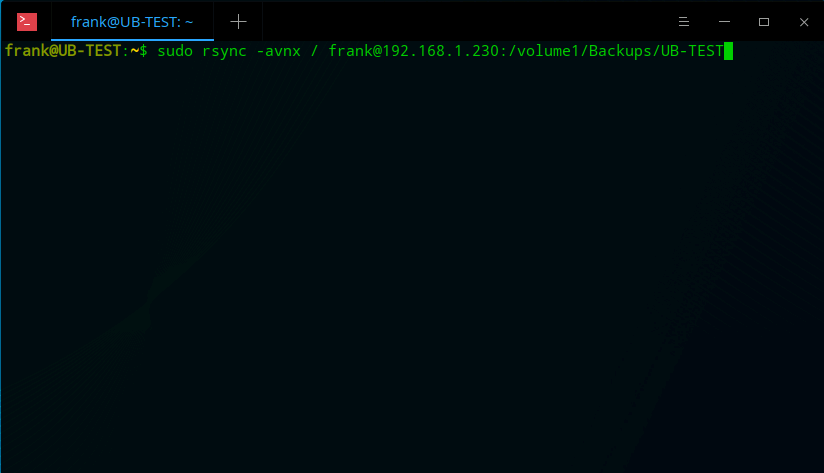
NOTE: the “n” command line parameter above will run a dry run when this is executed. This will NOT copy any files over. It will simply inform the user what files will be copied when the command (with the “n” parameter removed) is executed. It is also important to note that the first “/” in the Rsync command is the source data that we will be copying to the NAS.
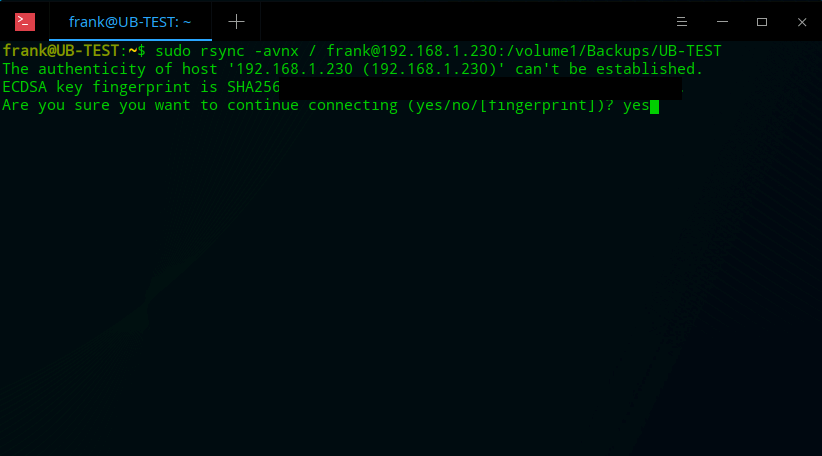
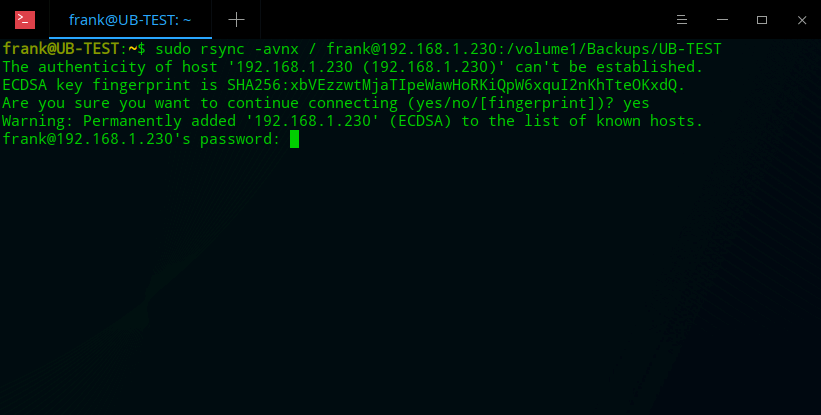
7. If this is your first time running the command, you will be asked to accept the ECDSA key fingerprint. Type yes and select the enter key.
8. Enter the password of your Synology NAS user account that has permission to the shared folder.
NOTE: you might need to enter the password of your Linux user first.
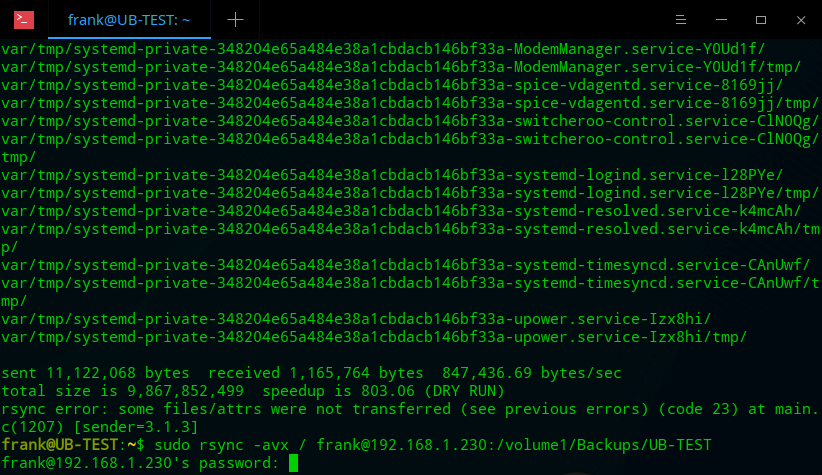
9. When the dry run has finished (assuming the results are what you were expecting), remove the “n” parameter, and run the command. When prompted, enter the NAS password once again.
sudo rsync -avx / [USERNAME]@[NAS IP ADDRESS]:/[NAS VOLUME]/Backups/[PC NAME]
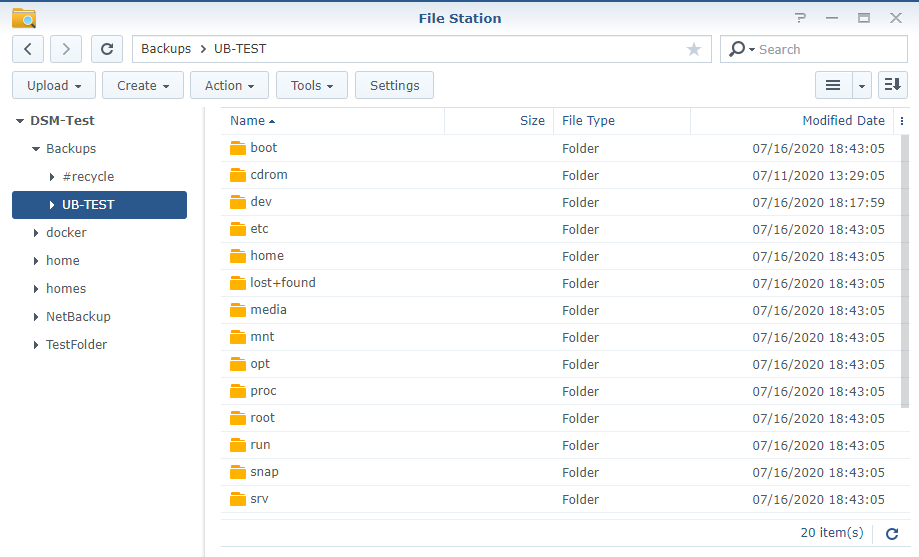
10. When the process is completed, you will see that your files are now on your Synology NAS in the folder we created.
Conclusion – How to Use Rsync on a Synology NAS
This tutorial looked at how to use Rsync on a Synology NAS. The first time executing this, all files will need to be backed up which will take a little longer than subsequent backups. Rsync does incremental backups, which means that it will view the files that are changed and back them up to the Synology NAS.
This process is NOT automated! You can only back up your machines when you execute the command. If you’d like to automate this process by using SSH keys and Cron, please check out our tutorial!
It’s always a good idea to back up your Synology NAS offsite. If you’re interested in doing that, check out our tutorials on how to back up your Synology NAS to a Raspberry Pi or Backblaze B2!