Backup a Synology NAS to a Raspberry Pi using Hyper Backup

This tutorial we will look at how to backup a Synology NAS to a Raspberry Pi using Hyper Backup.

We will first setup an Rsync server on a Raspberry Pi so that it can be used with Synology’s Hyper Backup. After completing this, you will be able to use your Raspberry Pi as an on-site or off-site backup destination. There are two sections that will guide you through the process of setting up the server. The first will show you how to format an external hard drive and install the Rsync server on your Raspberry Pi. After the setup is complete, you should be able to see and backup your NAS to your Raspberry Pi and attached hard drive. The second section will show you how to setup your Raspberry Pi to automatically connect to your OpenVPN server when powered on. This is incredibly helpful when using your Raspberry Pi as an offsite backup, as you can simply “power on” the Raspberry Pi and it will automatically connect to your VPN which means the backup job can start without interacting with the Raspberry Pi. Leave it at a family member or friends house and ask them to turn it on and you are good to go!

Prerequisites

1. Ensure that you have installed Raspberry Pi OS and can SSH into your Raspberry Pi.
2. If you will be completing the second portion of this tutorial for offsite backups, ensure that your OpenVPN server is setup to assign static IP addresses.

These are the two prerequisites we will need to complete to backup a Synology NAS to a Raspberry Pi.

Setup a Raspberry Pi as an Rsync Server – Backup a Synology NAS to a Raspberry Pi

1. The first step is to format your external hard drive as ext4 and make a file system. NOTE: it’s best to try and use an external hard drive that has its own power supply as you don’t want to rely on the Raspberry Pi powering your external hard drive if it isn’t absolutely necessary.

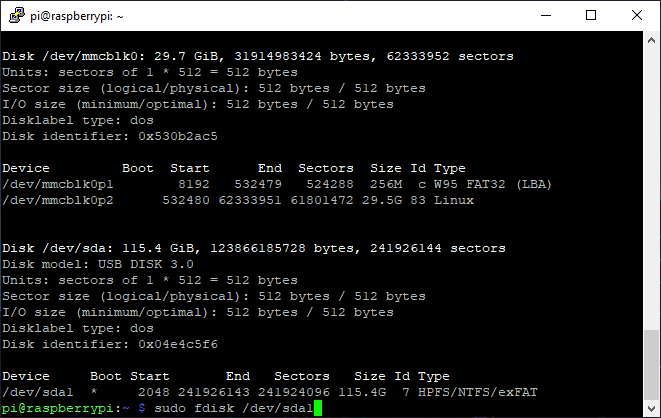
2. Run these commands to find your external hard drive, format it, and make a file system.

sudo fdisk -l
sudo fdisk /dev/sda1

NOTE: Ensure that you are using the path of your external hard drive.

format disk

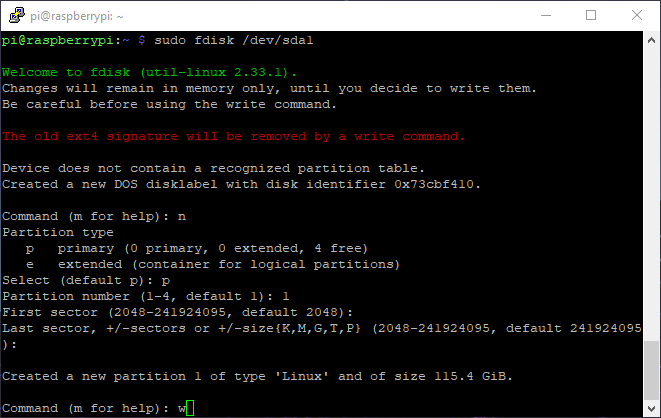
2. Type “n” to create a new file system and use all the default values by pressing “enter”, until the last step where you will need to press “w” to write.

create new file system

3. Reboot the system.

sudo reboot now

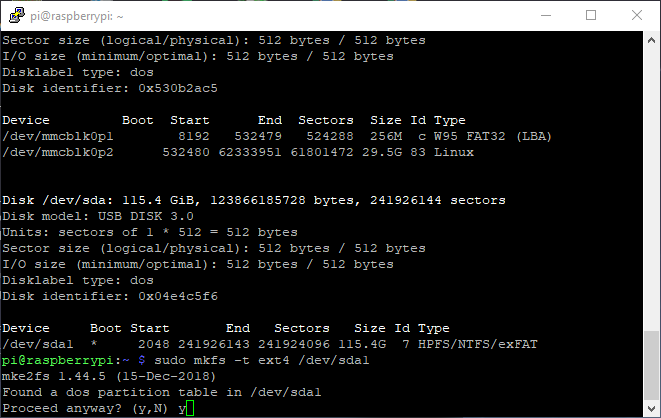
4. Ensure that your external hard drive has the same path as earlier and make a file system.

sudo fdisk -l
sudo mkfs -t ext4 /dev/sda1
file system confirmation

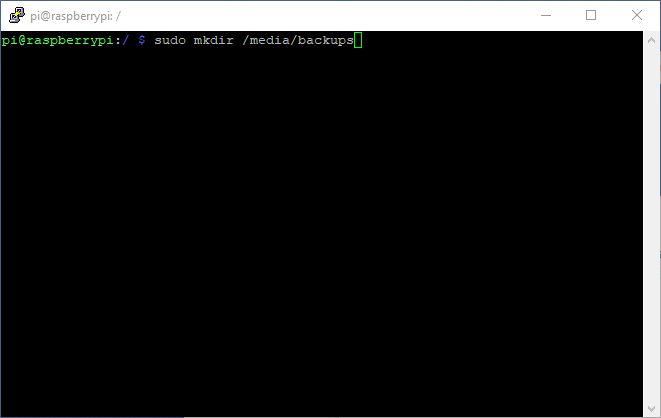
5. Now that we have formatted our drive, we need to ensure that this drive automatically mounts on boot. I will be mounting this to the /media/backups folder that I create, but you can put this wherever you’d like.

sudo mkdir /media/backups
creating directory

6. The next step is to get the UUID of your external hard drive so that we can update the fstab file and mount the drive on boot. Run the command below and copy the UUID of your external hard drive. When copied, run the command below to update the fstab file.

sudo blkid
sudo nano /etc/fstab
editing fstab file

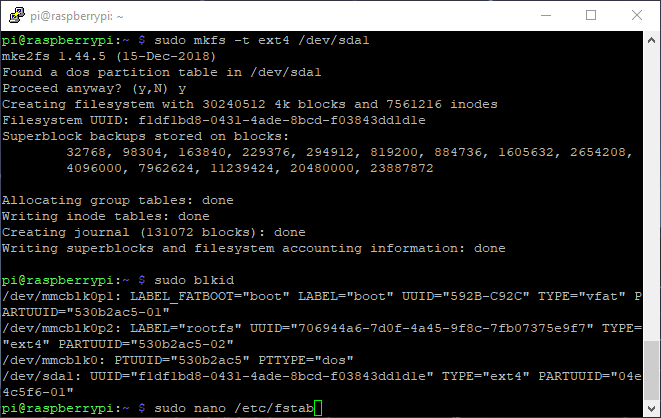
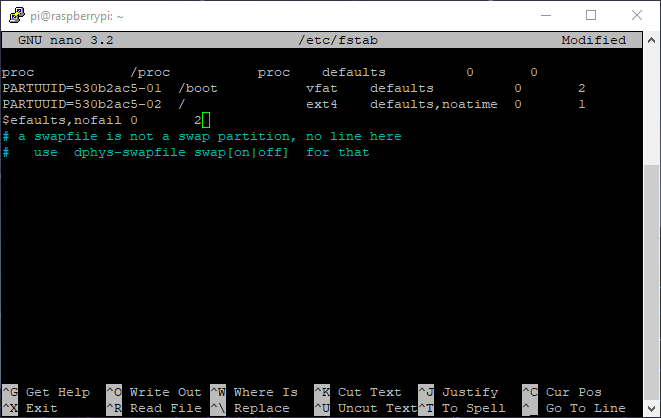
7. Enter in the line exactly as shown below and write out the file by pressing CTRL + O when complete. NOTE: You must “tab” between each block of text (each space below). It is also important to note that the “nofail” parameter allows you to boot the Raspberry Pi without the external hard drive attached – if this doesn’t exist, your Raspberry Pi will throw an error when the external hard drive is not connected and won’t boot.

UUID=[the UUID of your external hard drive] /media/backups ext4 defaults,nofail 0 2
fstab changes

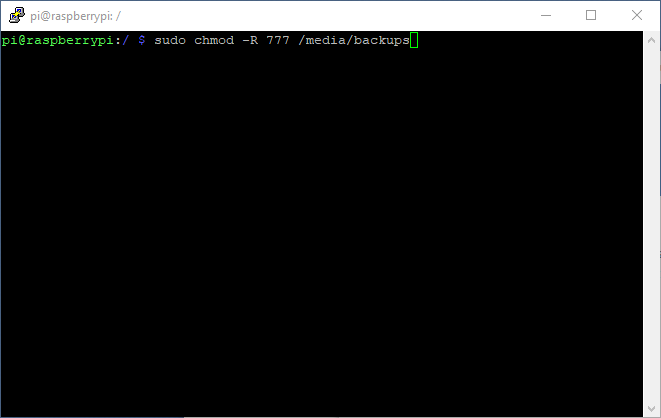
8. Give everyone read/write access to the newly created folder where your drive will be mapped. When done, reboot your Raspberry Pi and ensure that the drive mapped properly.

sudo chmod -R 777 /media/backups
sudo reboot now
changing the permissions on the directory created

9. The drive is now formatted and mounted. The next steps are to setup the Rsync server. Run the command below to edit the Rsync server file.

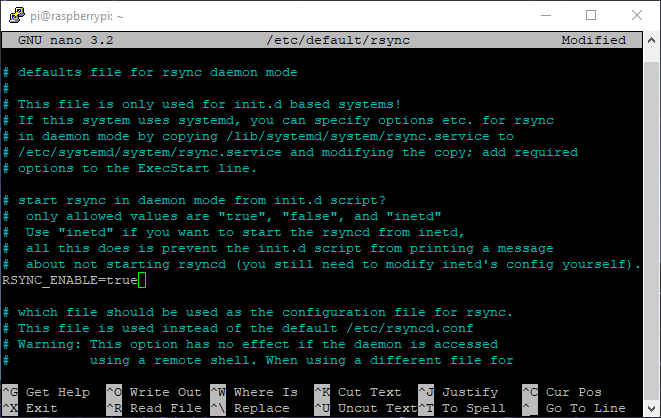
sudo nano /etc/default/rsync
editing rsync file

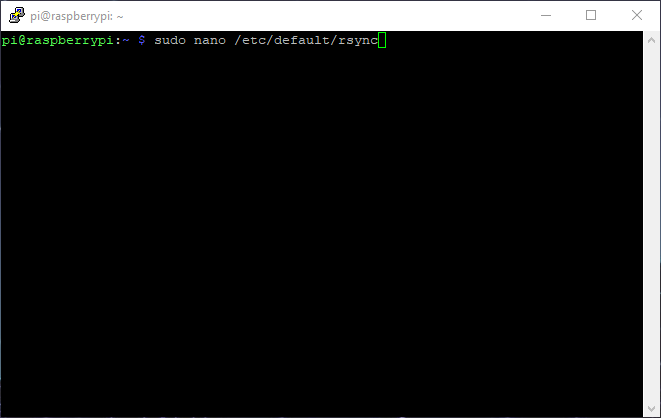
10. Change “RSYNC_ENABLE” from “false” to “true”.

changing rsync_enable from false to true

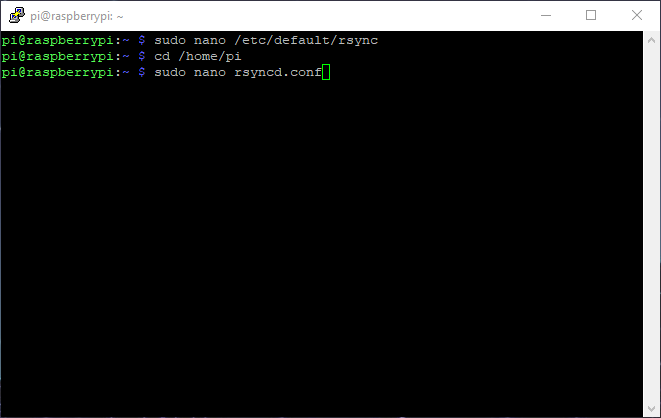
11. Navigate to your “pi” users home directory and create an “rsyncd.conf” file. NOTE: since we will be utilizing SSH for our Rsync backup, the setup is different than a traditional Rsync server.

cd /home/pi
sudo nano rsyncd.conf
editing rsyncd.conf file

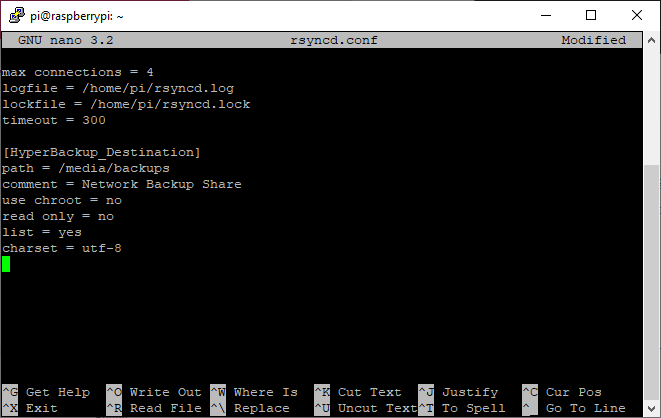
12. In your newly created file, enter the text below and save by pressing CTRL + O.

max connections = 4
logfile = /home/pi/rsyncd.log
lockfile = /home/pi/rsyncd.lock
timeout = 300
[HyperBackup_Destination]
path = /media/backups
comment = Network Backup Share
use chroot = no
read only = no
list = yes
charset = utf-8
addint settings to rsyncd.conf file

13. Enable the Rsync service. This step may not be necessary, but it doesn’t hurt to run. Reboot the system.

sudo systemctl enable rsync
sudo reboot now

MOUNTED DRIVE TEST

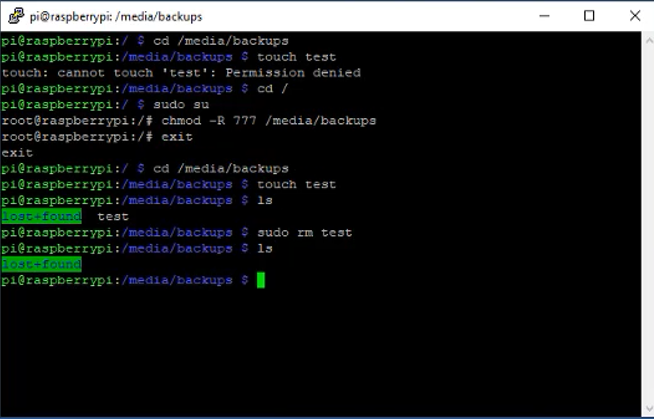
Before proceeding, ensure that you are able to create a file in the newly created folder that is mapped to your external hard drive.

cd /media/backups
touch test

If you get a permission denied error, you need to grant users read/write permissions to the directory using root.

sudo su
chmod -R 777 /media/backups
exit

Ensure that you can now create a file.

cd /media/backups
touch test

If you can, remove the newly created file.

sudo rm test
removing test folder

At this point, you can connect to Hyper Backup and configure the Rsync backup job. We will be connecting to our Raspberry Pi using the default username (pi) and password (raspberry – this should be changed). This will allow the backup job to utilize SSH which will keep all traffic encrypted. You will also be able to setup client-side encryption in later steps if you’d like to encrypt the backup files.

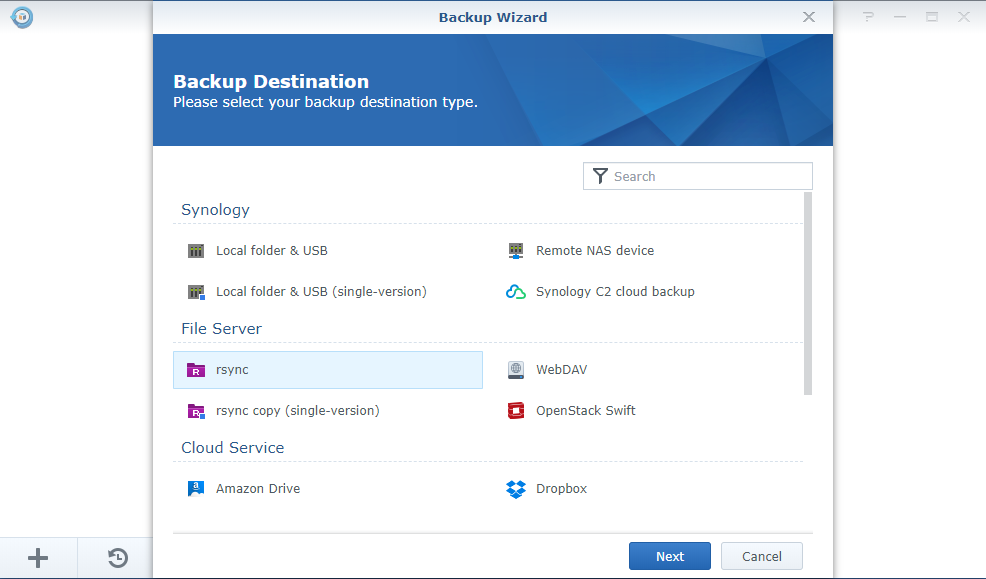
15. Open Hyper Backup and Create a new backup job. Select Rsync as the destination.

hyper backup rsync task creation

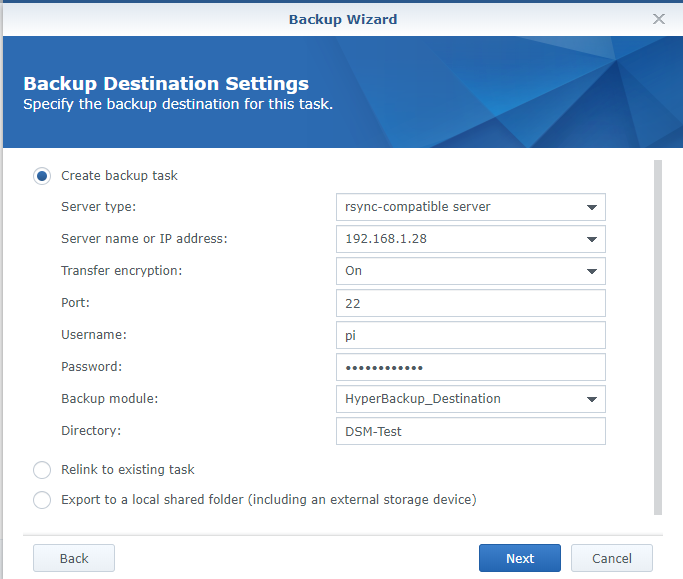
16. At the next step, configure the backup job as shown below. NOTE: you will need to substitute your Raspberry Pi’s IP address or hostname (default hostname is raspberrypi). The “Directory” text field is your backup’s file name.

rsync setup creation

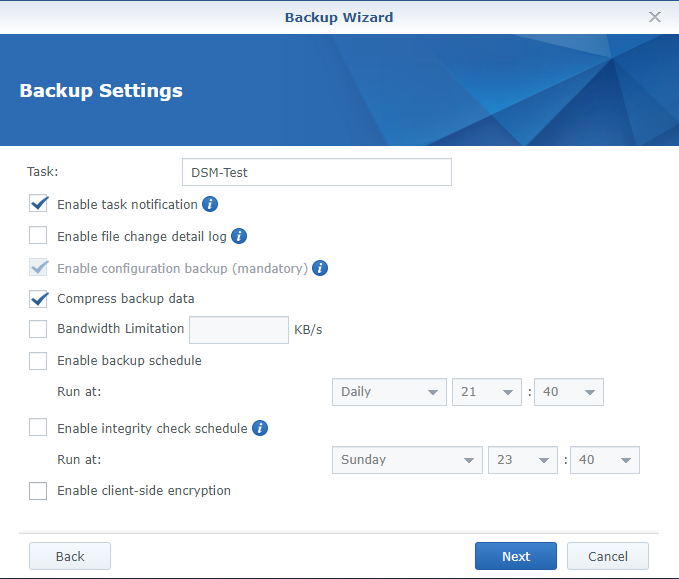
17. Configure the folders, applications, backup settings and proceed. NOTE: if you want to enable client-side encryption, you can select it here. On my production server, I use this option as my Raspberry Pi is setup as an offsite backup and I want to ensure the data is protected. It is important to note that if you lose this password or encryption key, you will be unable to restore your data. This step is optional.

task setting changes in dsm

The Rsync server setup process is now complete. At this time, if you plan on using your Raspberry Pi as an onsite backup, you don’t have to go any further. If you intend on using your Raspberry Pi as an offsite backup, the next steps will walk you through the process of setting up your Raspberry Pi to automatically connect to your OpenVPN server on boot. This allows you to put this device at a friend or family members house and ensure that it boots up and connects back to your home network without any user interaction.

Configure your Raspberry Pi to Automatically Connect to OpenVPN on Boot!

As stated earlier, I decided to setup my Raspberry Pi to automatically connect to my OpenVPN server so that I can have a family member turn on the Raspberry Pi and ensure it has an ethernet cable plugged in. I believed that if the process was more complex than that, I wouldn’t use it very often as I am using this as an offline backup. I am using the VPN Server application on my Synology NAS but any OpenVPN server will work. Just ensure that you have your “.ovpn” configuration file.

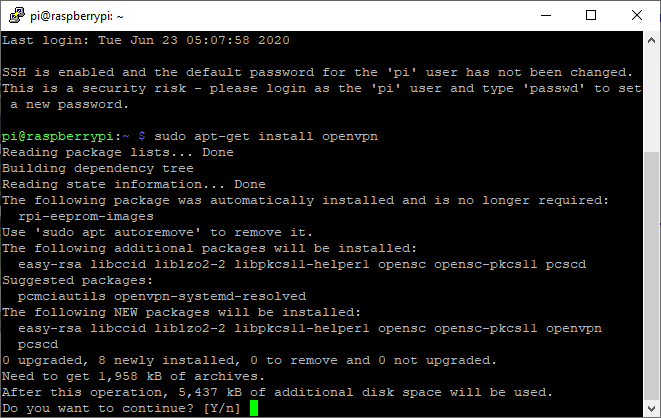
1. Install OpenVPN on your Raspberry Pi.

sudo apt-get install openvpn
installing openvpn on raspberry pi

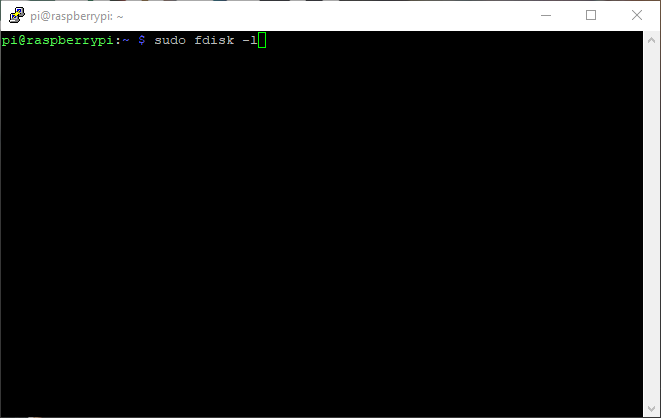
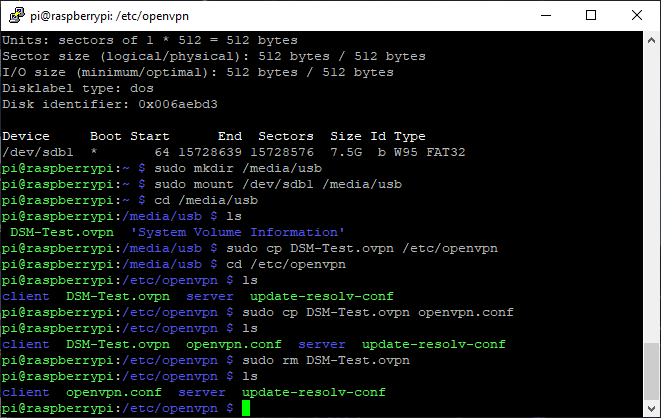
2. To transfer my “.ovpn” file to my Raspberry Pi, I inserted an external USB drive, mounted the drive to a local folder and copied the files to the OpenVPN directory. Follow the instructions below:
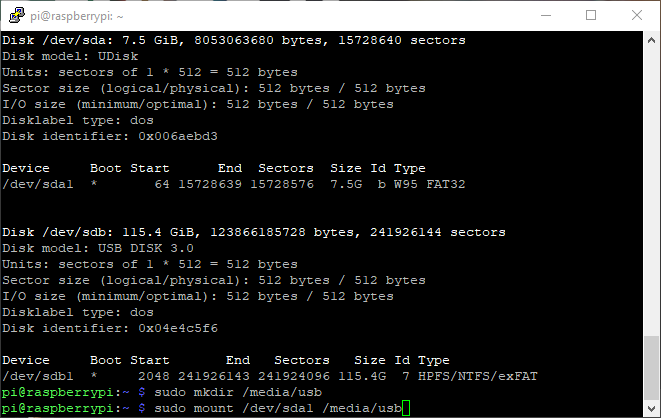
sudo fdisk -l
sudo fdisk -l command

NOTE: If you don’t have an OpenVPN file already configured, you can use this template. Ensure that you add your DDNS name to the top and the correct certificate info at the bottom.

dev tun
tls-client
remote [YOUR DDNS NAME] 1194
push "redirect-gateway def1"
pull
proto udp
script-security 2
comp-lzo
reneg-sec 0
cipher AES-256-CBC
auth SHA256
auth-user-pass .secrets
keepalive 10 120
<ca>
-----BEGIN CERTIFICATE-----
[YOUR CERT]
-----END CERTIFICATE-----
-----BEGIN CERTIFICATE-----
[YOUR CERT]
-----END CERTIFICATE-----
</ca>

3. Make a new directory and mount the USB drive to that directory.

sudo mkdir /media/usb
sudo mount /dev/sdb1 /media/usb
mounting usb drive on raspberry pi

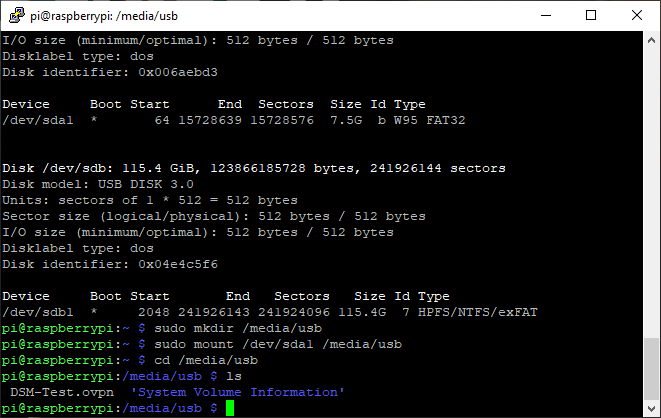
4. Navigate to the mounted folder.

cd /media/usb
showing contents of usb directory

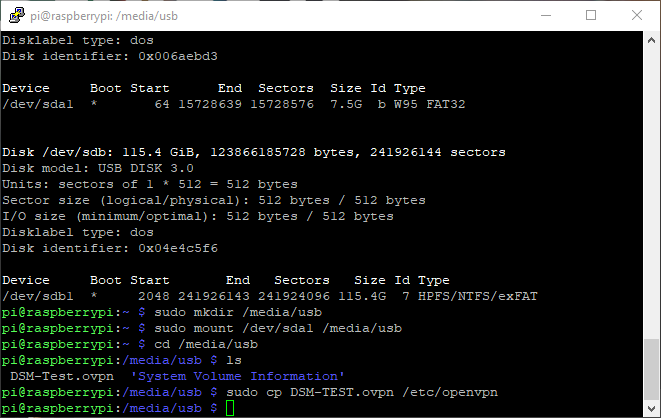
5. Copy the “.ovpn” file to your “/etc/ovpn” folder.

sudo cp DSM-TEST.ovpn /etc/openvpn
copying the openvpn file to use as a backup

6. Navigate to the “openvpn” folder, copy the file to the same directory and ensure that the name is exactly this: “openvpn.conf”. When completed, remove the old file.

cd /etc/openvpn
sudo cp DSM-Test.ovpn openvpn.conf
sudo rm DSM-Test.ovpn
removing the openvpn file

7. Next, we need to create a “.secrets” file.

sudo nano .secrets
creating a secrets file to store credentials

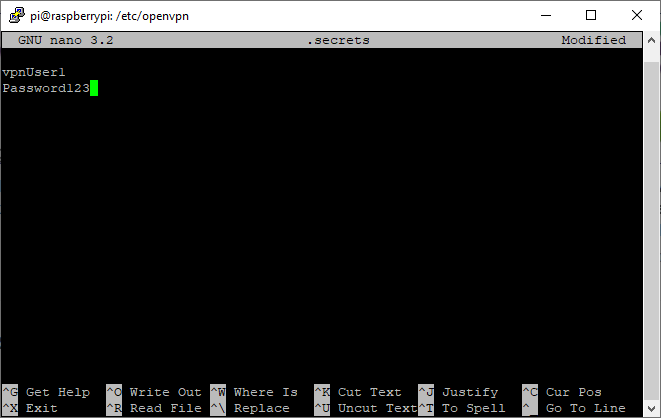
8. Enter in the username and password of your VPN user. Save the file by pressing CTRL + O.

adding username/password to secrets file

9. Change the permissions on the newly created “.secrets” file.

sudo chmod 400 .secrets

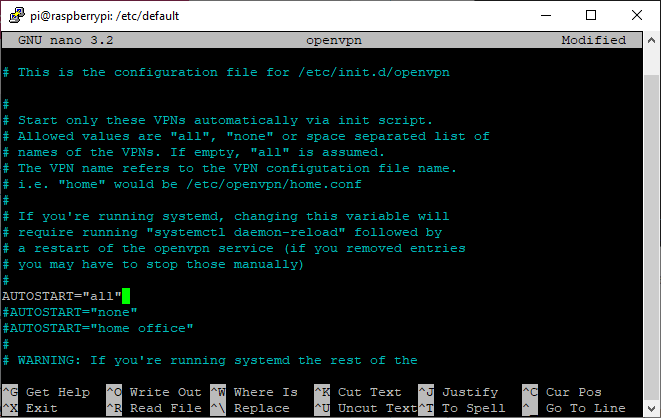
10. Navigate to the “/etc/default” directory and edit the “openvpn” file.

cd /etc/default
sudo nano openvpn
openvpn file creation

11. Uncomment “autostart=”all” and save the file by pressing CTRL + O.

changing autostart to be on

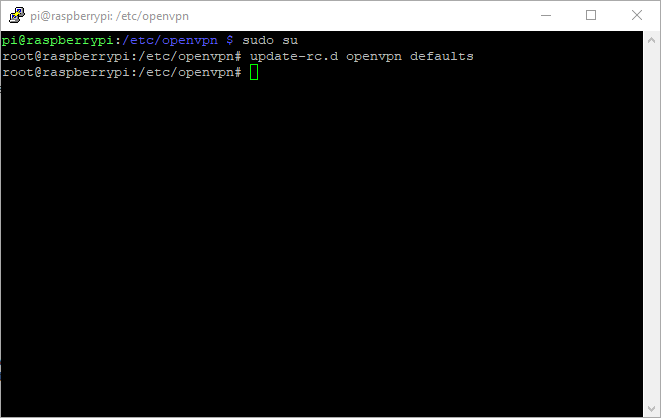
11. Update the OpenVPN service so that it starts by default. Ensure that you are root before running this command.

sudo su
update-rc.d openvpn defaults
updating rc.d openvpn file

11. Reboot your Raspberry Pi.

sudo reboot now

The Raspberry Pi should now boot up and automatically connect to your VPN! When you test your VPN, you will need to be connected to an external network. If you have a hotspot on your cell phone, this is the “easiest” way to test.

VERY IMPORTANT SETUP INFORMATION

Your home network and VPN network will be on different subnets which means that devices will only be able to talk to the machines on their subnet. In order to have each subnet talk to each other (in my case, 192.168.1.X and 10.5.0.X), a static route will need to be configured in your router. I cannot go over the setup steps for this as each router is different, but below is a screenshot of the static route that I configured.

static route creation on router

SETUP NOTES

  • The combination of the “Destination IP Address” and “IP Subnet Mask” is what will determine what addresses can speak to the “Gateway IP Address”. This entry should be listed as your VPN’s dynamic IP range (in my case, 10.5.0.0).
  • The “Gateway IP Address” is listed as your Synology NAS if you are using the VPN Server application.
  • After you configure your Static Route, you must restart your Synology NAS so that it picks up the newly added static route.
  • You will notice that you cannot ping from subnet A (192.168.1.0/24) to subnet B (10.5.0.0/24) without creating a static route. This static route is what will allow you to setup your Raspberry Pi’s static VPN IP address and connect to it.

Conclusion – Backup a Synology NAS to a Raspberry Pi

This tutorial showed how to backup a Synology NAS to a Raspberry Pi using Hyper Backup. If you care about your data, backups are integral. However, when you’re trying to backup a NAS, you generally have to pick and choose what you want to backup as NAS units normally have many terabytes of data stored. The process above was my solution to backing up “important” data, but not important enough data that I wanted to pay for cloud storage.

For my important data that I can’t lose, I use Backblaze B2 and I’m happy to pay the monthly costs. However, for my media, I couldn’t justify paying $240 a year for 4TB of storage that rarely changes and isn’t super important, which is why I’m very proud of this solution. For ~$130, I have an off-site backup solution that works just as well as some cloud offerings and can be restored significantly quicker than any cloud storage provider offers. This won’t be the best solution for everyone, but it’s a relatively easy way to backup a Synology NAS to a Raspberry Pi.

If you made it this far, thanks a lot for checking out the tutorial! If you have any questions, please leave them in the comments and I will do my best to answer them!

WunderTech

Frank is an IT professional with 13+ years experience and the creator of WunderTech. He focuses on sharing his experience with others on computer hardware, servers, software, networking, and self-hosted apps. He has a BS in Computer Information Systems and an MBA. Learn more about Frank in his bio.

This Post Has 28 Comments

  1. Oronzo

    Just a question: in the image 16 I can see you’ve used Transfer Encription YES, in port 22. But, if you’re on a OpenVPN, is it necessary? It seems like a double encription, an I right?

    1. WunderTech

      Technically, OpenVPN sets up a secure tunnel back to your local network so the tunnel between your local device and the Raspberry Pi will be encrypted. However, transfer encryption ensures that the actual backup being transferred locally is encrypted. So yes, you’re right in saying that they are two forms of encryption, but they differ in how the traffic is encrypted.

      For my personal use, I actually kept encryption off for a while. However, before I wrote this tutorial, I thought it was a bad practice to tell people to do that so I modified it to use encrypted traffic.

      You should be good either way, though! If I can answer any other questions, please let me know! Thanks for checking out the tutorial!

  2. Freek

    Thank you very much for this elaborate tutorial, appreciate it!

    I have a question regarding the user you use. You wrote: “We will be connecting to our Raspberry Pi using the default username (pi) and password (raspberry – this should be changed). This will allow the backup job to utilize SSH which will keep all traffic encrypted.”

    Is it also possible to set this up using a different, non root-user, account? I tried doing so myself and I keep getting the error: ‘Failed to establish the SSH connection’ in Hyper Backup while setting up the task. I can only get it to work using a non-root user when disabling transfer encryption and thus using port 873 but that is not what I want. Am I missing something?

    Thank you!

    1. WunderTech

      Thanks for checking out the tutorial!

      Yes, you should be able to use any user you’d like. The issue is most likely that the rsyncd.conf file is configured in the Pi users directory. Did you try and configure it for the user that you’d like to use?

      Let me know how it goes and we can continue troubleshooting!

  3. Linker

    There is a misspelled in “UUIID=[the UUID of your external hard drive] /media/backups ext4 defaults,nofail 0 2” not UUIID but UUID.
    It does not generate an error but the backup takes place on the sd card instead of on the external disk until the memory is full and hyber backup goes into error as if it no longer found the destination.

    1. WunderTech

      Thank you so much! I really appreciate you letting me know! I just updated the page.

  4. Fulg

    Thank you very much, you made my day ! I’ve been searching for a simple and working tutorial for this… and finally found this one !

    Deployed at home in 30 minutes, backing up now 🙂

    Thanks again

    1. WunderTech

      Glad you got it to work, thanks for checking out the tutorial!

  5. dvzw

    @WunderTech — First off, I am so appreciate for all your helpful and thorough tutorials!

    Hoping to find some help here with my specific setup. I am getting severely slow rsync speeds when copying from my Syn 920+ NAS to my Raspberry Pi 4 8G initially from my Local LAN (1gbit network). It starts out at roughly 10-15 MB/s but then eventually slows down to less than 1.5-2MB/s. Is this to be expected? Progress seemed to halt altogether after several hours, though the job was still running. I am looking at roughly 2TB of data for the initial copy.

    Anyone else experiencing similar issues? Not sure what I am doing wrong here.

    Syno NAS 920+
    Raspberry Pi 4 /w 8Gb MEM
    – DAS enclosure, Yottamaster USB 3.1 with 2x 10TB WD Red Plus drives
    – not setup for RAID, two single USB drives presented to Rasp Pi 4
    – internal dd test shows 200MB/s to each USB device locally from Rasp Pi 4

    My thought process was to do following:
    – perform initial full rsync via Local LAN
    – setup and validate rsync remote connectivity via OpenVPN
    – place Raspberry Pi + enclosure at friend’s house with regular remote rsync

    1. WunderTech

      Thanks for checking out the tutorials and I’m glad they help! Your thought process is correct and certainly the best approach. Trying to process everything initially through OpenVPN would take forever (though it should work). I haven’t witnessed any slow downs at all (outside of device limitations). I will be honest in saying though that I haven’t really watched the speeds, and normally just set it up to run and moved it off-site when it was finished.

      There are so many different things that it could be, that it’s hard for me to even suggest where to start. I would probably say that it’s related to the Raspberry Pi (you can try doing a copy from a PC to the Pi to see if it slows down at all). That would at least narrow it down to see if it’s the NAS sending the data or the Pi accepting the data that is the slowdown.

      1. dvzw

        Thank you for the suggestion, it was helpful. Checking from WSL/Ubuntu using rsync, I am getting 55-60MB/s to the RPi4. So the slowdown appears to be between Synology to RPi4. 1-2MB/s vs 55-60MB/s is a rather large difference. Is hardware to blame for my Syno 920+? Or are there any optimizations I could make? I found even going through direct ssh and testing rsync the speeds are not much improved (also tested without using SSH for transfer encryption).

        1. WunderTech

          From what I’m reading, Hyper Backup is known as being incredibly slow. I can’t confirm or deny it since I haven’t actually tracked mine, but with the amount of complaints online, it seems to be very common. The good news is that future backups should be incremental and significantly faster, but this could be the problem. If I get some time, I will try and do some testing, but my Raspberry Pi is off-site so it’s not an identical test. When I can, I will try and do some on-site testing!

  6. dvzw

    Update: Turns out a simple SHUTDOWN and startup again on my NAS fixed the slow transfer speeds to my Pi. Sheesh, I wish I would have tried that sooner! Local sync is now going MUCH faster. Thanks again for this idea! Though head’s up to anyone looking at HDD enclosures, I would PASS on the Yottamaster 2Bay USB 3.1, it has no active cooling and the HDDs regularly hang at or just above recommended operating temperatures. I am looking for a replacement now and sending this one back for refund.

    1. WunderTech

      That’s great news! Glad to hear you got it working better!

  7. Chris

    Just wondering if there still an advantage to using the Hyper Backup to Rasberry pi rather than directly to an external hard drive if planning a local backup. Thanks for the tutorial!

    1. WunderTech

      If you’re using it locally, there aren’t really any benefits, so an external hard drive is fine!

  8. Andrew

    What I really want is to keep my external HD at the other end of the house from the Synology, so there’s less chance of both getting zapped in a fire etc. Isn’t there an easier way of getting my HD on the local network from my distant bedroom and then backing up to it from the Synology in my basement? HyperDrive only seems to allow you to connect directly to a USB hard drive if it’s plugged directly in to the Synology itself.

    1. WunderTech

      If you can hook it up to a device (doesn’t have to be a Raspberry Pi) that has network connectivity, you can do it various different ways. If you don’t have anything though, a Raspberry Pi is a great option due to the price.

  9. Alex

    Do yo think I could use this with two different hard drive? Maybe write some of the data on one and some on the other.

    1. WunderTech

      Absolutely – you would just have to set them up as different destinations from the Synology NAS side.

  10. Dan

    I am getting an error with hyper backup:
    Exception occurred while backing up data. (The backup service is not running. Please check the backup service settings or the firewall settings.)
    Any idea what can cause this? The pi connects to synology over openvpn and I can ssh into it, but when I run the backup it fails after a few min. in /media/backups it creates a dir [name].hbk so there is communication between the pi and hyper backup. It just seems like it fails when it comes time to start the backup. I am using a different port than 22, but if it is my pi’s ssh port I wouldnt think it would be an issue?

    1. WunderTech

      Using a different port shouldn’t be the problem. I am assuming that you used that port on the Hyper Backup destination settings? As for the backup failing, is the file increasing in size at all? Did you add a “keep alive” parameter so that OpenVPN doesn’t close the connection?

      1. Dan

        I think I found the issue. At some point after I setup the raid and before my first backup(Had a synology nas failure) the raid on the pi failed and didn’t mount. When I ran the backup it was using the /mount/backups dir, but storing it on the sd card instead of my raid. I was able to get 24gb before it filled up and the backup failed with that generic error. Fixing the raid and creating a new backup task has fixed the issue for now and it is backing the data up. Just hoping this synology NAS doesn’t fail.

        1. WunderTech

          Glad to hear you were able to get it working!

  11. Tyler

    I have a couple of questions:
    First: I’m unable to setup a static route in my ISP’s router, but if I’m using my NAS as the openVPN server does this matter? If the Pi is connected to the VPN, can the NAS communicate with it without the static route in my router?
    Second: Before moving my Pi offsite and using openVPN to connect to my home lan, if I first run Hyper backup with my Pi rsync server on the local lan, do I then need to change the settings in Hyper backup so it can find the Pi on it’s new openVPN ip?

    1. WunderTech

      1. The static route might cause an issue as it is there to allow your local network (NAS) to see devices connected via VPN (Raspberry Pi). You can test if you see the Raspberry Pi, but if you can’t, this is most likely the reason why.

      2. That is correct – you would run the backup locally, move the Pi off-site, and then just change the IP address so that the NAS can find it.

  12. Jaymoon

    In the video you have “logfile = /var/log/rsyncd.log” in the ~/rsyncd.conf file…

    It should be pointed to a .log file in the user’s home directory (you have it correct in the write-up).

    1. WunderTech

      Did not even realize – thank you very much for letting me know!

Comments are closed.