The instructions below show you how to set up a Raspberry Pi headless, which is a fancy way of saying that you’ll set it up without a monitor, keyboard, or mouse. There are also detailed instructions on how to configure a Wi-Fi connection for internet access!
How to Set Up a Raspberry Pi Headless
We will look at how to set up a Raspberry Pi headless below.
1. Navigate to the Raspberry Pi website and download the Raspberry Pi Imager.
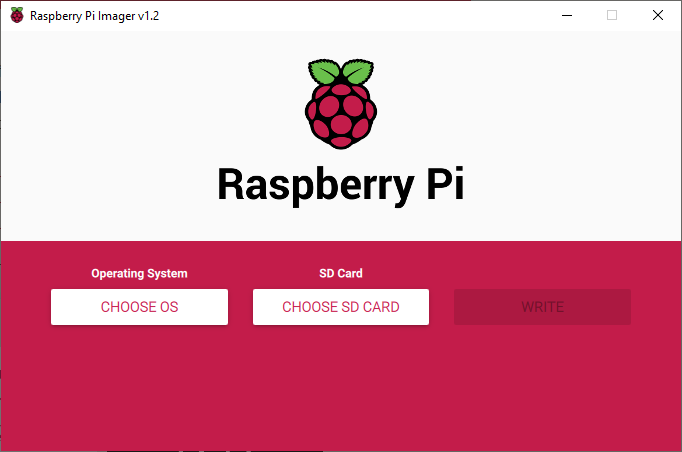
2. After the download finishes, launch the Raspberry Pi Imager application and connect your SD card to your computer.
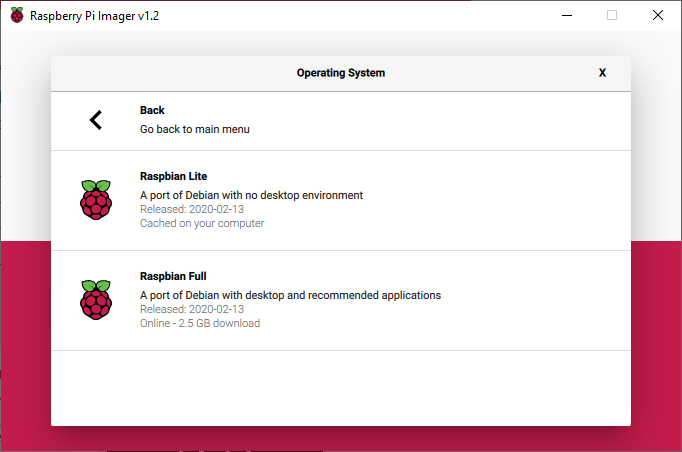
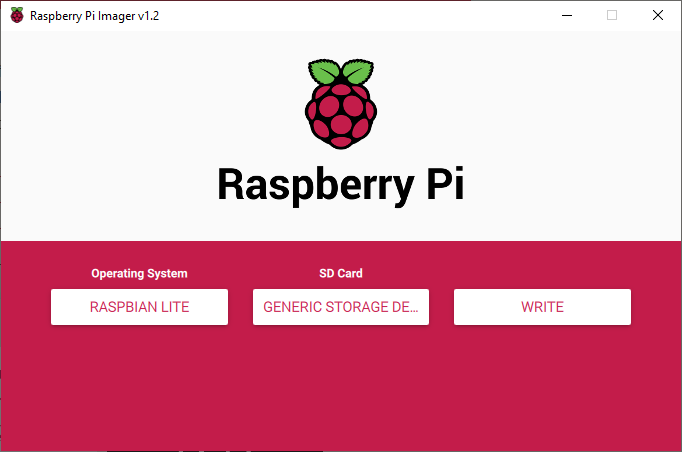
3. Select Choose OS and choose the operating system that you would like to use. In this example, I will be using Raspbian Lite.
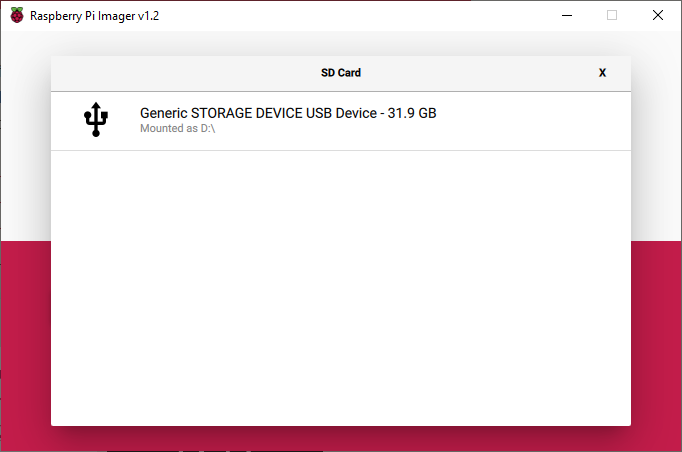
4. After selecting your operating system, select Choose SD Card and select the SD card that you connected to your machine.
NOTE: This will fully format the SD card so remove any important data prior to proceeding.
5. After the operating system and SD card have been selected, select write. This will write the operating system to the SD card.
6. After the process has completed, remove and re-add the SD card back to your computer. After the SD card has been added, select the drive.
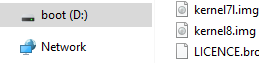
7. From here, two files will need to be added. The first will allow you to SSH into your Raspberry Pi and the second will give your system the Wi-Fi information necessary to connect to your home network.
NOTE: If you will be using a wired ethernet connection, the Wi-Fi Setup Instructions steps are not necessary.
8. Before proceeding, ensure that File Name Extensions are shown.

SSH Setup Instructions
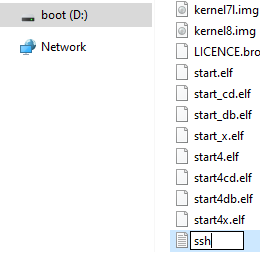
9. Select your SD card on the left-hand side to access the system files. Right-click and create a new text file. Name the file “ssh” and remove the “.txt” extension and press enter.
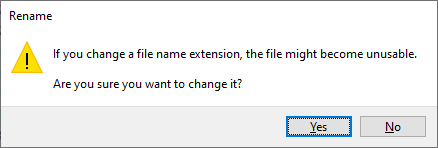
NOTE: you will receive a message stating that the file might become unusable if you change the file extension. Press Yes.
10. After creating this file, your Raspberry Pi will now have SSH enabled. If you are connecting via ethernet, the next steps are unnecessary. Skip to the SSH Instructions section to learn how to SSH into your Raspberry Pi.
Wi-Fi Setup Instructions
11. To configure a Wi-Fi connection on your Raspberry Pi, create a text file named wpa_supplicant.conf in the root directory of the SD card. The following text should be added to the file:
country=US
ctrl_interface=DIR=/var/run/wpa_supplicant GROUP=netdev
update_config=1

network={
scan_ssid=1
ssid="[SSID]"
psk="[PASSWORD]"
}
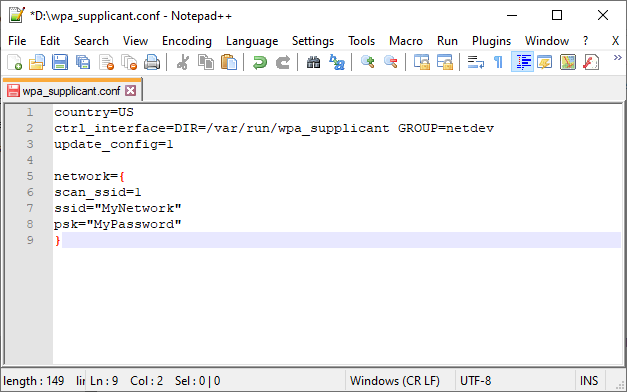
NOTE: Change the country if necessary.
12. Eject your SD card and add it to your Raspberry Pi.
SSH Instructions
13. Now that your Raspberry Pi is configured and running, you can SSH into it. For this, you can use your favorite SSH client. In this example, I will be using Putty which can be downloaded here.
14. By default, your Raspberry Pi will have the hostname “raspberrypi”. If this is your first Raspberry Pi, using that hostname should allow you to SSH into the client.
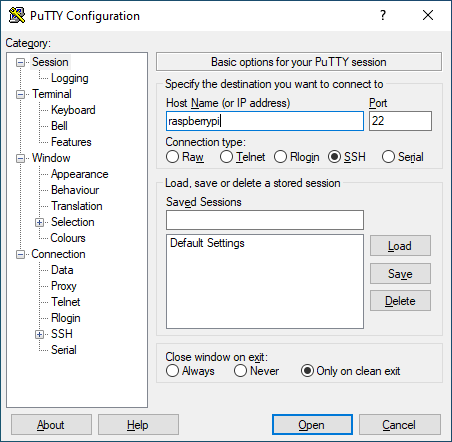
NOTE: If that hostname does not work, you will need to find the IP address of your Raspberry Pi. To do this, you can sign into your router and find the IP address, or you can download an IP Scanner on your computer.
15. When you first connect, you will receive a security warning. Select Yes.
16. If this is your first time connecting, the username will be pi and the password will be raspberry. After entering this information, you should be connected!
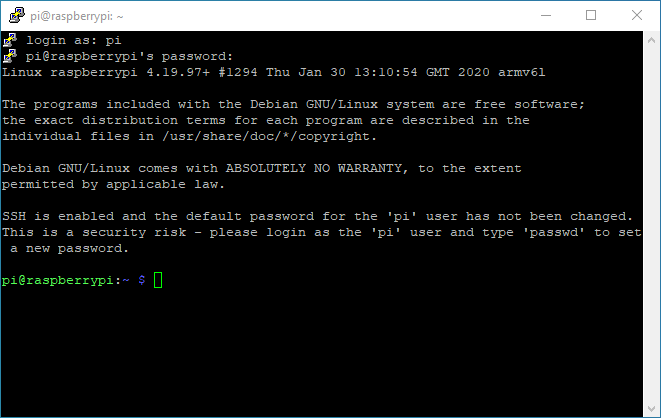
17. At this point, it is a good idea to update your system and change the default password. This can be done by running these commands:
sudo apt update
sudo apt upgrade
sudo raspi-config
18. Your Raspberry Pi is now configured to run headless!
Conclusion – How to Set Up a Raspberry Pi Headless
This tutorial explained how to set up a Raspberry Pi headless, without a monitor, keyboard, or mouse. After you are finished installing your Raspberry Pi operating system, check out our guide on installing Pi-hole if you’d like to put your Raspberry Pi to good use!