I’ve been running Synology NAS devices for over seven years, across the DS1019+, DS1821+, and DS923+. The place people get stuck before anything else even starts is finding the box on the network. You plug it in, the drive lights come on, and then nothing tells you what IP address it landed on.
There are three ways to find it, and which one works depends on whether the NAS is brand new or already configured, and whether you’ve got a firewall running on it. I’d start with the browser tool and move down the list from there. If you’re setting up a Synology for the first time, my full Synology NAS setup guide covers what happens after you get connected.
Find the NAS with find.synology.com (Web Assistant)
Synology hosts a browser tool that scans your local network and reports back any Synology devices it sees. It’s officially called the Web Assistant, and it’s reachable at both find.synology.com and finds.synology.com. Both spellings land in the same place, so whichever one you’ve seen written down will work.
This is where I’d start, because there’s nothing to install.
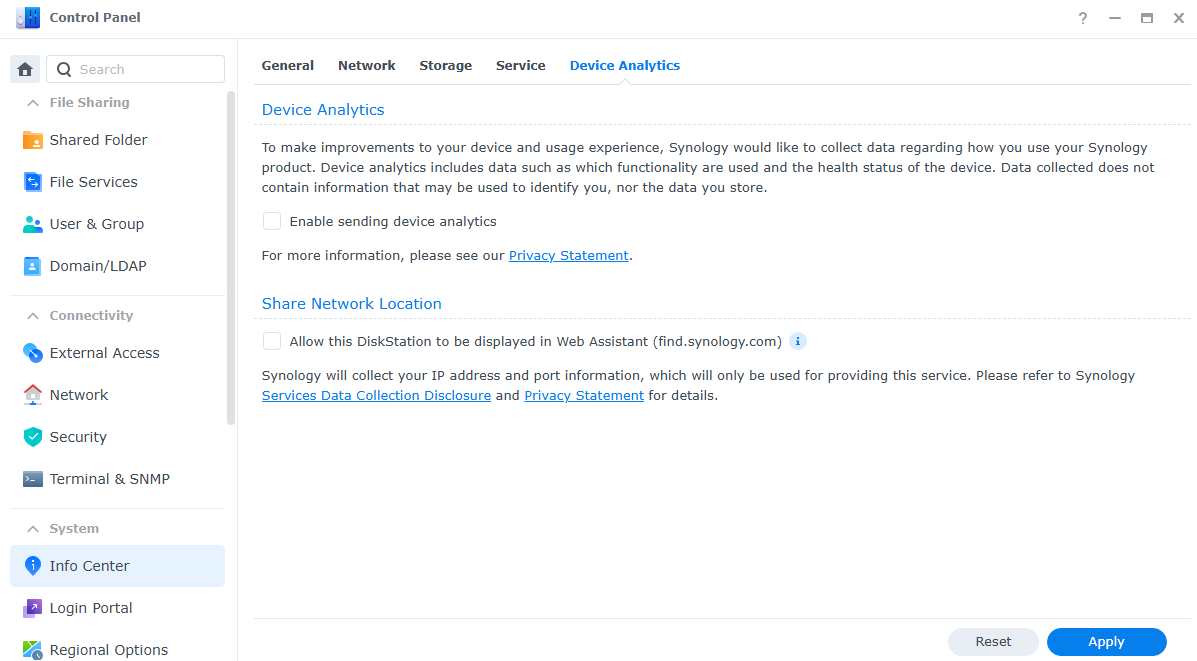
1. Open a browser on any device sitting on the same subnet as the NAS and go to find.synology.com. The scan starts on its own.
2. When your device shows up in the list, select Connect.
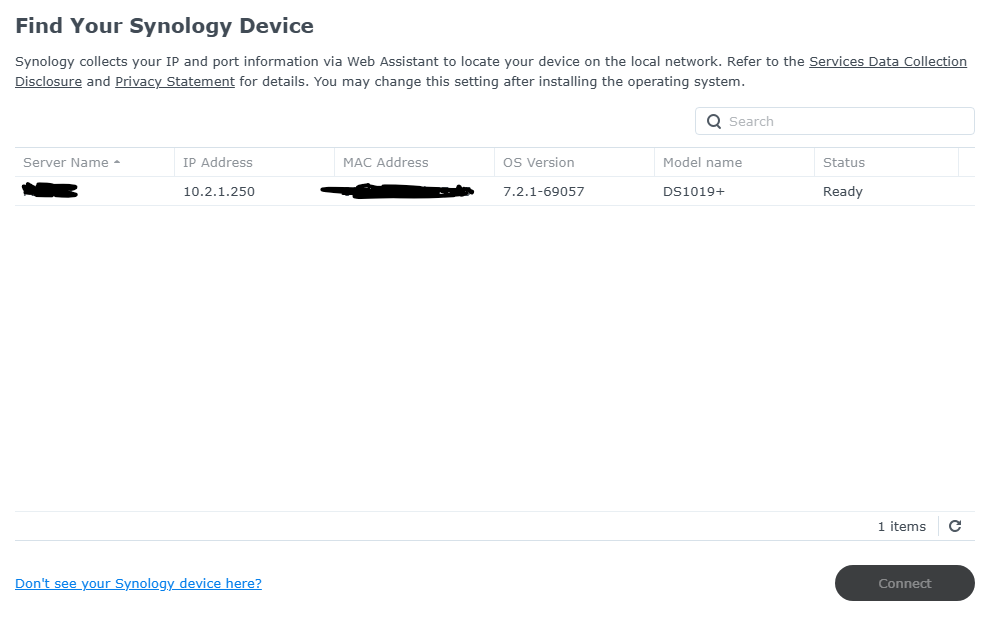
What happens after you select Connect
This trips people up, so here’s exactly what happens. Connect hands you straight to the NAS itself. If the device has already been configured, you land on the DSM login page and sign in with the account you created on it. If the NAS is brand new, you get the setup wizard instead, and DSM installs from there.
The tool finds your device and forwards you to it. That’s the whole job. There’s no Synology account involved at this step, and no credentials are typed into find.synology.com itself, so if you’re looking for somewhere to log in on that page, there isn’t one. Your DSM username and password belong on the screen it sends you to.
One catch. On a NAS you’ve already set up, the Web Assistant may have been blocked at some point. On a device straight out of the box it usually works first try. On an existing NAS, Synology Assistant is the better bet.
Find the NAS with Synology Assistant (Desktop App)
Synology Assistant is a desktop application that runs the same kind of scan from your computer instead of from a browser. You’ll see people call it the Synology finder, and it’s what I fall back on when the browser tool comes back empty on a NAS that’s already configured.
1. Go to the Download Center on Synology’s website and find Synology Assistant under the utilities section.

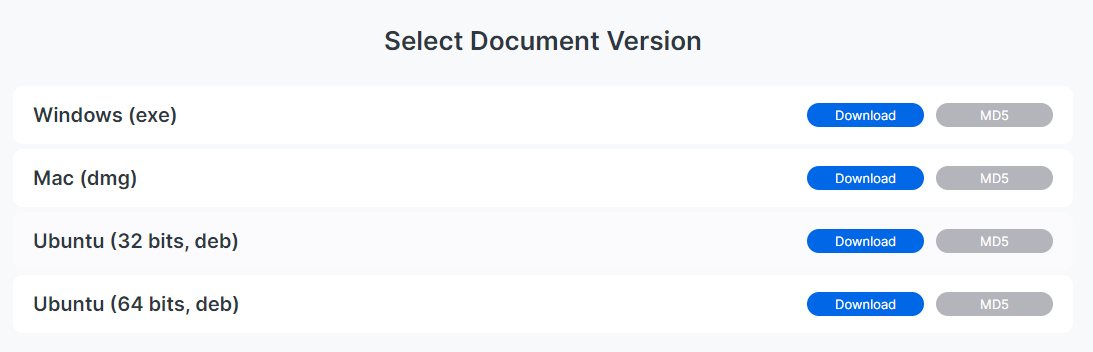
2. Download the build for your operating system. Windows, macOS, and Linux are all covered. Install it.
3. Launch Synology Assistant. It scans automatically and lists any Synology devices it finds, along with their IP addresses, model numbers, and DSM versions.

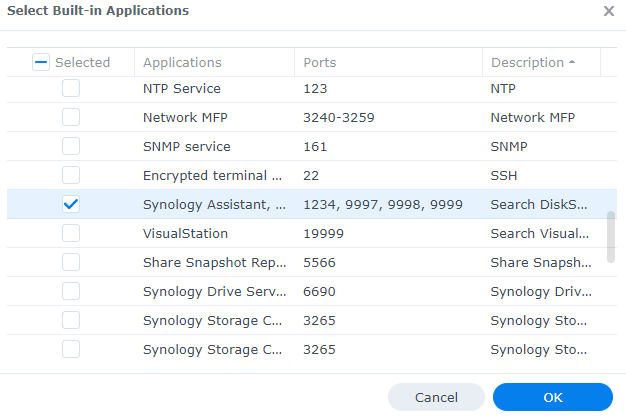
4. If Synology Assistant comes back with nothing, check whether you’ve turned on the firewall in DSM.
Synology Assistant leans on specific ports to talk to the NAS. If you’ve set up firewall rules on your Synology NAS, there’s a good chance those ports are sitting behind a deny rule. Add a rule that permits the traffic and run the scan again. This is the single most common reason the app finds nothing on a NAS that’s otherwise online and healthy.
Find the NAS with an IP Scanner
If neither Synology tool turned anything up, scan the network yourself. An IP scanner doesn’t use Synology’s discovery protocols at all, it just sweeps the subnet and reports what answers. That makes it the useful test: if the NAS doesn’t appear here either, the problem isn’t a Synology tool being blocked, it’s the network.
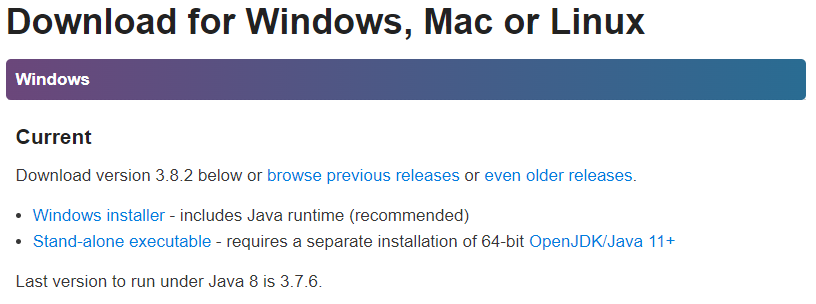
1. Download Angry IP Scanner and install it. Windows, macOS, and Linux builds are all available.
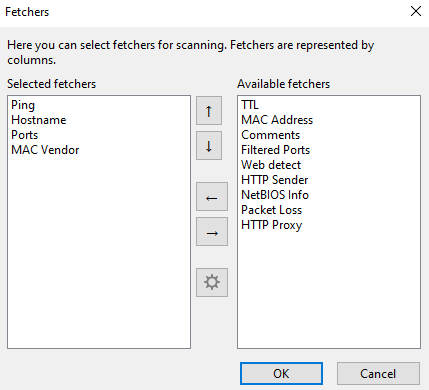
2. Open it, go to Tools, then Fetchers, and add MAC Vendor to the list.
That adds a column showing the hardware manufacturer for every device that responds. Without it you’re looking at a wall of IP addresses with no way to tell which one is the NAS. With it, the Synology box labels itself.
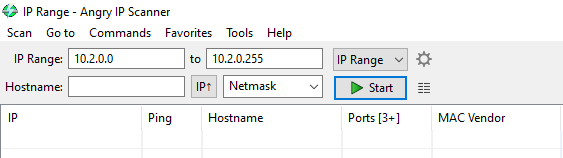
3. Your current network range gets filled in for you. Select Start.
4. When the sweep finishes, look down the MAC Vendor column for Synology. The IP address on that row is your NAS. Put it in a browser and you’ll get DSM.
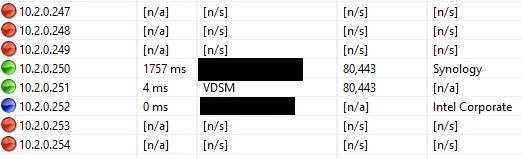
If Synology doesn’t appear anywhere in that list, the NAS either isn’t getting a network connection or it’s on a different VLAN or subnet than the computer running the scan. Both devices need to be on the same network for any of this to work. If you’re running VLANs, this comes up more than you’d expect. I’ve hit it a few times myself after reconfiguring my network and having the NAS come back up on the wrong VLAN.
The NAS Still Won’t Show Up
Three methods down and nothing found. At that point it’s almost always one of these:
- The NAS is offline. Check the power and status LEDs on the front, and check that the Ethernet port has link lights. A NAS that’s powered on but has no link is invisible to every tool above.
- It has a static IP on a subnet that no longer exists. If someone set a static address at some point and the network has changed since, the NAS is sitting there answering on an address nothing can reach.
- There’s a hardware fault. A dead NIC or a bad cable will keep the device off the network while it powers on and boots normally.
If you can physically reach the NAS, a Mode 1 reset puts the network settings back to DHCP without touching your data. That’s usually the fastest way out of the static IP problem, and it’s what I’d do before pulling drives or opening the case.
Once you’re back into DSM, map a network drive so the NAS shows up in File Explorer, or set up remote access so you can reach it from outside your network. Either one means you won’t be hunting for the IP address next time. And if you’re still deciding which Synology to buy, my Synology NAS buying guide covers the current lineup.