Protecting a Synology NAS from ransomware is extremely important to ensure that integrity is maintained for critical data. Ransomware protection can be broken down into three steps:
- Preventing a ransomware attack.
- Protecting against a ransomware attack.
- Recovering from a ransomware attack.
The first is preventing it, the second is protection if it does happen, and the third is recovery. You must use the first two steps in order to be able to recover your data if you’re hit with a ransomware attack. However, we’re going to look at each option below. Always remember that it’s best to ensure your Synology NAS is configured following best practices for security.
What is Ransomware?
Ransomware is a malicious attack that encrypts the data on a user’s device and demands a ransom to decrypt the data. The ransom is generally paid in cryptocurrency to avoid tracking and can target anyone from individuals to businesses. Any ransomware attack can cause significant losses (whether it be data or financial) and must be protected against.
Ransomware can be completed through various methods, like phishing attacks or malware. As soon as the ransomware exploit runs, the data on the device will be encrypted and without proper recovery steps, your data might be lost forever. Even if you pay the ransom (though I wouldn’t recommend that you do), it doesn’t guarantee that you’ll get the decryption key, which leads to questions on exactly how to protect from ransomware attacks.
1. Preventing a Ransomware Attack on a Synology NAS
The first step is to ensure that you do everything in your power to prevent the attack from happening altogether. This is generally completed by configuring different settings on your Synology NAS and local network.
Ensure External Access is Limited
If you are accessing your NAS externally, you must ensure that you’re doing it following best practices. Utilizing something like DDNS and port forwarding is generally the least secure option you can use as you’re exposing your NAS to the external world, where port scanners can find and attempt to attack your NAS.
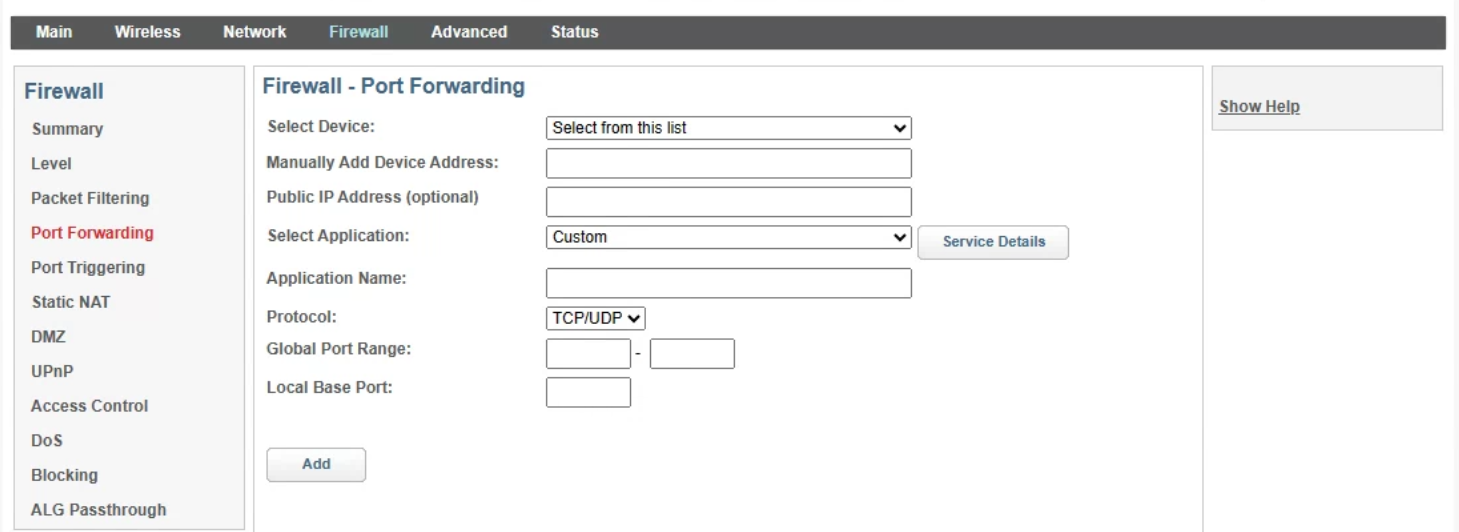
Port forwarding can be configured on the NAS using uPnP or on your router. You must check both places. To confirm the NAS doesn’t have anything configured, access the Control Panel > External Access > Router Configuration and ensure that nothing exists in the list. If it does (and you don’t know why it’s there), remove it.
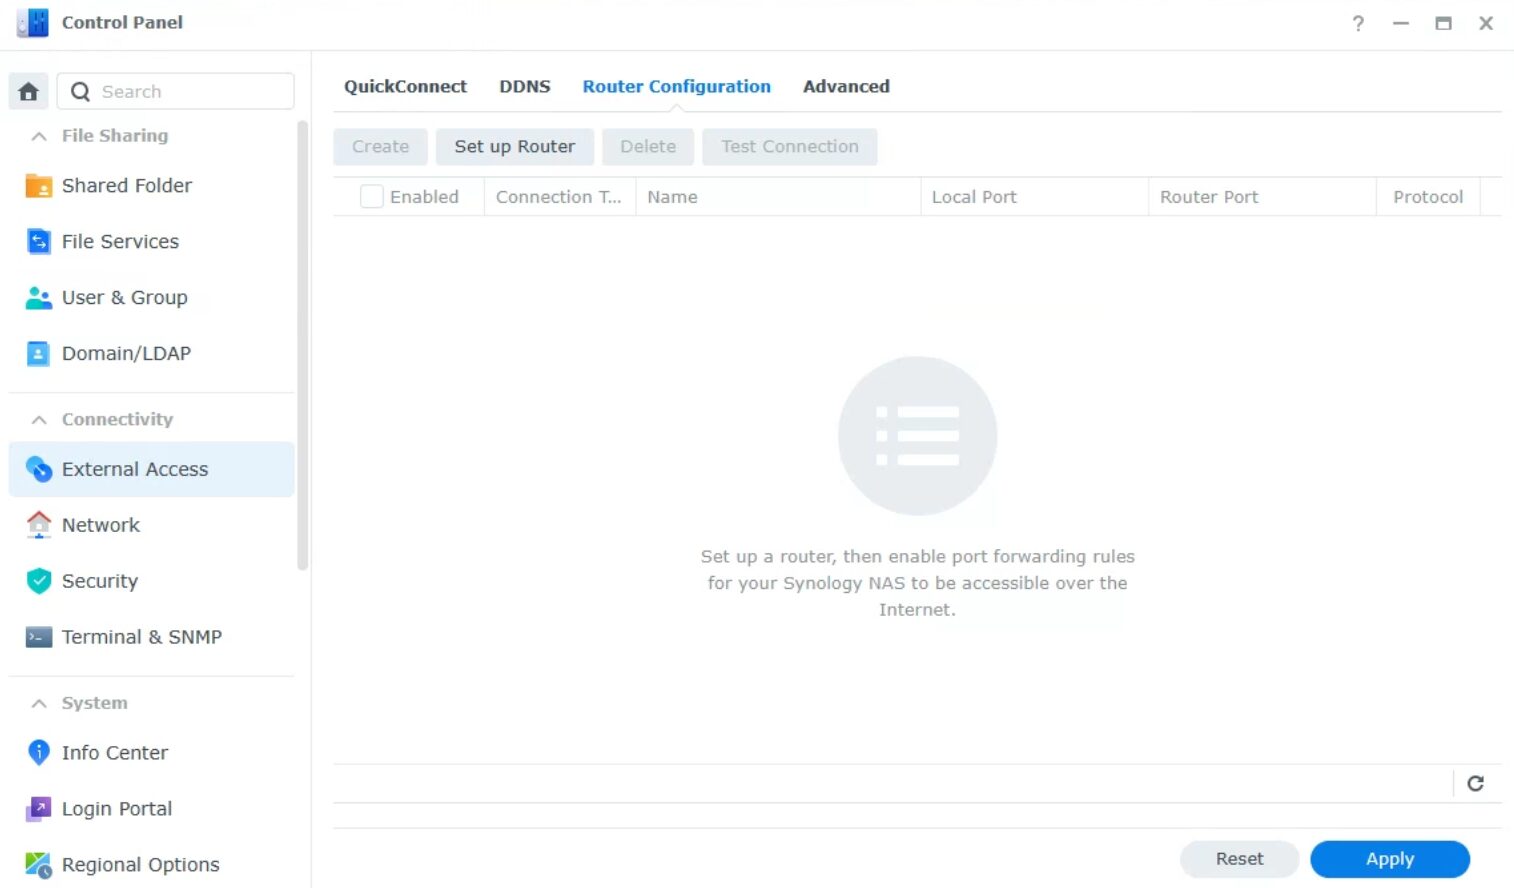
After that, access your router and check the port forwarding section to ensure that no rules exist. If they do, you must remove them.
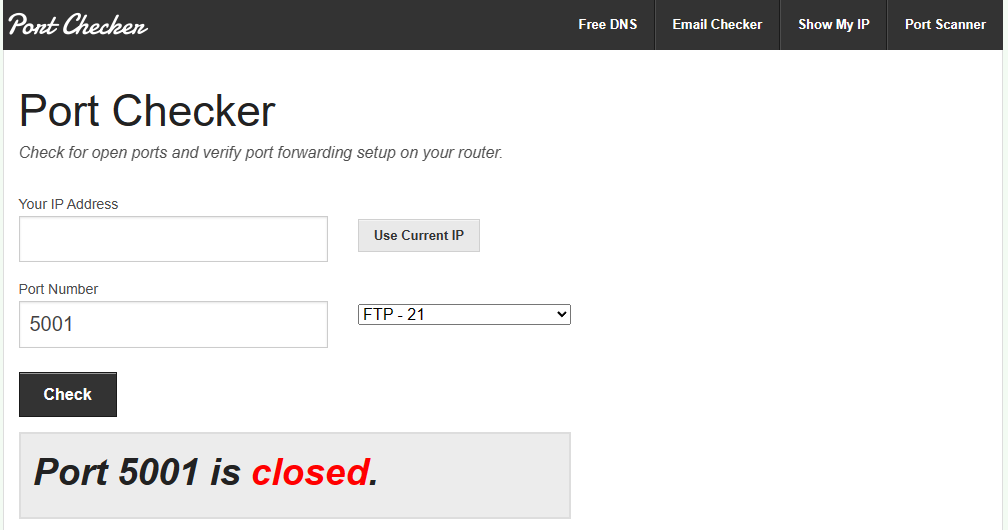
If you want to validate that your NAS is not port forwarded to the external world, use a port checker and the DSM port you’re using to check to see if the port is open. If it’s not, you’re good. If it is, you should consider removing the port forwarding.
If you’re interested in accessing your NAS externally, I’d recommend looking into a VPN like OpenVPN, Tailscale (extremely easy setup), or even something more straightforward like Synology QuickConnect.
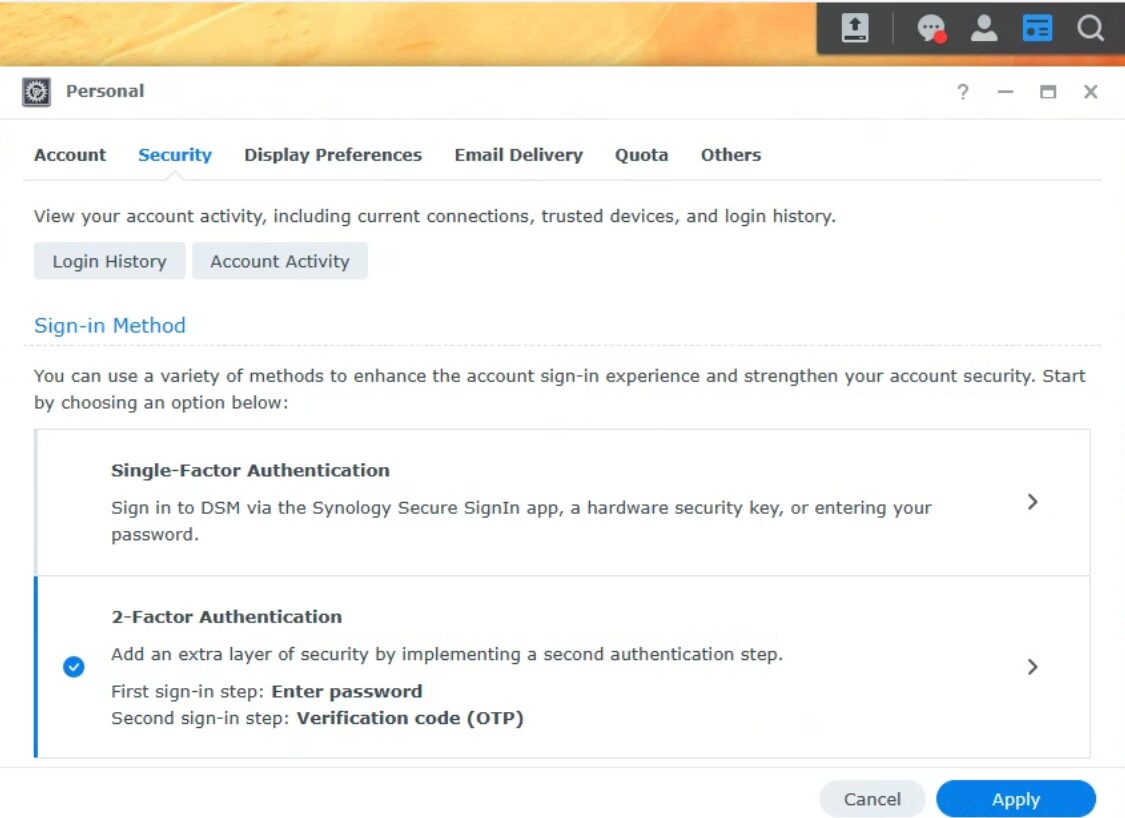
Configure Two-Factor Authentication on your Admin Accounts
On your admin accounts, utilizing Two-Factor Authentication (2FA) is an easy way to ensure that if someone gets access to your admin account, they still can’t access DSM (as they’ll need a second factor). The goal is to attempt to limit DSM access so that attackers cannot access the management interface.
To configure 2FA, Log in to DSM > Select Person Icon (top right) > Personal > Security > 2-Factor Authentication. Follow the prompts and configure two-factor authentication with your mobile device.
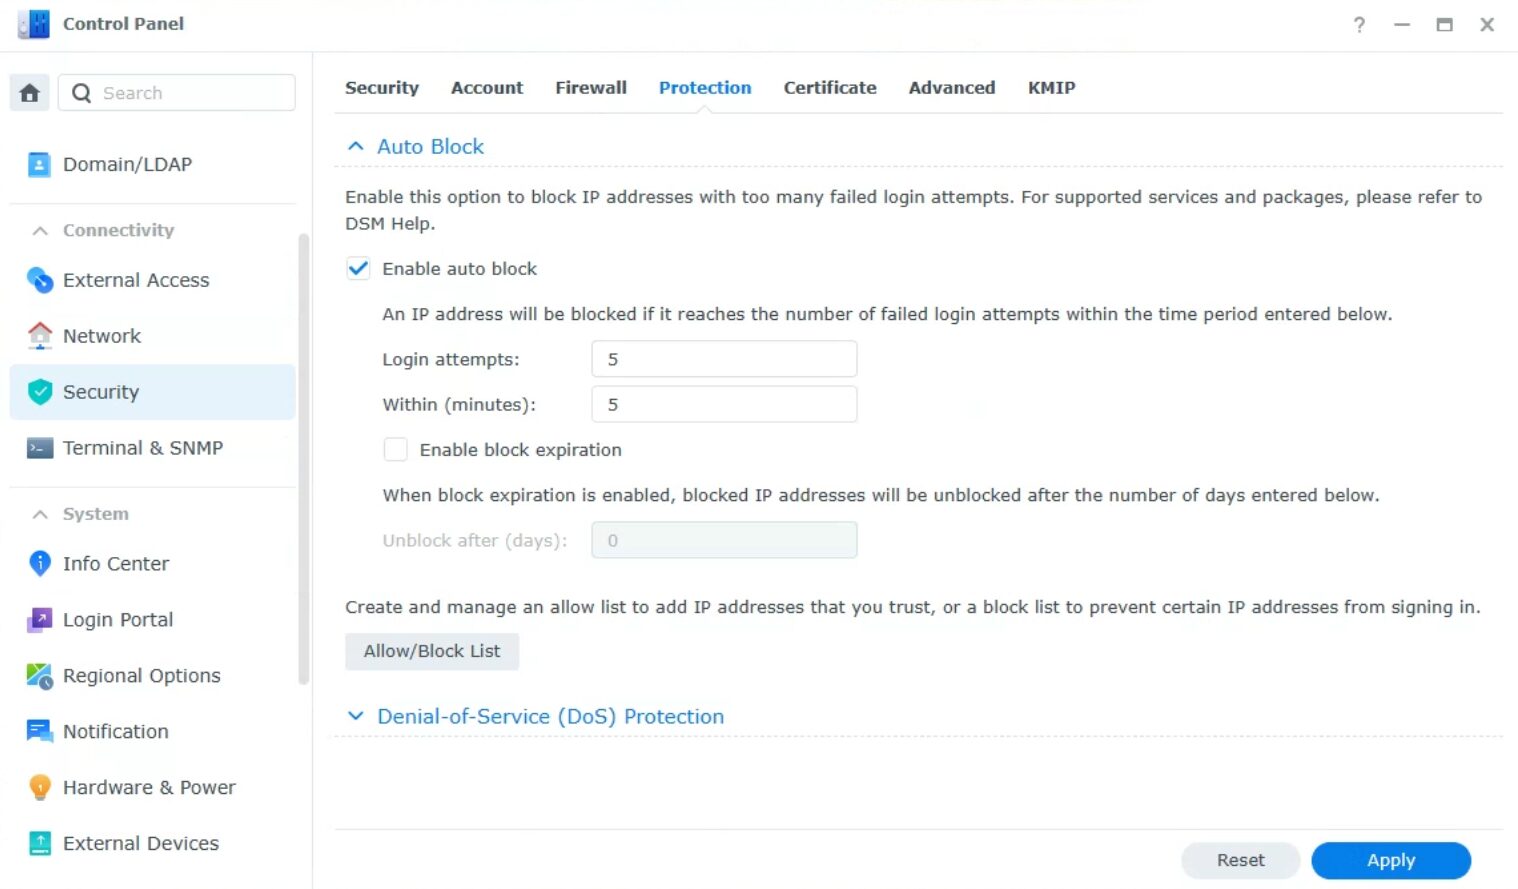
Configuring Auto Block
Auto Block will ensure that if a user attempts to log in to DSM a certain number of times within a certain number of minutes, the IP address will be blocked. Keep in mind, that this means you can indirectly lock yourself out of your account. However, it will also block attackers.
To configure auto block, Log in to DSM > Control Panel > Security > Protection > Enable Auto Block. You can then determine how many attempts within how many minutes should result in a blocked IP address (the IP can be internal or external). You can also view your block list and determine if you’d like to enable block expiration (so the IP address will be removed after a certain number of days).
2. Protecting against a Ransomware Attack
While preventing a ransomware attack is the ultimate goal, you should still have protections in place. While these protections will protect against ransomware attacks, they’ll also protect against indirect or accidental data loss and are best practices from a data integrity perspective.
Configuring Snapshots
Snapshots freeze files at a point in time. Synology devices can be configured to automatically take snapshots by utilizing the Btrfs filesystem. These snapshots take up an extremely small amount of space, but allow you to roll back if data loss occurs.
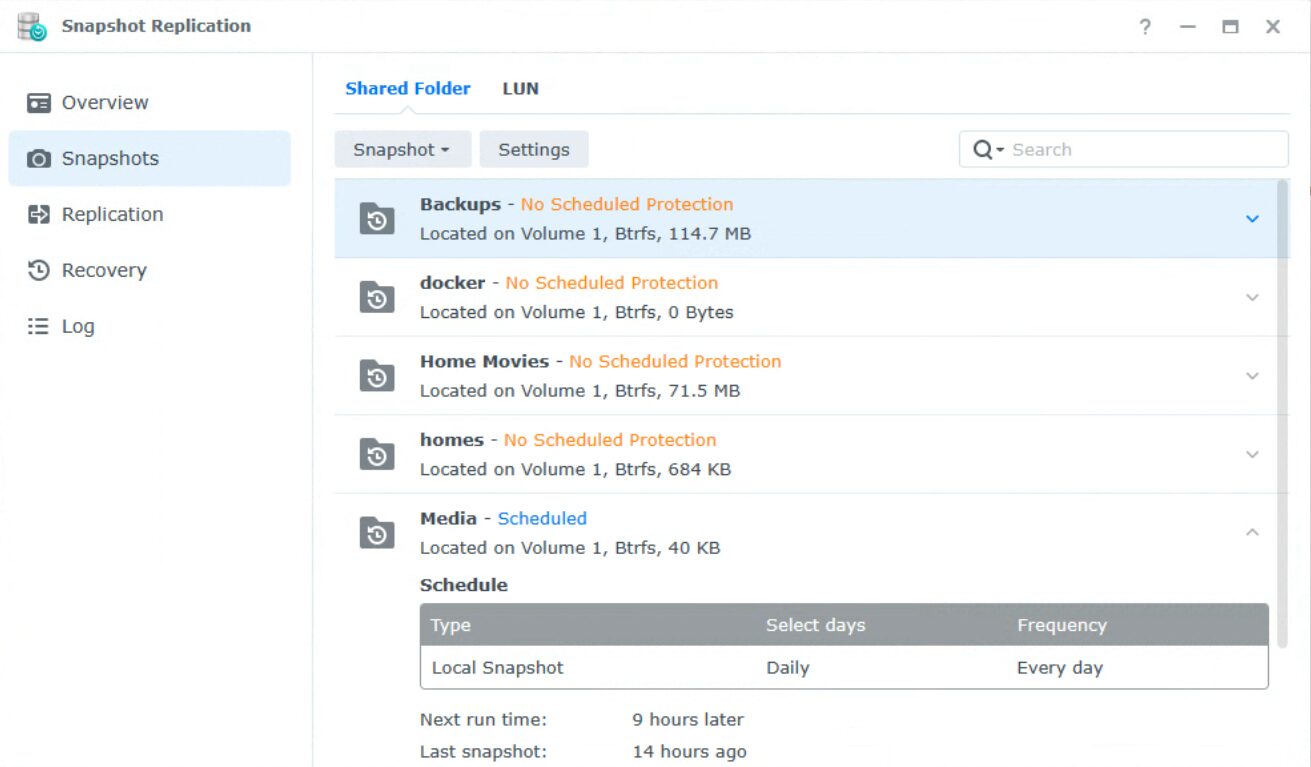
1. To configure Snapshots, download the Snapshot Replication tool from Synology’s package center.
2. Open Snapshot Replication, then select Snapshots, and finally, Settings on a Shared Folder.
3. Enable a snapshot schedule, then select a timeframe. If you’d like to enable immutable snapshots, keep in mind that NO ONE INCLUDING YOU can delete these. This means that once a snapshot is taken, it will be stored for the total number of days in the Protection Period.
This is great for Ransomware protection, but keep in mind that you cannot delete it whatsoever, which can be a downside in the event of reclaiming space. In summary, if you delete something, you have to wait for the total number of days you set in the immutable snapshot configuration before the space will be reclaimed on the NAS.
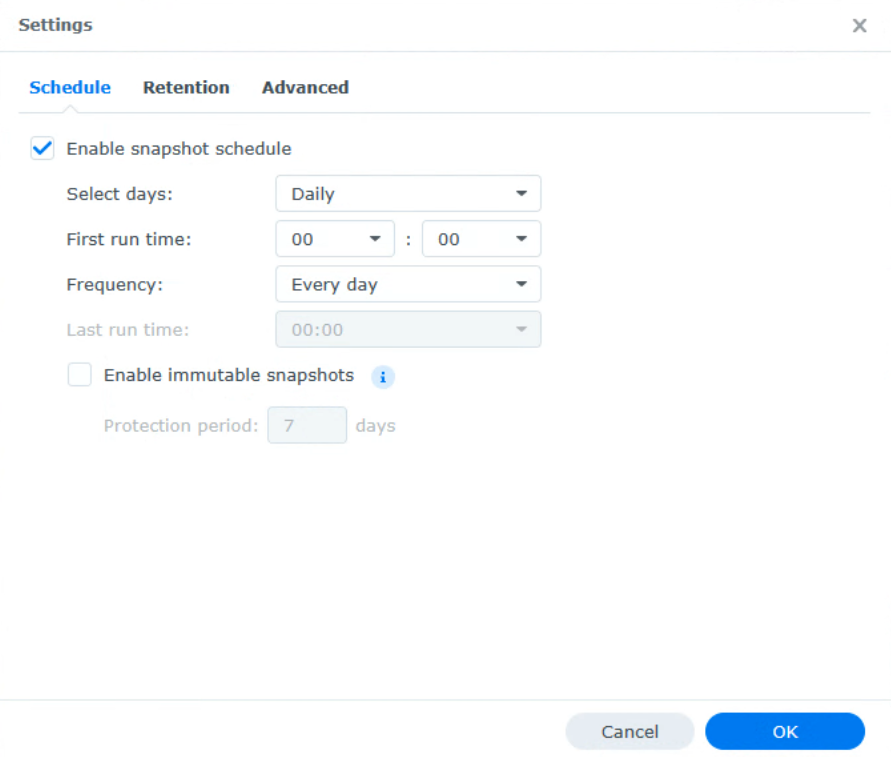
4. Configure a Retention period in the settings of the Snapshot configuration, then save. At that point, snapshots will automatically be taken based on that schedule. You must configure this for each shared folder.
Configuring NAS Backups
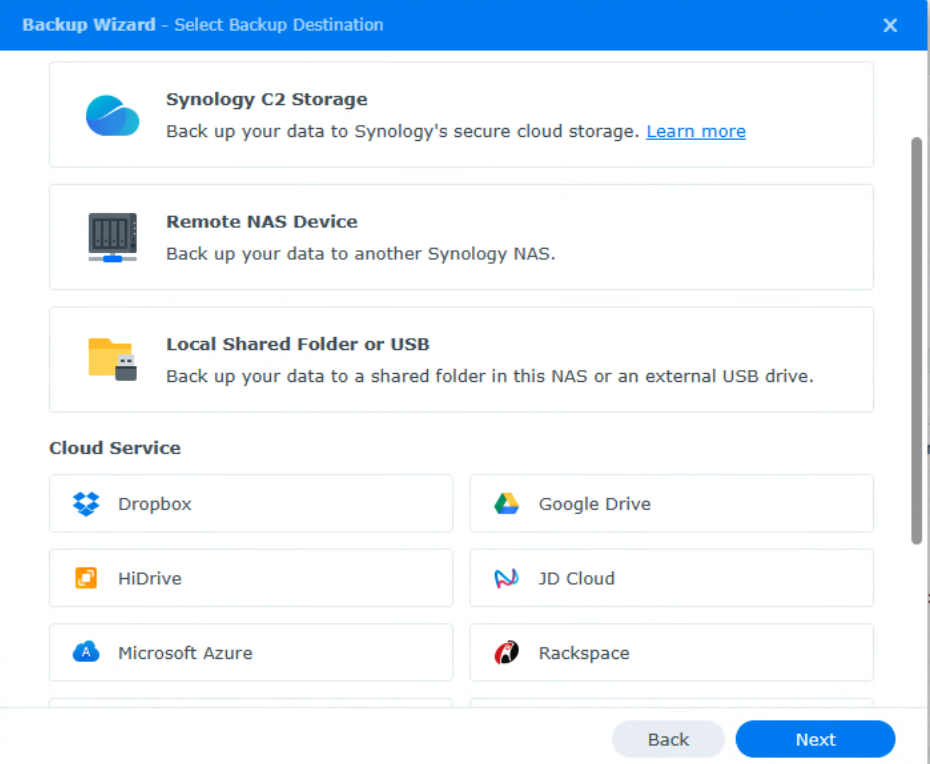
Backups and Snapshots work hand in hand. Since snapshots are stored in the actual storage pool, you must be aware that if something happens to the storage pool, the data will be lost entirely. For this reason, you must configure backups and the easiest way to do it is by using Hyper Backup.
Hyper Backup will allow you to configure a backup task to a cloud server, local server, remote NAS, and even more. This ensures that the data on your NAS is backed up daily or weekly.
If you have a combination of snapshots and backups, this will give you the best overall protection from ransomware attacks.
3. Recovering from a Ransomware Attack
If you’re hit by a ransomware attack and you have snapshots and backups configured, this is the order in which I’d recommend you follow to restore your data.
Step 1: Restore Snapshot Data
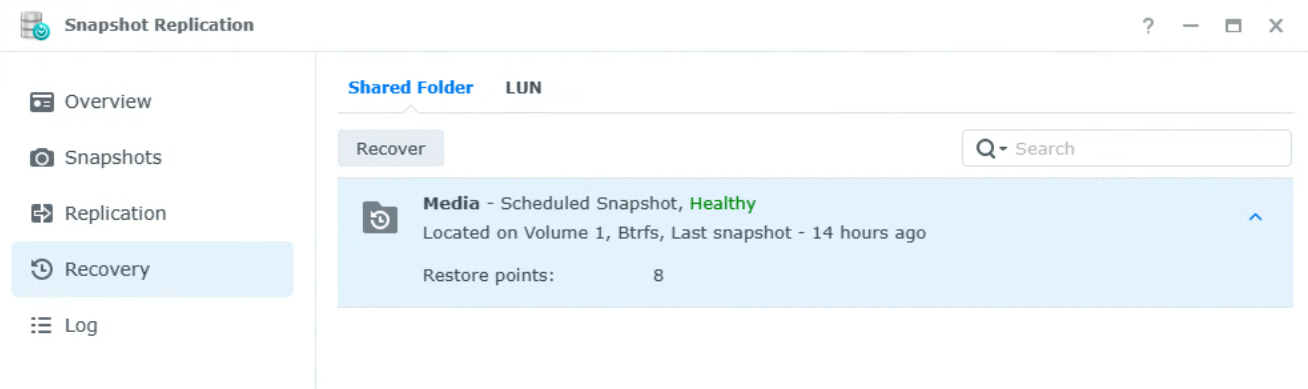
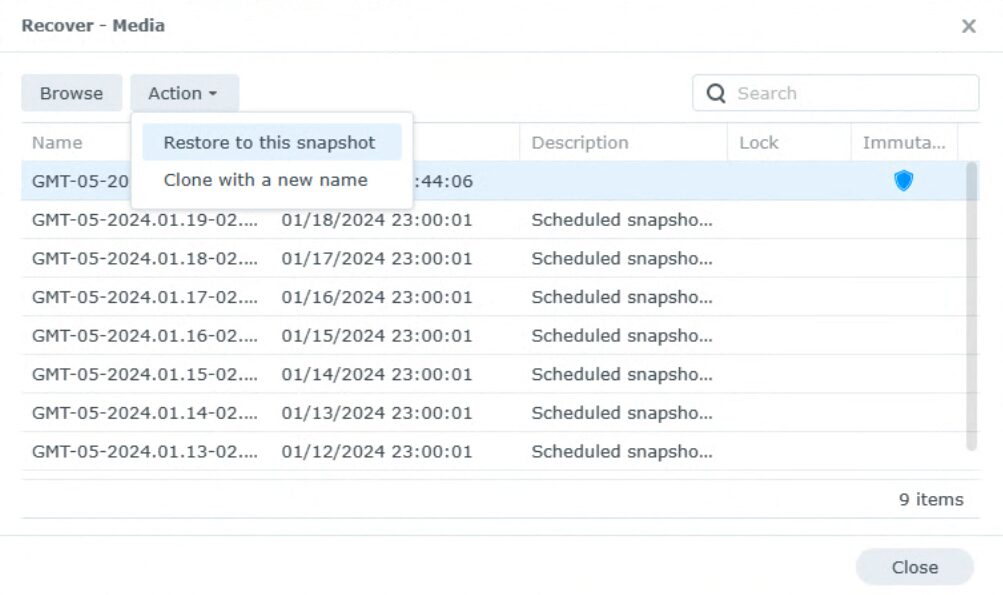
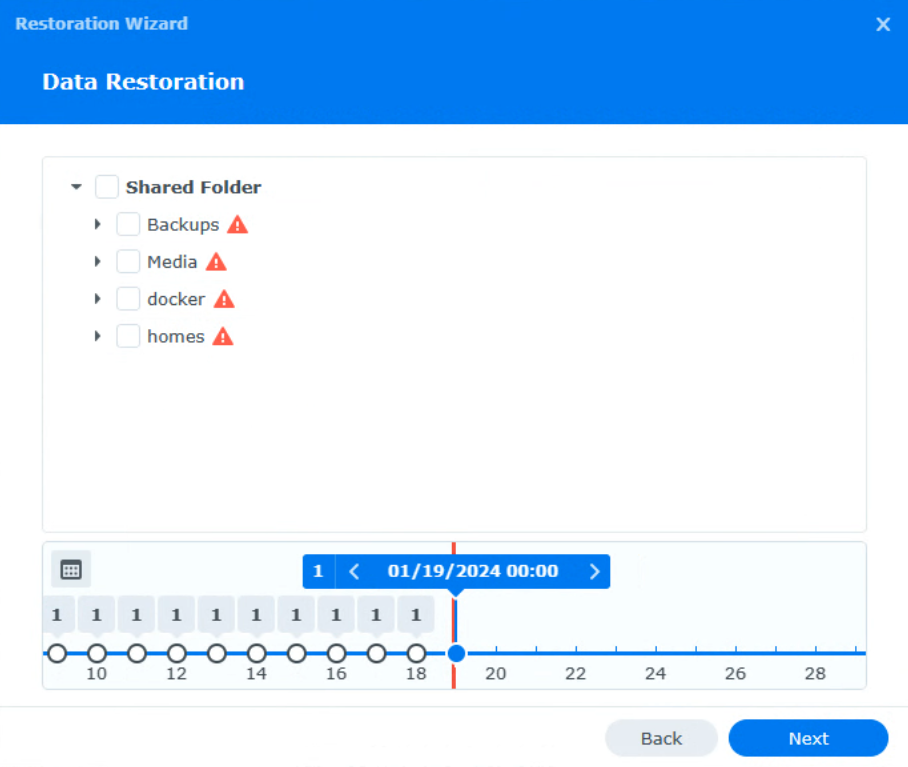
If DSM is accessible and you have access to the Snapshot Replication tool, open it and select the Recovery tab. From there, you should see a list of all shared folders that snapshots are configured for. Select Recover on each shared folder
You’ll then have to select a specific snapshot and restore it. After selecting that option, you’ll be asked to create a snapshot (which you can ignore if you actually were hit with ransomware), and after a few seconds, the data should be recovered. If you want to use an immutable snapshot (if they were configured), you can select one where a shield icon is showing in the Immutable column.
Step 2: Restoring from a Backup
While snapshots are my preferred approach for restoring data (for overall speed and ease of use), you might not be able to if they were removed or weren’t configured. Restoring data in Hyper Backup is fairly straightforward and can be done to restore data directly to shared folders on your NAS.
Just keep in mind that if you’re using a cloud server, it can take a long time to restore your data (honestly, even local servers will take a while). Just be patient and the data will slowly be restored.
Data can be restored by selecting individual files directly, or even a full shared folder from the backup. You can even go back through prior versions to ensure you select the correct file(s).
Step 3: Consider Ransomware Removal Tools
The options above are my preferred steps to recovering from a ransomware attack on a Synology NAS, though it’s important to mention that you may have already been attacked and didn’t configure any of the steps above.
While I recommend that you do the steps above after you figure out how you’re going to handle this, there are ransomware recovery tools online that you can attempt to use to decrypt the data.
I haven’t personally used any of them so I don’t feel comfortable linking to any, but searching the internet will yield various tools you can use. Paying the ransom is not the best option, so explore the tools available and see if any can help.
Wrapping Up
Protecting against ransomware attacks on Synology NAS devices is almost entirely about being proactive as opposed to reactive. If the attack has already occurred, your recovery options are extremely limited. However, completing the steps above now can protect you from future attacks and increase the overall security of your Synology NAS.
As always, nothing is a guarantee, and following best practices doesn’t necessarily mean that it can never happen, but it should put you in a good position if it ever does.