Today we are going to look at how to set up OpenVPN on a Raspberry Pi.
Setting up OpenVPN on a Raspberry Pi is fairly straightforward due to PiVPN. The PiVPN project allows you to easily and securely install WireGuard or OpenVPN on a Raspberry Pi. Before looking at how to set up OpenVPN on a Raspberry Pi, you must ensure that you have a DDNS hostname or static IP address. This will be covered in the steps below.
How to Set Up OpenVPN on a Raspberry Pi
Before we look at how to set up OpenVPN on a Raspberry Pi, let’s look at exactly what OpenVPN is.
Configuring OpenVPN Server
The process below will look at how to set up OpenVPN on a Raspberry Pi
1. Run the command below to install PiVPN.
curl -L https://install.pivpn.io | bash
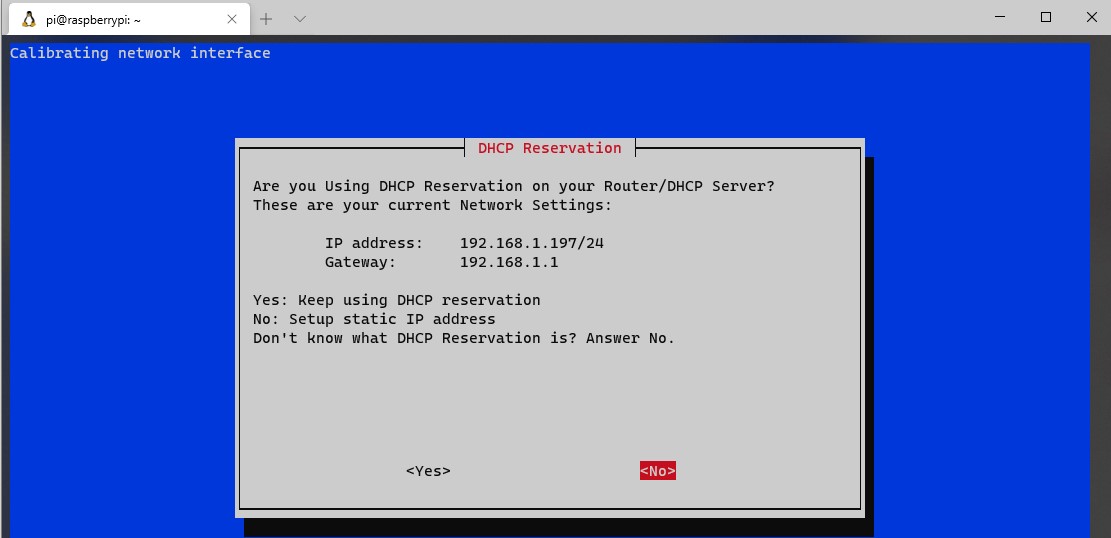
2. The first screen will inform you that you need to set a static IP address. It’s best to set a static IP address in your router’s settings, as you are ensuring that DHCP does not try and give this address to any other devices.
However, certain routers (mostly ISP-provided ones) do not allow you to complete DHCP reservations. If you can’t set a static IP address for your Raspberry Pi in your router, set a static IP address on the Raspberry Pi by selecting No and following the instructions. I specified a static IP address in my router so I selected Yes.
3. You will now need to select a local user. If you’ve created a different user (outside of the default pi user), you will have the option here. For most people, you will select the Pi user.
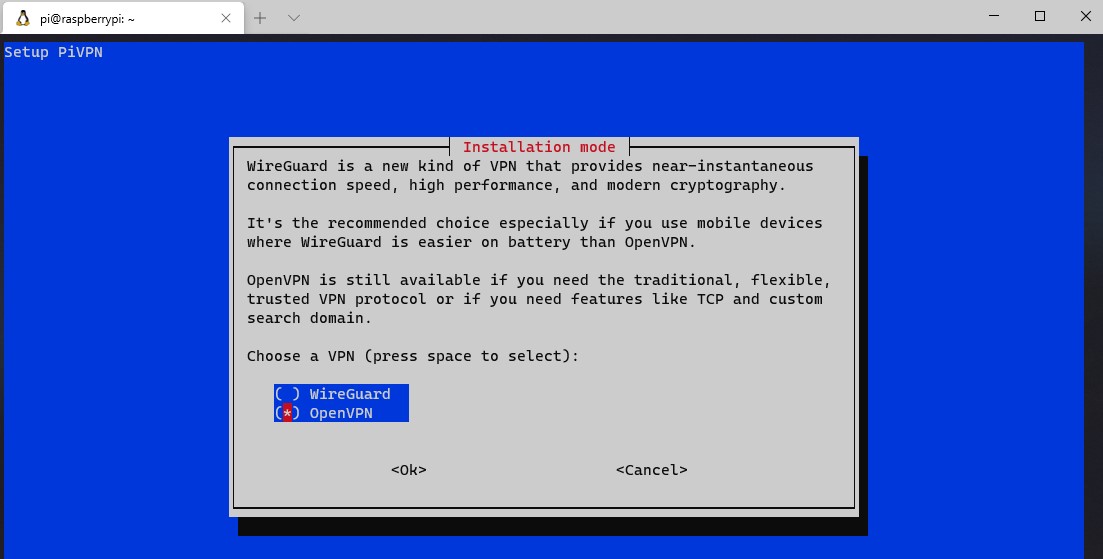
4. You will be brought to a screen that will inform you that PiVPN will allow you to install OpenVPN or WireGuard on a Raspberry Pi. Select OpenVPN and then OK.
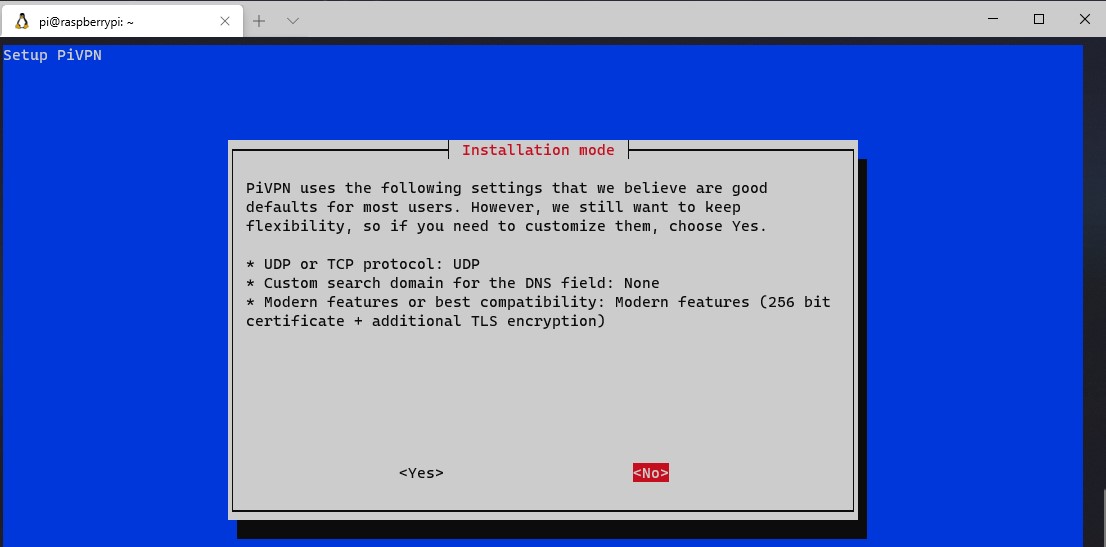
5. The next section will have a few default settings. My recommendation is to keep these settings, but if you intend on changing any of them, select yes. The suggested approach is to select No to proceed.
6. OpenVPN will now install!
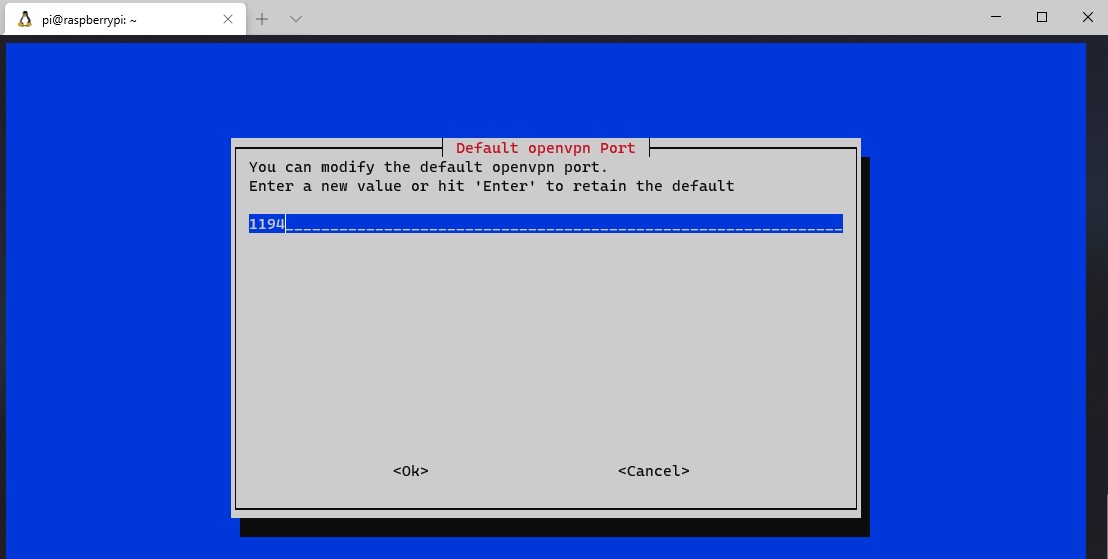
7. The default port that OpenVPN uses is UDP 1194. If you would like to change this, you can do that here. Select OK and then select Yes to confirm the port settings are correct.
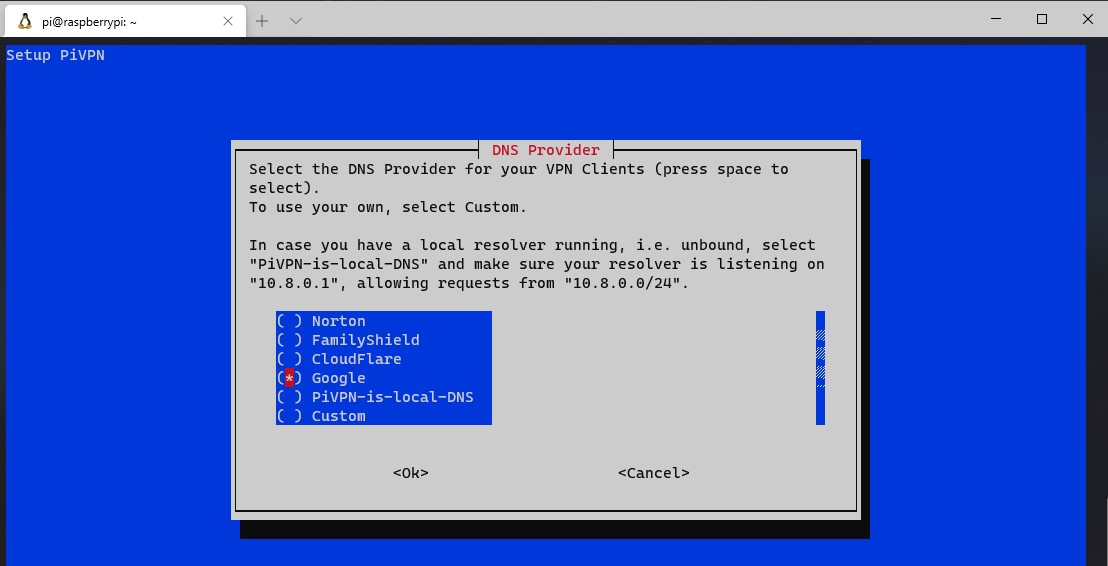
8. You now need to select the DNS provider you’d like to use. Select Custom if you’d like to use your own DNS server (Pi-hole/AdGuard Home, etc.), or any of the public DNS providers if you don’t want to use a local DNS server.
9. You will now be prompted to use your public IP address or public DNS entry. If you have a static IP address, you are free to use this address. However, if you have a dynamic external IP address, you will need to set up DDNS. You can learn how to do that here.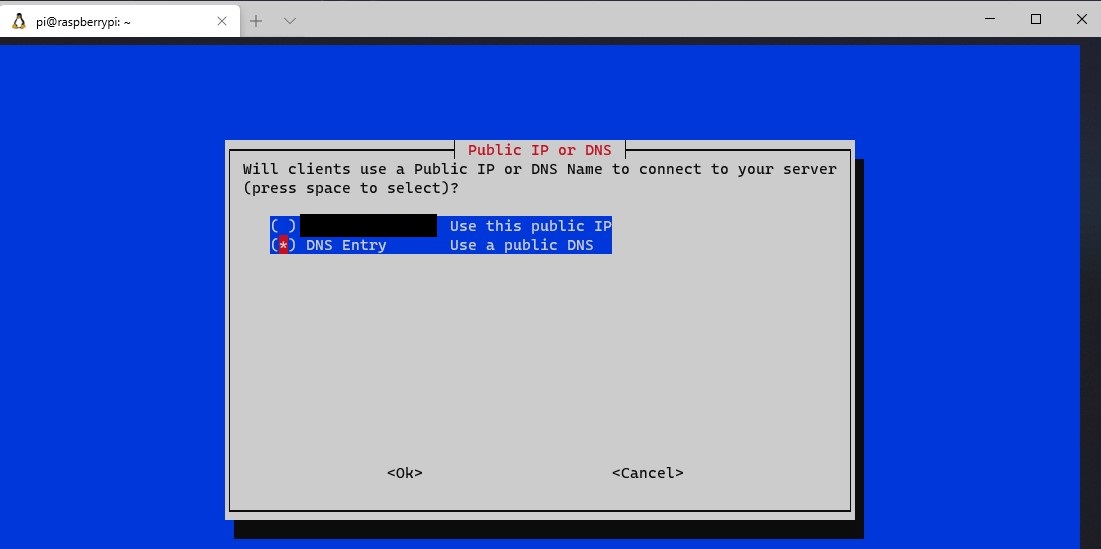
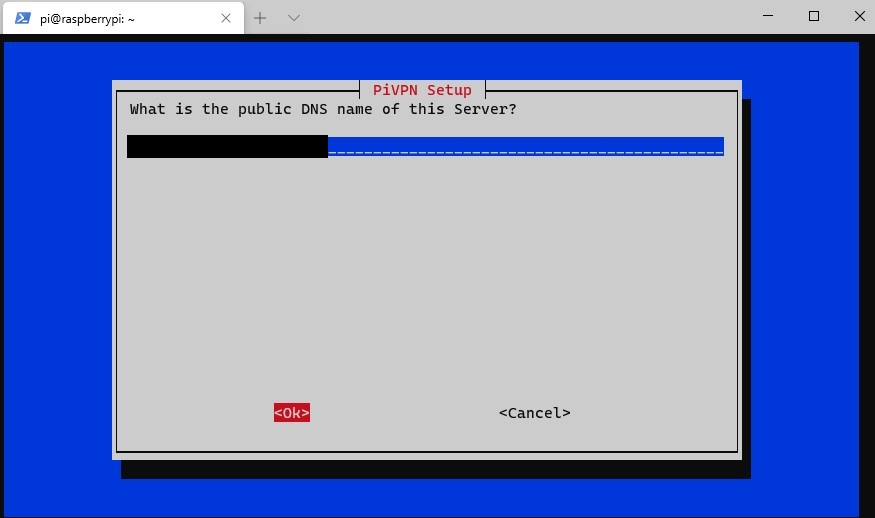
10. If you selected to use a dynamic DNS address, you can enter that information here. At the next screen, select Yes to confirm that it is correct.
11. You will be prompted that the server key and HMAC key will be generated. Select OK.
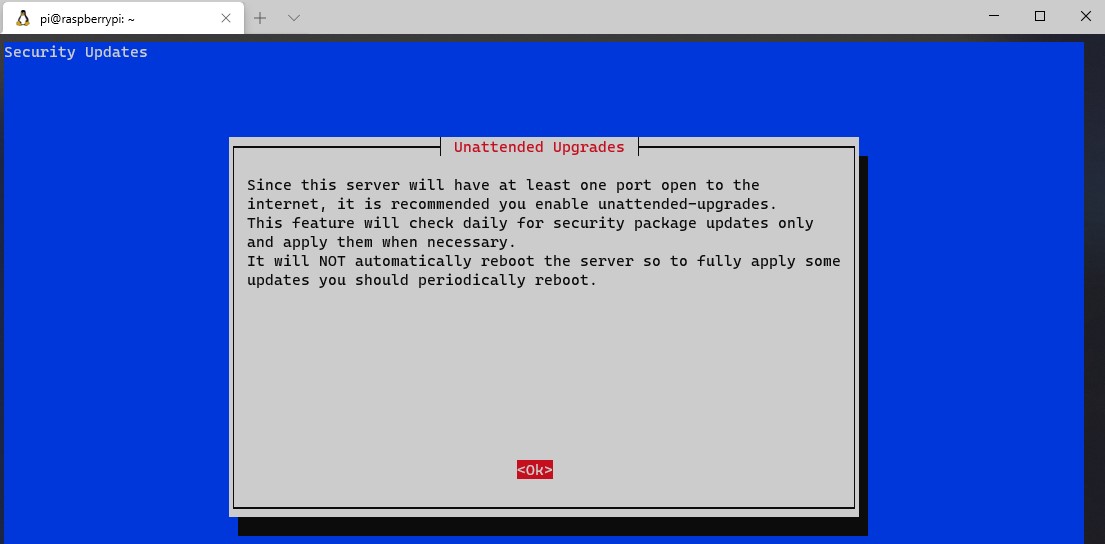
12. The next step will tell you that the VPN Server will check for unattended upgrades, and a periodic reboot will be required. This is a great option. Enable unattended upgrades (unless you have a good reason not to) and proceed. The packages will now install.
13. The installation is now complete! Reboot your Raspberry Pi. The next section will explain how you can set up VPN profiles.
OpenVPN Profile Creation
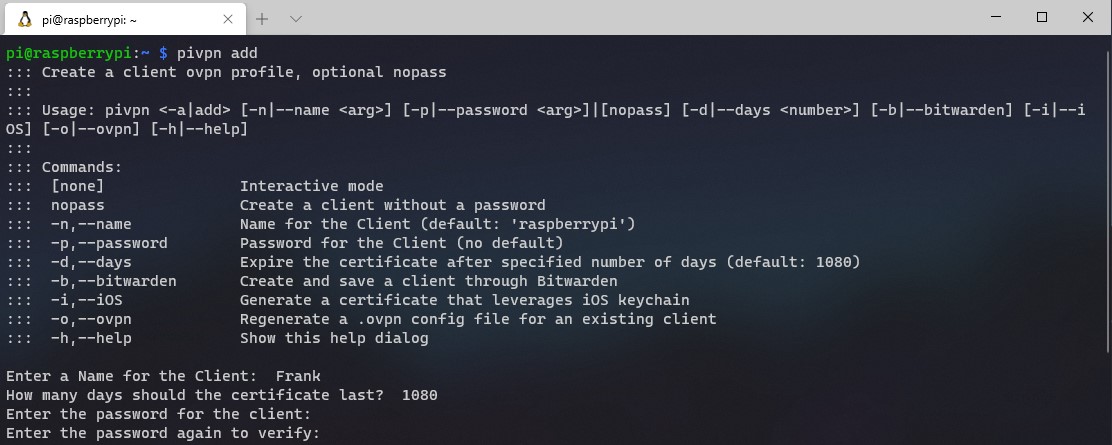
1. Creating a profile is very easy thanks to PiVPN. Run the command below to start the profile creation.
pivpn add
2. Enter a name for your client. You will then be asked how long the certificate will last. Most people will use the default 1080 day certificate, but this can be adjusted if you’d like. Then, enter and verify a password for the client. The profile will then be created!
3. You can access the profile by navigating to the ovpns folder.
cd /home/pi/ovpns
4. It is recommended that you transfer this file locally, meaning by using a network share or an external USB stick. The reason is that your .ovpn file contains a certificate at the bottom. While simply having this file won’t allow you to connect (you still need the password defined above), it’s still recommended that you do your best to keep it local to the device using it. With that disclaimer, if you want to email it to yourself, that’s another option as well.
Follow the instructions below if you’d like to mount an external USB drive to your Raspberry Pi and move the .ovpn file.
5. Make a directory to mount the external USB drive to.
sudo mkdir /mnt/eUSB
6. Find the drive by name. You will have to use the device name.
sudo fdisk -l

7. Mount the drive to the folder location and copy the file! NOTE: Make sure that you replace /dev/sda1 and the .ovpn file with your device name and file name.
sudo mount /dev/sda1 /mnt/eUSB
sudo cp Frank.ovpn /mnt/eUSB
8. The file will now exist on your external USB drive!
Port Forwarding for OpenVPN on a Raspberry Pi
We now need to port forward UDP port 1194 on our router to our Raspberry Pi. Now, port forwarding will be completely different on every brand’s router settings page. This is a great guide that shows how to port forward on a few different brands of routers, but the best thing to do is try and google the name of your router and port forwarding. Example: Netgear port forwarding
- Create a port forwarding rule for UDP port 1194 to your Synology NAS’s IP address. In the example below, 192.168.1.220 is the IP address of my Synology NAS.

Assuming that you were able to open UDP port 1194 successfully, the port configuration is now complete!
Configuration for OpenVPN
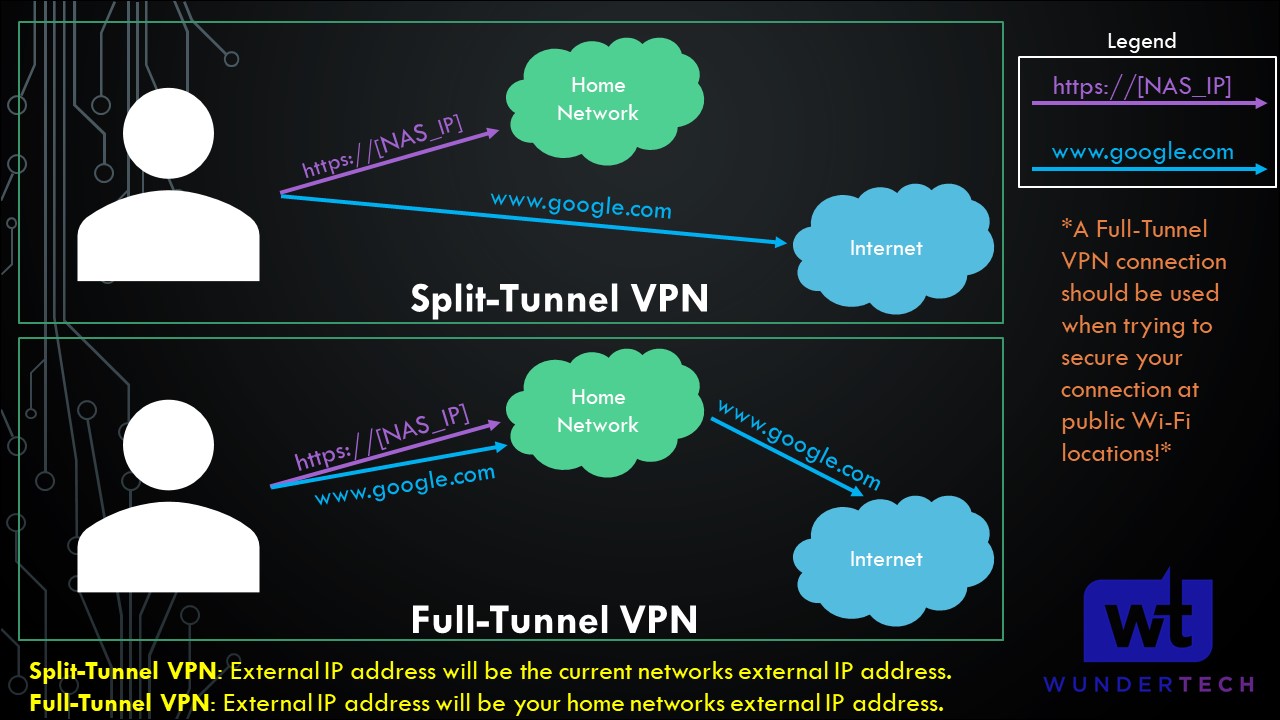
This section is important for future steps (so you know what kind of profiles you’d like to create). We will be creating either a split-tunnel VPN, a full-tunnel VPN, or both in later steps.
Split-Tunnel VPN: Traffic is only sent through your network if it is attempting to access an internal resource. Your IP address when navigating to a site outside of your network will be the IP address of the network that you are currently on.
Full-Tunnel VPN: All traffic is sent through your home network. Your IP address for internal and external requests will be your home network’s IP address.
I created a very basic image below that explains this, but we will look at how to configure both in later steps. It’s important to note that both connection types will allow you to access your local network. This only shows how traffic is routed differently to external networks.
NOTE: This is not the exact network flow. I am simplifying the process as much as I can.
OpenVPN Config File Change for Split-Tunnel
By default, the OpenVPN config file is set as full-tunnel. If you’re interested in setting up a Full-Tunnel and Split-Tunnel VPN profile, create two different .ovpn config files. In the Split-Tunnel config file, add the data below.
NOTE: If you create a Split-Tunnel profile, you must change the 192.168.1.0 IP address to use your local subnet. 192.168.1.0 and 192.168.0.0 are the most common, but you might have changed this to something different.
route-nopull
route 192.168.1.0 255.255.255.0 vpn_gateway
OpenVPN Client Configuration
Setting up OpenVPN on the client is very simple as soon as you have the .ovpn file added to the device.
1. Download the OpenVPN client software for your device here.
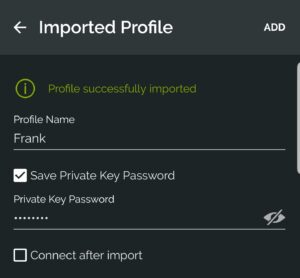
2. Select the add button at the bottom and then choose File. You should now be prompted to browse for the .ovpn file that we created earlier. Upload the file and then enter the private key password that we created earlier.
3. You should now be able to connect to your VPN from an outside network and access your local resources! If you are created two profiles (one for Split-Tunnel and one for Full-Tunnel), you will have to do this twice.
Conclusion on Configuring a Raspberry Pi with OpenVPN
This tutorial showed how to set up OpenVPN on a Raspbery Pi using PiVPN. PiVPN makes it easy to set up WireGuard as well, so check out my tutorial on that if you haven’t yet!
This is my preferred approach for accessing my local network from an outside network. While services can be exposed using a reverse proxy server or port forwarding, this is generally the more secure option.