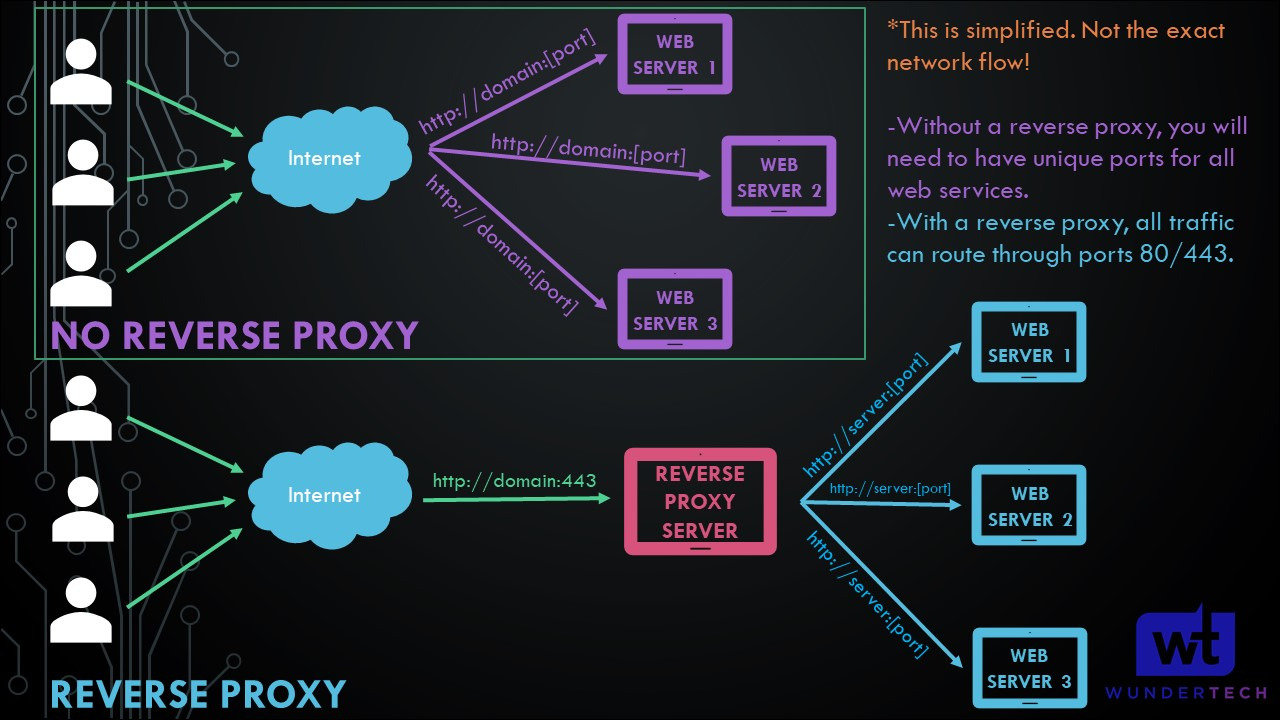
In this tutorial, we’ll look at how to install Nginx Proxy Manager in Home Assistant. Nginx Proxy Manager is a reverse proxy server, which means that by configuring an individual instance, you can expose multiple web services outside of your local network.
Overall, this simply means that requests are sent to an individual server (in this case, our reverse proxy server) and the server will then forward the request to the local server.
You can install Nginx Proxy Manager directly inside of Home Assistant if you’d like by following the instructions below.
NOTE: The process below utilizes the Home Assistant Supervisor!
How to Install Nginx Proxy Manager in Home Assistant
1. The first step is to open Settings, then select Add-ons. As mentioned above, if you’re not using the Supervised version of Home Assistant, you won’t see this option.
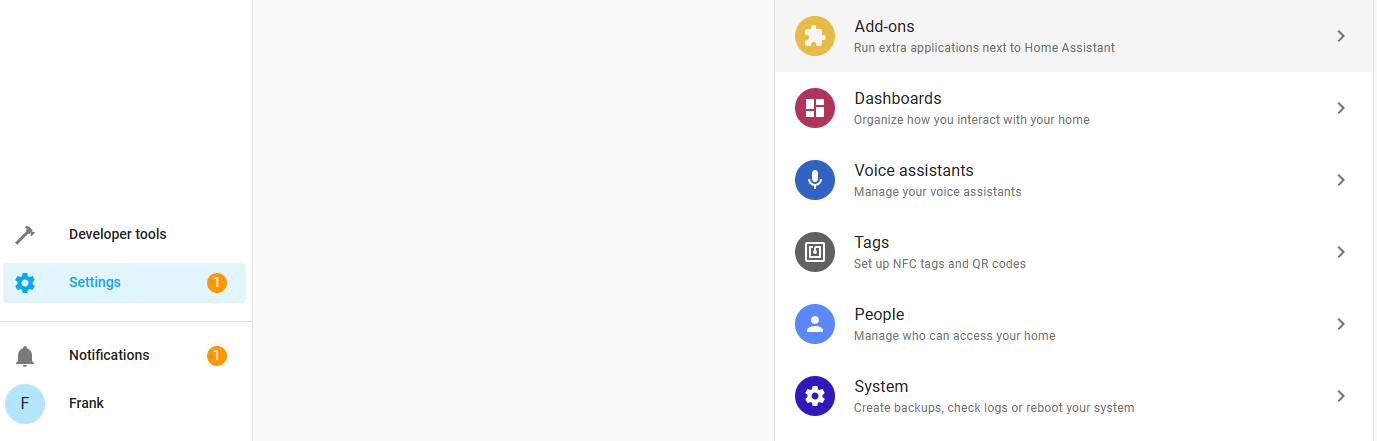
2. Select Add-on Store in the bottom right.

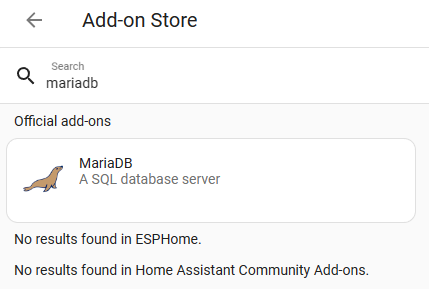
3. Search for the MariaDB database, select it, and then Install. If you don’t install MariaDB, Nginx Proxy Manager will not work!
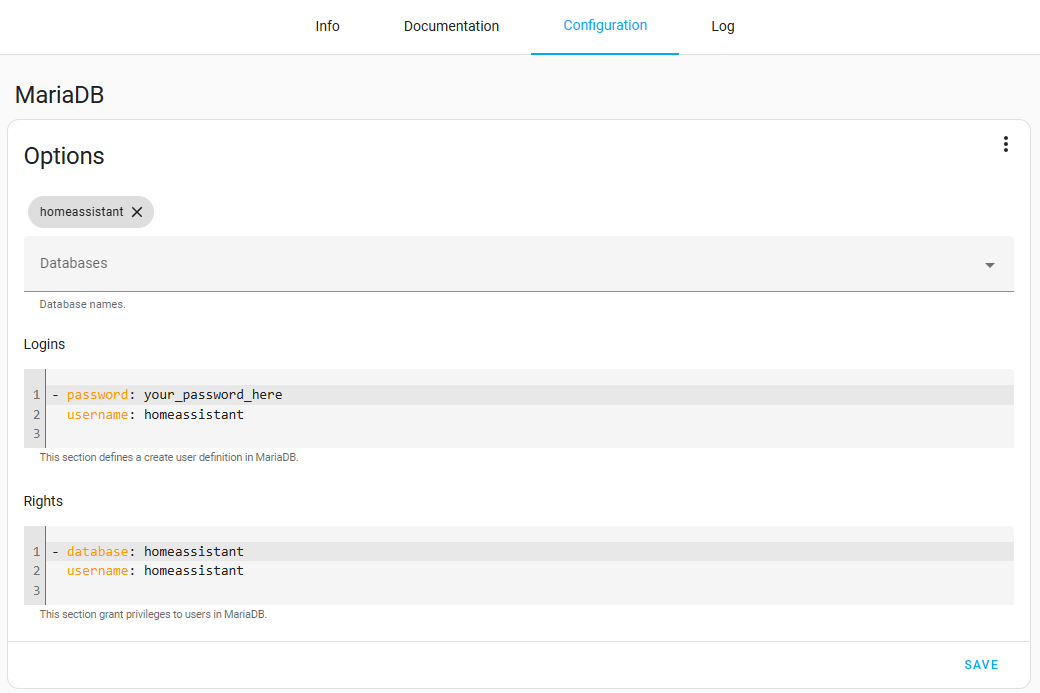
4. Select Configuration, and then enter a password (which you’ll use to access the database), then Save.
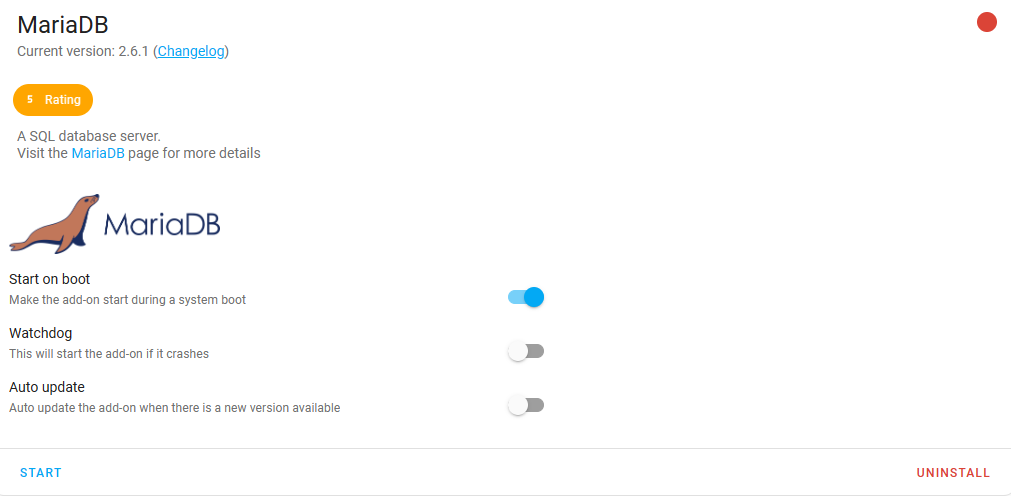
5. After the password has been updated for MariaDB, select Start (in the Info tab).
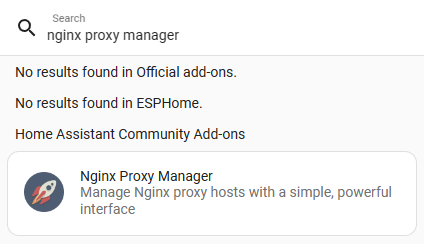
6. Now that MariaDB is installed, search for Nginx Proxy Manager and then select it in the Add-on Store.
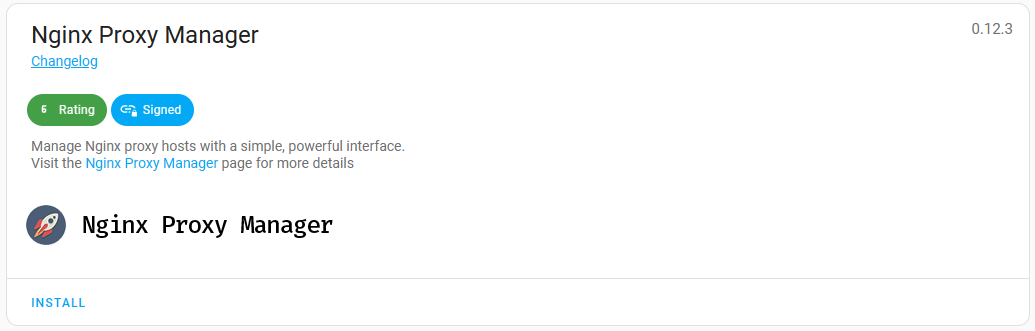
7. Select Install and the application will start to install.
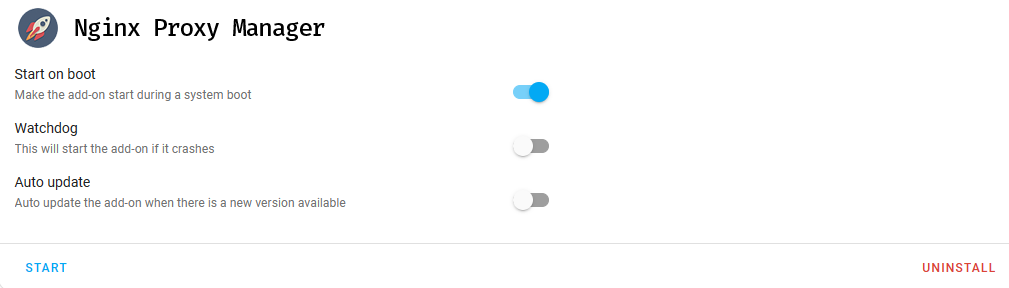
8. When it’s done installing, select Start. This is also where you can enable Watchdog (to restart the service if it stops) if you’d like!
9. After it’s started, you can select Open Web UI. By default, Nginx Proxy Manager uses TCP port 81 for the web interface (and TCP ports 80 and 443 for the actual reverse proxies).
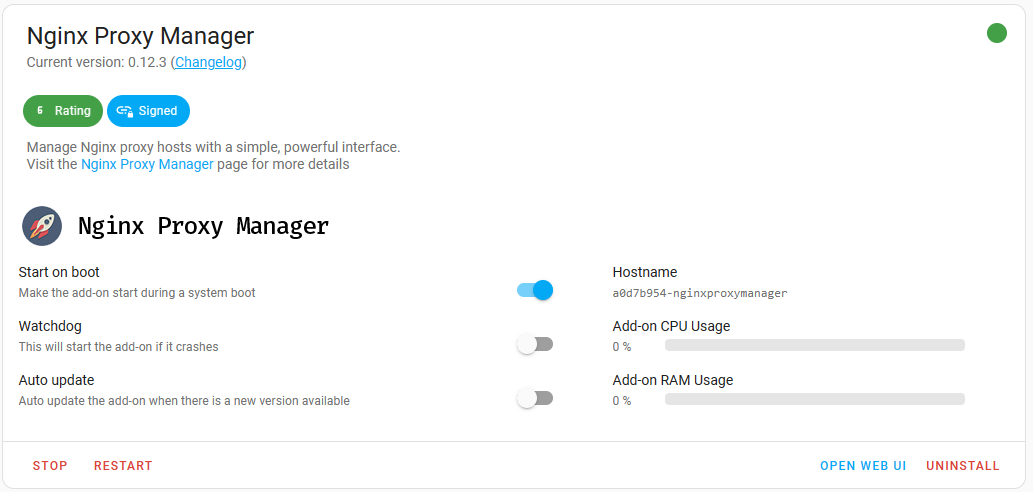
10. Select Open Web UI and you’ll be at the login page for Nginx Proxy Manager! If for some reason the web user interface isn’t accessible, check the log to see if there are any errors.
Accessing and Using Nginx Proxy Manager
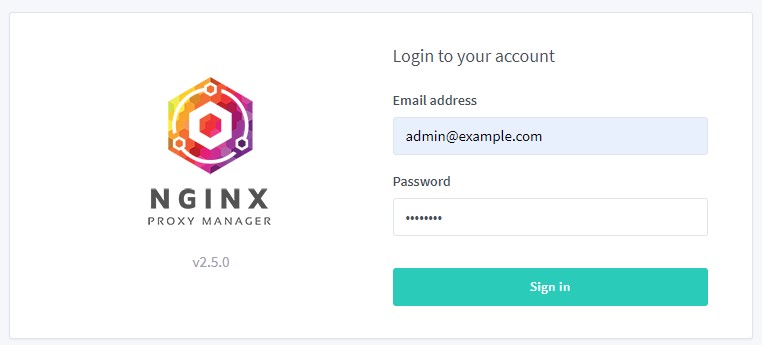
1. Login with the email address admin@example.com and password changeme.
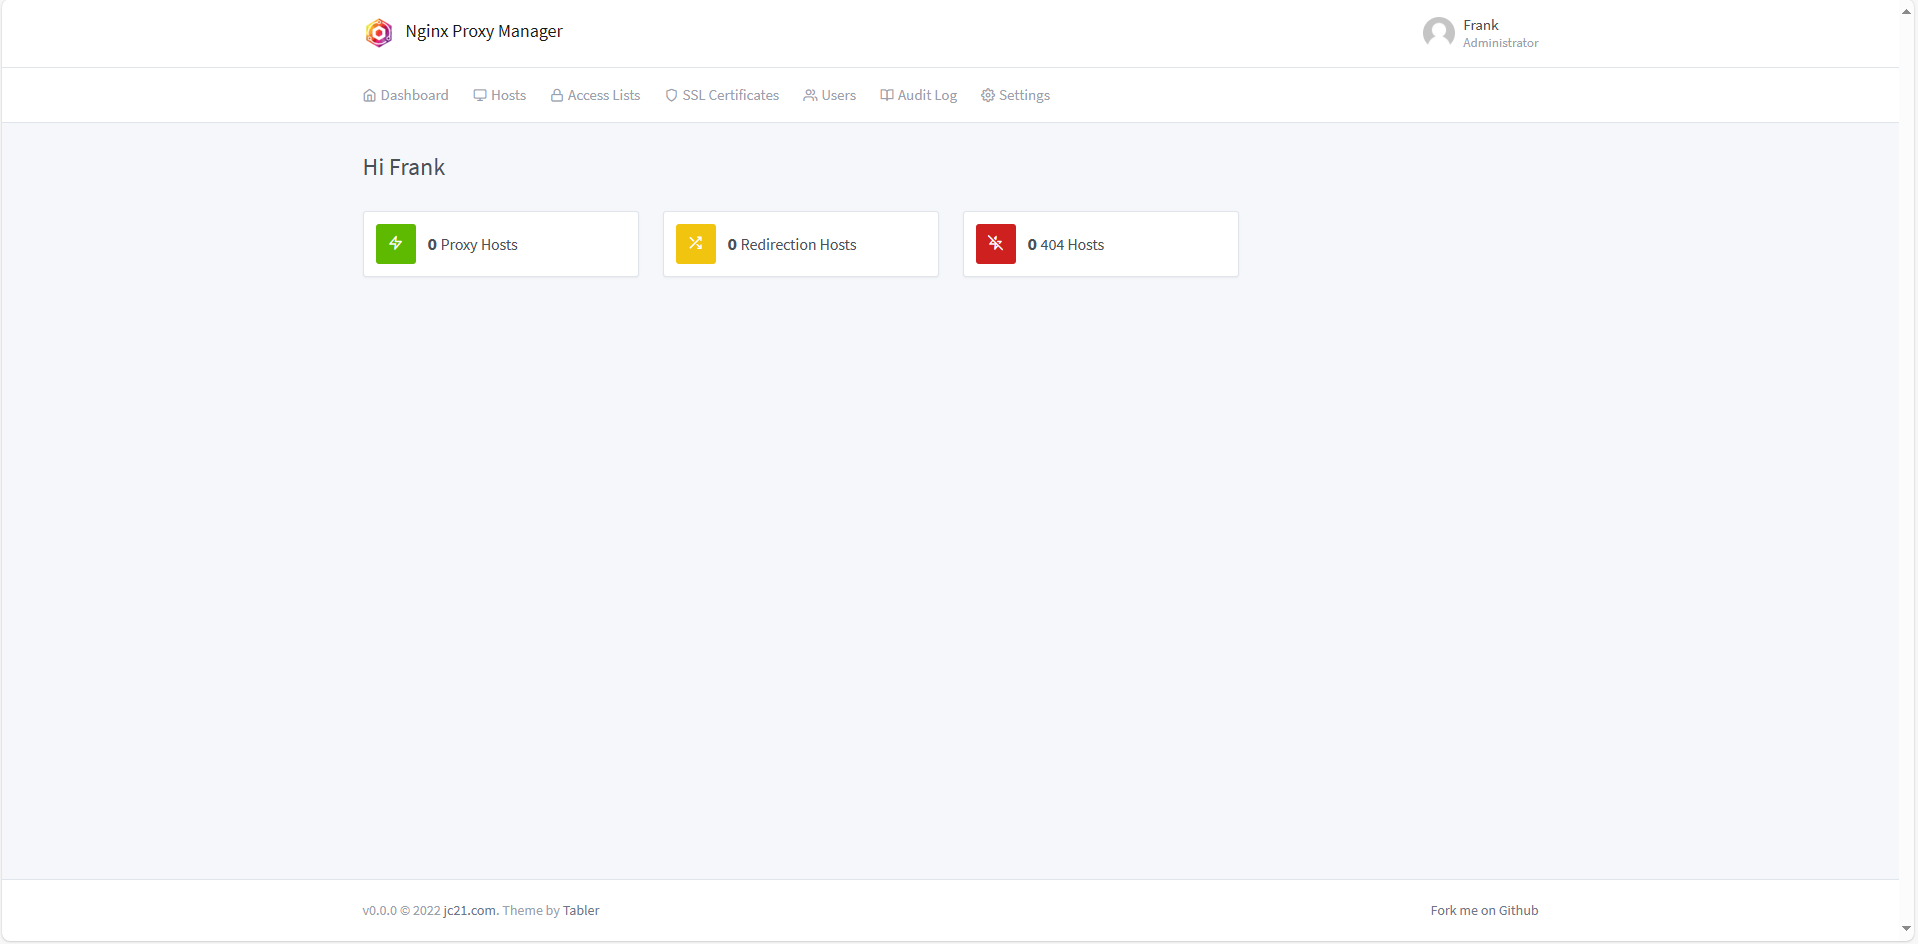
2. After logging in, you’ll be prompted to update your password and email address and after you do, you’ll be at the dashboard!
Make sure that you port forward TCP ports 80/443 to your Home Assistant server so that you can access your devices from outside of your local network!
Creating a Proxy Host
When you try and create a Proxy Host, there are a few important fields to take note of:
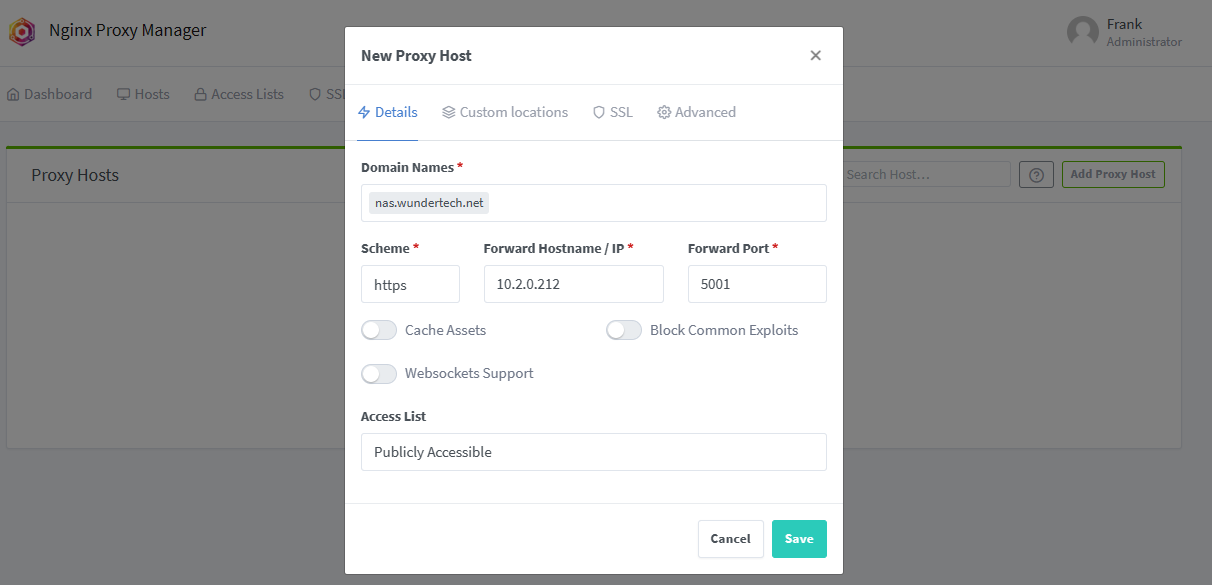
- The domain name will be the subdomain + domain that you are using for this proxy host. If you don’t own a domain, it’s important to purchase one before continuing as you’ll be able to create as many subdomains as you’d like, as well as get SSL certificates.
- The scheme will be the way you access the local service. For example, if you’re accessing the local service using http (http://local_ip), then you’ll use http here. If it’s https (https://local_ip), it’ll be the https scheme.
- This is not what you’ll use to access this domain from outside of your local network!
- In the Forward Hostname/IP section, enter the local IP address or hostname (if using IP, make sure it’s static).
- In the Forward Port section, enter the port this service uses.
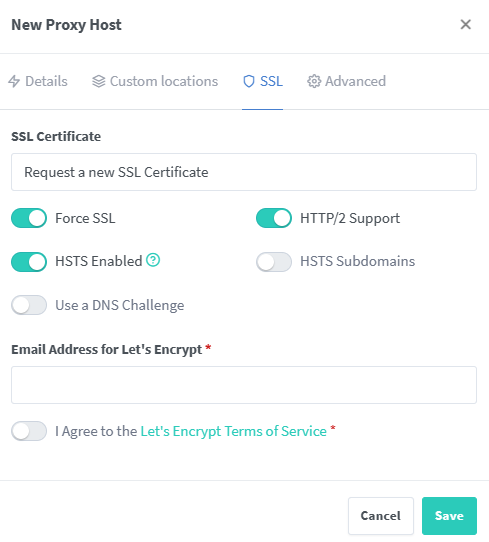
Getting a Let’s Encrypt SSL certificate
In order to get a Let’s Encrypt SSL certificate, you’ll have to select the SSL tab and request a new SSL certificate. You can get a wildcard certificate if you’d like (*.domain.com), or you can simply request it for this individual service. A few key notes:
- The DNS configuration must be done on the website where you purchased your domain name with either a CNAME (DDNS) or A (IP Address) record.
- You can use a DNS challenge if you’d like, but the process is slightly different and can be configured by following this video and configuring Cloudflare.
Assuming everything is configured properly (port forwarding, SSL certificate, domain configuration) if you access the subdomain + domain that you configured, you should have a secured version of your web service!
Conclusion & Final Thoughts
Every time I use NGINX Proxy Manager, it reminds me how simple it really is. After using various different types of reverse proxy servers, this is truly the easiest one that I have ever used. It works, has a simple user interface, and makes certificate retrieval (and even DNS challenges) super simple. You really can’t go wrong with NPM.