This tutorial will look at how to set up WireGuard on pfSense. WireGuard is a VPN tool that’s faster, simpler, and leaner than something like OpenVPN. Where OpenVPN has the benefit of longevity, WireGuard is the newer, faster VPN protocol that many people are looking to try. While I love WireGuard, many users ask if they should set up redundancy for their VPN, and I think that it’s a great idea. If you want to do that, please consider setting this up with OpenVPN as well. This way, you are ensuring that you’ll always be able to connect.
This is a long tutorial, because the configuration is very complex compared to other firewalls. With that said, I’ve been running WireGuard for many years at this point, and I can confirm that this setup process still works properly in 2026!
How to Set Up WireGuard on pfSense
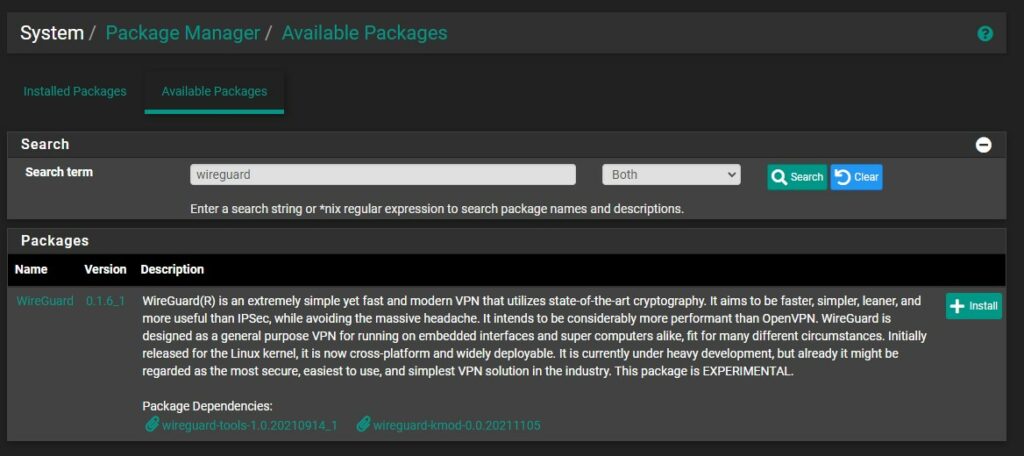
The first thing that we need to do is install the package for WireGuard.
1. Open the Package Manager and search for WireGuard, then Install the latest version of the package. This will install the Server for WireGuard.
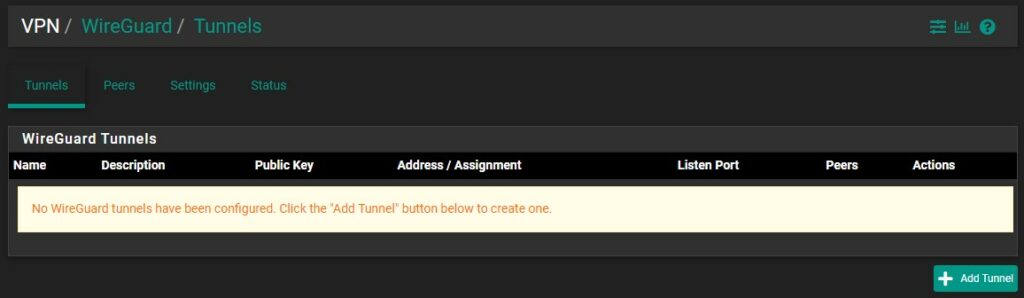
2. After the package has installed, select VPN then WireGuard and under the Tunnels section, select Add Tunnel.
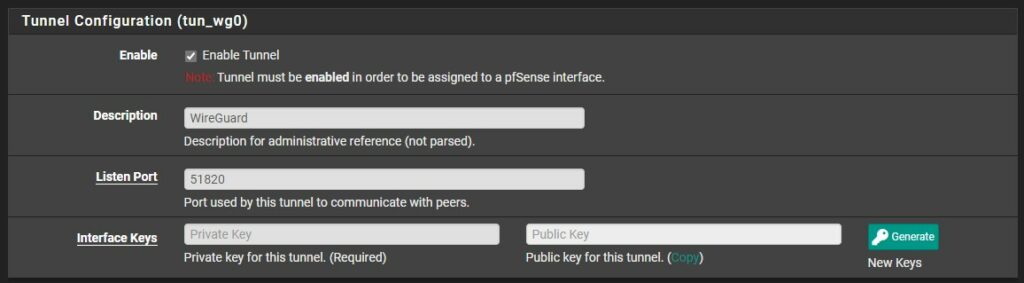
3. In the Tunnel Configuration, set the Description as WireGuard, the Listen Port as 51820, then Generate private and public keys.
4. Copy the Public Key. We will need this for our client configuration.
5. Create the tunnel, then select Settings, and ensure that Enable WireGuard is selected. Then Save and Apply.

WireGuard Gateway Interface Setup Process
Now that we created our pfSense WireGuard tunnel, we have to create the WireGuard Gateway interface.
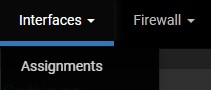
1. Select Interfaces, then Assignments.
2. At the bottom, add the tunnel we just created. The name will be listed as OPT, then a number.

Select the interface (OPT8 below) to edit it.

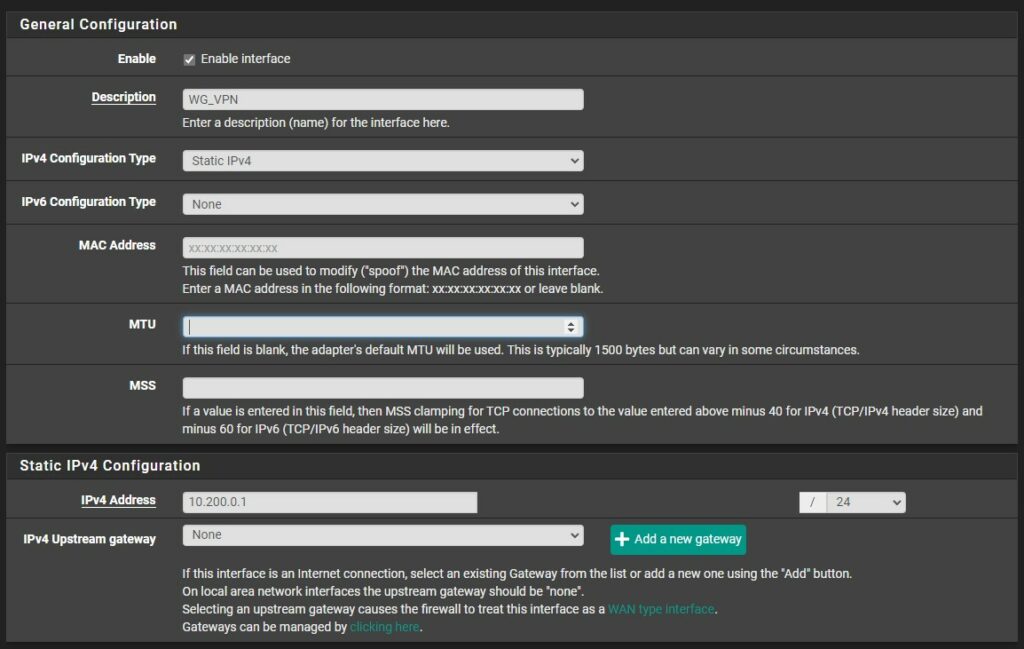
3. Enable the interface and change the Description to whatever you’d like. Change the IPv4 Configuration type to Static IPv4.
4. In the Static IPv4 configuration, set the IP address as 10.200.0.1 /24. If you’d like to use a different subnet range, you can change the 10.200.0 to whatever you’d like (as long as it’s not currently in use). Set the MTU as 1420 (special thanks to r/pfsense for the info). Save and Apply the interface settings.
5. If you go back to the WireGuard Tunnel, you’ll now see that the interface is assigned to our Tunnel.

Creating Firewall Rules for the WireGuard Port
Now that a WireGuard tunnel and interface have been created, we need to create two firewall rules. One for our WG_VPN interface, and one for WAN (to allow traffic on port 51820).
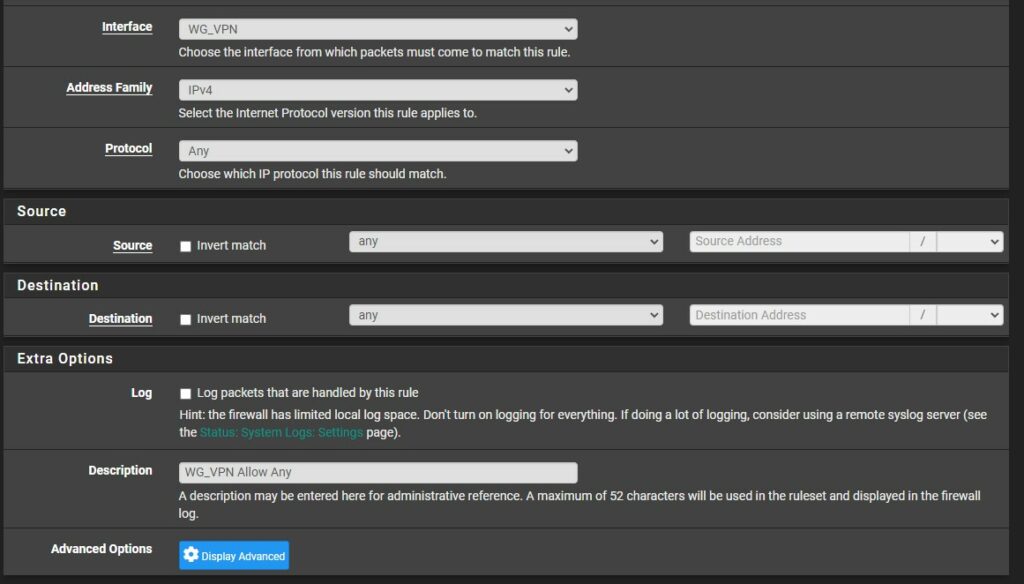
1. Select Firewall, then Rules, and under WG_VPN (our WireGuard Interface from above), Add a new rule.
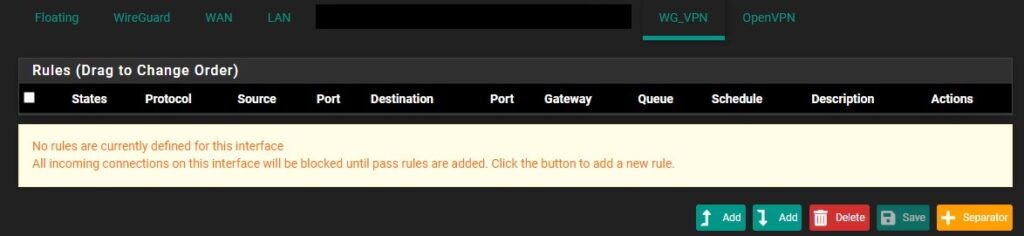
2. Change the Protocol from TCP to Any and give the firewall rule a Description, then Save and Apply the rule.
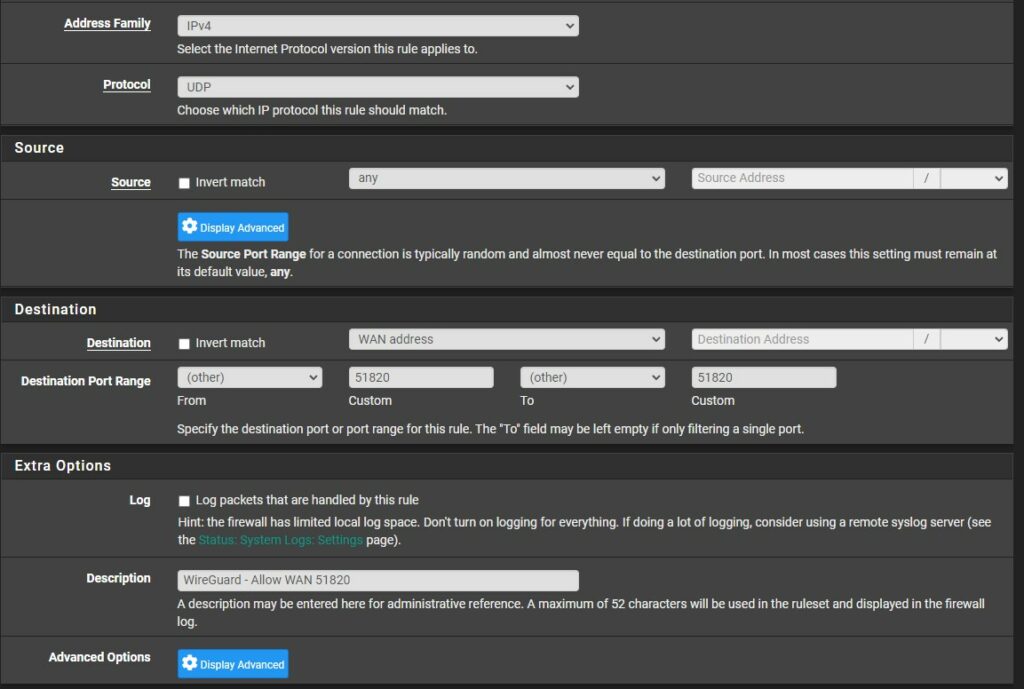
3. Select WAN (same as step one, but for WAN instead of WG_VPN) and add a new firewall rule. Leave the Address Family as IPv4, then set the Protocol to UDP. Set the Destination as WAN address and set the custom port from and to 51820. Save and Apply the new firewall rule.
WireGuard Peer Configuration
We will now create a “peer”, which is a client that will connect to our server. The WireGuard Peer setup is slightly unique in the sense that you need to get the Public Key from the peer you’re setting up.
This can be anything, from a Windows PC to a Mac/Linux device, or even an Android/iOS device. The process will be the same, meaning that you need to set up the interface on that device first. The YouTube video above explains this in detail.
Android Setup
1. On Android, I created a new WireGuard Tunnel by creating a Name and generating a Public/Private Key. In the Addresses section, I set it as 10.200.0.5/24, which is the IP address that will be assigned to this client. Make sure you add /24 or you will run into trouble connecting to other devices.
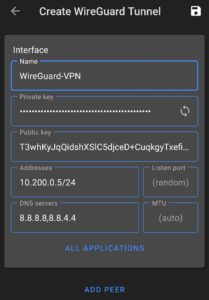
Copy the public key and save. We will modify the WireGuard peer configuration on this device after we finish setting up pfSense.
Windows OS Setup
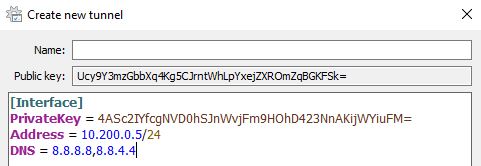
2. On Windows, add an Empty Tunnel. When you do, a Public Key and Private Key will be generated. In the Addresses section, I set it as 10.200.0.5/24, which will be the IP address that will be assigned to this client. Make sure you add /24 or you will run into trouble connecting to other devices.
Copy the public key and save. We will modify the WireGuard peer configuration on this device after we finish setting up pfSense.
Connecting Client Peer to Server
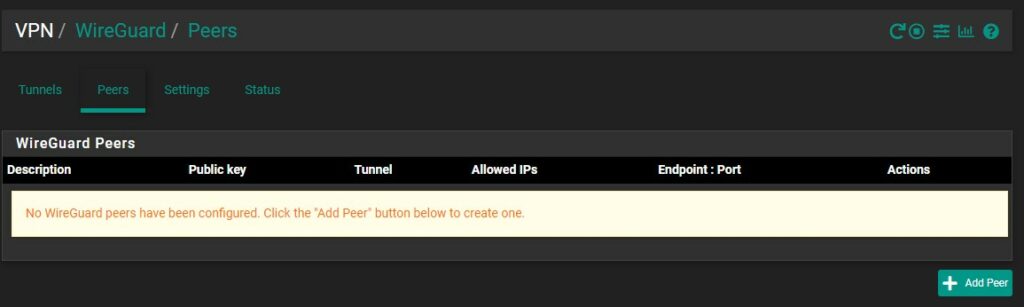
3. On pfSense, select VPN then WireGuard, then select Peers and Add Peer.
4. In the Tunnel section, select the WireGuard VPN tunnel we created in step one. Create a Description, then enter the Public Key of the peer. To be clear, this information should be the public key on the device that you want to connect back to this server (either the Android or Windows device from above).
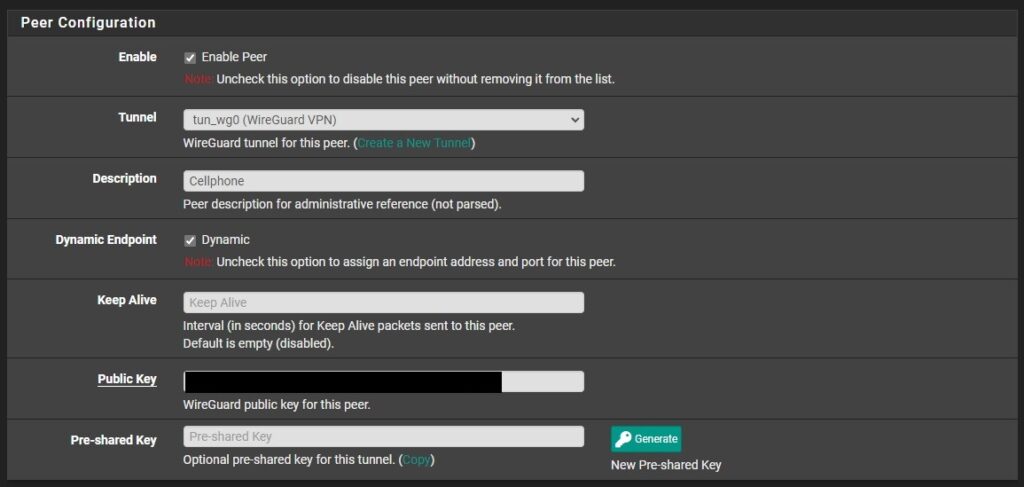
5. In the Allowed IPs section, set the IP address that you set in the client configuration, but make sure you use /32. The best way to think of this is the Allowed IPs on pfSense is the IP address that your client will use when connecting.

The peer is fully configured at this point, but you can increase the security of WireGuard by ensuring a public key and pre-shared key will be required to connect. To do this, select Generate a pre-shared key. You’ll then have to copy this and add it to the WireGuard Client configuration.
To be clear, this will require the WireGuard client to contain the pfSense servers Public Key and Pre-Shared Key in order to connect.

How to Configure Client Devices in WireGuard
Now that the WireGuard peer has been configured on pfSense, we must set up the peer configuration on our client device.
Android WireGuard Client
1. Using our Android phone as an example, Public Key will be the Public Key of our pfSense WireGuard Tunnel. You can reference this information from the Tunnel configuration if needed in pfSense.
2. If you set up a pre-shared key above, enter the pre-shared key. If you didn’t, you can skip this step.
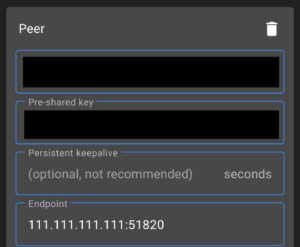
3. The endpoint will be your static external IP address. If you don’t have a static external IP address, it will be your DDNS hostname. If you don’t have a DDNS hostname, you can follow this tutorial to set one up using DuckDNS (free) or this one to set up DDNS using Cloudflare (you must own your own domain for this option). At the end, append port 51820.
IP_ADDRESS_OR_DDNSHOSTNAME:51820
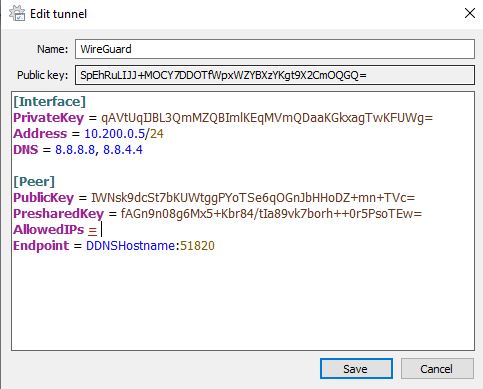
Windows WireGuard Client
The same functionality will work on Windows, though you’ll have to type in the variables first. Below is an example configuration.
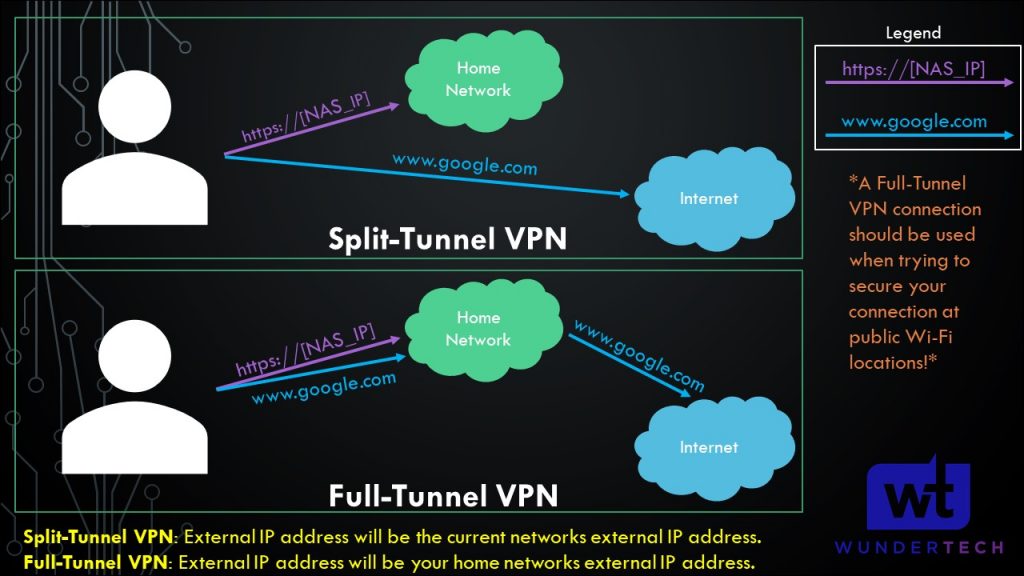
Split-Tunnel vs. Full-Tunnel VPN Comparison
This section is important for future steps. We will be creating either a split-tunnel VPN or a full-tunnel VPN (or both) for WireGuard.
- Split-Tunnel VPN: Traffic is only sent through your network if it is attempting to access an internal resource. Your IP address when navigating to a site outside of your network will be the IP address of the network that you are currently on.
- Full-Tunnel VPN: All traffic is sent through your VPN tunnel. Your IP address for internal and external requests will be your home networks. I created a very basic image below that explains this.
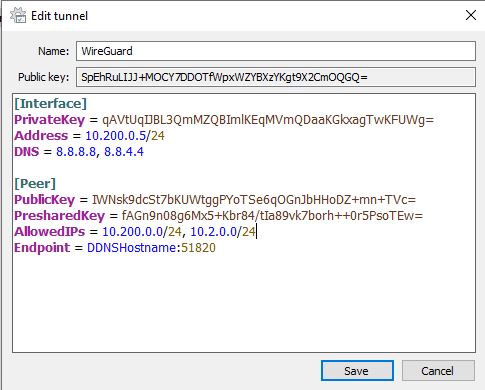
Split-Tunnel WireGuard Client Configuration
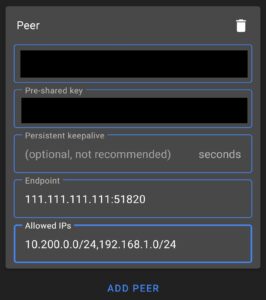
In the AllowedIPs section, enter the IP addresses that you’d like sent through this VPN tunnel. At minimum, this should be your VPN subnet (in our case, 10.200.0.0/24) and LAN subnet (so that you can connect to your local devices). Separate all subnets that you’d like to access by a comma.
Android Example
Windows Example
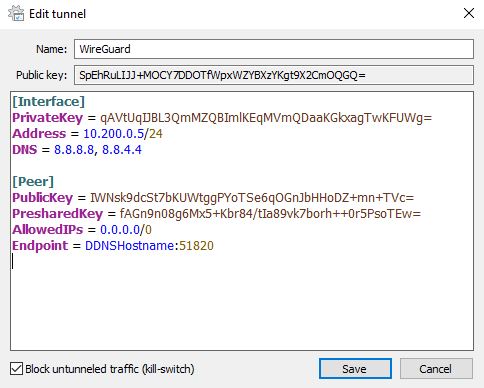
WireGuard Full-Tunnel Client Configuration
If you’d like to route ALL traffic through the VPN tunnel, set the AllowedIPs parameter to 0.0.0.0/0. This will route all traffic through the VPN tunnel.
Android Example
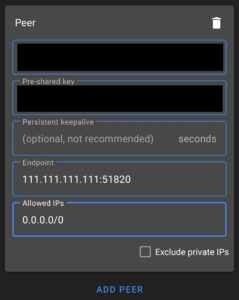
Windows Example
Connecting Client Devices to the WireGuard Server
Your entire configuration should be set up at this point and is ready to go! Ensure that you’re on an external network and connect. You should be able to connect to your LAN subnet and any local resources hosted on it.
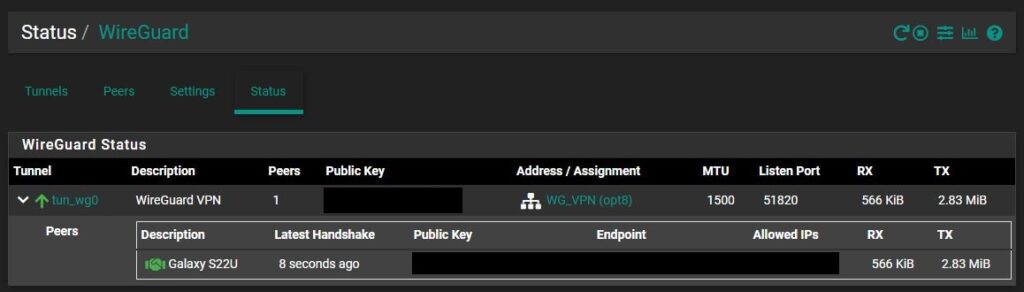
You can check that the client and server have made a “handshake” by selecting Status then WireGuard in pfSense and expanding the tunnel we created. If you’re connected and the handshake was successful, you will see a green handshake symbol.
Troubleshooting: Restarting the WireGuard Service
If you ever have to restart the service for WireGuard, select Status then Services and select the Restart icon.

Conclusion & Final Thoughts on the pfSense WireGuard Setup
This tutorial looked at how to set up WireGuard on pfSense. WireGuard is my favorite VPN and I’ve been using it for many years and it is absolutely rock solid. Not only does it provide great performance, but it’s been incredibly reliable as well. As mentioned earlier, you can set up OpenVPN and run that on pfSense as well to ensure you have VPN redundancy if you’d like, but truthfully, I don’t think it’s necessary.