Today we are going to take a look at how to set up DDNS on pfSense using Cloudflare.
DDNS can be used for many home-lab services as it simply tracks the external IP address of your home network. If you’re fortunate enough to have a static external IP address, DDNS will do nothing other than allow you to connect a domain name to your external IP address. However, if you have a dynamic IP address (as most people do), DDNS will allow you to ensure you’re always connecting to your external IP address. This can all be accomplished relatively easily by following the instructions below on how to set up DDNS on pfSense using Cloudflare.
You will have to own a domain that is connected to Cloudflare to follow the tutorial below. If you would like to learn more about Cloudflare, please watch the video below!
1. Instructions
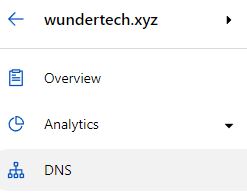
1. Log in to Cloudflare and select DNS.
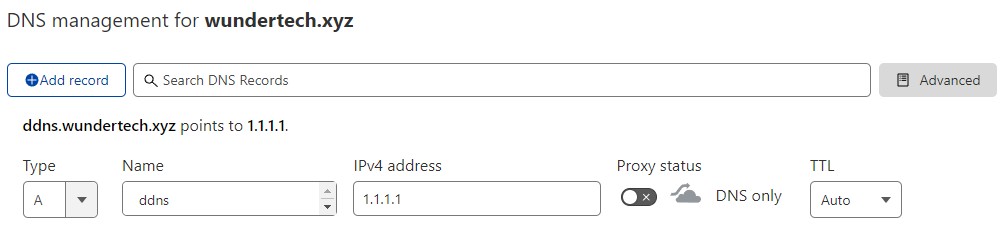
2. Select Add Record and leave the Type as A. In the Name section, enter how you’d like to access it. Keep in mind that this is the subdomain portion, which is the extension that comes before your domain name. You can use whatever you’d like (ddns is what I’ll be using) or you can use the @ symbol which will point directly to your domain (no subdomain). In the IPv4 field, enter 1.1.1.1 (Cloudflare’s DNS server which will be updated at a later time) and change the Proxy status to DNS Only, then Save.
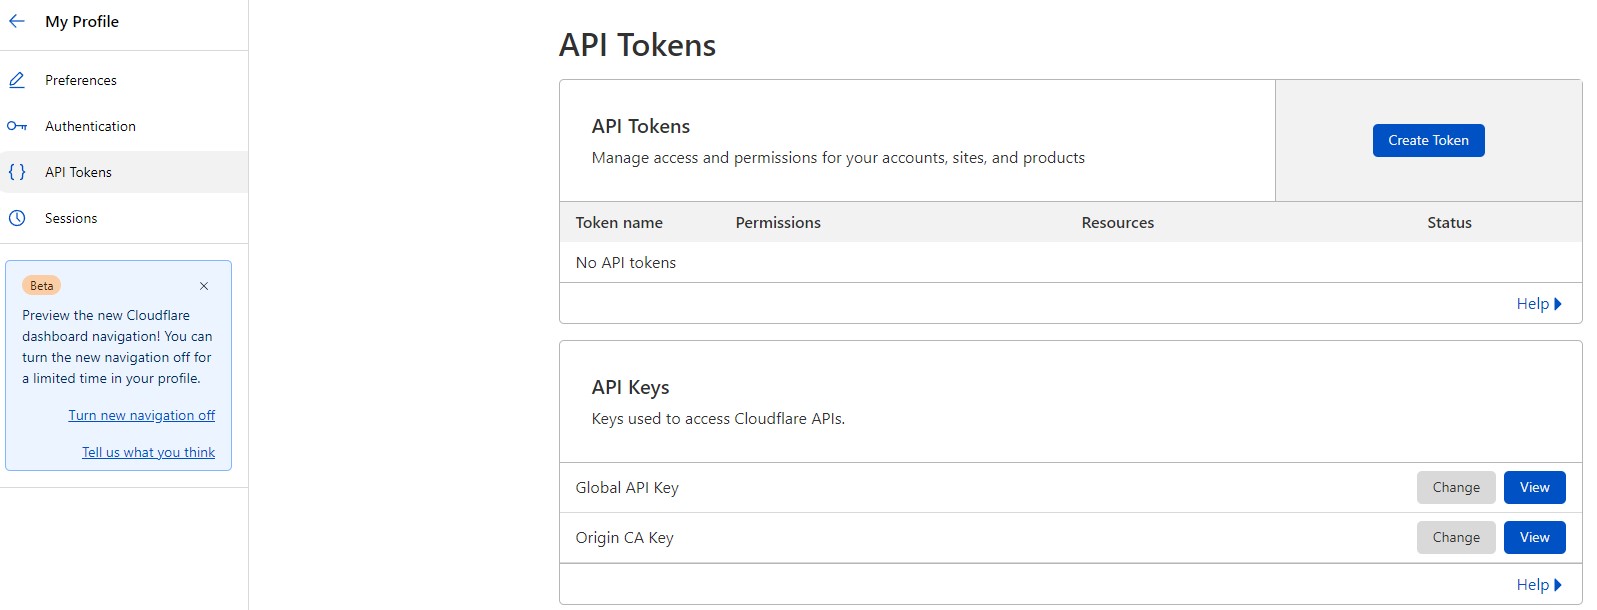
3. We now need our Global API Key to use as our password in pfSense, which can be accessed in the API Tokens section of Cloudflare (My Profile > API Tokens).
NOTE: As of the creation of this tutorial, custom API tokens are not working properly, however, they’re a significantly better solution. Using a custom API token will allow you to grant DNS permissions ONLY, while the global API key gives permission to EVERYTHING. I am hoping that at some point, this is fixed.
4. Select View next to your Global API Key then enter your password
5. The API Token will now appear. Copy the Token, then head over to pfSense.
6. Select Dynamic DNS under Services, then select Add to add a new service.

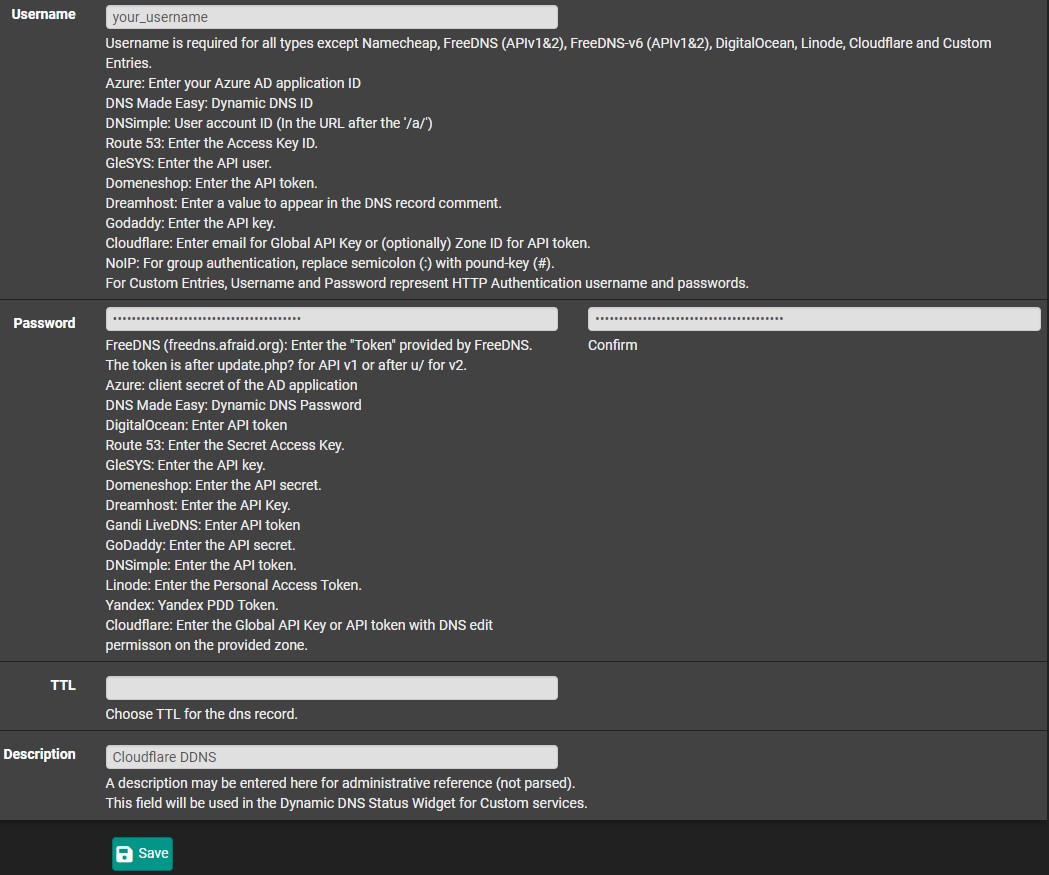
7. Change the Service Type to Cloudflare, then populate the Hostname section with your subdomain and domain name.
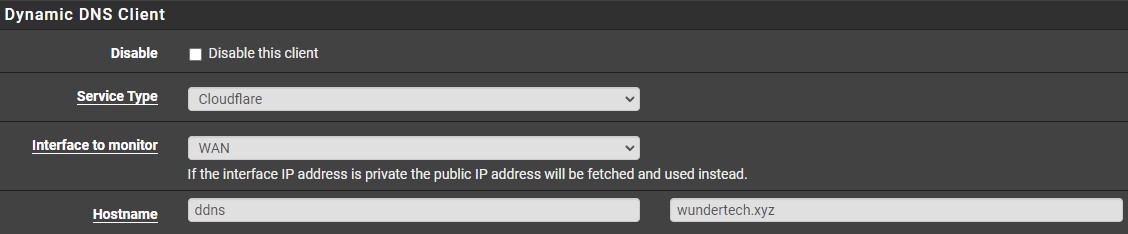
8. Set the Username field as your Cloudflare username, then paste in the API Token that you retrieved earlier. Finally, set a Description and Save.
NOTE: If you’d like to use Cloudflare’s proxy service, select Enable Proxy. This will mask your home IP address and will return Cloudflare’s IP address if requested.
9. The Cached IP address in pfSense will now show your external IP address. As long as the status shows a green checkmark, everything will function as expected and the domain name you selected will ALWAYS point to your external IP address! If you check the IPv4 field in Cloudflare (initially set as 1.1.1.1), it will now be updated to your external IP address as well.

2. Conclusion – How to Set Up DDNS on pfSense using Cloudflare
This tutorial showed how to set up DDNS on pfSense using Cloudflare. DDNS can be used for many services and running it in pfSense with Cloudflare is a great option! Not only does it work well, but your home IP address can be masked by using Cloudflare’s proxy which is a great feature! In a later tutorial, we will take a look at how you can utilize this DDNS hostname to connect to your local network utilizing a VPN.
Thank you for checking out the tutorial!