In this tutorial, we will look at how to set up OpenVPN on pfSense. pfSense is a great place to run OpenVPN as there are tons of controls you can use to limit or enhance it’s functionality.
Why Should You Install OpenVPN on pfSense?
I’ve created a few OpenVPN tutorials using a Raspberry Pi or Synology NAS, but out of all implementations, this is my “favorite”. Utilizing pfSense allows you to run OpenVPN on your router and offload the service to that device which is arguably the best place to have it running.
OpenVPN is a little more complex to set up on pfSense than it is on a Raspberry Pi or Synology NAS, but that’s just how pfSense is. Tons of options (which can mostly be skipped or bypassed), but having those options offer you a ton of flexibility that you don’t normally have. My goal is to simplify the process as best as I can and show how to set up OpenVPN on pfSense as easily as possible.
Please be aware that if you do not have a static external IP address (which most people don’t), you must set up DDNS. DDNS stands for Dynamic DNS and it tracks your external IP address to ensure that you will ALWAYS connect to your home network when using that domain name. If you own your own domain, you can set up DDNS on Cloudflare.
However, if you don’t have a domain name, the best (and easiest) solution that I’ve used is DuckDNS. DuckDNS is totally free and doesn’t have any annoying 30-day refresh intervals like No-IP. Please follow this tutorial to set up DuckDNS on pfSense.
This tutorial will be from a home user’s point of view.
How to Configure OpenVPN on pfSense
This is everything you need to do to set up OpenVPN on pfSense and have a functional VPN server.
- Configure the OpenVPN Server by setting up a certificate, subnet, and firewall rule.
- Export a client certificate for each user that will be accessing OpenVPN.
- Modify the configuration file for client devices, then connect to the server using an OpenVPN client.
1. Server Setup for OpenVPN
The easiest way to set up OpenVPN is by using the OpenVPN wizard. It will guide you through most of the process.
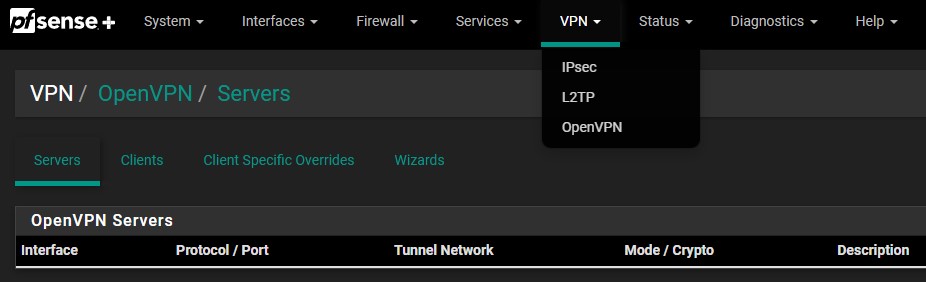
1. Select VPN and then OpenVPN. From there, select Wizards.
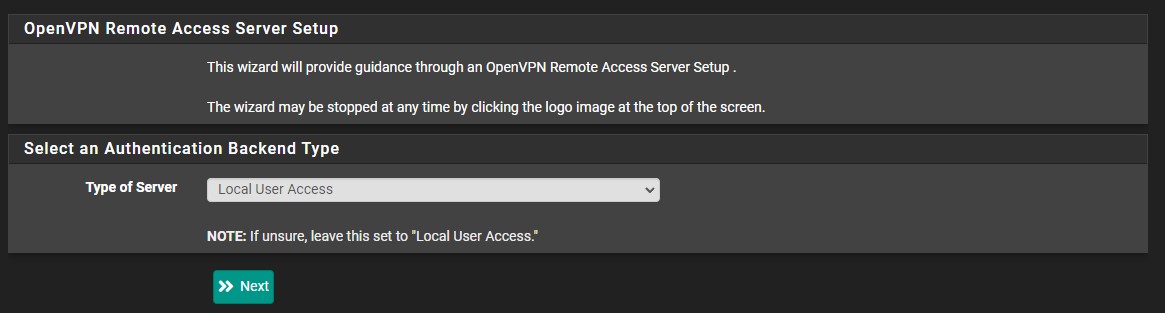
2. Keep the Type of Server as Local User Access and then select Next.
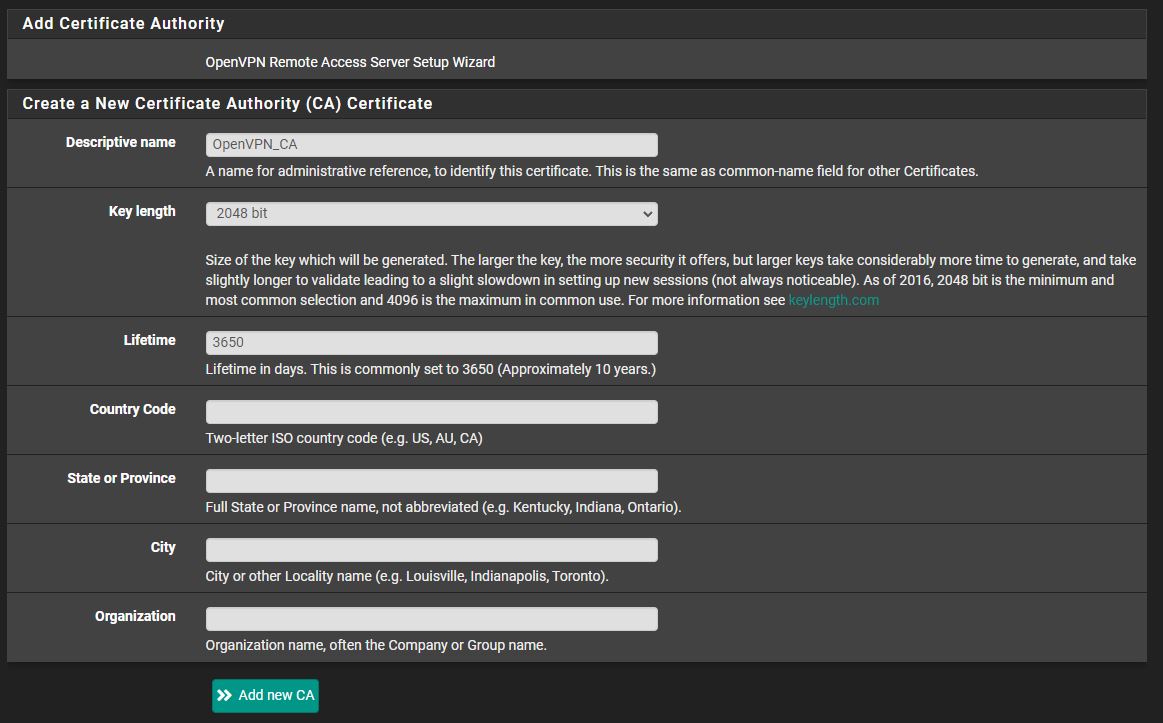
3. OpenVPN will need its own Certificate Authority. Select Add new CA and at the next screen, give the certificate a name. Populate the location information if you’d like.
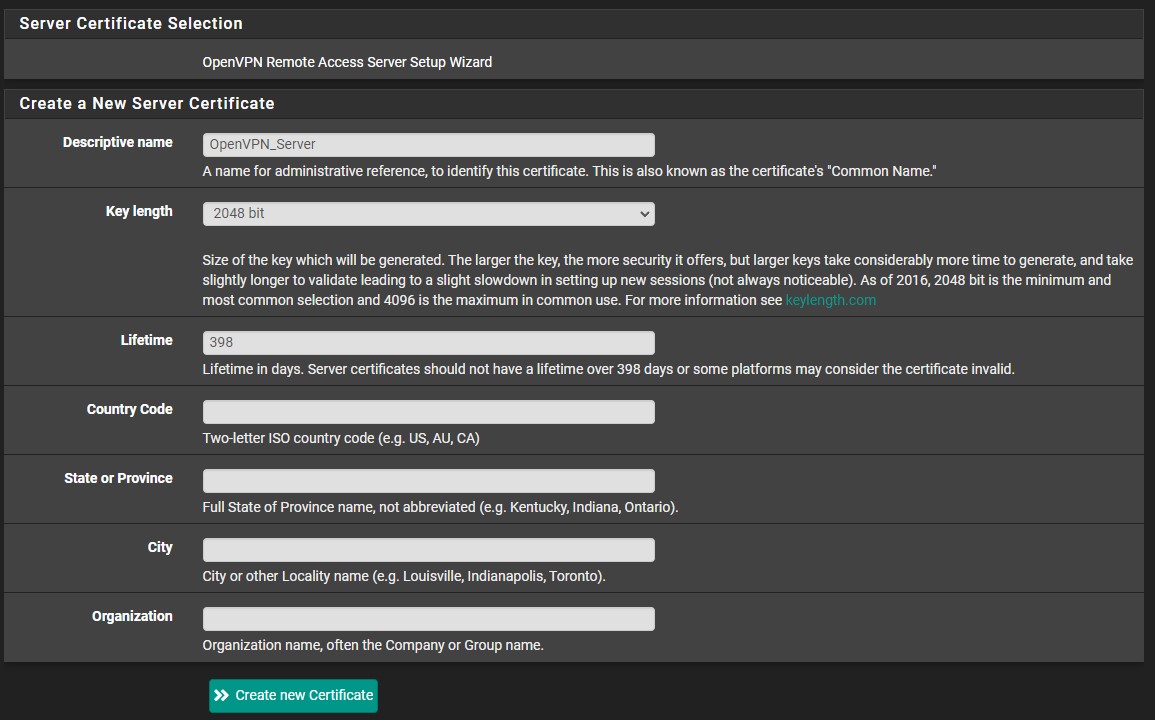
4. Next, we’ll create a server certificate. Give the certificate a name and like the last step, populate the location information if you’d like.
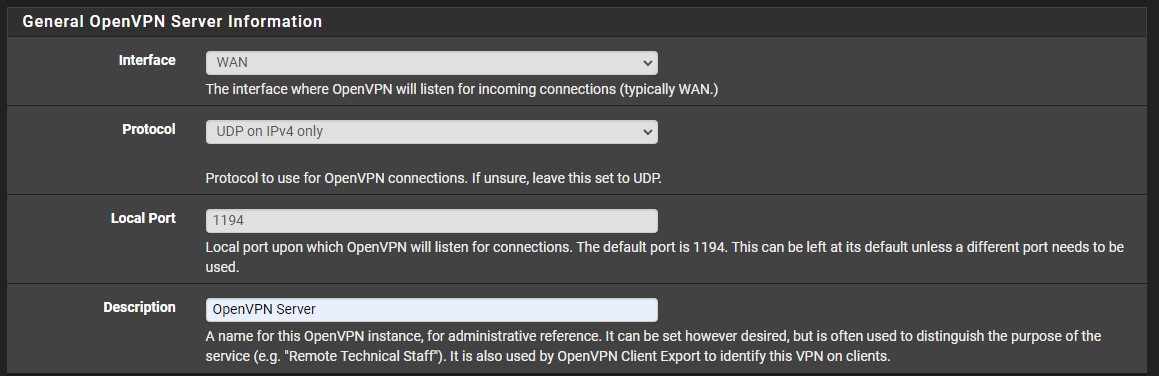
5. At the next step, give the OpenVPN server a description. Leave the interface, protocol, and local port as default (WAN, UDP on IPv4 only, 1194).
6. The cryptographic settings can stay as default and in the Tunnel Settings, ensure that you select a subnet that is NOT currently in-use. In the Local Network section, enter in your LAN subnet as it will allow the local network to be accessible through OpenVPN.
If you would like to set a maximum number of concurrent connections, you can change that setting here. The rest of the settings can stay as default. It is not required to change any additional settings, but if you’d like to use a specific DNS server, you can change that under the Client Settings. When you’re done with everything, select Next.

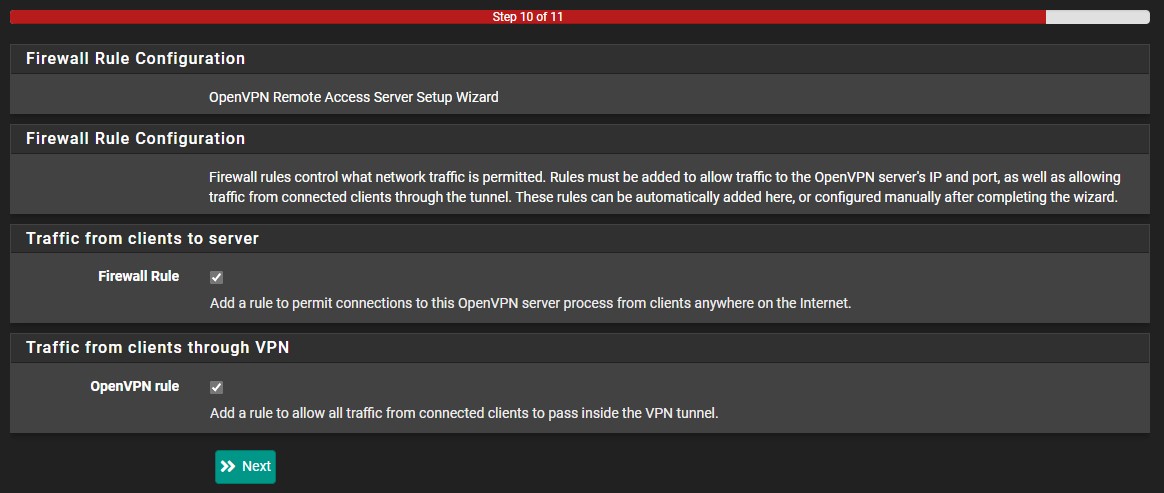
7. At the next screen, ensure that you automatically create the Firewall Rule and the OpenVPN Rule and then select Next. The server configuration is now finished!
2. OpenVPN Client Export Package & User Accounts
Before setting up a pfSense OpenVPN Client, there are two prerequisites that must be completed:
Ensure that you install the openvpn-client-export package from the Package Manager (System > Package Manager > Available Packages).

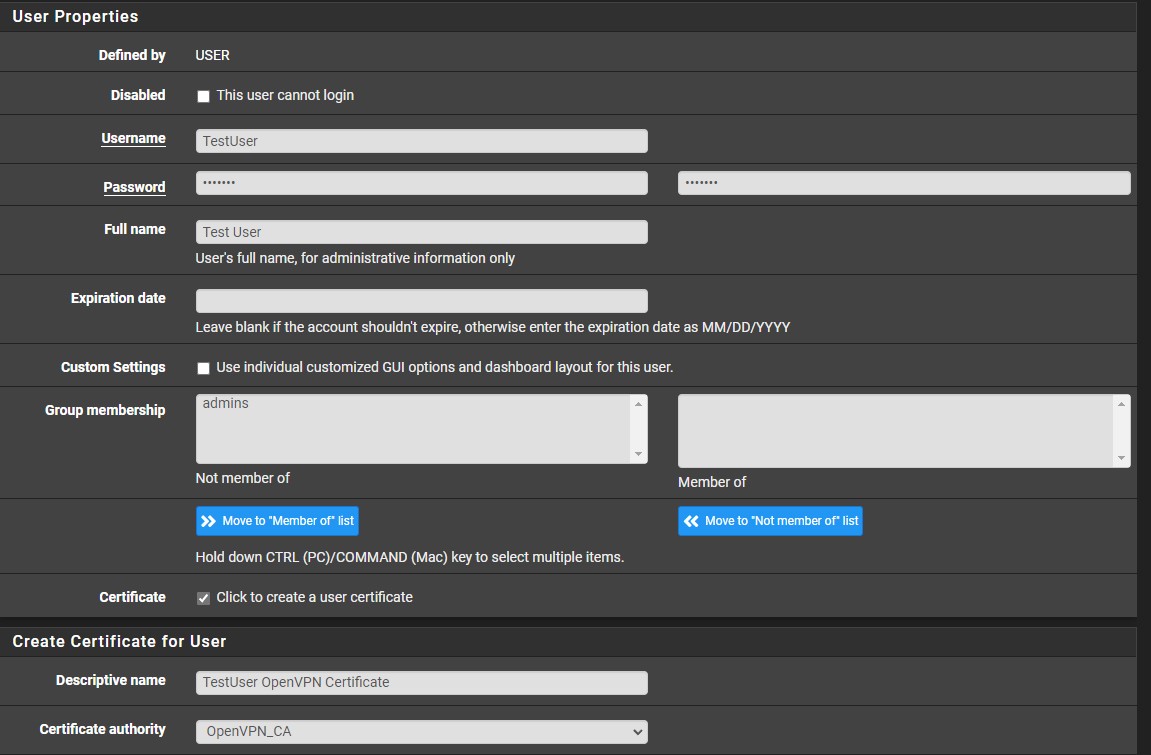
Ensure that you have a user account set up with a user-certificate created. This can be completed by selecting System > User Manager > Add. Select a username and password, then select click to create a user certificate. Give the certificate a name (generally, Username + OpenVPN Certificate) and ensure that the OpenVPN_CA that we created earlier is selected. Leave the rest as default and save.
3. Client Configuration
Now that the client export tool and user account are created, we can proceed in exporting our configuration file.
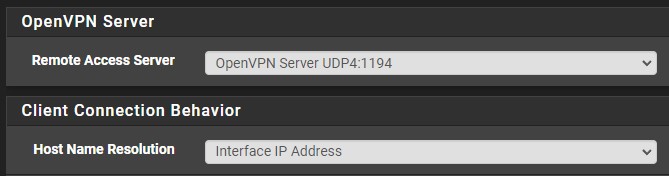
In the OpenVPN settings (VPN > OpenVPN), select Client Export. If you have a static external IP address, leave the Host Name Resolution as Interface IP Address. If you have DDNS set up on pfSense, the DDNS hostname will be available in the dropdown list. If you have DDNS set up on another device, select Other and enter in the DDNS hostname. You can then save these settings.
I generally recommend using the OpenVPN Connect (iOS/Android) file. This will generate an ovpn configuration file that can be used on Android/iPhone devices, or the new, OpenVPN Connect application on Windows or MacOS. By default, the configuration file will have all the necessary information that will allow you to connect back to your local network.
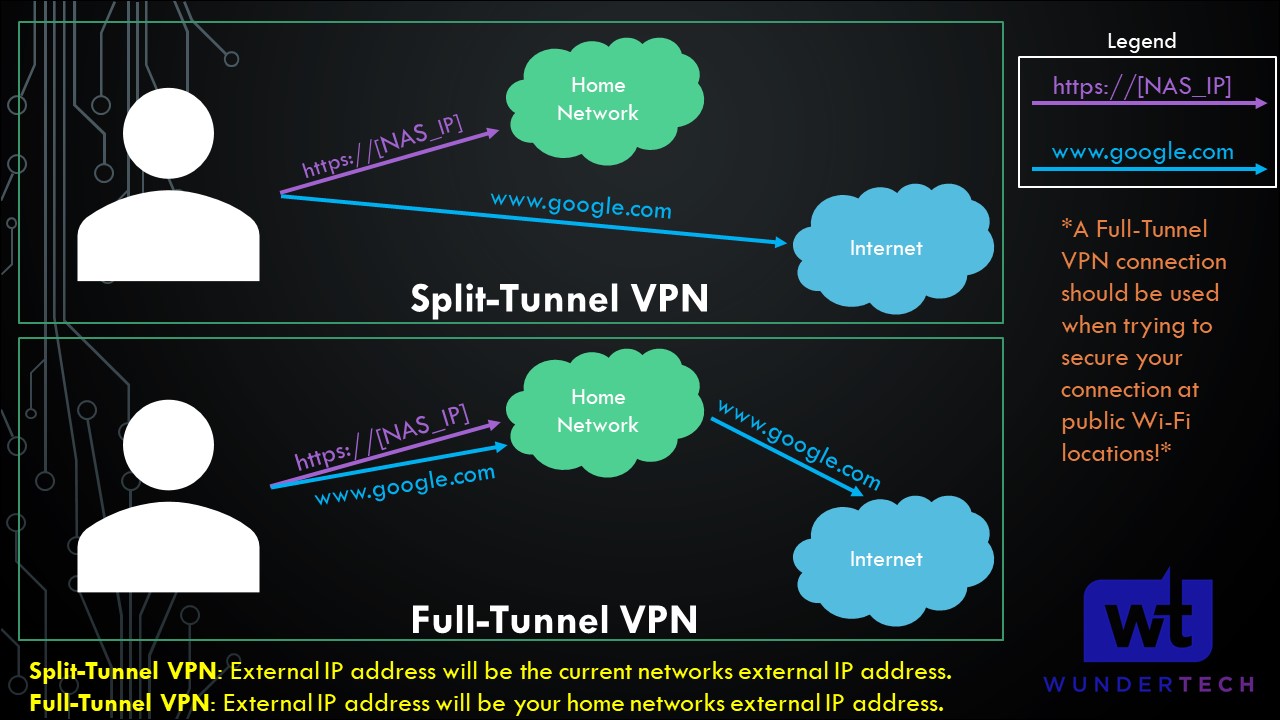
However, there’s one quick thing I’d like to cover regarding how traffic will be sent over that VPN tunnel. The image below will show you the difference between a split-tunnel and full-tunnel VPN.
Split-Tunnel VPN: Traffic is only sent through your network if it is attempting to access an internal resource. Your IP address when navigating to a site outside of your network will be the IP address of the network that you are currently on.
Full-Tunnel VPN: All traffic is sent through your home network. Your IP address for internal and external requests will be your home networks.
NOTE: This is not the exact network flow. I am simplifying the process as much as I can.
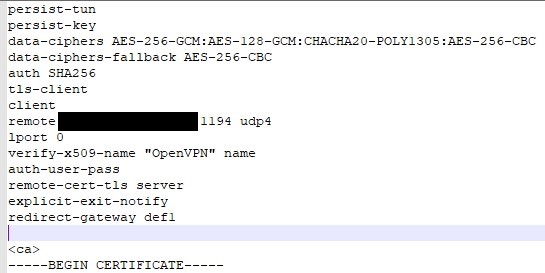
Please keep in mind that you can create two configuration files (one for split-tunnel and one for full-tunnel) if you’d like the option to use both. For a full-tunnel VPN configuration file, add the text below to your configuration file (above the certificate).
redirect-gateway def1
If you omit this line, the configuration file will be for a split-tunnel VPN by default.
Import this file in an OpenVPN Connect application and ensure that you’re not on your local network. The best place to test is on a mobile network using a mobile phone.
If you’d like to test the split-tunnel/full-tunnel VPN configuration, connect to the split-tunnel VPN, then search “what is my IP” in Google. The IP address returned should be the IP address of your mobile network (or whatever network you’re connected to).
If you then disconnect and connect to the full-tunnel VPN and search the same thing, you should return the IP address of your home network (where the VPN server is configured).
Conclusion & Final Thoughts on OpenVPN in pfSense
This tutorial showed how to set up OpenVPN on pfSense. Fortunately, by using the wizard and client-export tools, the process to set up OpenVPN on pfSense is relatively straightforward. You can now create as many users as you’d like, export their own configuration file and they will be able to connect to your VPN server!
Thank you for checking out the tutorial on how to set up OpenVPN on pfSense. If you have any questions, feel free to leave them in the YouTube comments!