In this tutorial, we will look at how to set up TrueNAS as a NUT server.
If you’re running TrueNAS, it’s very important to use a UPS device to automatically shut down your NAS server if it experiences power loss. This is generally because NAS devices utilize RAID, which means that a small part of each file is stored on each connected hard drive.
If you happen to lose power at the same time that a write action occurs, you run the risk of data corruption or in a worst-case scenario, the entire RAID array crashing.
You don’t have to pick a specific UPS device to use, but I have always trusted APC devices and they’ve worked well for me in the past. There are rack-mounted solutions that generally cost a lot, but also have a bunch of other benefits such as pure sine wave output. For a basic UPS though, I recommend checking out this APC device. You must make sure that the UPS device can communicate with TrueNAS through a USB cable.
This tutorial will look at how to set up TrueNAS as a NUT server, but also how to connect TrueNAS to your NUT server if it’s running on another device (NUT client).
We will look at how to set up TrueNAS as a NUT server on TrueNAS Scale, but the process will be very similar on TrueNAS core.
1. How to Set Up TrueNAS as a NUT Server Master
This will show how to set up TrueNAS as a NUT server master. If you want to set it up as a slave (client), scroll down to step two.
Before we configure TrueNAS to be our NUT server, we need to confirm that we have a connection with the UPS device through the USB port.
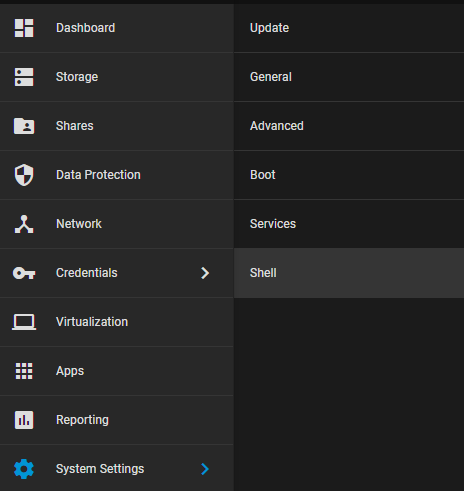
1. Select System Settings then Shell.
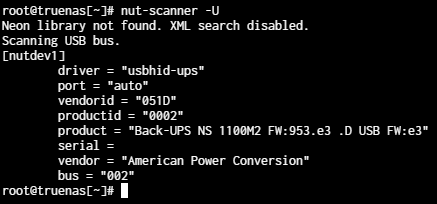
2. Run the command below to validate that TrueNAS can see and communicate with the UPS. You should see your UPS device as well as all of the information for it.
Keep note of the driver as we will need it in a future step.
nut-scanner -U
3. Select System Settings then Services.
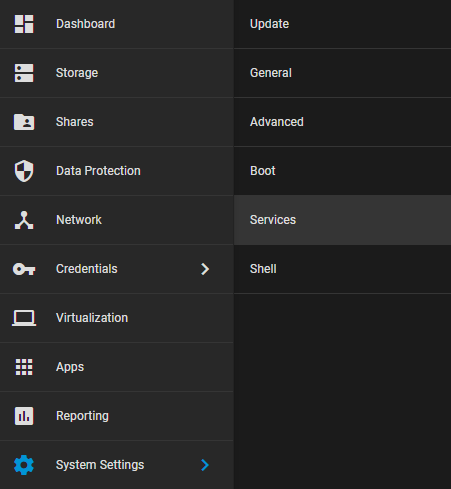
4. Scroll down to UPS. Start the service, then enable it to start automatically. After you enable both, click the pencil icon all the way to the right to edit the UPS service.

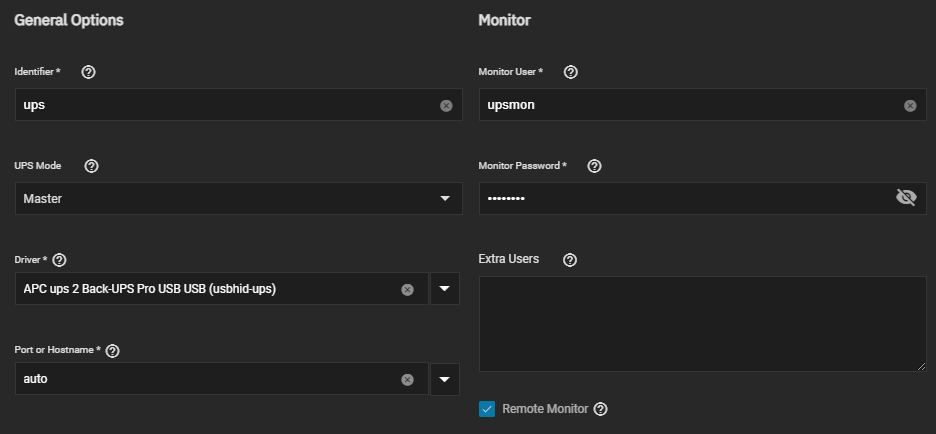
5. Modify the General Options and change them to match the settings below.
- Identifier: ups
- Monitor User: upsmon
- UPS Mode: Master
- Monitor Password: [SET_YOUR_PASSWORD]
- Driver: Select the device that you have, but make sure that the driver matches what you found in step two above (usbhid-ups in my case). The actual name doesn’t matter, but the driver must match.
- Port or Hostname: auto
- Enable Remote Monitor
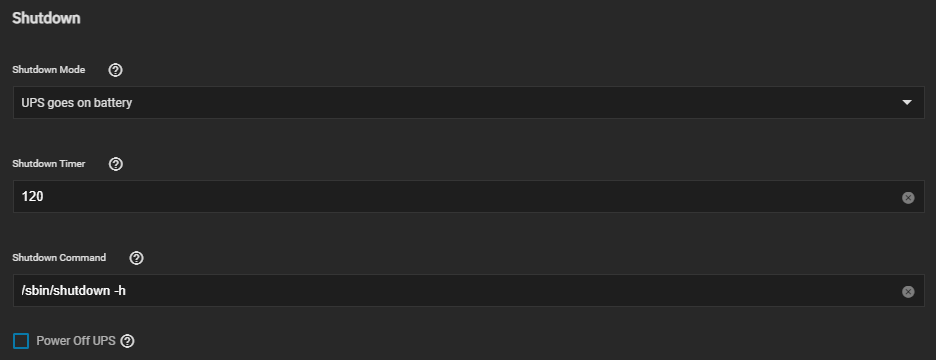
6. In the Shutdown section, modify the settings (examples below).
- Shutdown Mode: UPS goes on battery or UPS reaches low battery – select the option that you’d like depending on if you want TrueNAS to shut down immediately (UPS goes on battery) or when the UPS reaches a low battery (UPS reaches low battery).
- Shutdown Timer: 30 – this can be modified to a higher value if you’d like. This will shutdown TrueNAS 30 seconds after the UPS goes on battery or reaches low battery (whatever you select in the Shutdown Mode).
- Shutdown Command: /sbin/shutdown -h
- Power Off UPS: This can be enabled to power off the UPS when TrueNAS shuts down.
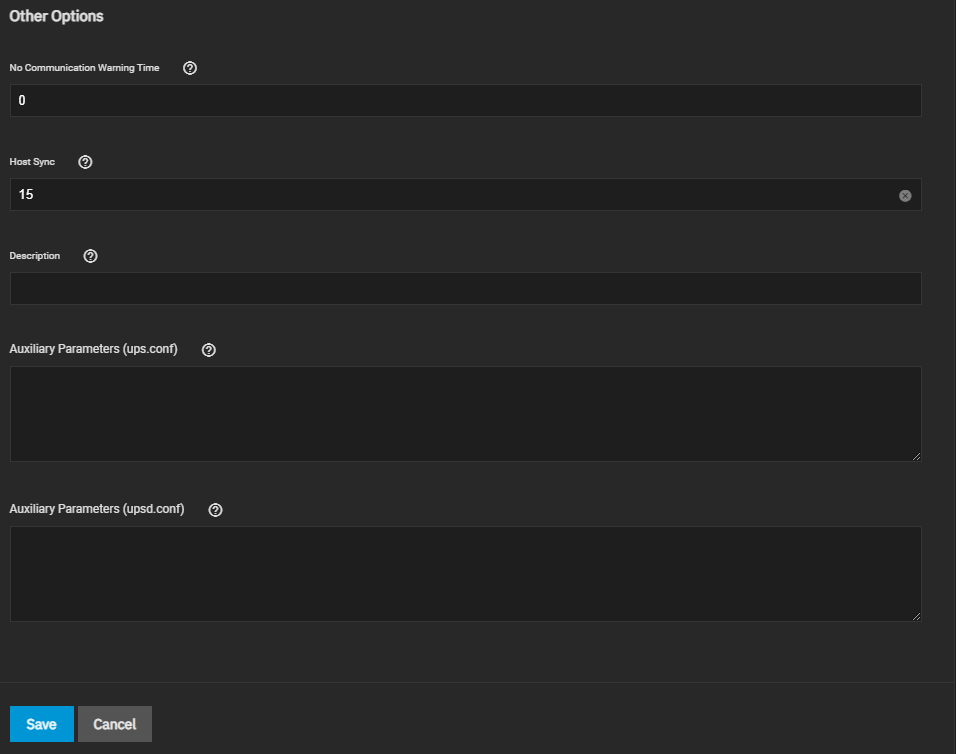
7. The Other Options section isn’t mandatory, but if you’d like to configure anything or add any additional parameters to the ups.conf or upsd.conf file, you can do that here.
When you’re done modifying the settings, Save the configuration.
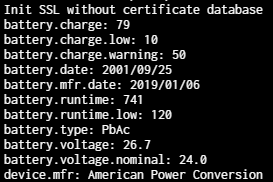
8. At this point, TrueNAS should be connected with your UPS! If you’d like to test the connection, access the shell by selecting System Settings then Shell.
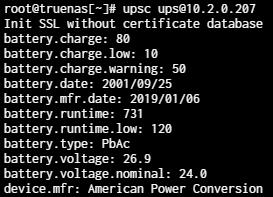
Run the command below to see if you can connect to the UPS! You should return the battery level and various other things for the UPS.
upsc ups@localhost
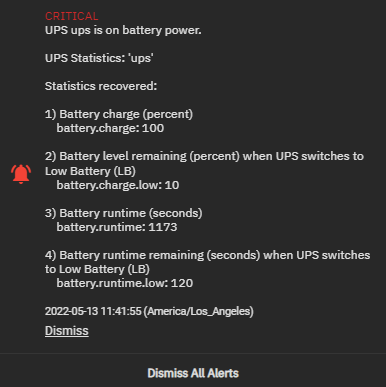
9. In the event that your UPS does go on battery power, you’ll get an alert in TrueNAS and the operating system will shut down based on the settings configured above.
2. How to Set Up TrueNAS as a NUT Server Slave/Client
This will show how to set up TrueNAS as a NUT server slave (client). If you want to set it up as a master, scroll up to step one.
Step one looked at how to set up TrueNAS as a NUT server, but as a master, meaning that TrueNAS is monitoring the UPS and will shut down automatically based on its connection with the UPS.
The steps below will look at how to set up TrueNAS as a NUT server, but on the slave side, meaning that TrueNAS will monitor a master (through the network) and automatically shut down based on the information it receives from that NUT server.
I’ll be connecting to a NUT Server hosted on a Synology NAS in this section.
1. Select System Settings then Services.
2. Scroll down to UPS. Start the service, then enable it to start automatically. After you enable both, click the pencil icon all the way to the right to edit the UPS service.
3. Modify the General Options and change them to match the settings below.
- Identifier: ups
- Monitor User: [NUT_SERVER_MASTER_USER]
- UPS Mode: Slave
- Monitor Password: [NUT_SERVER_MASTER_PASSWORD]
- Remote Host: IP Address of the NUT Server (Master)
- Remote Port: 3493
- Port or Hostname: auto
- Enable Remote Monitor
4. In the Shutdown section, modify the settings (examples below).
- Shutdown Mode: UPS goes on battery or UPS reaches low battery – select the option that you’d like depending on if you want TrueNAS to shut down immediately (UPS goes on battery) or when the UPS reaches a low battery (UPS reaches low battery).
- Shutdown Timer: 30 – this can be modified to a higher value if you’d like. This will shutdown TrueNAS 30 seconds after the UPS goes on battery or reaches low battery (whatever you select in the Shutdown Mode).
- Shutdown Command: /sbin/shutdown -h
7. The Other Options section isn’t mandatory, but if you’d like to configure anything or add any additional parameters to the ups.conf or upsd.conf file, you can do that here.
When you’re done modifying the settings, Save the configuration.
8. TrueNAS will now monitor the UPS at the remote location. To confirm that you have a connection, run the command below by accessing the Shell (System Settings > Shell).
upsc ups@[NUT_SERVER_IP]
3. Testing – How to Set Up TrueNAS as a NUT Server
The process above is how to set up TrueNAS as a NUT server master or slave. Please keep in mind that you won’t be certain that any of this will work until you actually lose power or pull the plug on your UPS to test it.
When you do lose power, your NAS will either monitor the UPS through the USB cable (if acting as a master) or through your network (if acting as a slave).
Please keep in mind that if the NAS is monitoring your UPS as a slave, it must be able to communicate with your NAS through your network. This means that your router or switch must stay online during a power outage.
While we do our best to provide accurate information, there are many variables in this tutorial that we cannot account for. None of the authors, contributors, or anyone else connected in any way whatsoever can be responsible for your use of the information contained in this article. It is your responsibility to evaluate the information and implement it using proper procedures. Use at your own risk.
4. Conclusion: NUT Server in TrueNAS
This tutorial looked at how to set up TrueNAS as a NUT server. This is something that every TrueNAS owner must set up if they own a UPS…which you certainly should.