In this tutorial, we will look at how to install Xpenology on KVM, a Linux based hypervisor.
Running Xpenology on a KVM virtual machine is a great way to have a fully functioning NAS without dedicating an entire machine to the operating system. After looking at how to install Xpenology on KVM, check out some of our tutorials on different ways to use DSM!
The process is fairly straight forward, but there are a few prerequisites that I want to point out:
Prerequisites
- You must be running a 64-bit version of Linux with virtualization turned on in your systems BIOS settings.
- You must be running a processor that is the Haswell generation or newer. I have set this up on an AMD Ryzen 5 1600 and a Core i7 5600U (for testing), and they both run great. If you do not have a Haswell generation or newer processor, you will never be able to find your “Synology” when trying to connect.
- For older hardware, please use one of the older loaders which requires an older version of Synology DSM. This thread explains the minimum requirements: https://xpenology.com/forum/topic/13333-tutorialreference-6x-loaders-and-platforms/ NOTE: You will need to use a different MAC address based on which loader you use.
A few helpful notes before we get started…
- If you are using the correct processor (and loader) but cannot find your “Synology”, either your MAC address is different than written in this guide or you are using incorrect NIC settings.
- If you get to the stage of installing the operating system and the installation fails, check to ensure that the boot drive is set as SATA. If it wasn’t, you might need to generate a new QCOW2 image file.
- Outside of installing KVM/QEMU, I installed the UEFI firmware which can be installed by using the command below. I am not certain that this is required, but if you run into any issues, it can’t hurt to install them.
sudo apt install -y virt-manager qemu-efi
- The most important point: Xpenology is a home-brewed version of Synology’s DSM. It is suggested that you use this for testing purposes or you backup your important files regularly (which should be done regardless). Xpenology has a great developer community, but there is no true “support”, and no guarantee that this operating system will be stable. I personally own a DS1019+ which is used as my production NAS and use Xpenology for testing purposes only. Use at your own risk.
- Do NOT update Xpenology without ensuring that the new version works with the existing bootloader. Incremental updates are generally fine, but major version updates may require a new or updated bootloader.
How to Install Xpenology on KVM – Instructions
1. Download Jun’s Loader (v1.04b DS918+) from here.
2. After the download is complete, extract the files and place the synoboot.img file in the location of your choosing. For this tutorial, I will place it in my “Documents” folder.
3. When the file is in the folder of your choosing, navigate there and run the command below to convert the image into a QCOW2 image. This is the image file that we will import into the Virtual Machine Manager.
qemu-img convert -f raw -O qcow2 synoboot.img syno-ds918-qcow2.img
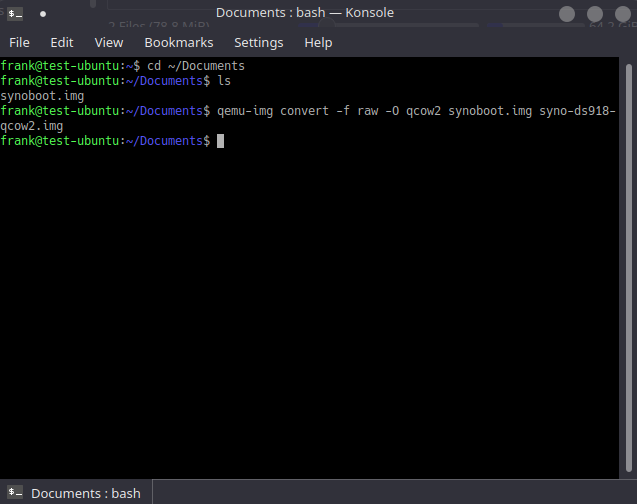
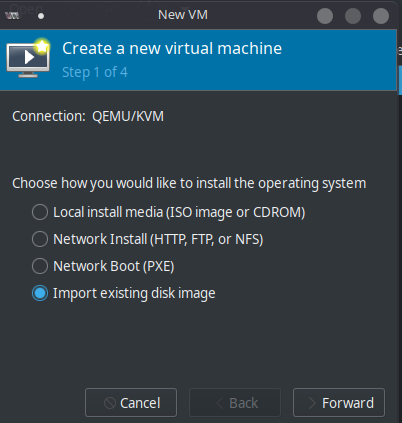
4. After the image has been created, create a new Virtual Machine in Virtual Machine Manager. In step one, select “Import existing disk image”.
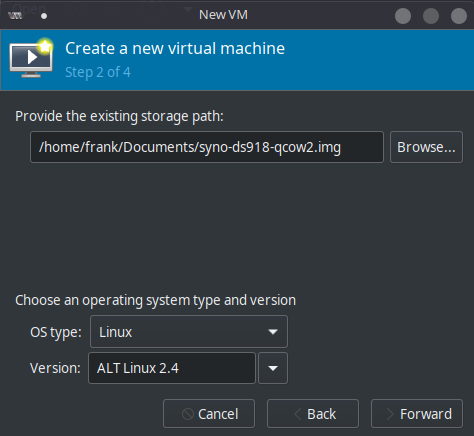
5. At the second step, select “Browse” and select the QCOW2 image file that we created in step three. For OS type, select “Linux” and for the version, select “ALT Linux 2.4”. I am not certain that these settings are mandatory, but I know that it works using these settings.
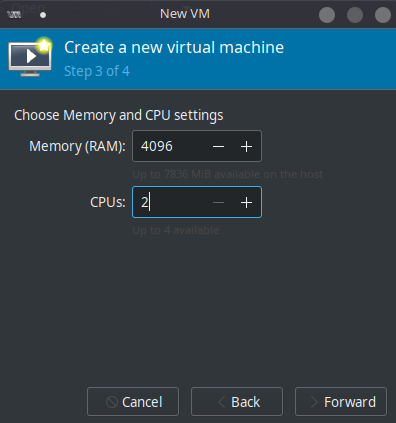
6. Specify the Memory (RAM) and CPUs you would like allocated to this virtual machine.
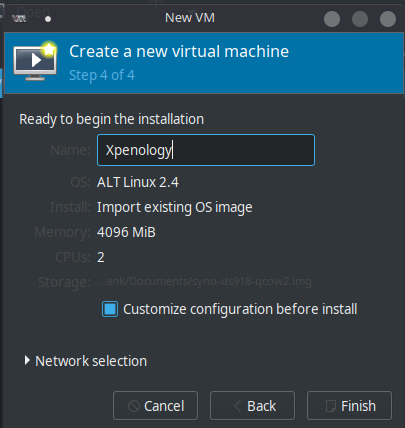
7. At the final step, give your Virtual Machine a name, select “Customize configuration before install” and select “Finish”.
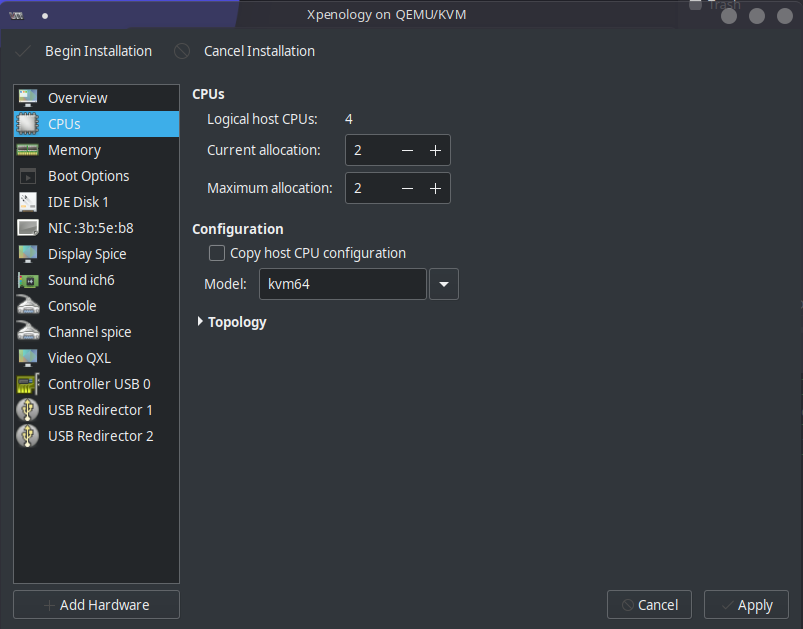
8. When customizing the virtual machine before installation, there are a few very important changes that we need to make. First, change the CPU to “kvm64” and apply.
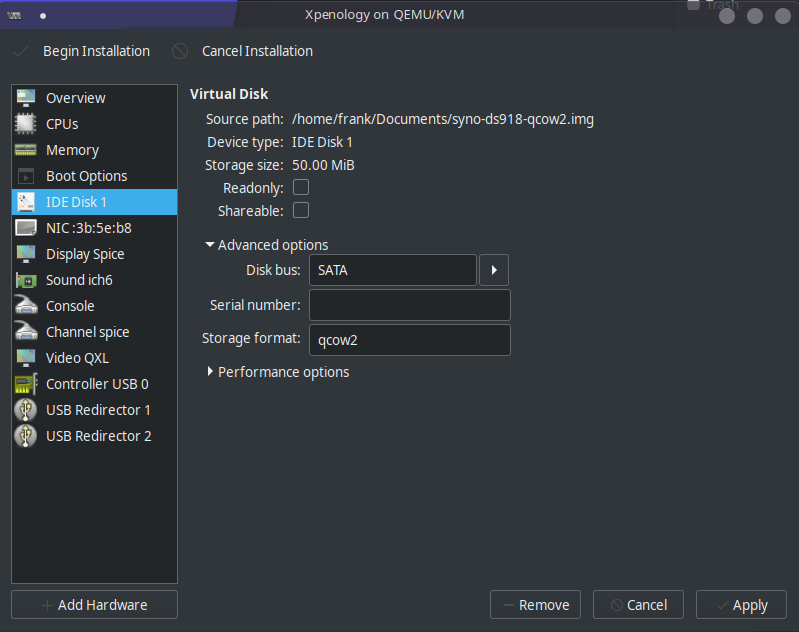
9. Under IDE Disk 1 (the default hard drive), change the “Disk bus” to “SATA” under the advanced options and apply.
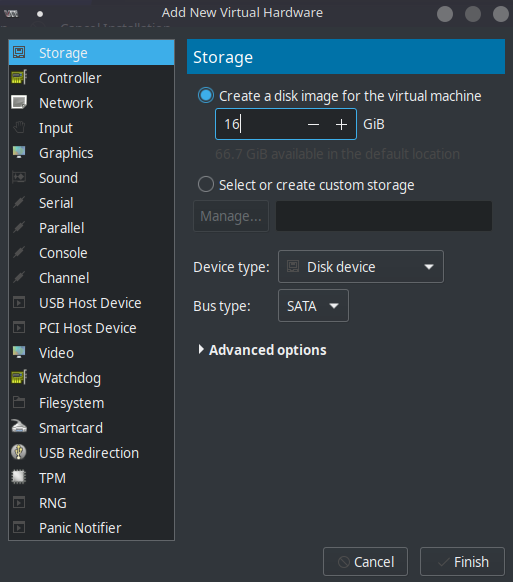
10. Select “Add Hardware” in the bottom and add a new SATA drive that is 16GB. You can realistically make this as large as you’d like, but I create a volume using this virtual disk and use the space for app installations.
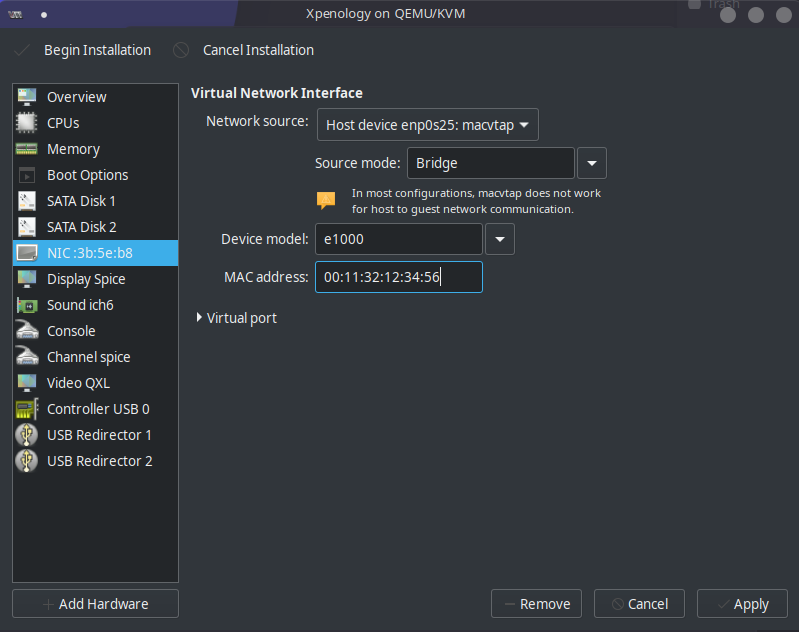
11. Under the “NIC” settings, change the “Network source” to “Host device macvtap”. Under the “Device model”, change the setting to “e1000”. Enter the MAC address as “00:11:32:12:34:56” and apply. NOTE: you MUST use a wired ethernet connection for this step. Wireless cards will not work. The settings above are also VERY important, as you will be unable to find your “Synology” in later steps with an incorrect MAC address or NIC configuration.
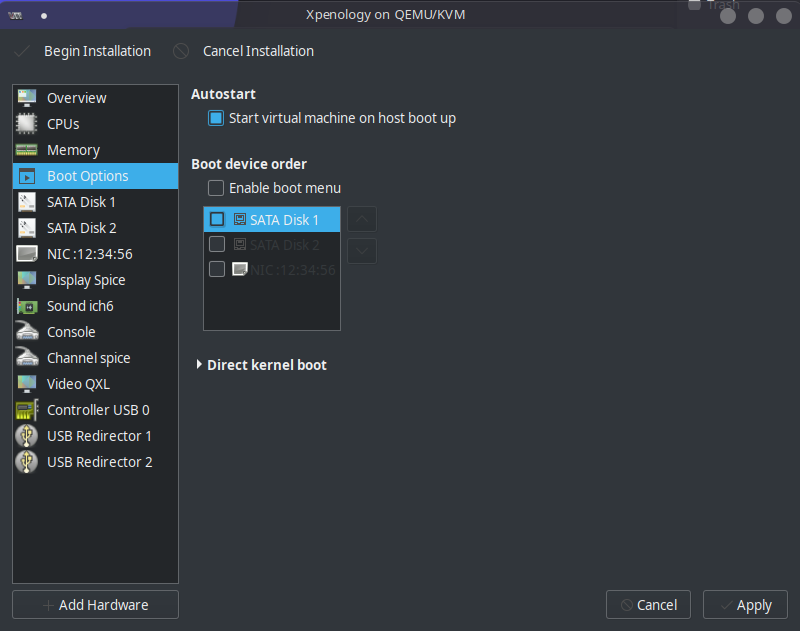
12. Under the “Boot Options”, change the Boot device to “SATA Disk 1”. You can also check off “Start virtual machine on host boot up” if you’d like this virtual machine to start when the operating system initially starts.
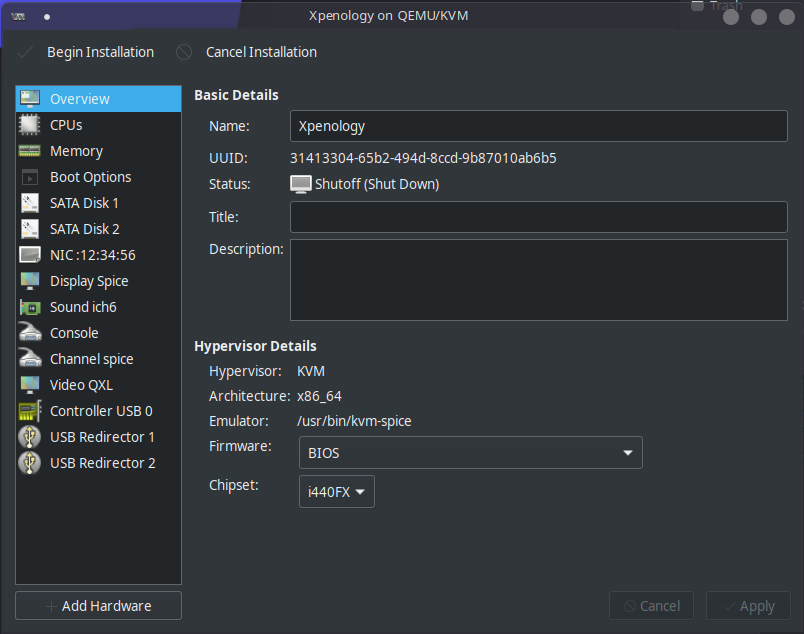
13. With all of these settings configured, you can now select “Begin installation”. The loader will now boot.
14. We must now download the DSM version that we will be installing. Click here to download DSM 6.2.3 for the DS918+ (the version of our bootloader). If you would rather install an older version (6.2.1, 6.2.2), you can use this link to download the file. NOTE: Download the “.pat” file, not the “.pat.md5”.
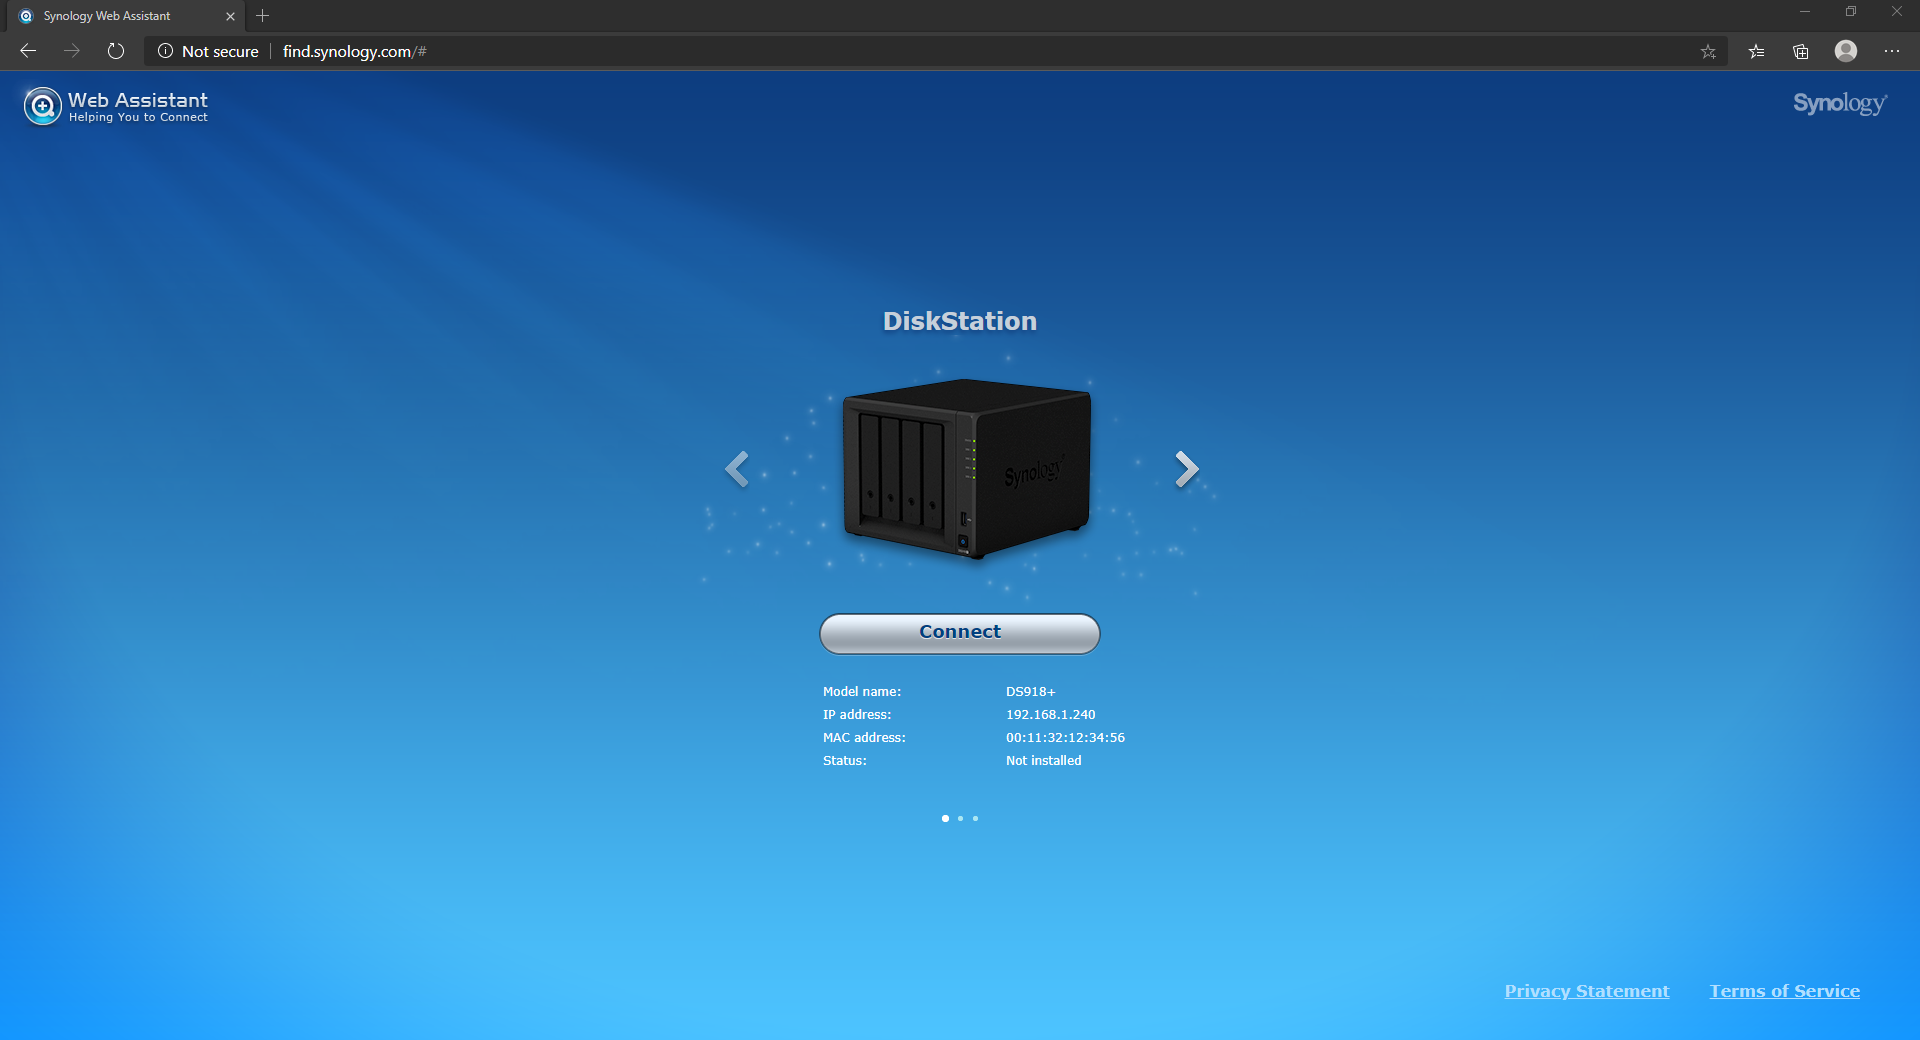
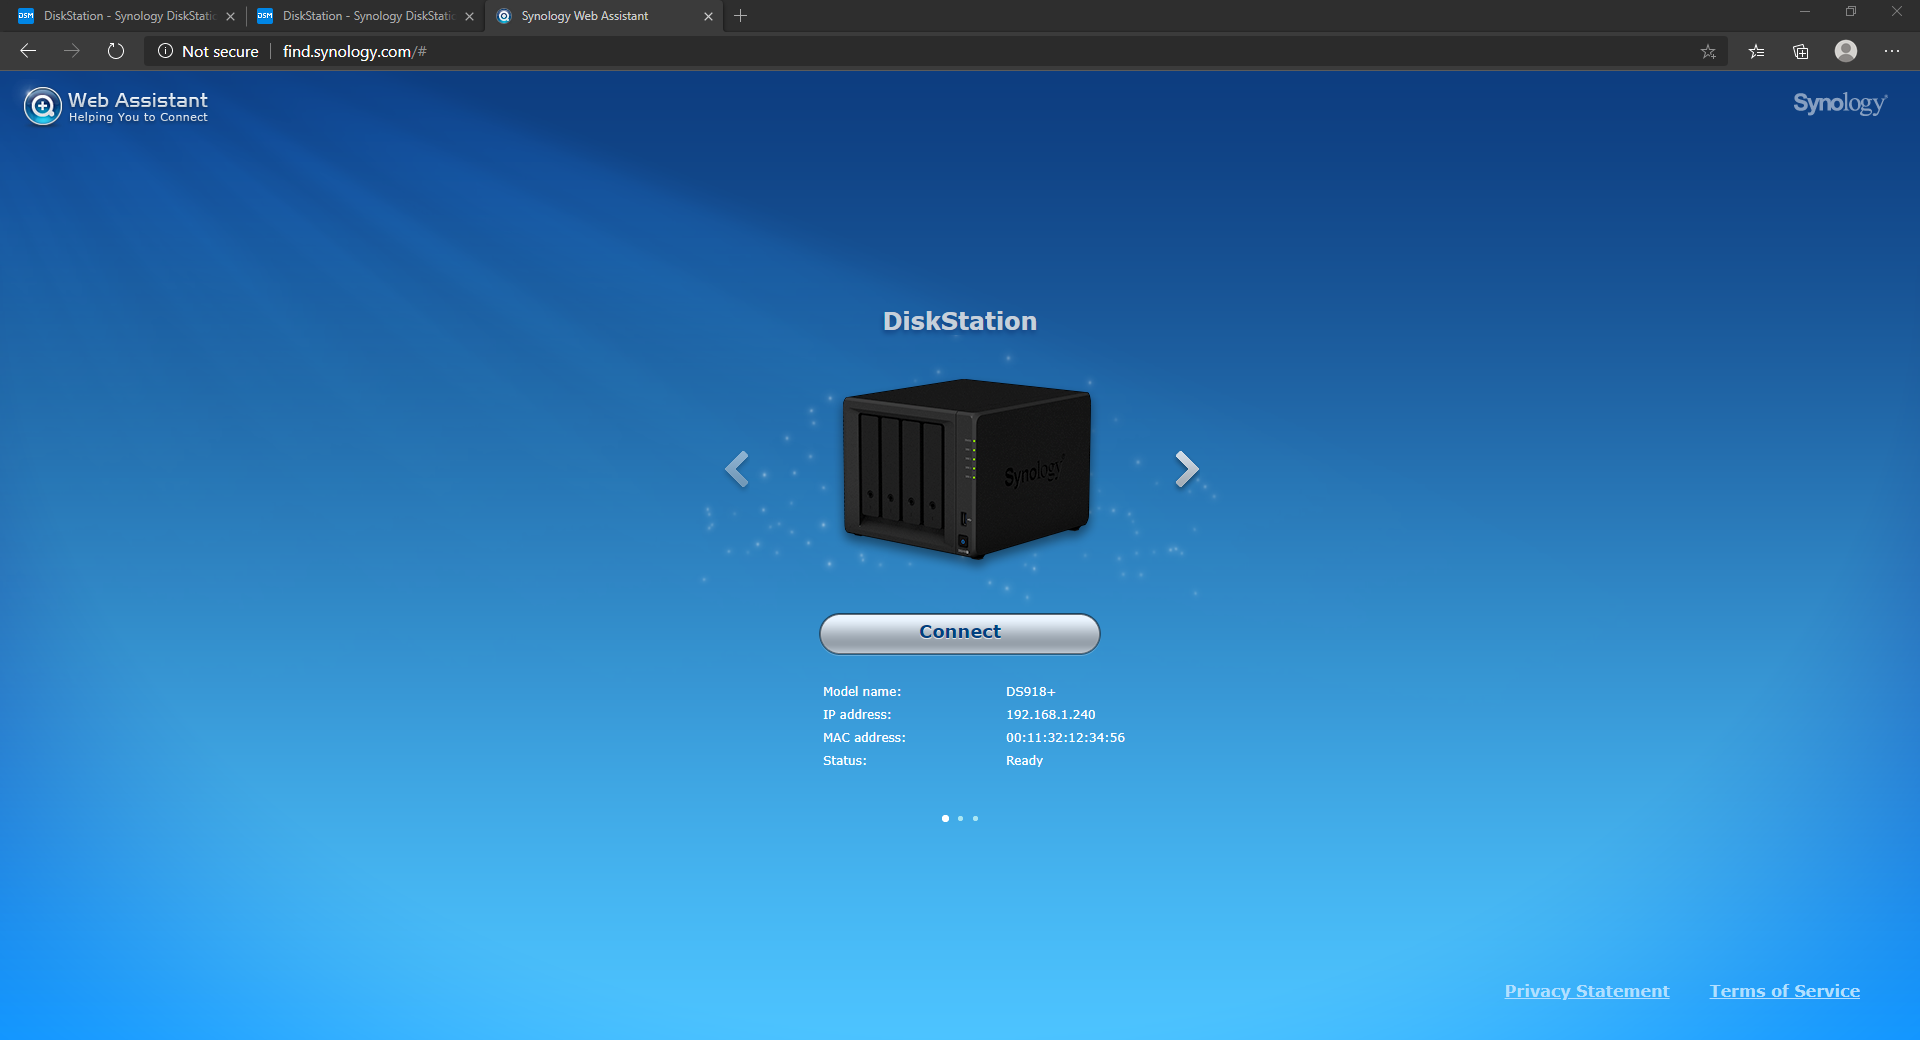
15. After the DSM version is downloaded and a few minutes have now passed, you should be able to find your Synology. Navigate to the website http://find.synology.com and wait for your device to be found. DHCP will give your DiskStation an IP address and you will be able to see the MAC address listed as we configured in step 11. Select “Connect”.
16. Accept the End User License Agreement and select “Set Up”.
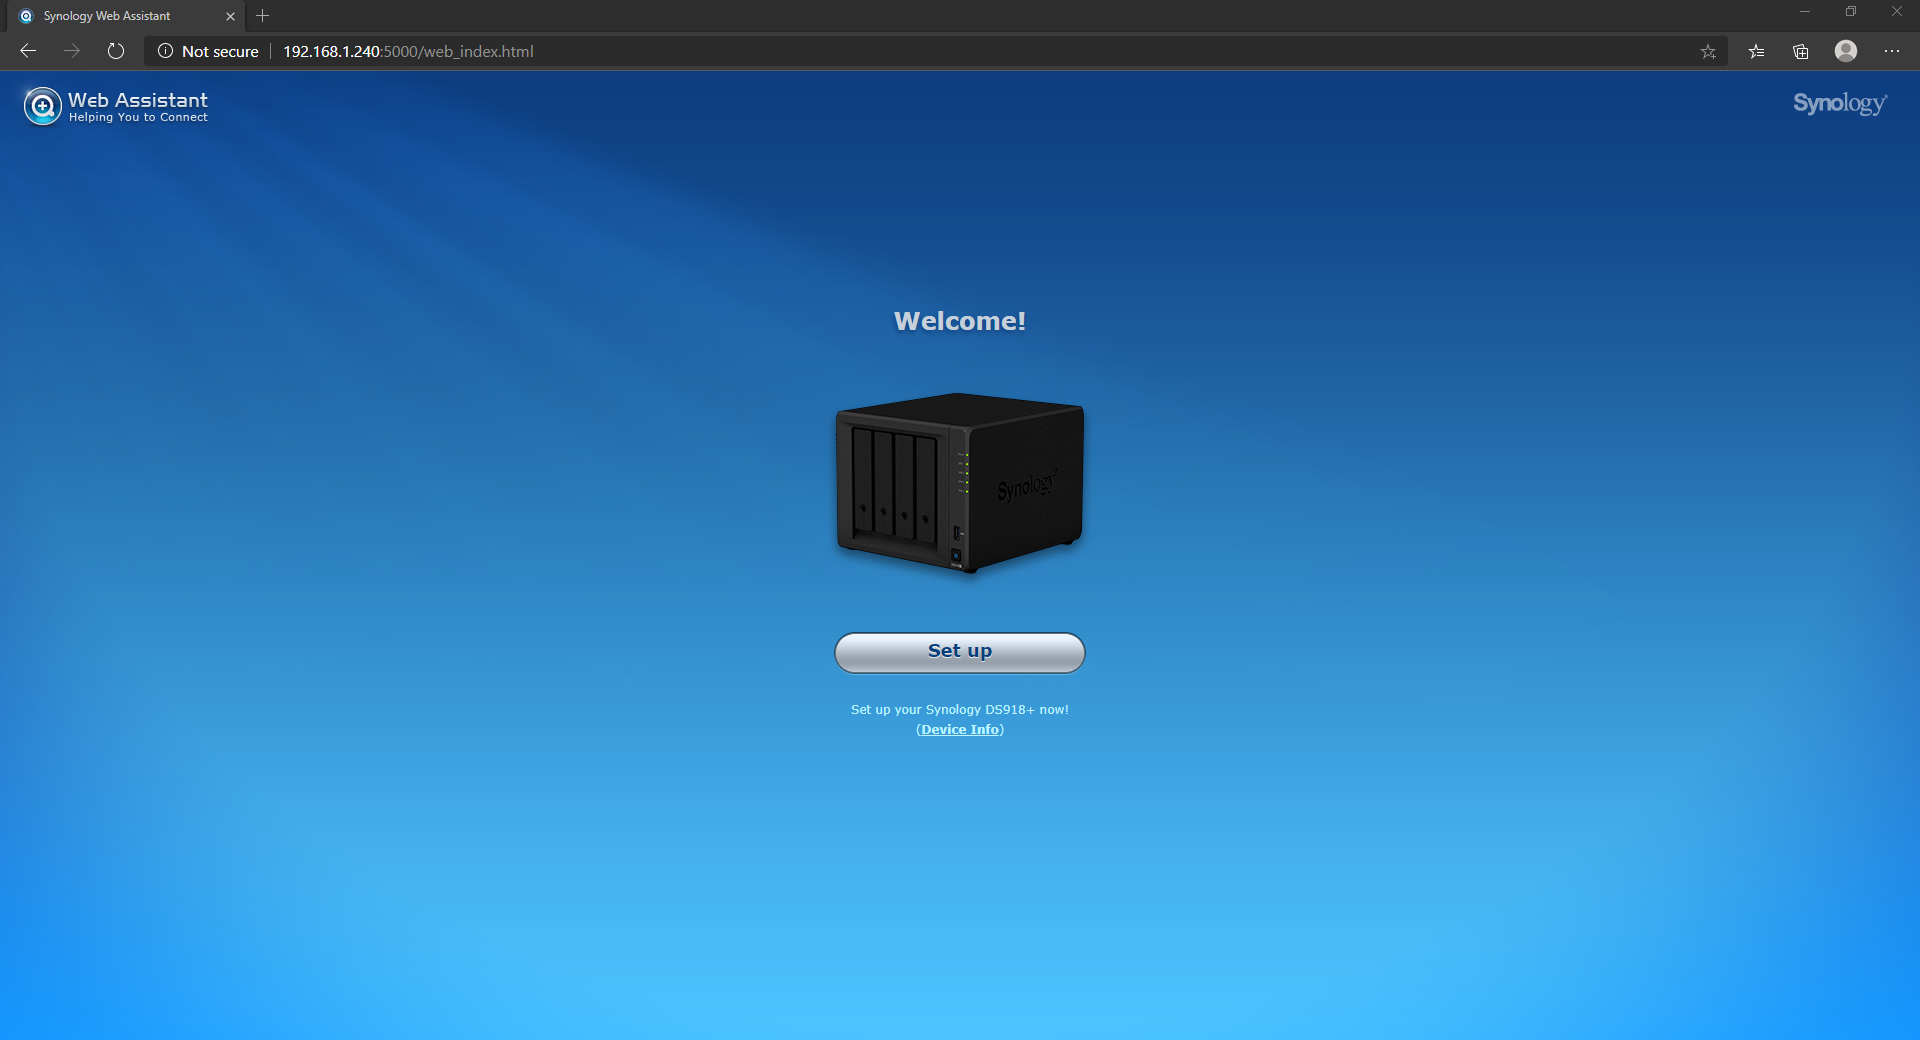
17. We will now install DSM. Select “Manual Install”.
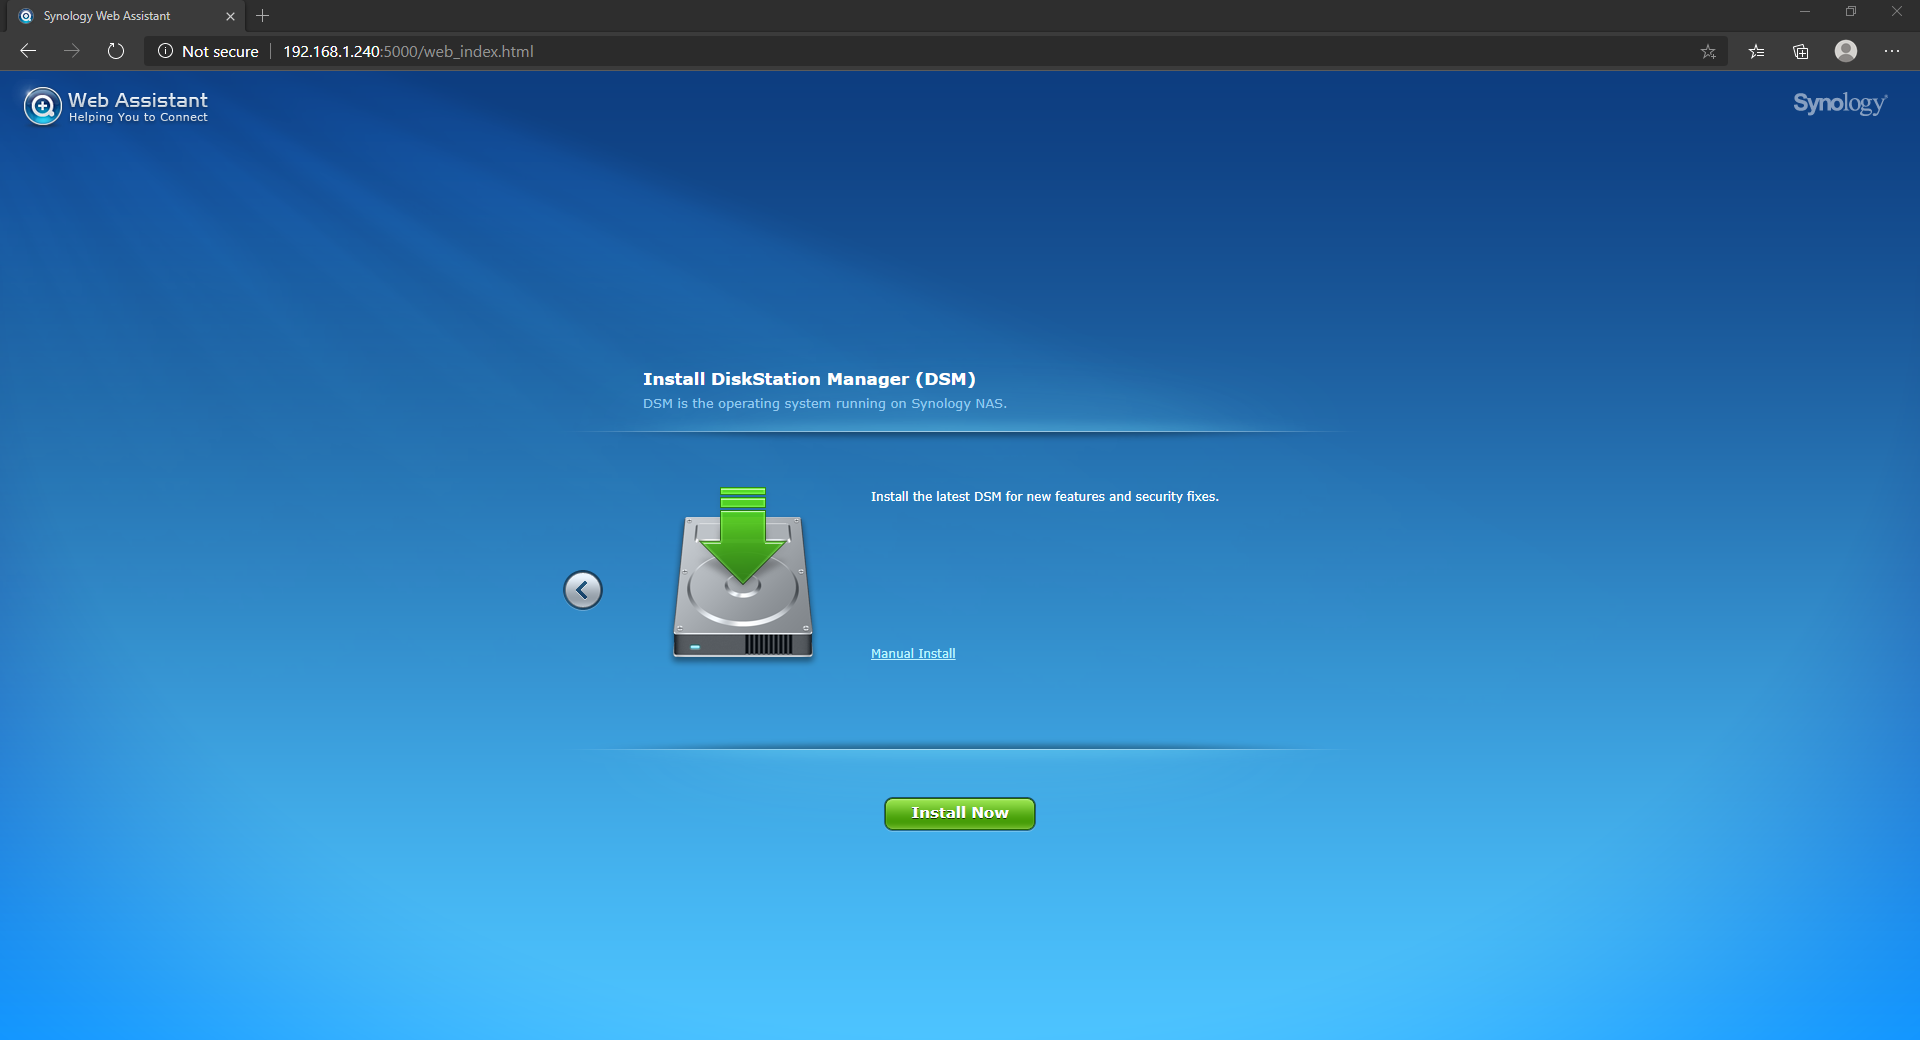
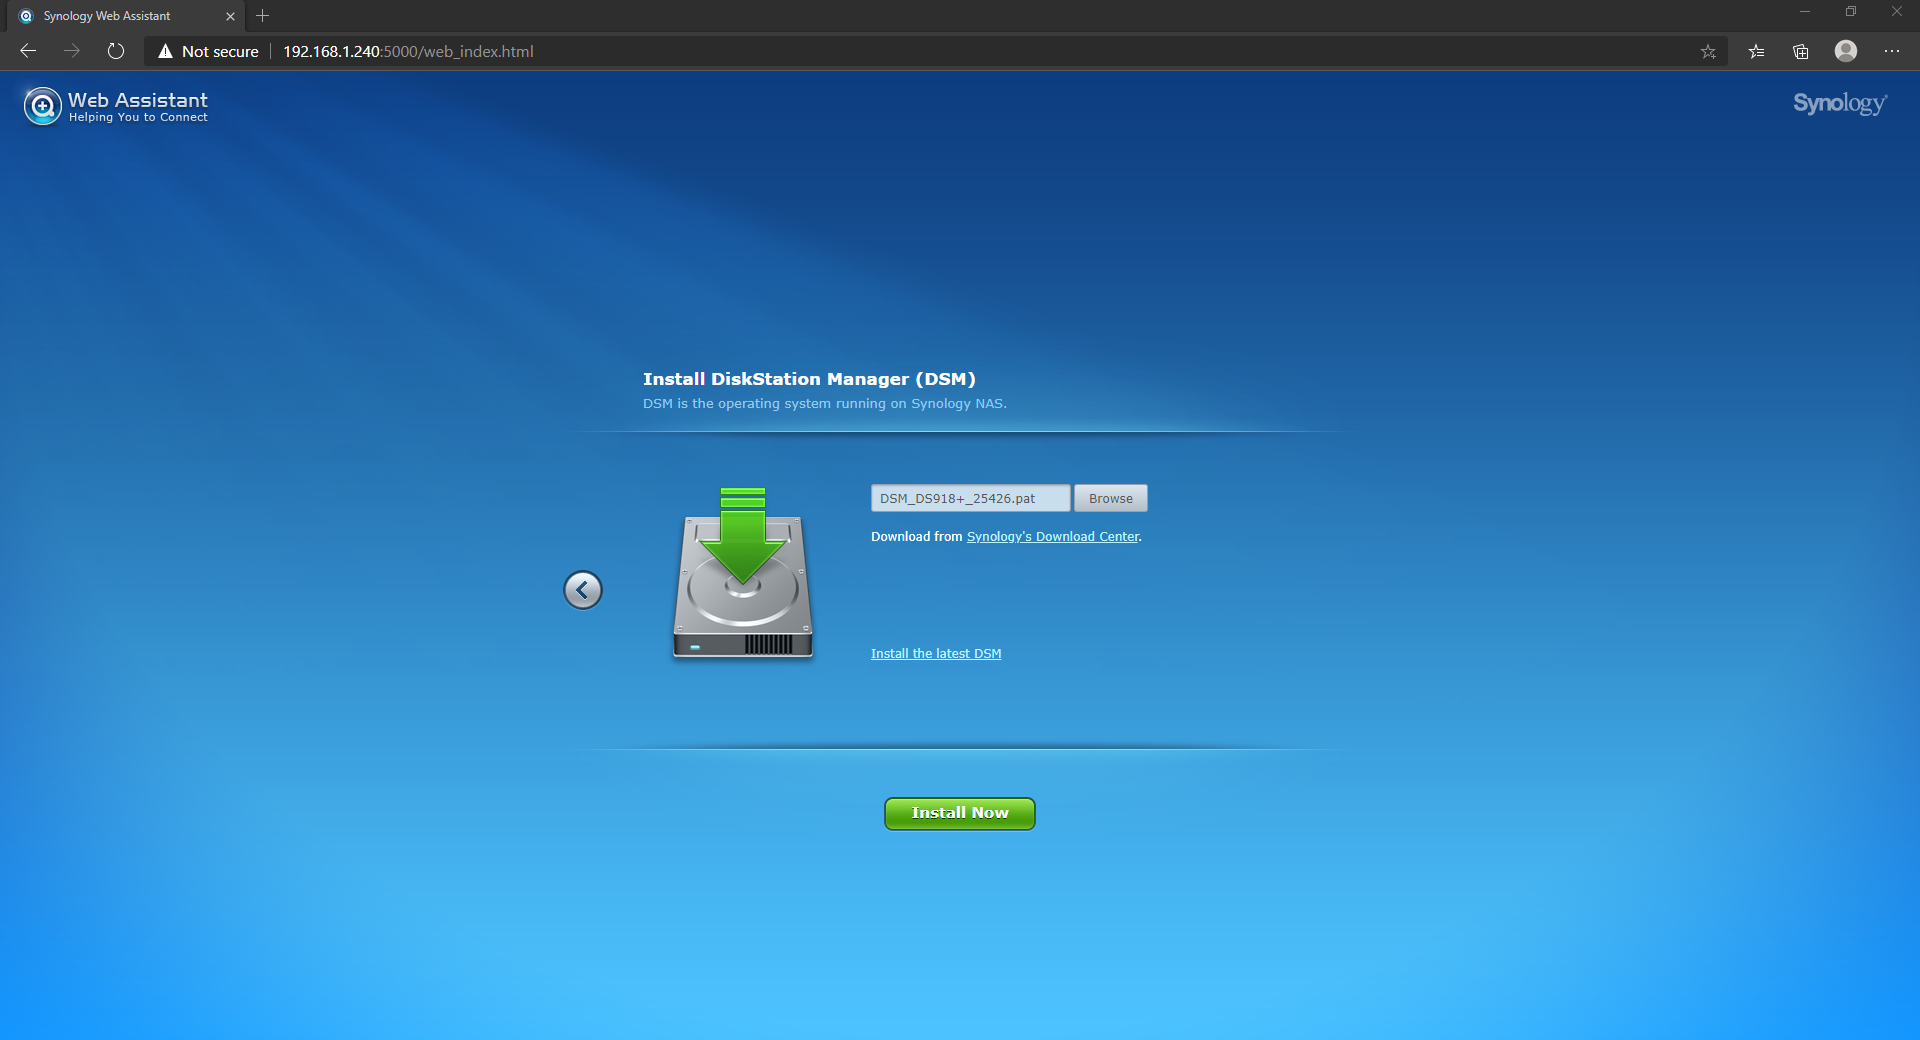
18. Browse to the file we downloaded in step 14 which is the DSM operating system. After selecting the file, “Install Now”.
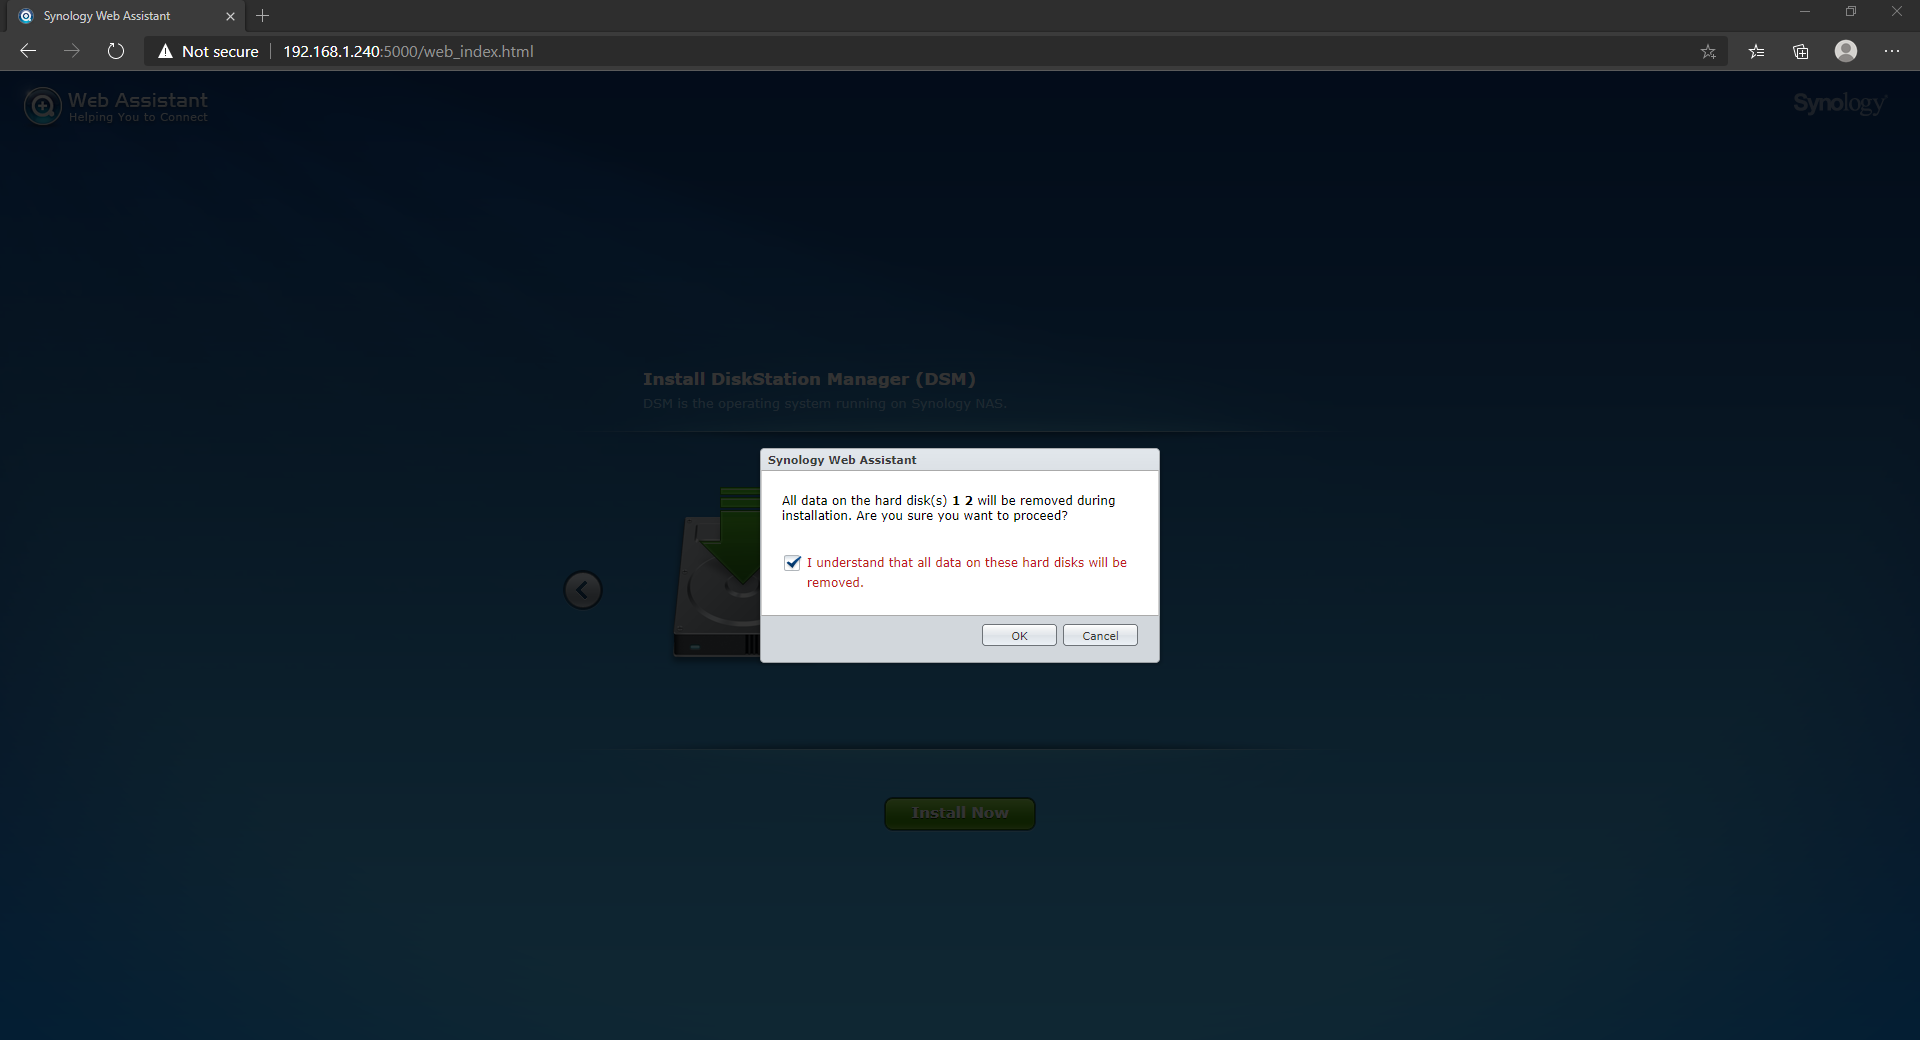
19. You will be prompted informing you that all data on hard disk(s) 1 and 2 will be removed. The data that this is referring to is the QCOW2 image that we created and the 16GB virtual hard drive. Check the “I understand” box and press “OK”.
20. DSM will now install. The installation process can take upwards of 10 minutes and will reboot the “Synology” when complete.
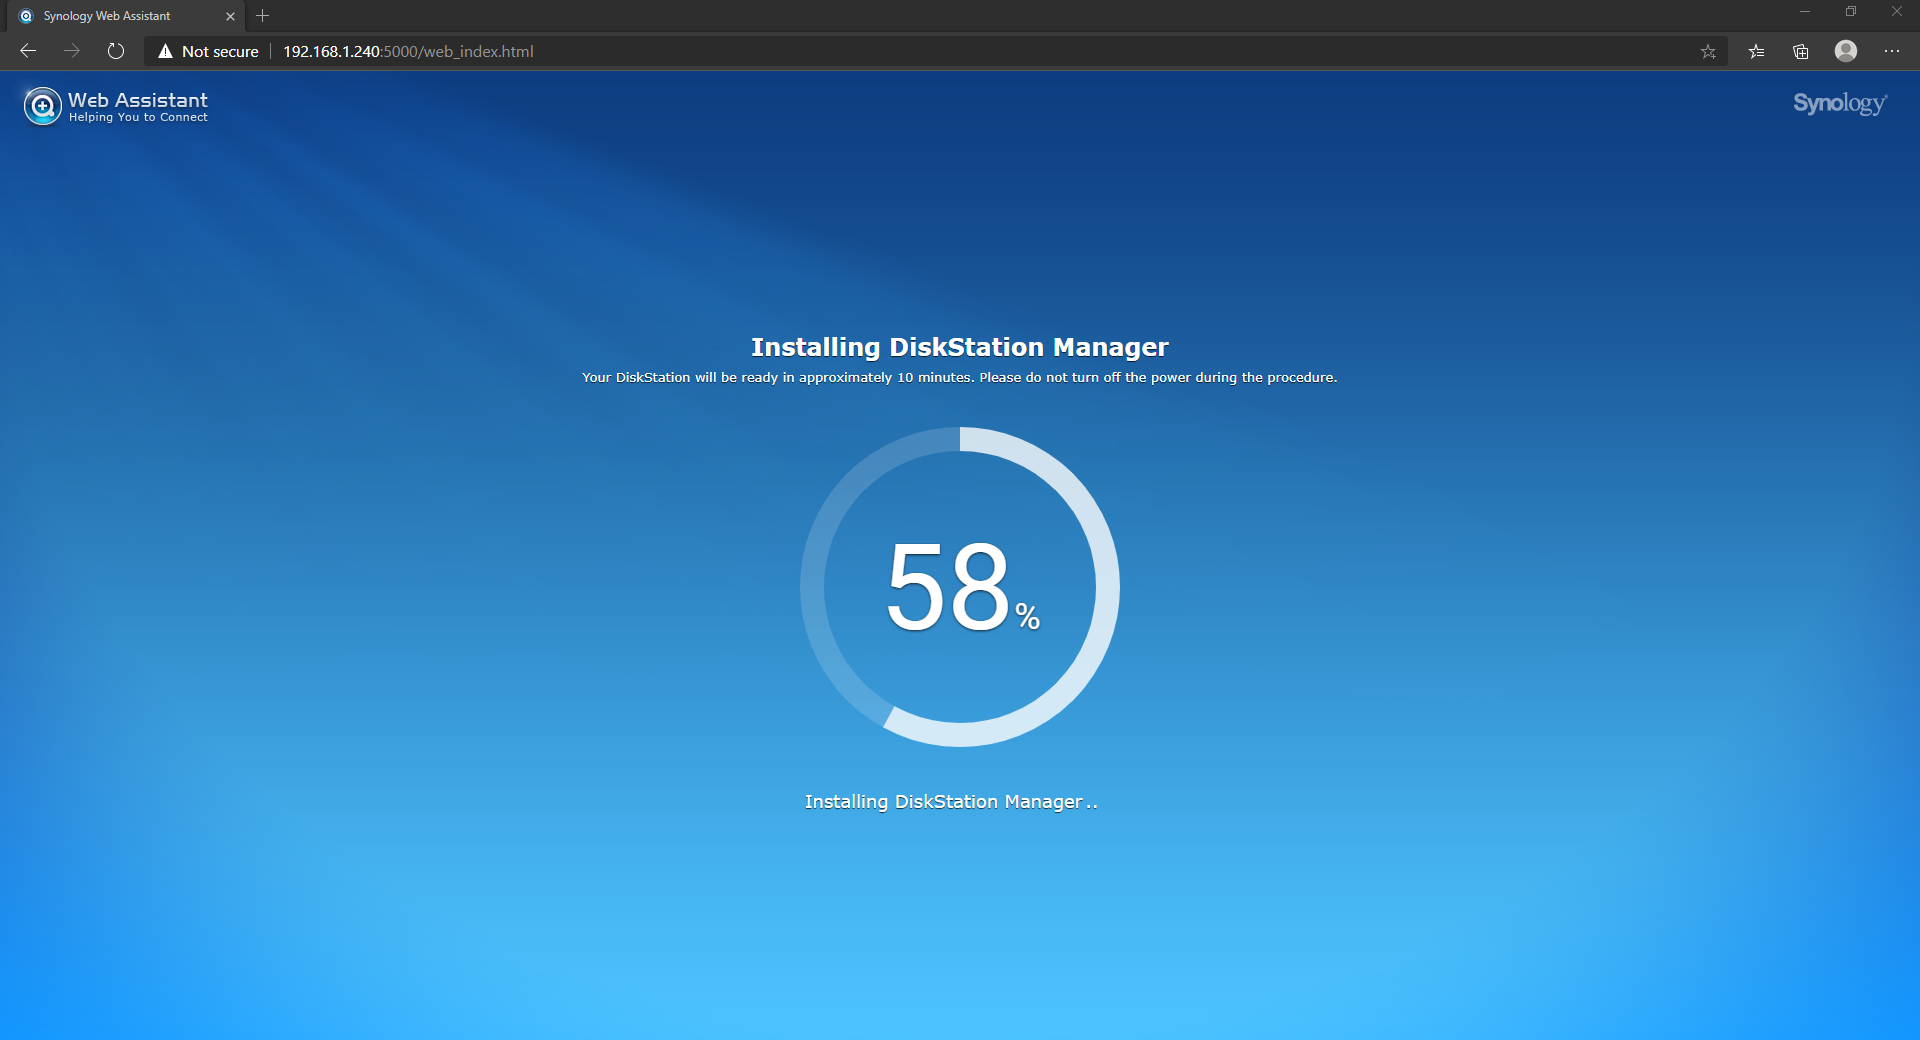
21. After a few minutes have passed, open a new tab and navigate to http://find.synology.com. Your DiskStation should show up and you will be able to connect.
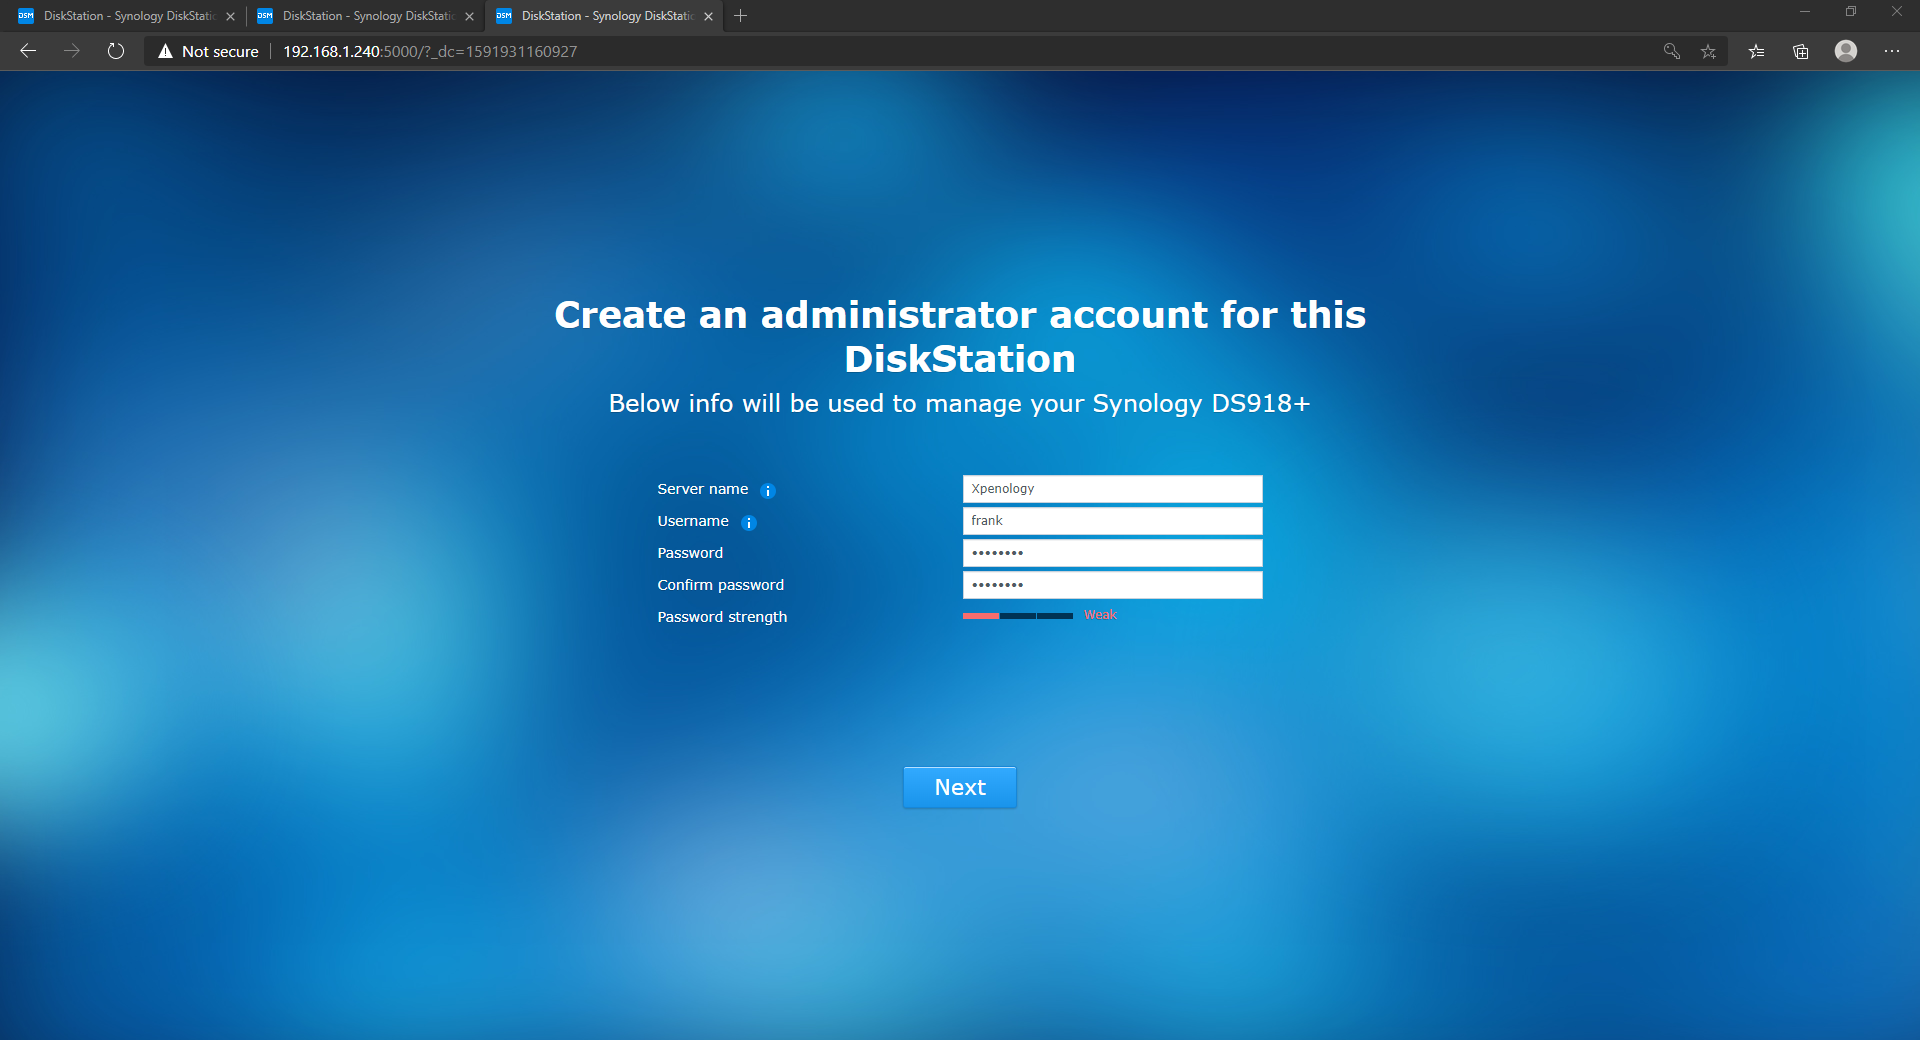
22. Give your DiskStation a Server Name, Username and Password.
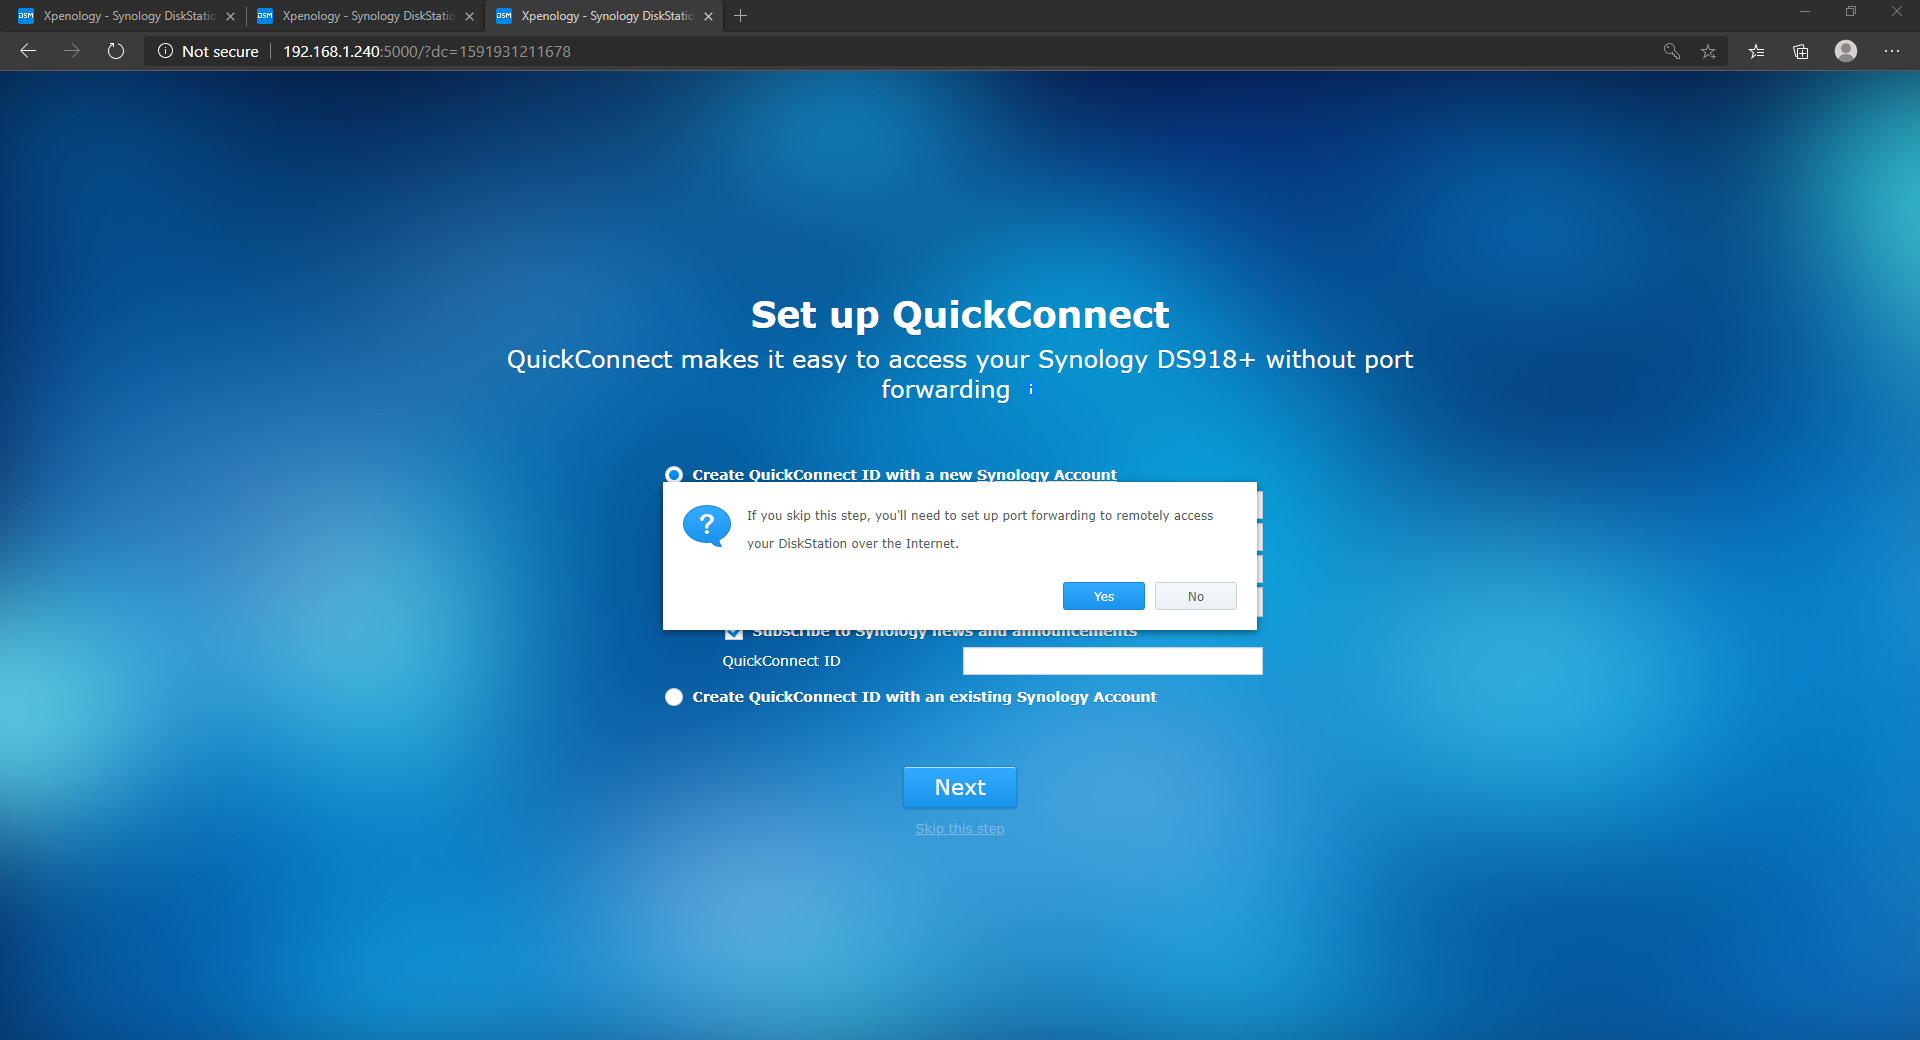
23. The next step will ask you to setup QuickConnect. DO NOT CREATE AN ACCOUNT. Select “Skip this step” at the bottom of the screen. You will be prompted that you’ll need to set up port forwarding to connect. Select “yes”.
24. Final step is to select “Go”!
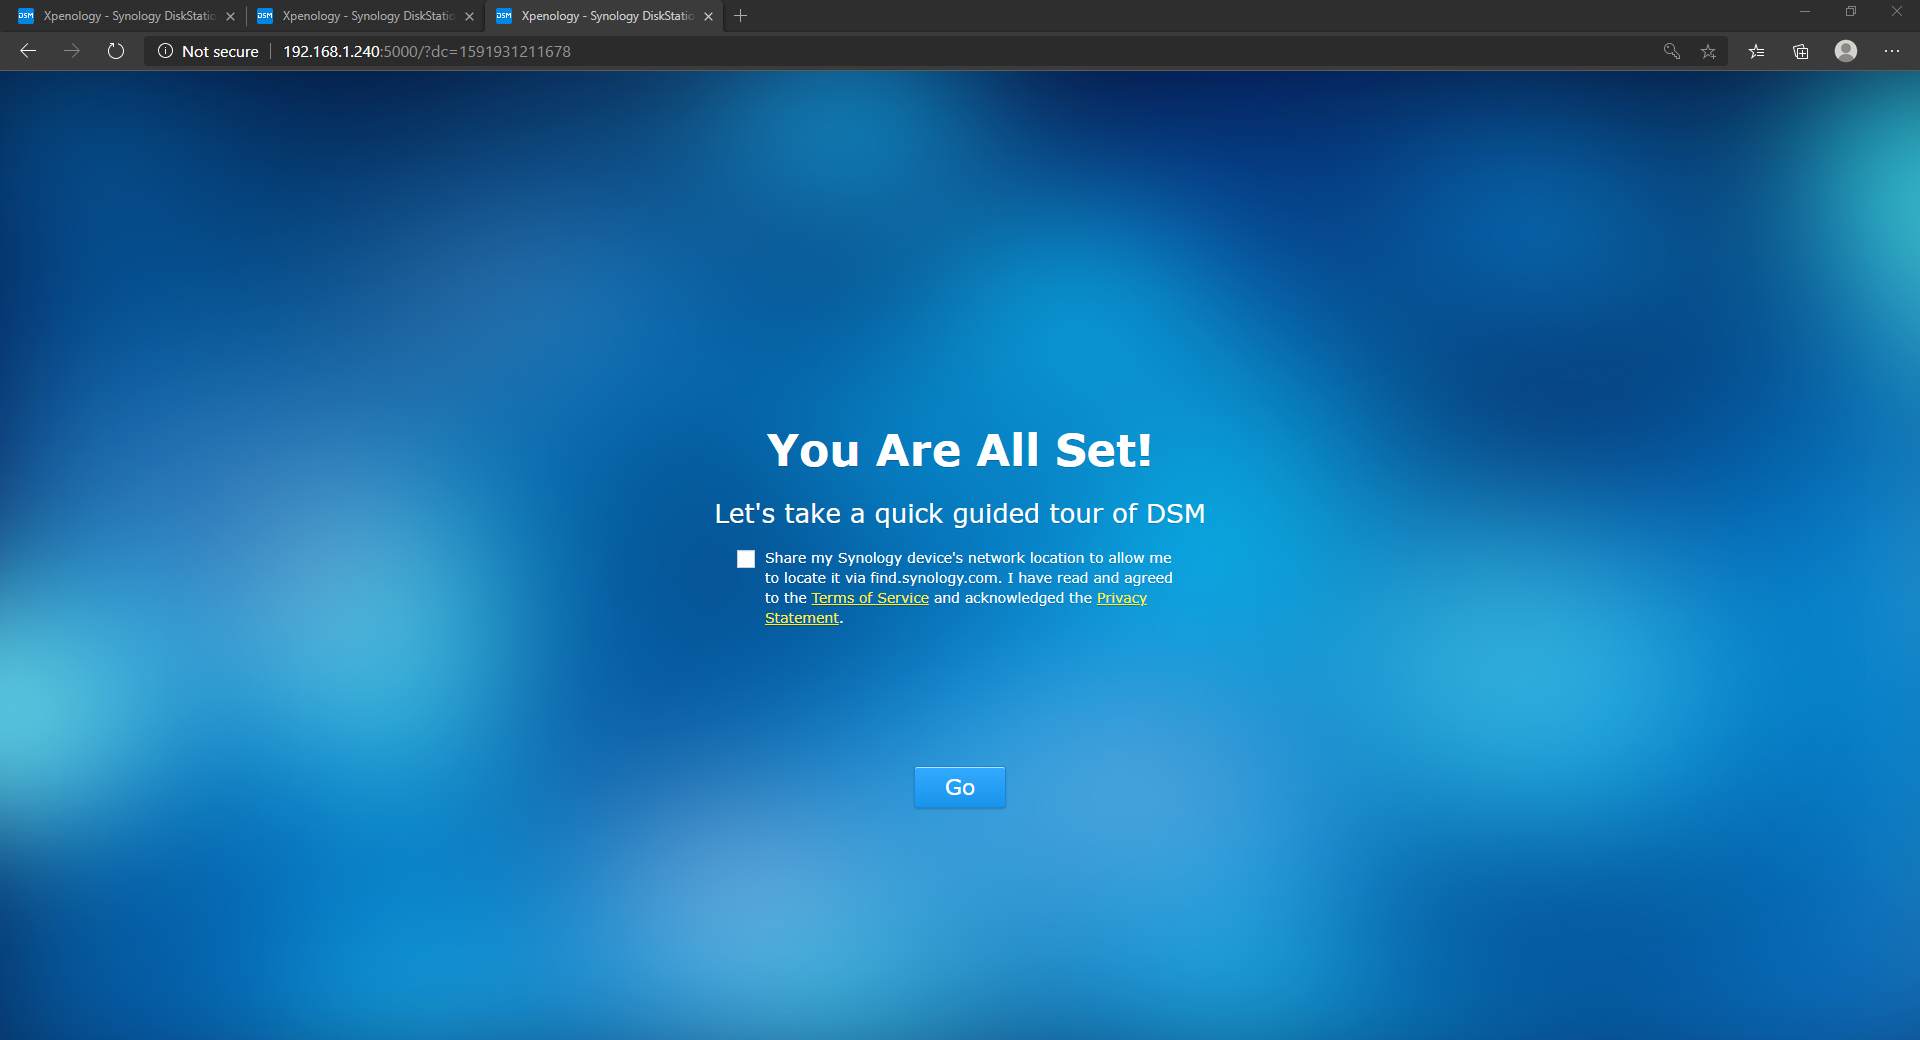
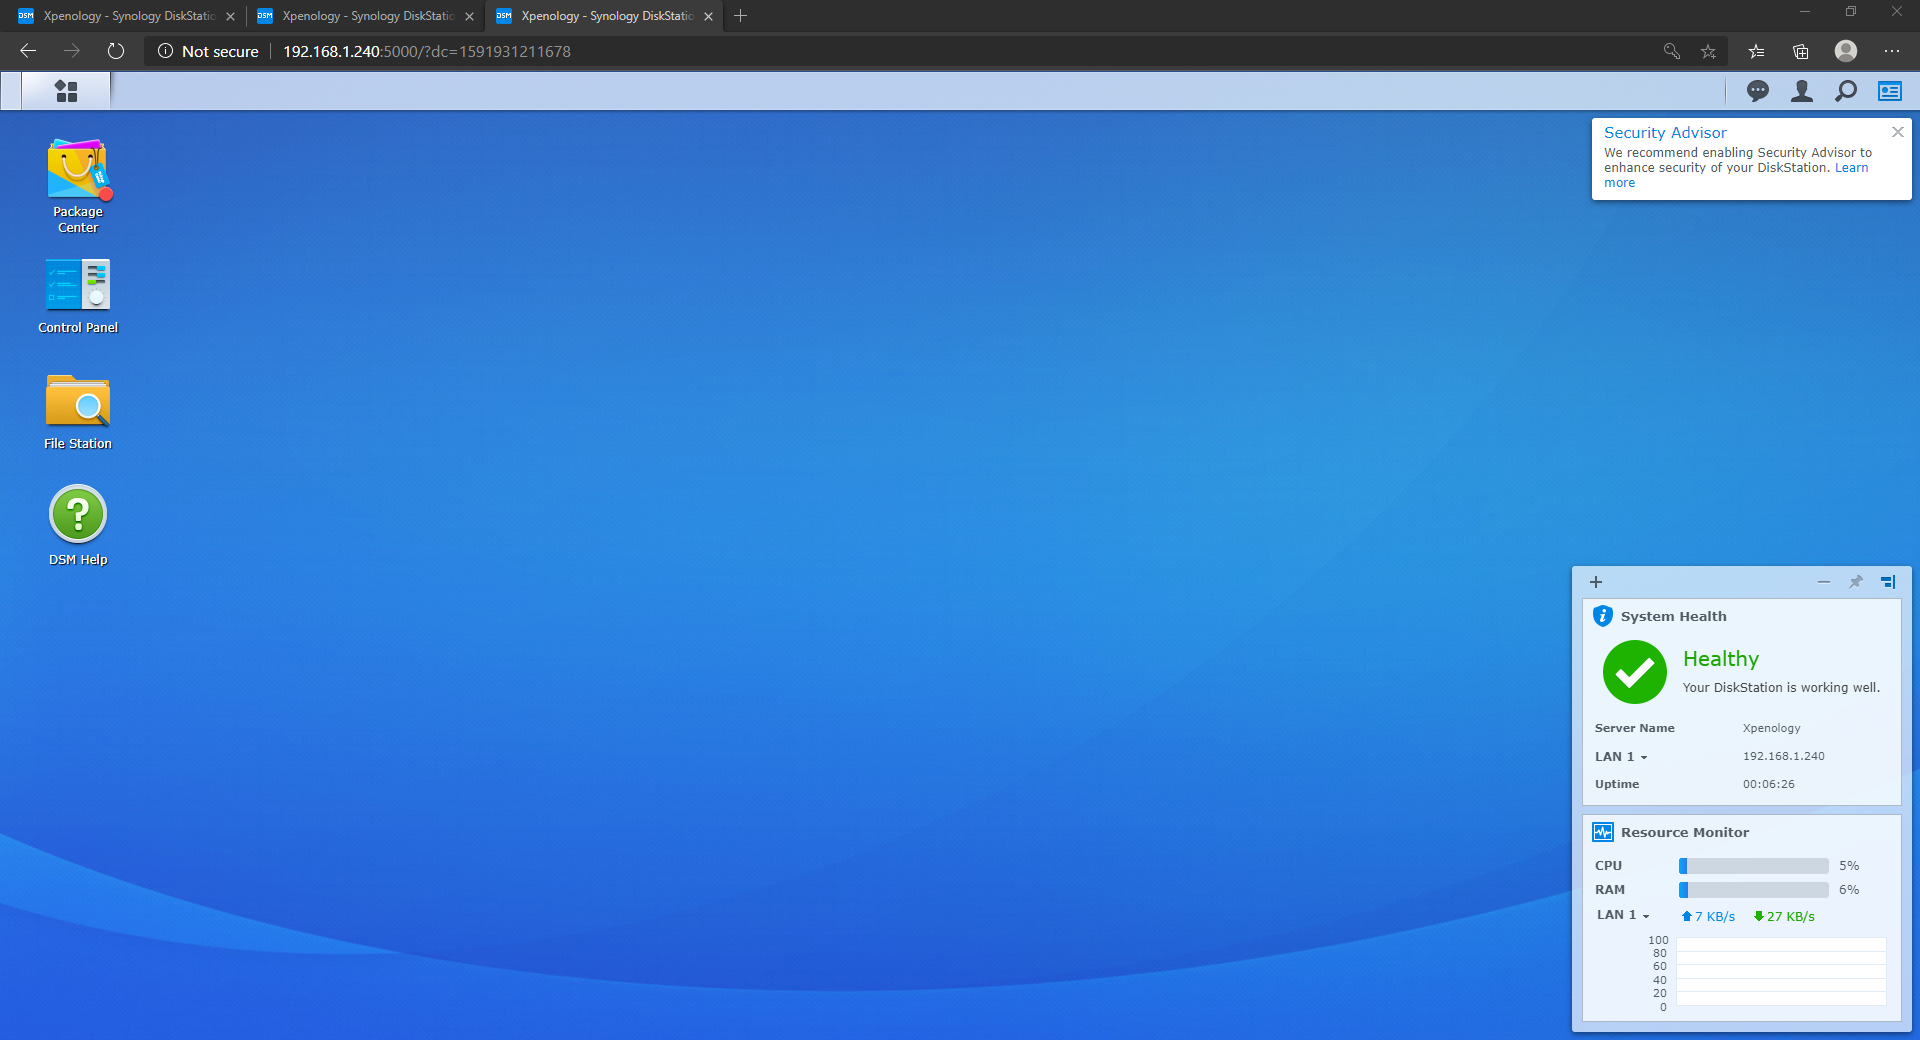
25. Xpenology is now installed. From here, you will need to configure your volumes, storage pools, and everything else involved with configuring DSM from scratch. The setup is now technically complete, but I have added a few helpful tips below. The first will show you how to change the QCOW2 drive from SATA to USB (so it doesn’t show up in DSM). I will also show you how to pass physical hard drives to the NAS so that they can be added to storage pools as a raid array.
Continued Configuration
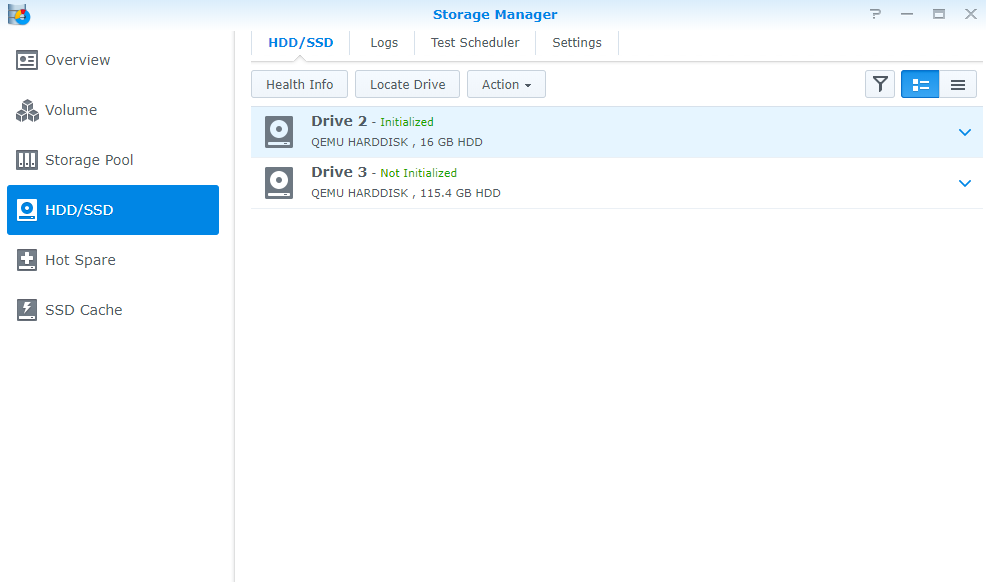
1. When installing DSM, we had to set the QCOW2 image we created as a SATA drive. Without doing this step, the DSM installation will fail. However, after installing DSM, you will notice that this drive is passed to the operating system and will show under the “HDD/SSD” section of the storage manager.
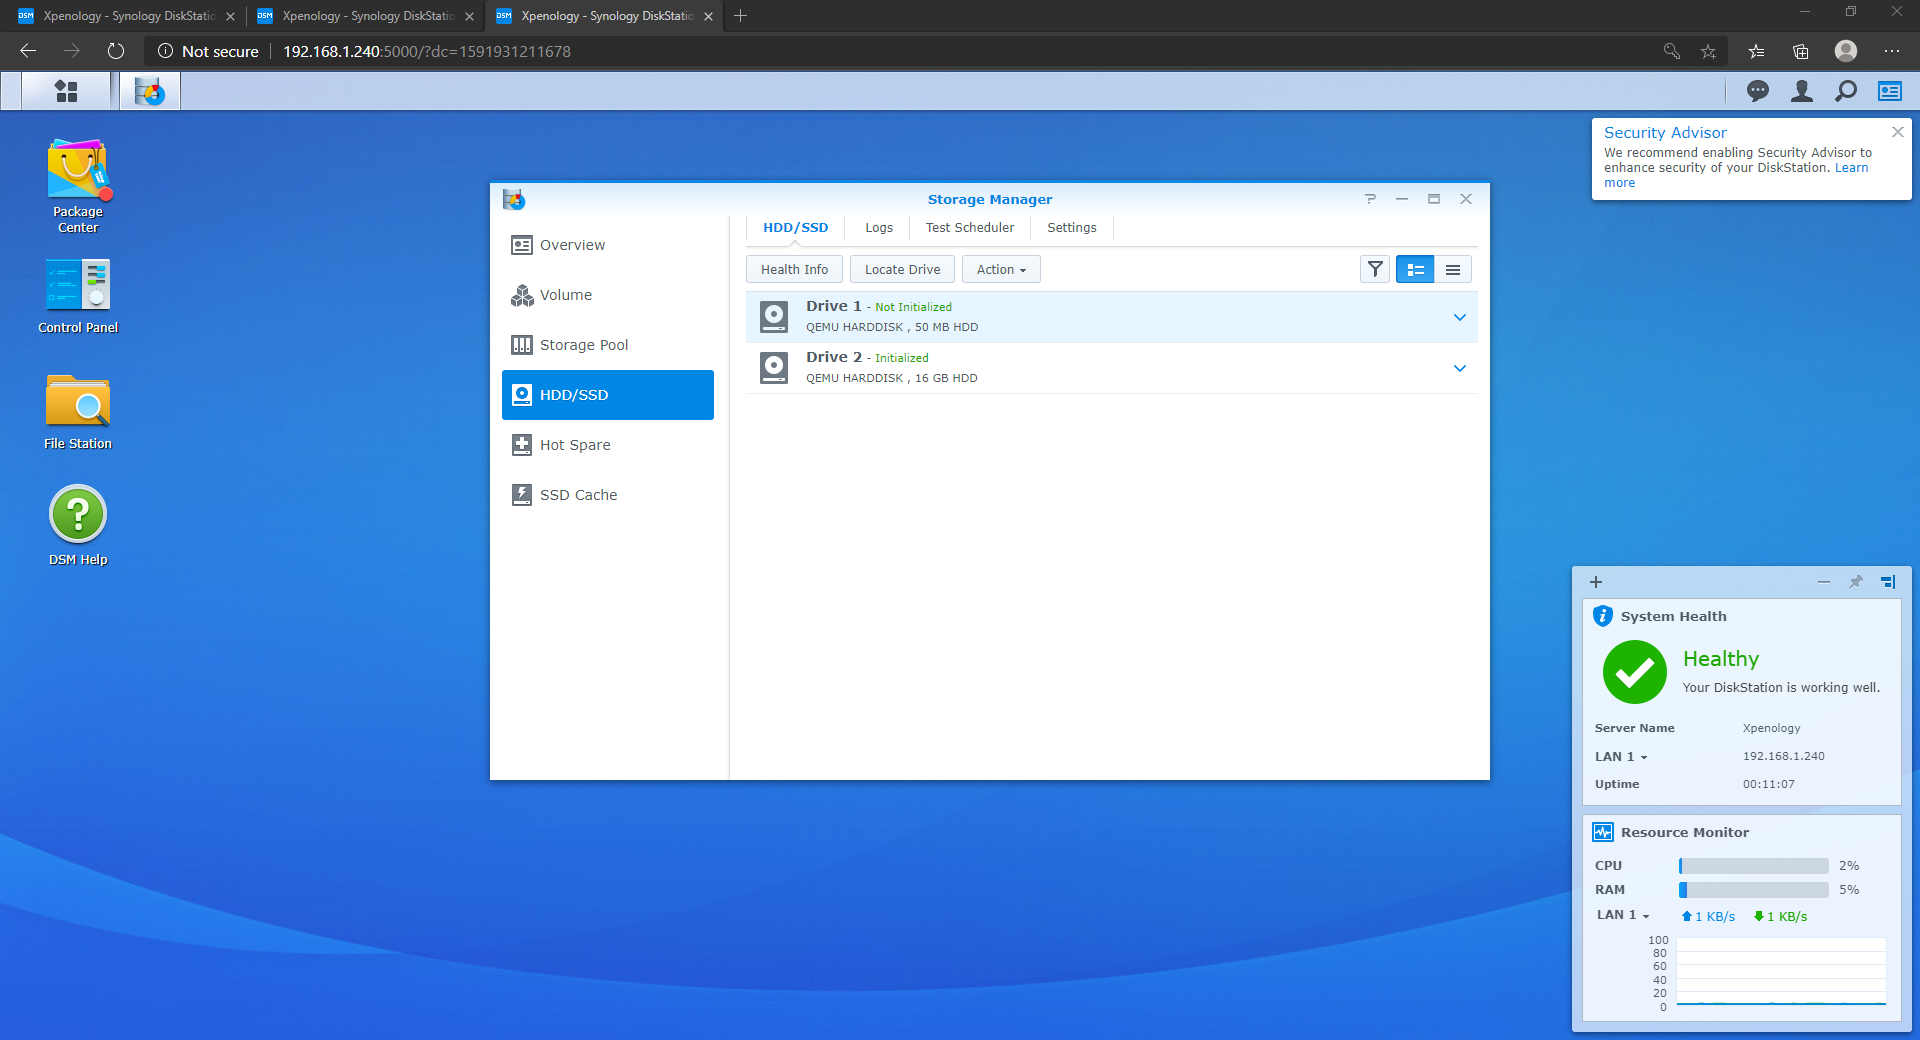
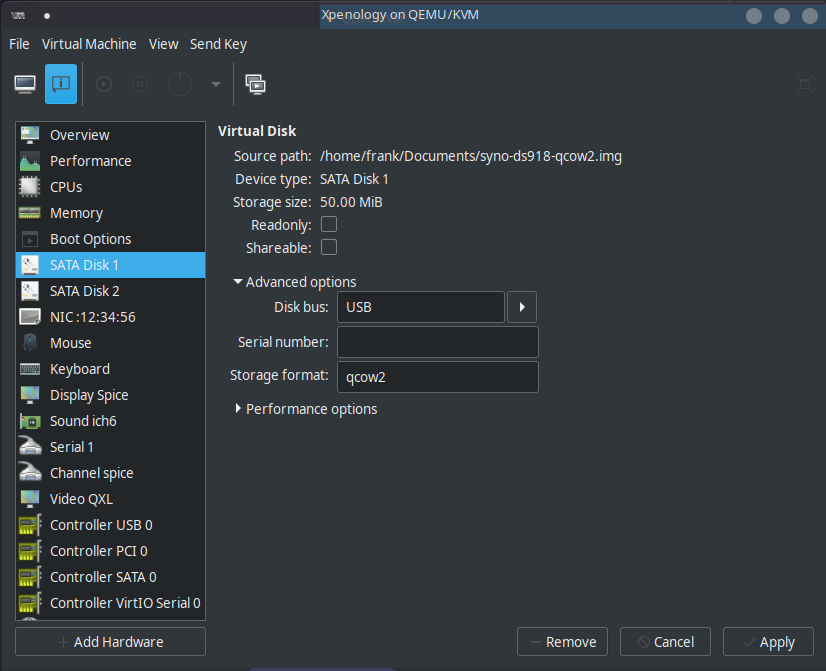
2. If you’d like to remove this drive from showing up, shut down the Xpenology OS that we just created and navigate to the KVM settings. Under the “SATA Disk 1” settings, change the “Disk bus” to “USB” and apply. This setting will stop DSM from listing this as a drive.
3. Ensure that the “Boot Options” now has the “USB Disk 1” as the first boot option.
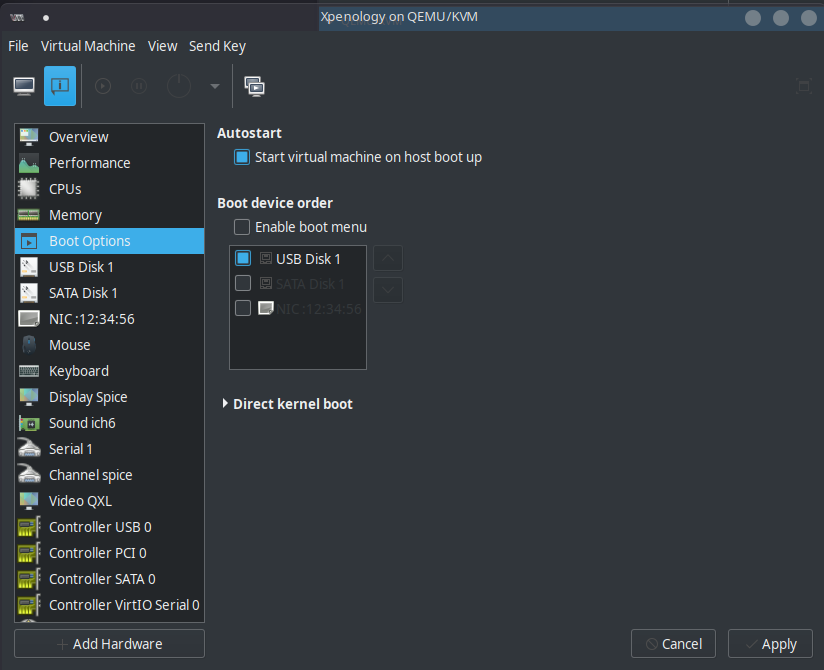
4. We will now need to pass physical drives to our Xpenology so that we can create a raid array. In order to do this, we will need to find the drives name which can be done using the GUI or by running a command in the terminal. This is the command that needs to be run to get the drives names.
lsblk
5. The second option is by using a great tool called GParted. If you don’t have GParted, you can install it by running this command:
sudo apt install gparted
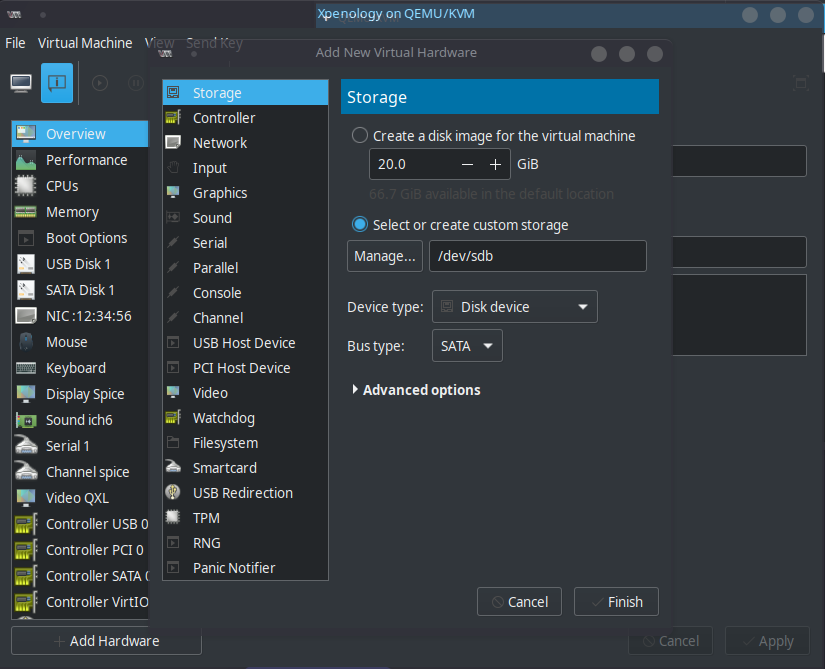
6. Open GParted, and switch to the physical Hard Drive in the top right that you would like passed to Xpenology. The important thing that we are looking for is the name. In my case, I will be passing “/dev/sdb” to Xpenology.

7. Navigate back to the virtual machine’s settings and select “Add Hardware”. Under Storage, enter the name found in the step above. Change the “Bus type” to “SATA” and click “Finish”. The drive will now be passed to Xpenology. Do this for all of the physical drives you have that you would like passed to Xpenology. You will now be able to create raid arrays using these drives. NOTE: When you pass these drives to Xpenology and create a storage pool, ALL DATA WILL BE ERASED. Ensure that no important data exists on these drives before proceeding.
Screenshot with drive added and boot drive set as USB:
Conclusion
This concludes the tutorial on how to install Xpenology on KVM. This is a pretty long process, but somewhat straight forward if you follow the instructions above. The biggest issues you may run into are hardware related, but the instructions above should guide you along the process as easily as possible.
If you’ve just finished setting up Xpenology, check out our tutorial on how to setup DDNS! If you have any questions on how to install Xpenology on KVM, please leave them in the comments!



Yes, Used same mac as yours and it presented me with welcome screen correctly. The VM was running as expected.
Which loader are you using? The MAC address that I supplied was for the DS918+ loader.
I got the setup on OMV5 with KVM through cockpit interface. All setting seem to be same . I have bridge, e1000, MAC 00:11…..56, and source-br0). After successful boot to the screen with message. Diskstation was not found.
I haven’t done this through OMV so it’s hard for me to guarantee that it will work, though theoretically it should. If the disk station can’t be found, it’s generally mac address related. Can you confirm that the VM is starting up properly?
This worked welll for me – thanks.
Does anyone know how to configure QEMU for graceful shutdowns?
Ive installed the powerbutton.spk in the xpenology VM and confirmed that a VMM power off command now shuts the VM down.
I now want this to happen when I shutdown the host.
I can see libvirt uses /etc/sysconfig/libvirt-guests – is this the same?
Hi WunderTech,
could I have the xml config of this vm?
Thank you
I unfortunately got rid of that server as I purchased a second NAS and no longer have the config. I apologize for the inconvenience!
Hi Ferno, did you manage to get it running? I m trying the same approach.
Thanks
Hi WunderTech, Do you mean in the Server? That is a Xeon E3-1230V2 Which is Haswell and should be fine. I have another server running with the same xpenology boot loader on Bare metal. Regarding the VM. Not sure which one it is emulating. What do I need to check?
Yes, Haswell should be fine. If you were running sandy bridge, you’d have to use a specific image, so it’s not that. I think you’re on the right track that it’s just the network interface. Have you seen if you can access the config file and update it to be e1000? Also, are you using the right mac address?
I want to accomplish the same, run Xpenology on OMV5. Were you able to run it after all the troubleshoot? Was your loader DS3615 for 1.04?
Hi WunderTech, I think I might have mis communicated the realise. I am not trying to run OMV on KVM. OMV (Open Media Vault) is Debian 10 Based and includes KMV. You can manage it through Cockpit or command prompt and since a couple of days there is also a KVM plugin which is still in early test state.
What I am trying to accomplish is to get Xpenology running on the KVM that comes with the Debian version in OMV (Open media vault) and I must say I am getting further each day. For instance, I switched to the DS3615 Bootloader and that one shows up in the Synology Assistant on my network. unfortunately with an IPIPA address. So now I have to fix that. Did you come across this issue of the xpenology boot loader showing up with an IPIPA address?
I run xpenology on bare metal and in 2 instances of ESXi and have never encountered this issue.
Got it! Sorry for the misunderstanding!
Do you know what processor you’re using? The processer (and mac address for certain images) actually matters a lot. As you saw, some of the other bootloaders work better with different hardware. Let me know and hopefully I can help!
Hi WunderTech, The problem is that I do not have a option to use MacVtap Bridge and model e1000 in Cockpit on OMV.
There is an option to bridge to en01 (not sure if this is the same as macvtap) but I cant select e1000 for that one.
So I was wondering if there is alternative in Cockpit for the NIC and if you have experience with it.
In the meantime I discovered a KVM plugin for OMV which enables me to use the right nic but I cant find the sync on the network. I can see the device booting in the console and the xpenlogy boot loader is available (like in my ESXi setups). But the Syno is not discoverable on the network. I used the MAC address in you example.
I’m unfortunately not sure, I do apologize. I haven’t set up OMV in KVM, so my experience is only working with it on a Raspberry Pi (where you don’t have to define the NIC). Have you considered setting up an Ubuntu server and running OMV on that?
Hi Wundertech, Thnx for this great tutorial, I am trying to get this running on OMV on which I do not have Virt-Admin so I am using Cockpit. I get the VM to run but am having trouble to get the correct NIC installed. Th options you show with dirt-manager (eg. e1000) are not present in the VM session of cockpit.
Do you know how to add the correct pic to KVM using cockpit or the cli?
I haven’t tried to install this on my own, but what exactly isn’t working? Are you unable to access OMV?
Hi wow thanks for the guide this is so amazing will try it later this week when I have time can you tell me what version of Linux your using for this.. so basically here is the thing. I use Hyper-V and I would like to get this to work there ? I am not sure if you can run it directly if not its not a big deal.. I can run a VM of Linux and run it the way your using it.
Thanks
Thanks for checking out the guide!
In this tutorial, I was using Ubuntu 18.04 LTS, but I have it working using the same process on Ubuntu 20.04 LTS. I am unfortunately not sure if you’ll be able to follow this guide with a VM of Ubuntu on Hyper-V because KVM/QEMU is a Hyper-V alternative. You’d in essence be trying to install a Virtual Machine inside of a Virtual Machine and that generally doesn’t work.
I do believe that you can get Xpenology working on Hyper-V, however. If I can help at all, please let me know!
Outstanding, i got a running DSM in less than 10 minutes 🙂
Thank you !
I’m glad to hear it worked, thank you for following the tutorial!
Hi !
i’m looking for xml config of this vm, i want only use command line to build it
can you export me the xml?
Cheers
Yes, I can! Do you want me to email it to you at the address that you registered this comment with?
Thanks for reading the tutorial!