In this article, we’ll take a look at how to install Homebridge on a Raspberry Pi. There are technically two different ways that you can install Homebridge – the first is by using the default Raspberry Pi image, and the second is by installing it as a Docker container. Another great place to run Homebridge is on a Synology NAS.
There isn’t necessarily a right or wrong way to do it, but this is how I’d look at it:
- If you only want to use this device for Homebridge, install the entire Homebridge operating system.
- If you want to use this device for various different services, utilize Docker.
Homebridge Raspberry Pi Image
If you want to devote this entire device to Homebridge, the best thing you can do is install the Homebridge operating system with the Raspberry Pi Imager and the path below.
Raspberry Pi Imager > Other Specific-Purpose OS > Home Assistants and Home Automation > Homebridge
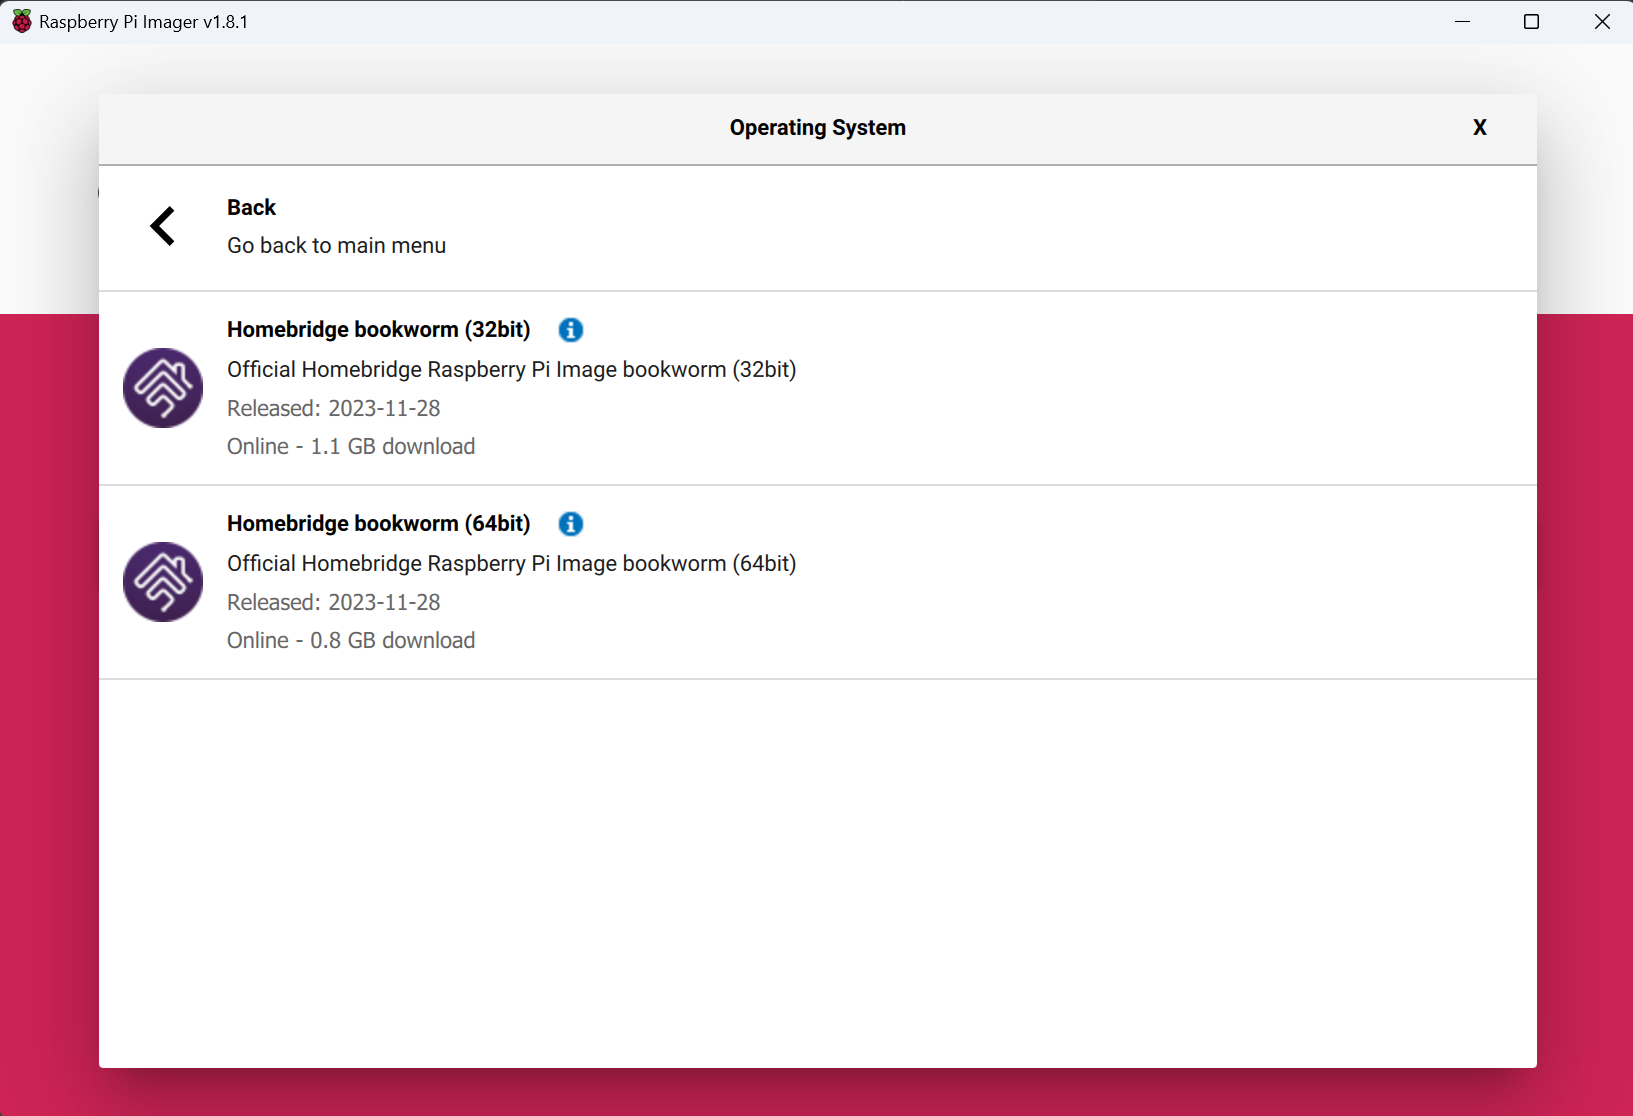
You’ll have to select either the 32-bit or 64-bit version (depending on which Raspberry Pi device you’re using), then write it to your flash drive.
How to Install Homebridge on a Raspberry Pi using Docker
Now that we looked at how to install Homebridge on a Raspberry Pi with the image, let’s take a look at how you’d install it with Docker. This is the preferred option for many people since Docker can be used for various things, and the setup process isn’t that bad.
With that said, you must have Portainer installed if you’re following this guide. You can configure it with a Docker Run command, but I prefer Portainer since the overall process is just easier to manage.
NOTE: If you ever plan to move Homebridge to a different device (or simply want to back it up), you must copy the data in this folder to the new location, and then map the volume on the new device to the data.
1. Run the commands below on the Raspberry Pi OS to create a new directory for the UniFi Controller’s data.
cd ~
mkdir homebridge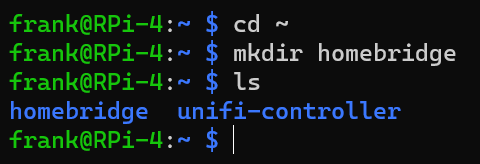
2. Get the full path of the current directory and save it for later.
pwd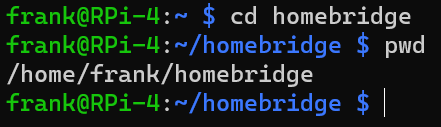
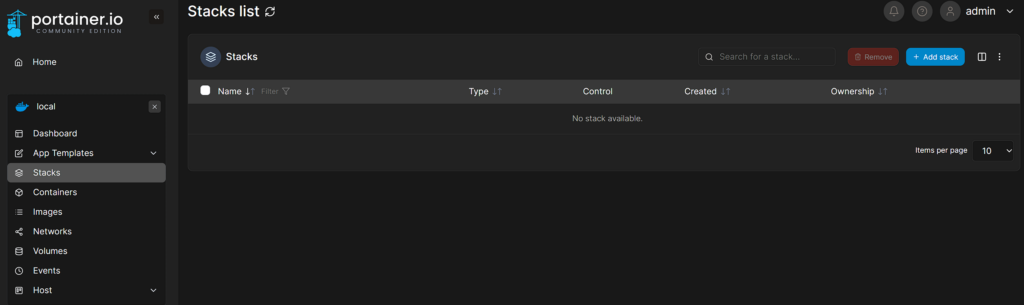
3. Log in to Portainer and select Stacks, then Add Stack.
4. Give the stack a name, then paste the contents below into the editor. You will most likely have to update the timezone, but the rest of the settings can stay as default.
There are other parameters you can use as well if you’d like, but the configuration below should give you a default setup. When you’re done making changes, select Deploy the Stack at the bottom of the screen.
NOTE: You must change the path from /home/frank to the path of your user that we found in step two!
version: '2'
services:
  homebridge:
    image: homebridge/homebridge:latest
    restart: always
    network_mode: host
    volumes:
      - /home/frank/homebridge:/homebridge
    logging:
      driver: json-file
      options:
        max-size: "10mb"
        max-file: "1"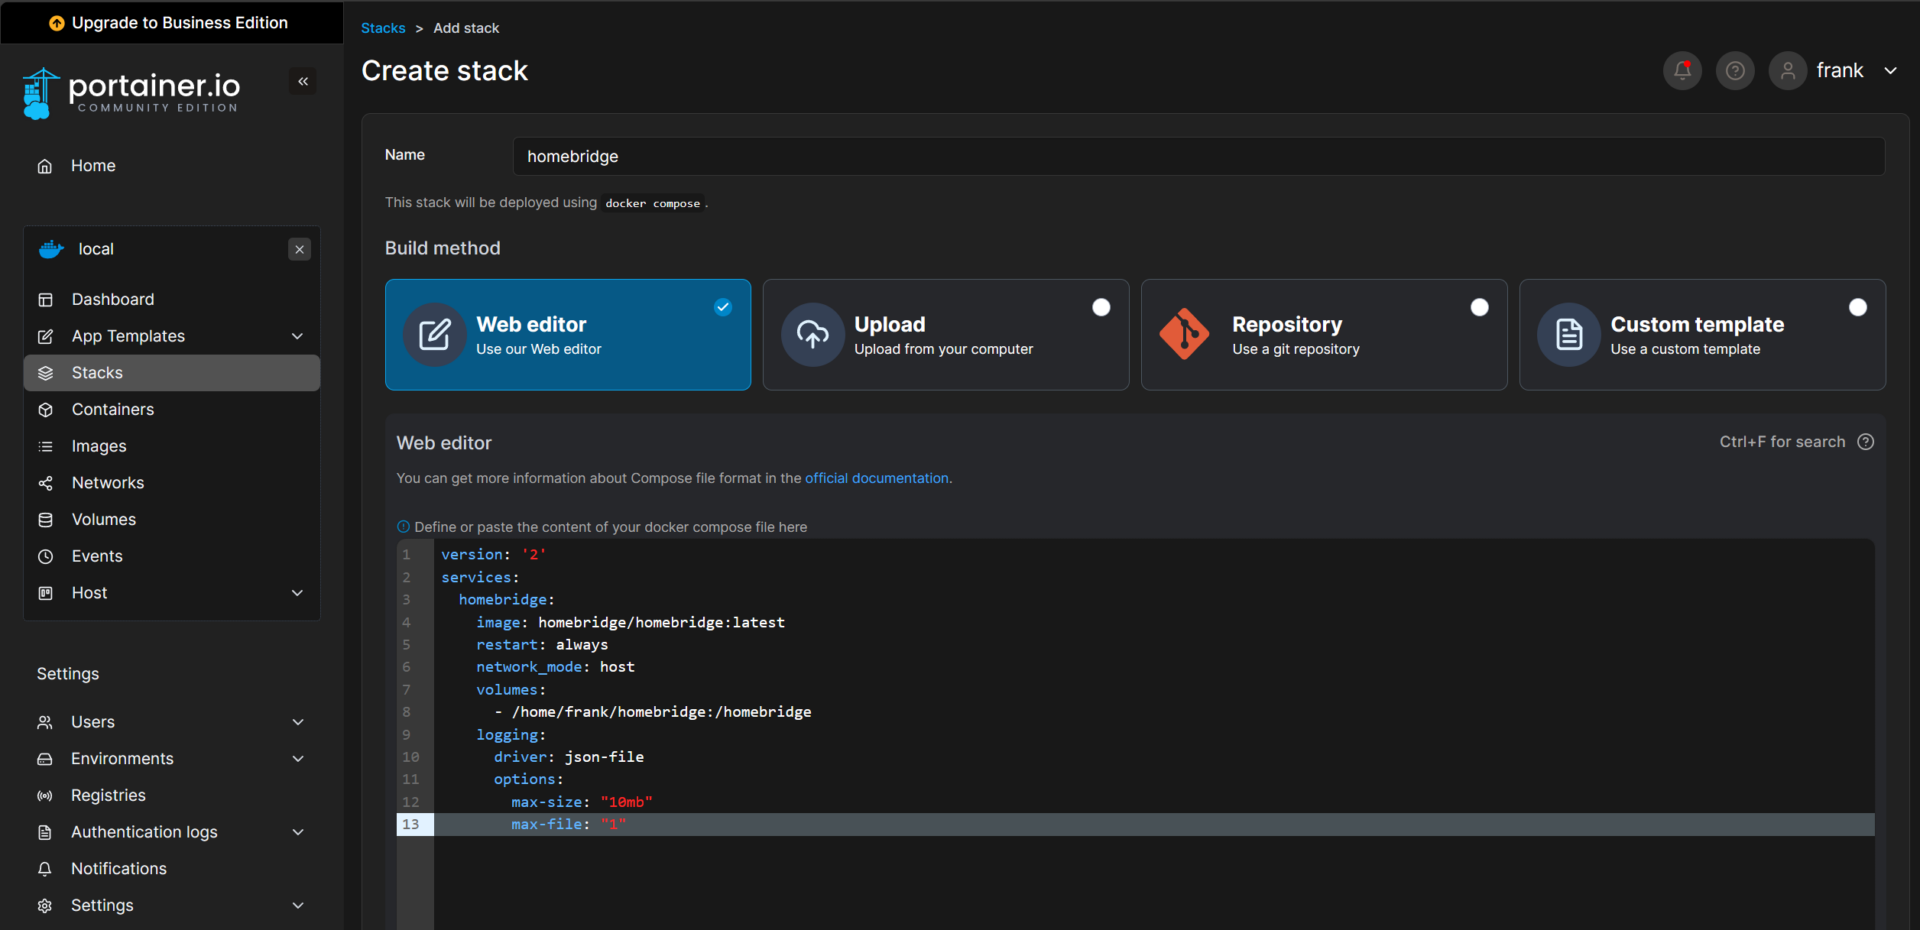
5. It will take a few minutes to deploy the container, but when you’re brought back, you should see the container running in the Containers tab.

6. You can access Homebridge by accessing the IP address of your Raspberry Pi and port 8581.
http://RASPBERRY_PI_IP:8581Homebridge Setup Process
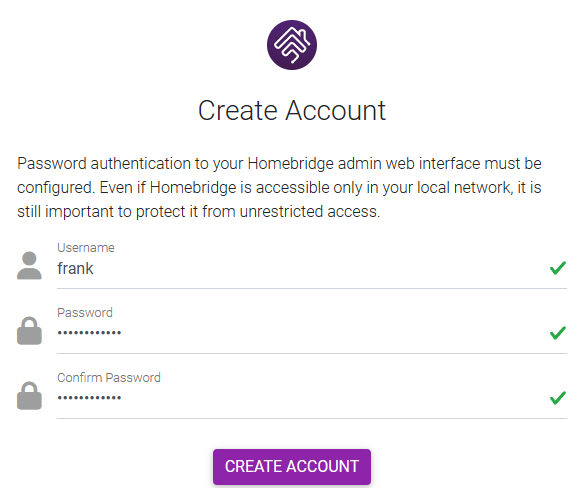
Now that Homebridge is installed and accessible, you can start the setup process.
1. Select Get Started, then create a Username and Password.
2. Now that it’s created, select Open Dashboard.
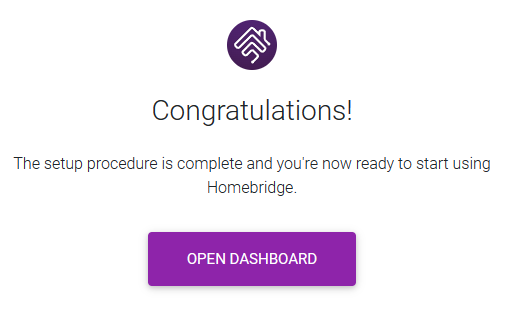
3. Homebridge will now be set up and functional! Please keep in mind that you’ll have to pair Homebridge with your HomeKit app in iOS and continue configuring Homebridge, but from a functionality perspective, it’s now configured on your Raspberry Pi.

Conclusion & Final Thoughts on Homebridge
This tutorial looked at how to install Homebridge on a Raspberry Pi. The biggest decision that you’re going to have to make is if this will be a devoted Homebridge Raspberry Pi, or if it’s going to be used for multiple services. There are tons of different services you can run on a Raspberry Pi and adding Homebridge as one of them will extend the overall functionality of the device.
With that said, the setup process for the image is going to be a lot easier, so you’ll have to determine what you want to do with the device in advance. Thanks for checking out the tutorial on how to install Homebrige on a Raspberry Pi. If you have any questions, please leave them in the comments!