In this tutorial, we’re going to look at how to install Homebridge on a Synology NAS. There are two main ways that you can install Homebridge on a Synology NAS, and each option will technically work, but we’ll look at how to install Homebridge using Docker Compose below.
Before we look at how to install Homebridge on a Synology NAS, let’s look at what Homebridge is.
What is Homebridge?
Homebridge is open-source software that lets users connect smart home devices that aren’t traditionally supported by Apple’s HomeKit to the platform. In summary, it sits in the middle of smart home devices and Apple’s HomeKit and allows device connectivity.
Homebridge is compatible with tons of different smart home devices but must be installed on a standalone device. The easiest way to install Homebridge (in my opinion) is Docker and Docker Compose, which makes the overall support of Homebridge very broad.
If you’re interested in learning some of the differences between Homebridge and Home Assistant (if you’re interested in using it), please check out our article!
Installing Homebridge on a Synology NAS using Container Manager
With DSM 7.2 and Container Manager, you can now use Docker Compose. Utilizing this approach is significantly easier than managing Docker containers in the past through the Synology GUI.
We’ll utilize Docker Compose below, but if you want to use the Synology GUI, you technically can.
NOTE: Please be aware that your NAS must support Container Manager to use the method below.
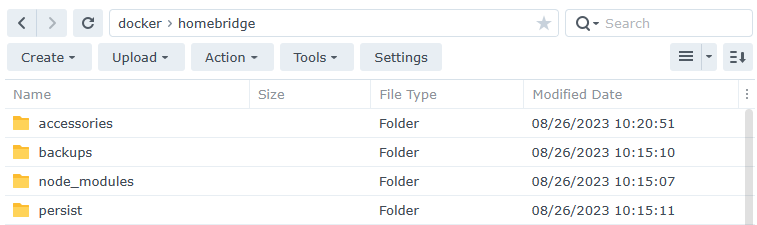
1. Ensure that Container Manager is installed (from the Package Center) and open File Station. In the Docker folder, create a subfolder named homebridge.

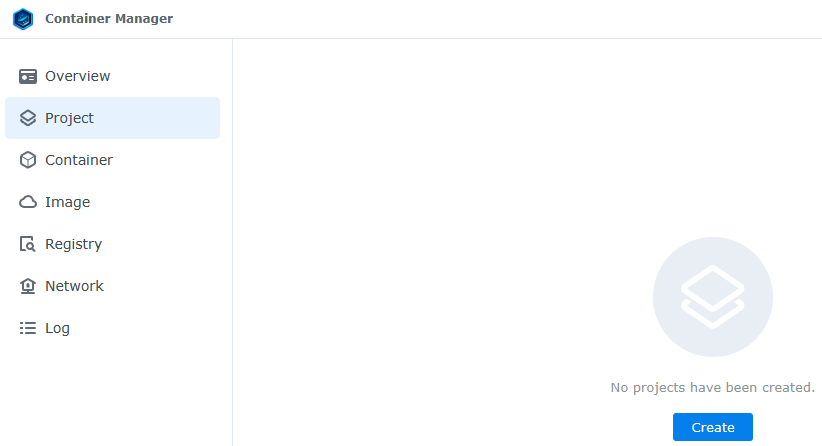
2. Open Container Manager, then select Project and Create.
3. In the Project Name, enter homebridge, then select the path of the homebridge folder we created and select Create docker-compose.yml.

4. Paste the contents of the Docker Compose file below. A few important notes you need to be aware of:
- The container will automatically restart if stopped and use the host network interface (same IP as your NAS). This is all configured in the docker-compose file below.
- In the Volume section, you MUST select the volume that the Docker folder is installed on. For almost everyone, that will be /volume1/, but if you have multiple volumes and installed Docker on a different volume, you might have to adjust this to /volume2/ or /volume3/, etc.
version: '2'
services:
  homebridge:
    image: homebridge/homebridge:latest
    restart: always
    network_mode: host
    volumes:
      - /volume1/docker/homebridge:/homebridge
    logging:
      driver: json-file
      options:
        max-size: "10mb"
        max-file: "1"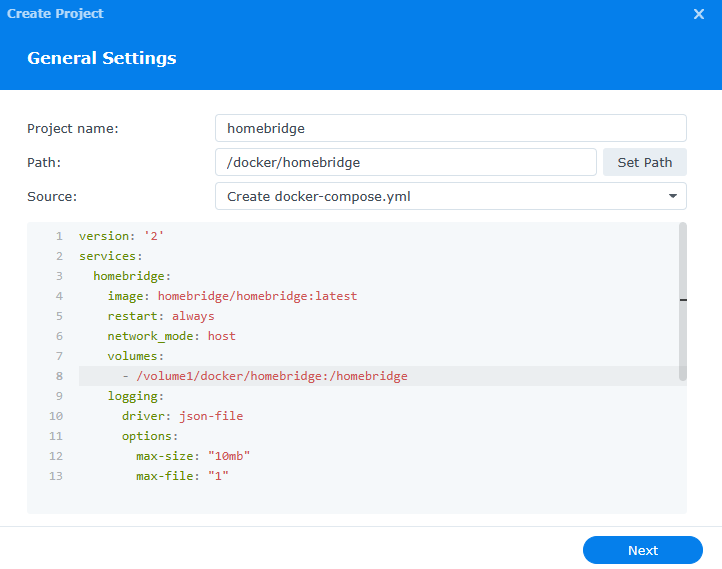
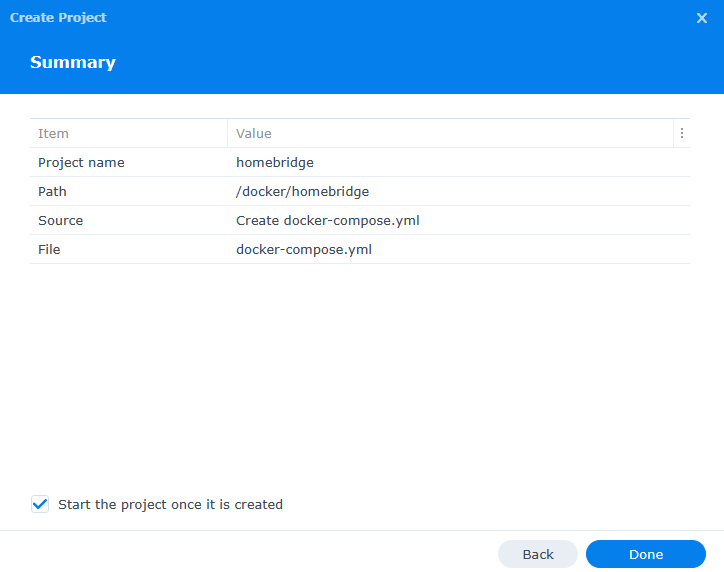
5. No other settings have to be adjusted, so you can select Next until you get to the summary page. Select Done to create the Homebridge container.
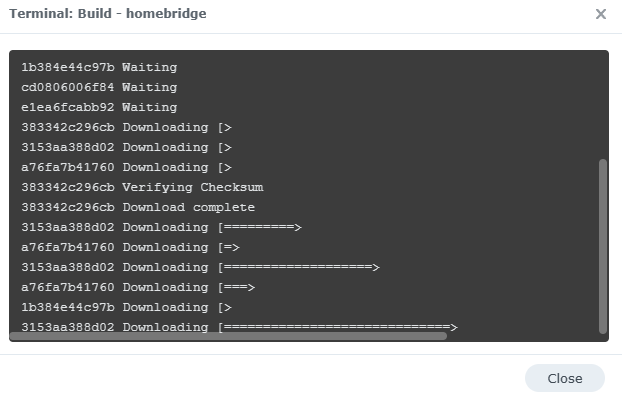
6. The container will now download and install!
7. If you’re using Synology’s Firewall, create an allow rule for TCP port 8581. If you aren’t using the firewall, you can access Homebridge by accessing the IP address of your Synology NAS and port 8581.
http://SYNOLOGY_NAS_IP:8581
Homebridge Setup Process
Now that Homebridge is installed and accessible, you can start the setup process.
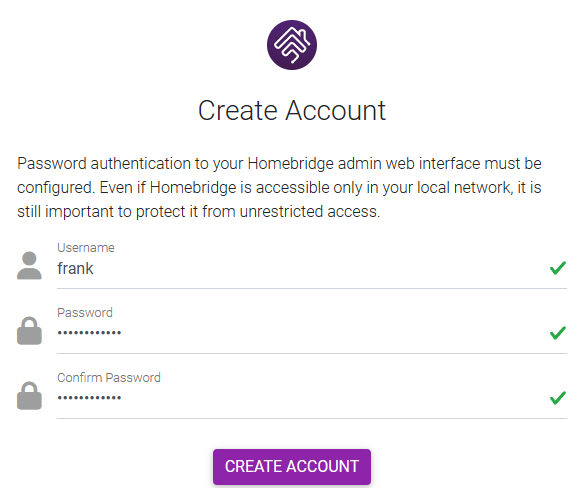
1. Select Get Started, then create a Username and Password.
2. Now that it’s created, select Open Dashboard.
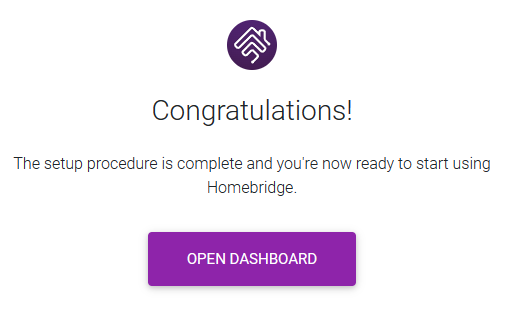
3. Homebridge will now be set up and functional! Please keep in mind that you’ll have to pair Homebridge with your HomeKit app in iOS and continue configuring Homebridge, but from a functionality perspective, it’s now configured on your Synology NAS.

Conclusion & Final Thoughts: Homebridge Install
This tutorial looked at installing Homebridge on a Synology NAS. If you’re using Apple HomeKit and want to extend the functionality, Homebridge is a great option. Please keep in mind that you’ll have to continue the configuration of Homebridge, but the setup process is now complete.
Remember that the configuration files for Homebridge will exist in the docker folder, so if you’d ever like to move the container (without backing up and restoring it), this is the best option.