In this article, we’re going to look at how to expand the memory on a Synology NAS.
When you purchase a Synology NAS, it comes with a standard amount of memory (RAM) (each device may be slightly different). Some devices may allow you to upgrade the RAM. The process of installing memory is fairly straightforward, but we’re going to look at some of the benefits, as well as the process for installing memory on a Synology DS923+. This process is the same for most Synology devices.
The links below are Amazon affiliate links, which means that I earn a percentage of each sale at no cost to you. Thank you for your support.
Why Should You Add Memory to a Synology NAS?
Adding memory to a Synology NAS can have several benefits for the Synology DSM operating system.
- Improved performance: More memory allows you to do more with your NAS. This includes file sharing, media streaming, backups, applications, and more. More memory can also improve your network transfer speeds, as RAM is sometimes a bottleneck, meaning the transfers can be held back by the amount of RAM available.
- Scalability: As your data grows, your NAS may need more memory to continue operating efficiently.
Overall, the main takeaway is that adding memory will help the device function better and can increase the overall performance, especially when using the device with multiple applications or large amounts of data.
Official vs. Unofficial Memory for Synology NAS Devices
When you’re interested in upgrading memory on a Synology NAS (RAM), you have two options: purchase the official Synology RAM sticks or purchase aftermarket, unofficial memory.
From a compatibility standpoint, Synology only recommends and supports official Synology Memory. However, purchasing unofficial memory is both cheaper (and in most cases, significantly) and functions the same as the official memory does. The downside of unofficial memory is that short-term and long-term stability and functionality aren’t guaranteed. Synology memory is tested and validated for use in Synology devices, but it comes at a premium.
Overall, there isn’t a right or wrong answer. The only point to be aware of is that compatibility is not guaranteed unless you purchase official Synology memory.
How to Expand the Memory on a Synology NAS
From an expansion standpoint, the process is similar on all Synology models, though it might differ slightly.
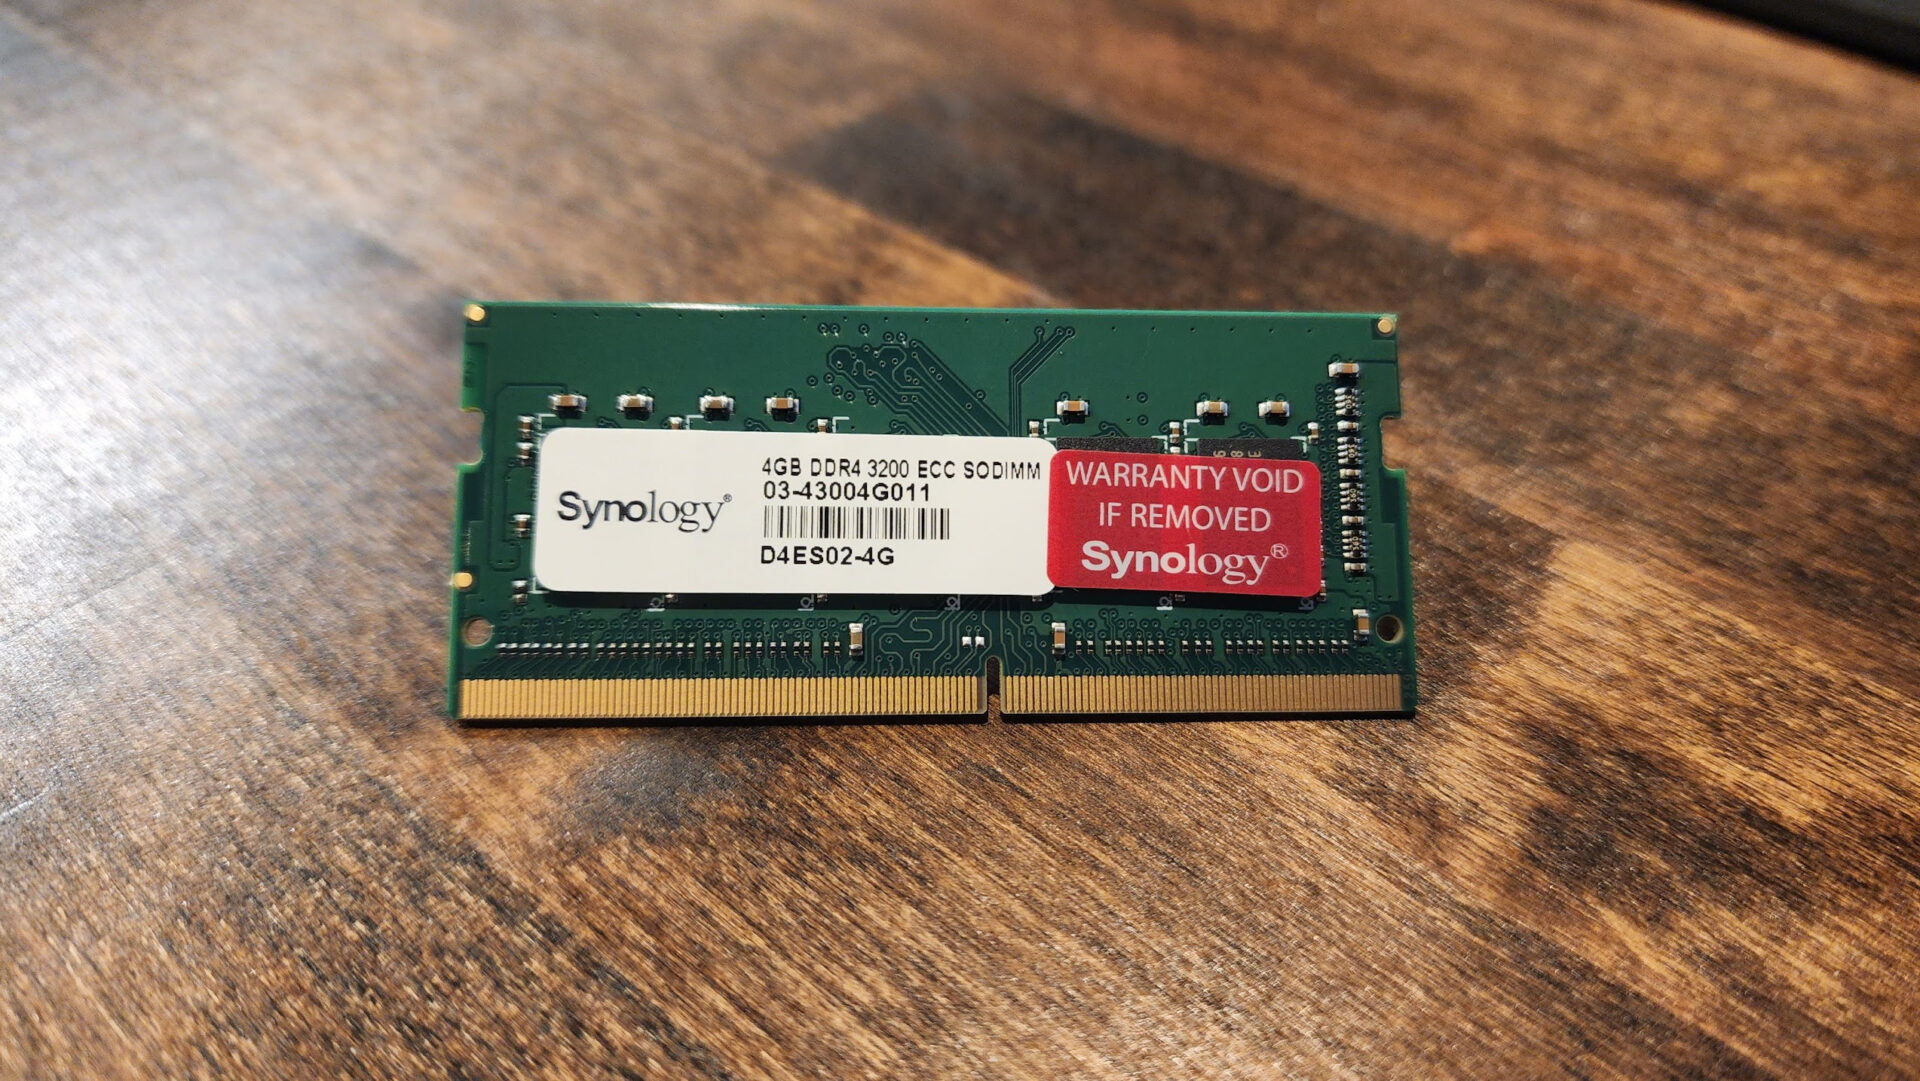
In this example, I’m going to utilize a Synology DS923+ and 4GB of official Synology D4ES02-4G memory.
1. The memory unit is generally on the right side of the device. You’ll have to remove, at minimum, one bay of your Synology NAS to access the memory module. Shut down the device before proceeding.
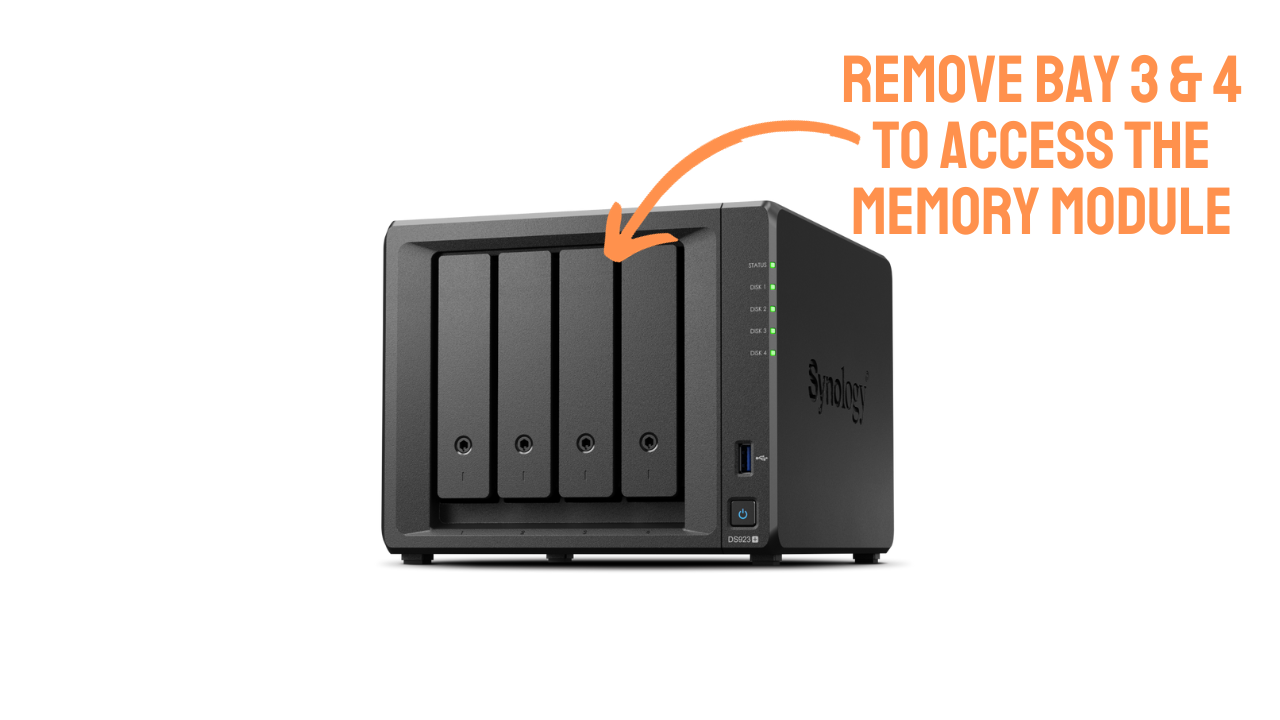
2. After you have access to the memory module, add the memory to the available spot (in the correct direction) and then push down to “click” it into place.

This great video from Tech Me Out highlights how to add memory to a Synology DS923+ (as well as SSD caching drives and 10GbE).
3. That’s it! The memory is now installed, and you can power your device back on!
Confirming the Memory has been Installed
1. After the device has been powered on, you can confirm that you have been allocated the new memory by opening the Resource Monitor.
2. Select Memory, and then confirm that the memory has been added. This device initially had 4GB of RAM and is now showing 8GB of RAM in total.

Conclusion: Adding RAM to a Synology NAS
This tutorial looked at how to expand the memory on a Synology NAS. There are many reasons why you might want to add RAM to a Synology NAS, with the main one being performance. Depending on what you’re running on your NAS, added memory can improve the overall operation of all actions and is a cheap and efficient way of fixing potential issues.