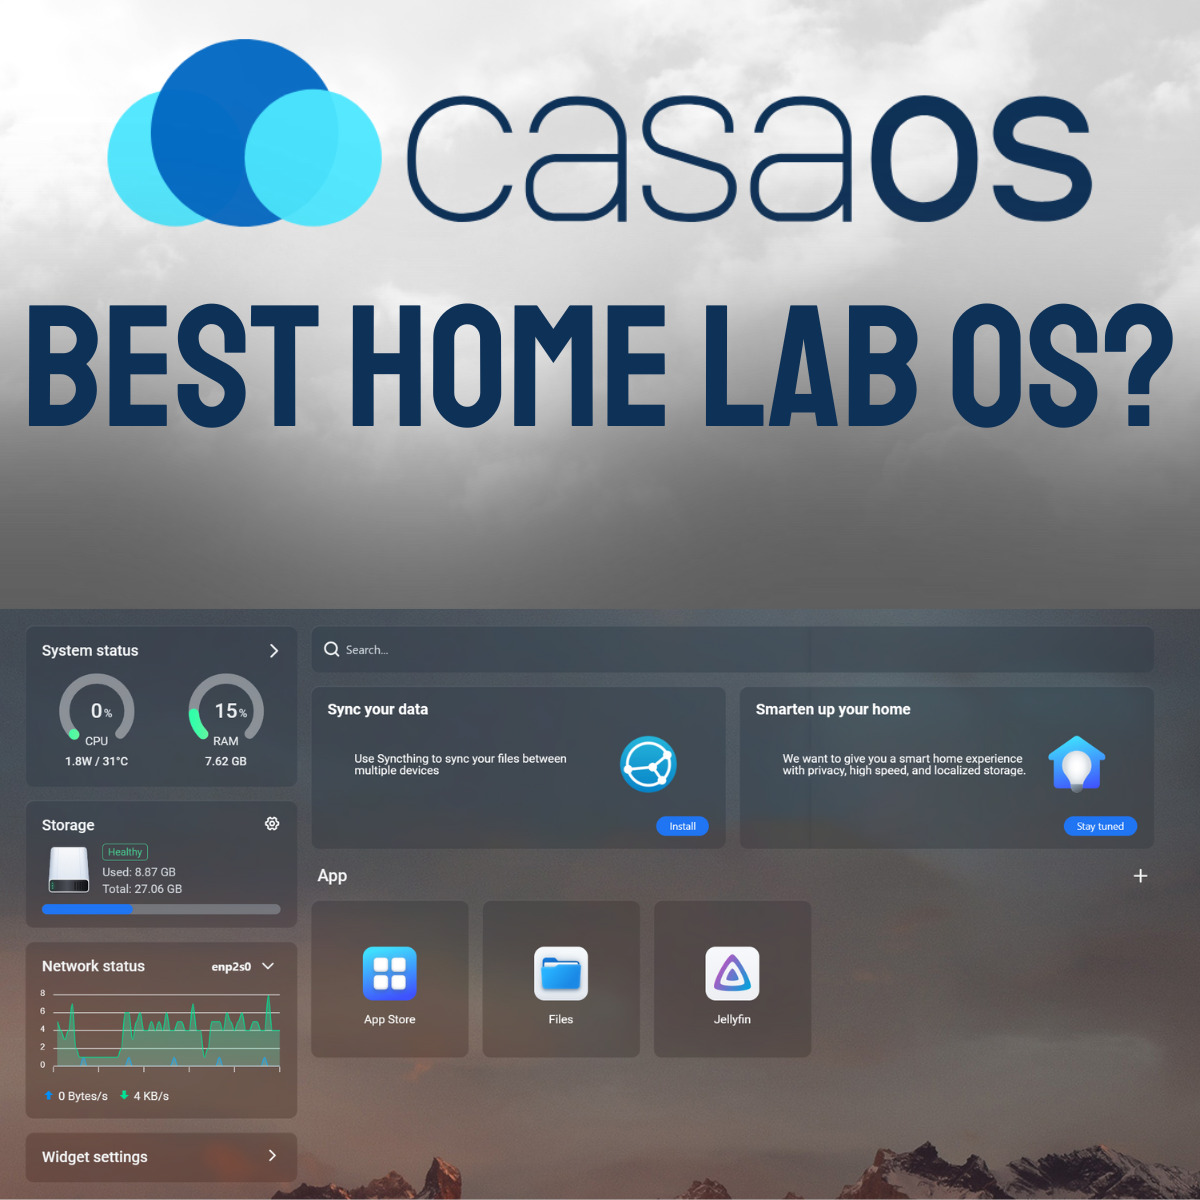
If you’re interested in implementing a new home lab tool, or even just viewing other home lab operating system options, CasaOS should be on your list. The entire goal of CasaOS is to be “simple”, meaning that you’ll install it and access it through a web browser to manage the entire operating system.
What is CasaOS?
CasaOS is an open-source operating system developed by IceWhale Technology with the goal of being the easiest, and most straightforward home lab operating system you can use. What makes it unique is that it allows you to install Docker applications with one click, simplifying the entire process for all users (especially beginners).
CasaOS comes installed by default on the ZimaBoard (also created by IceWhale Technology). While you can use CasaOS with the ZimaBoard, you can also configure it on other operating systems by running the install command below:
curl -fsSL https://get.casaos.io | sudo bashBy running that command, you’ll be able to configure and implement CasaOS on various types of hardware, making it a legitimate home lab option.
Configuring CasaOS
If you’ve purchased a ZimaBoard or installed CasaOS on your own hardware by running the command above, you can configure it by following the steps below.
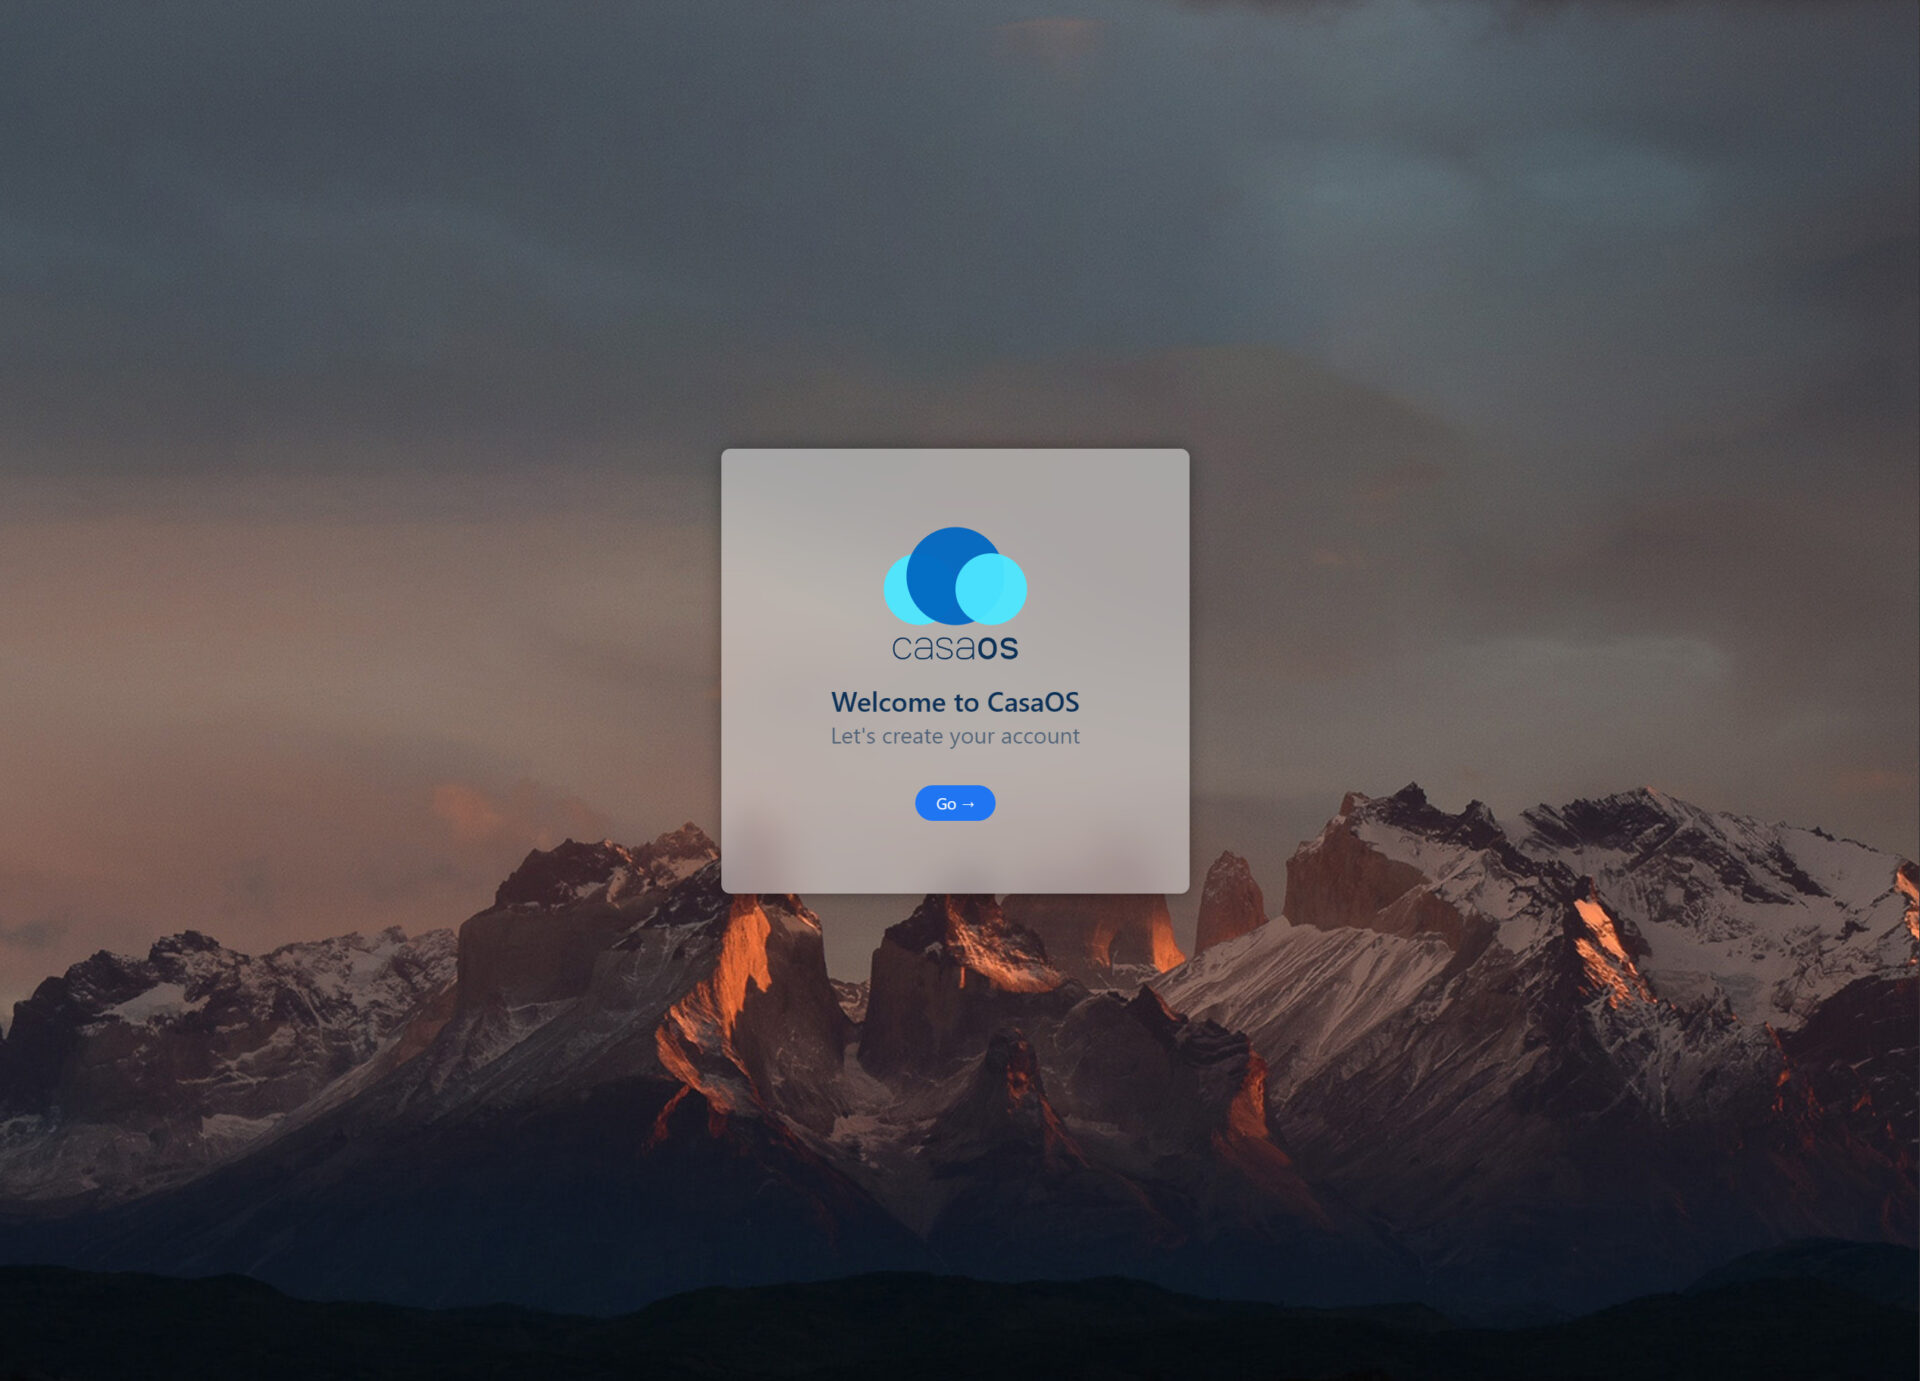
1. Access CasaOS by navigating to the IP address (or hostname) of your CasaOS instance. When you access the main page, select Go.
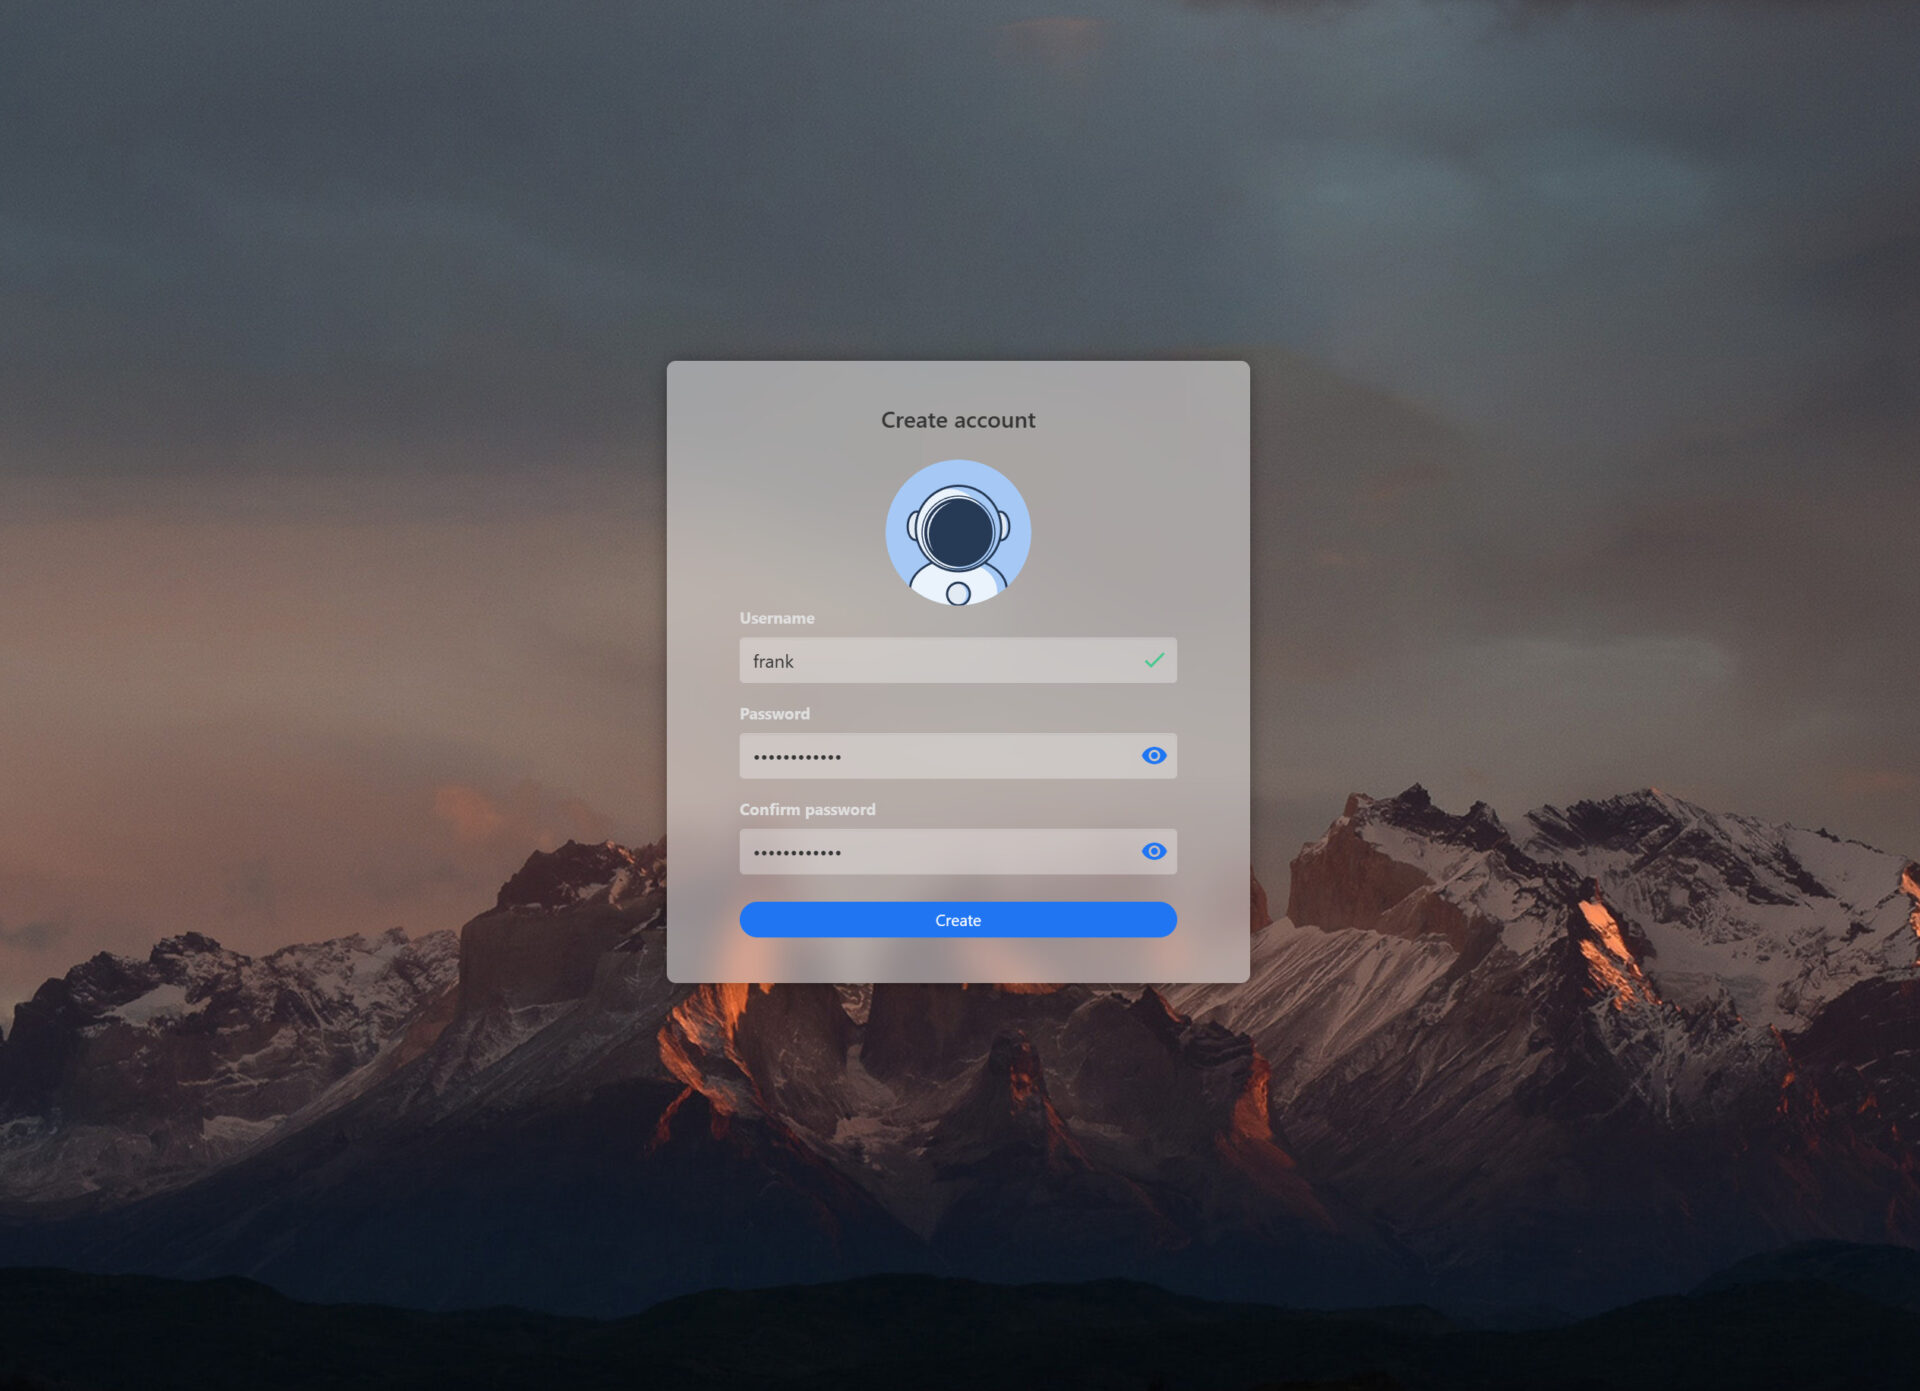
2. Enter a Username and Password that you’ll use to connect to the web dashboard. After entering the information, select Create.
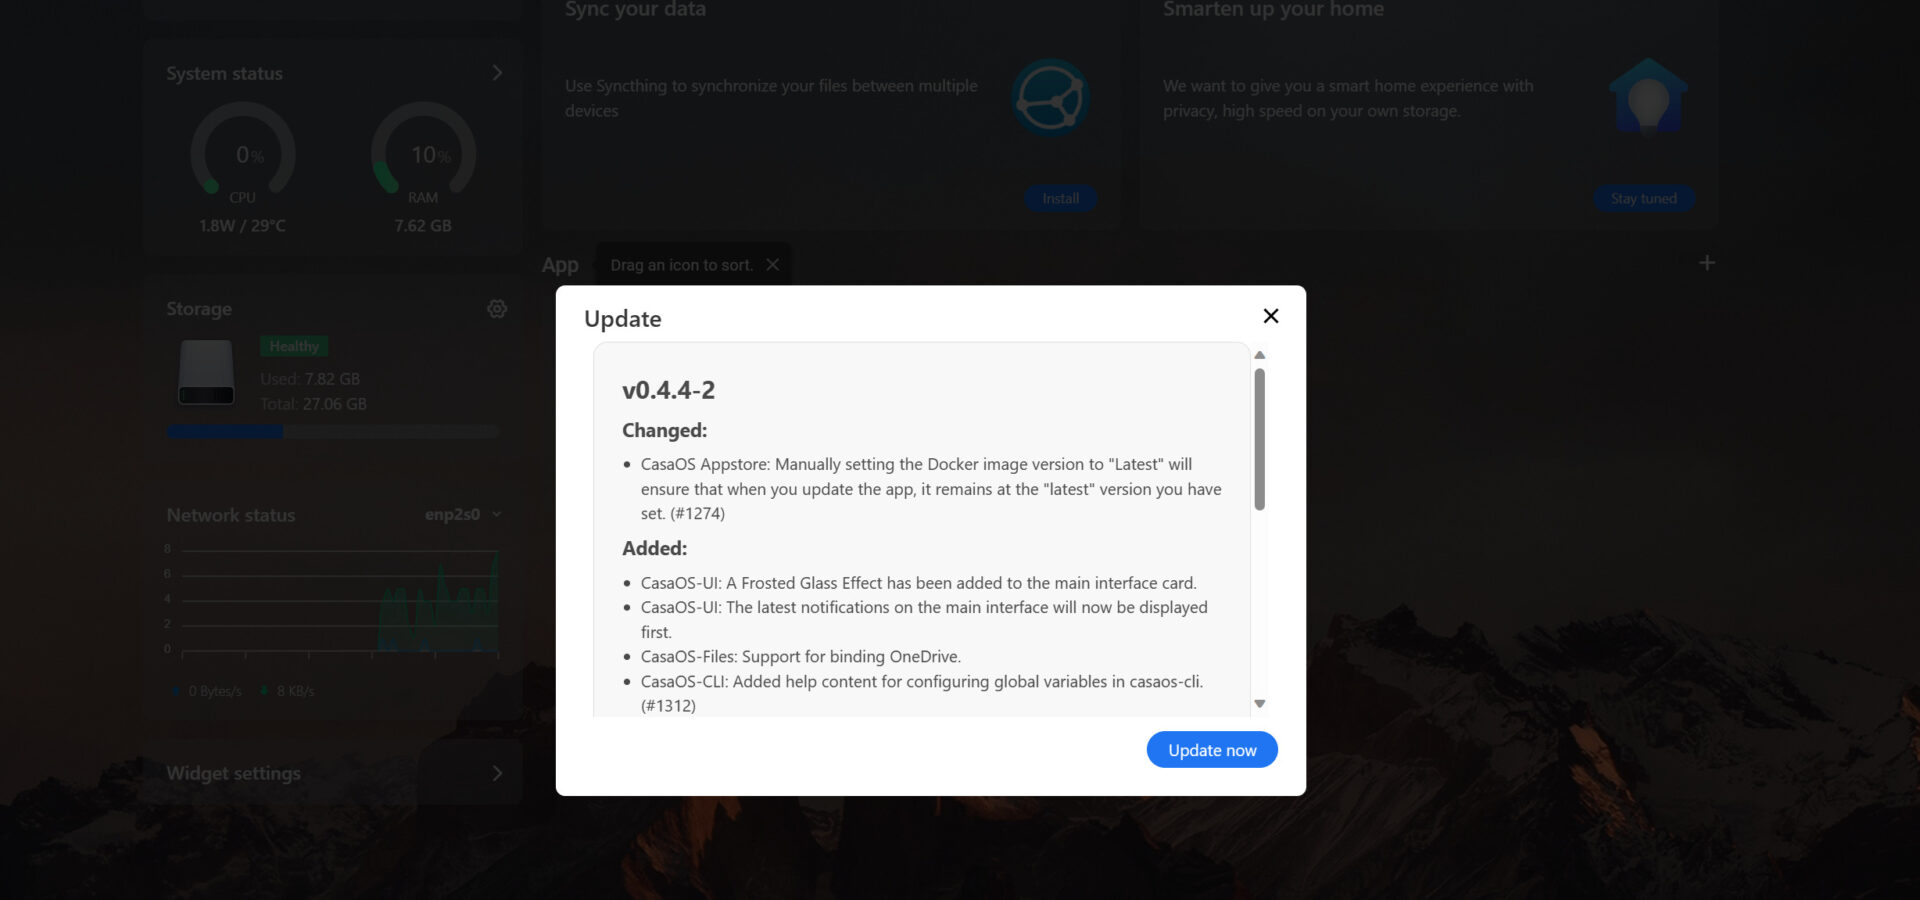
3. As soon as you access the dashboard, select Settings (in the top left), then Update to ensure that the operating system is updated to the latest version.
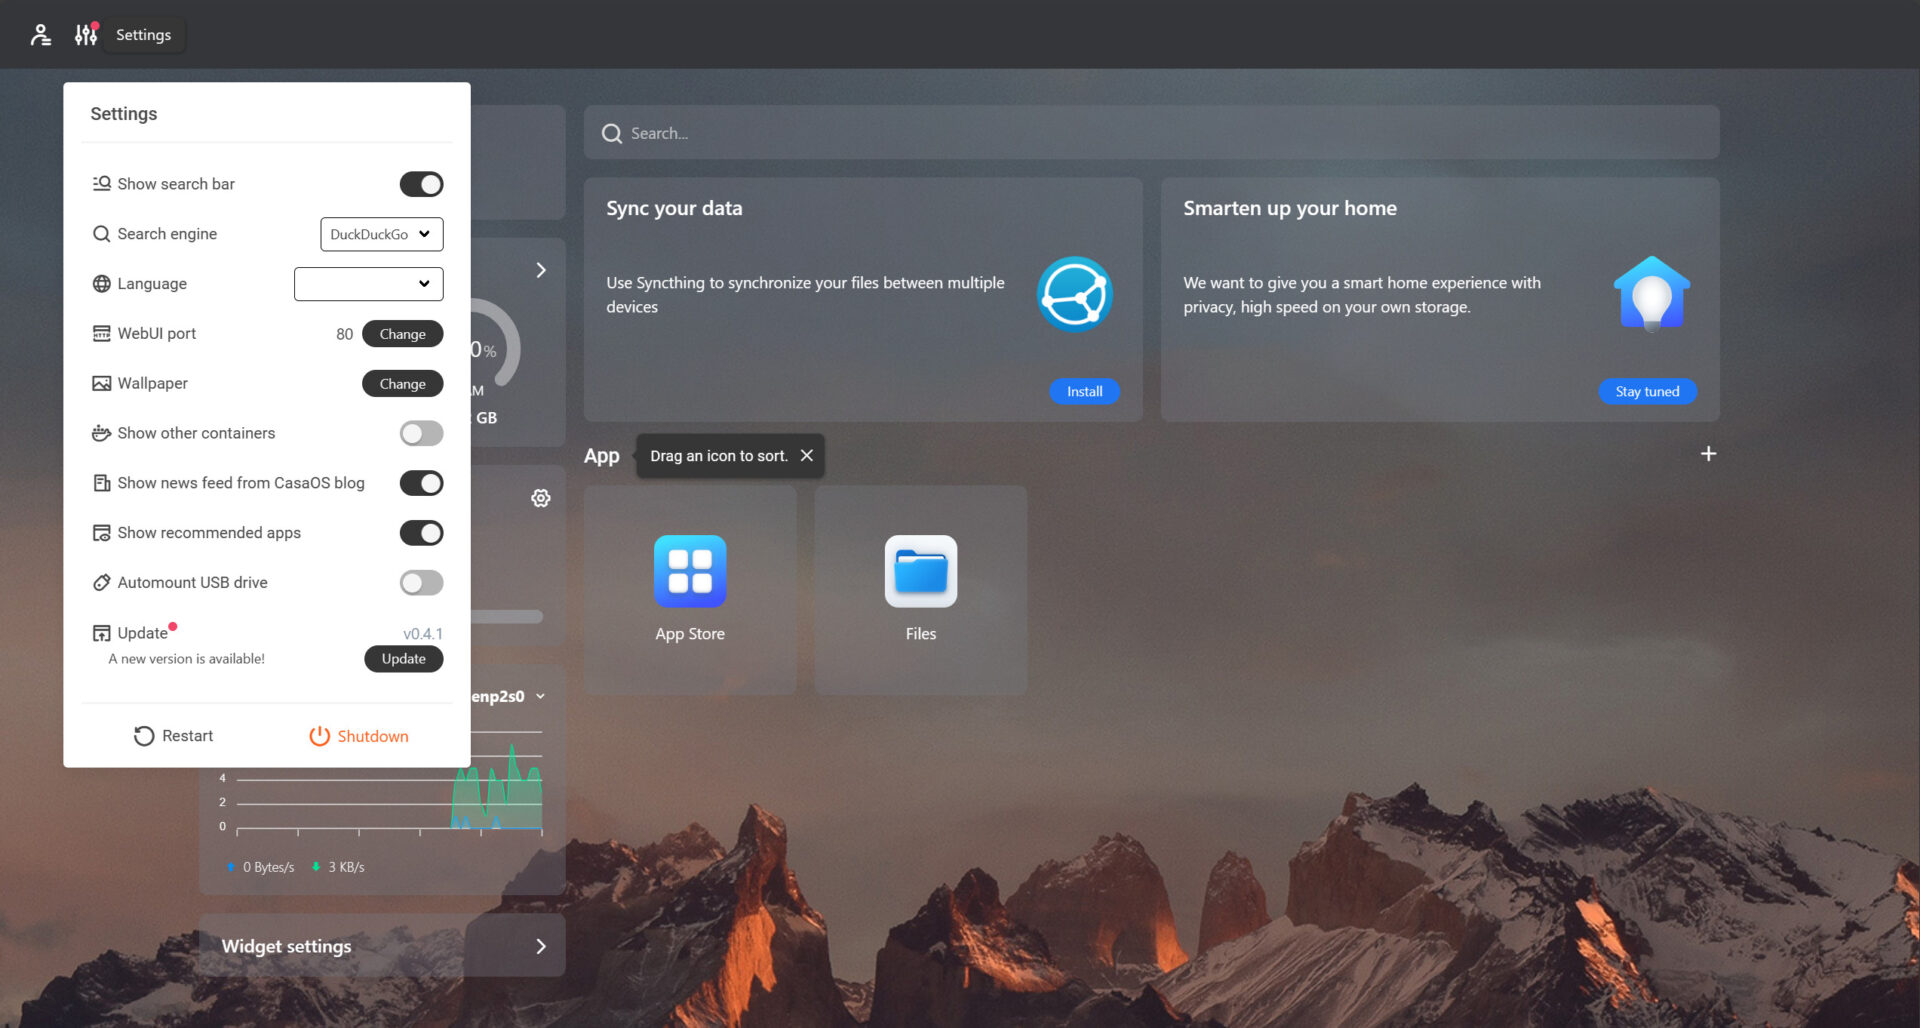
4. Review the notes, then select Update Now. Installing updates is important for security and new enhancements, so before you start using CasaOS, it’s important to ensure that it’s up to date.
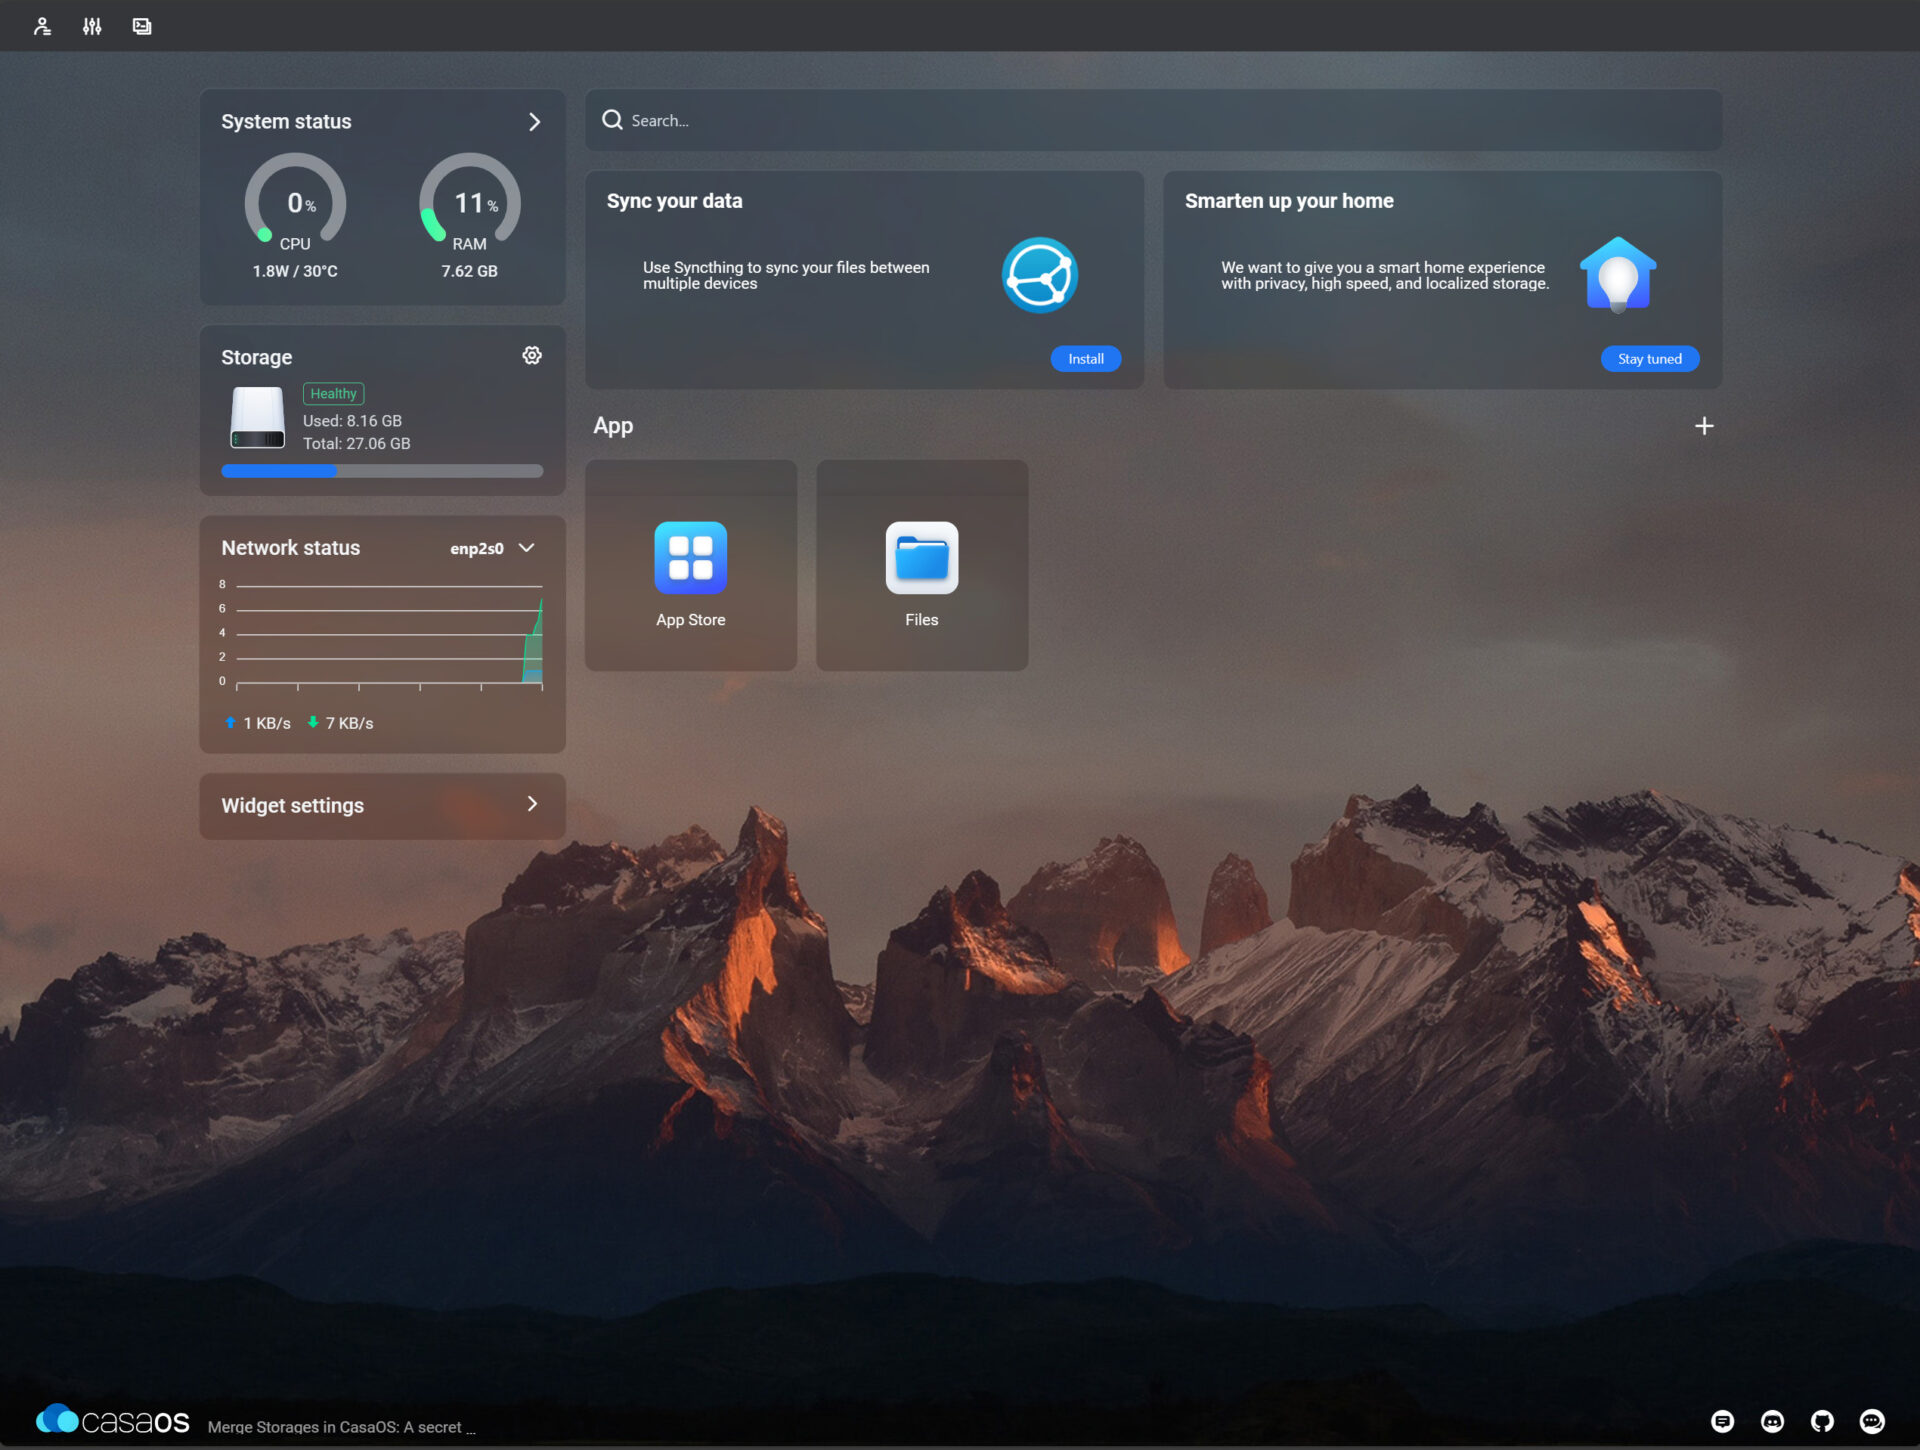
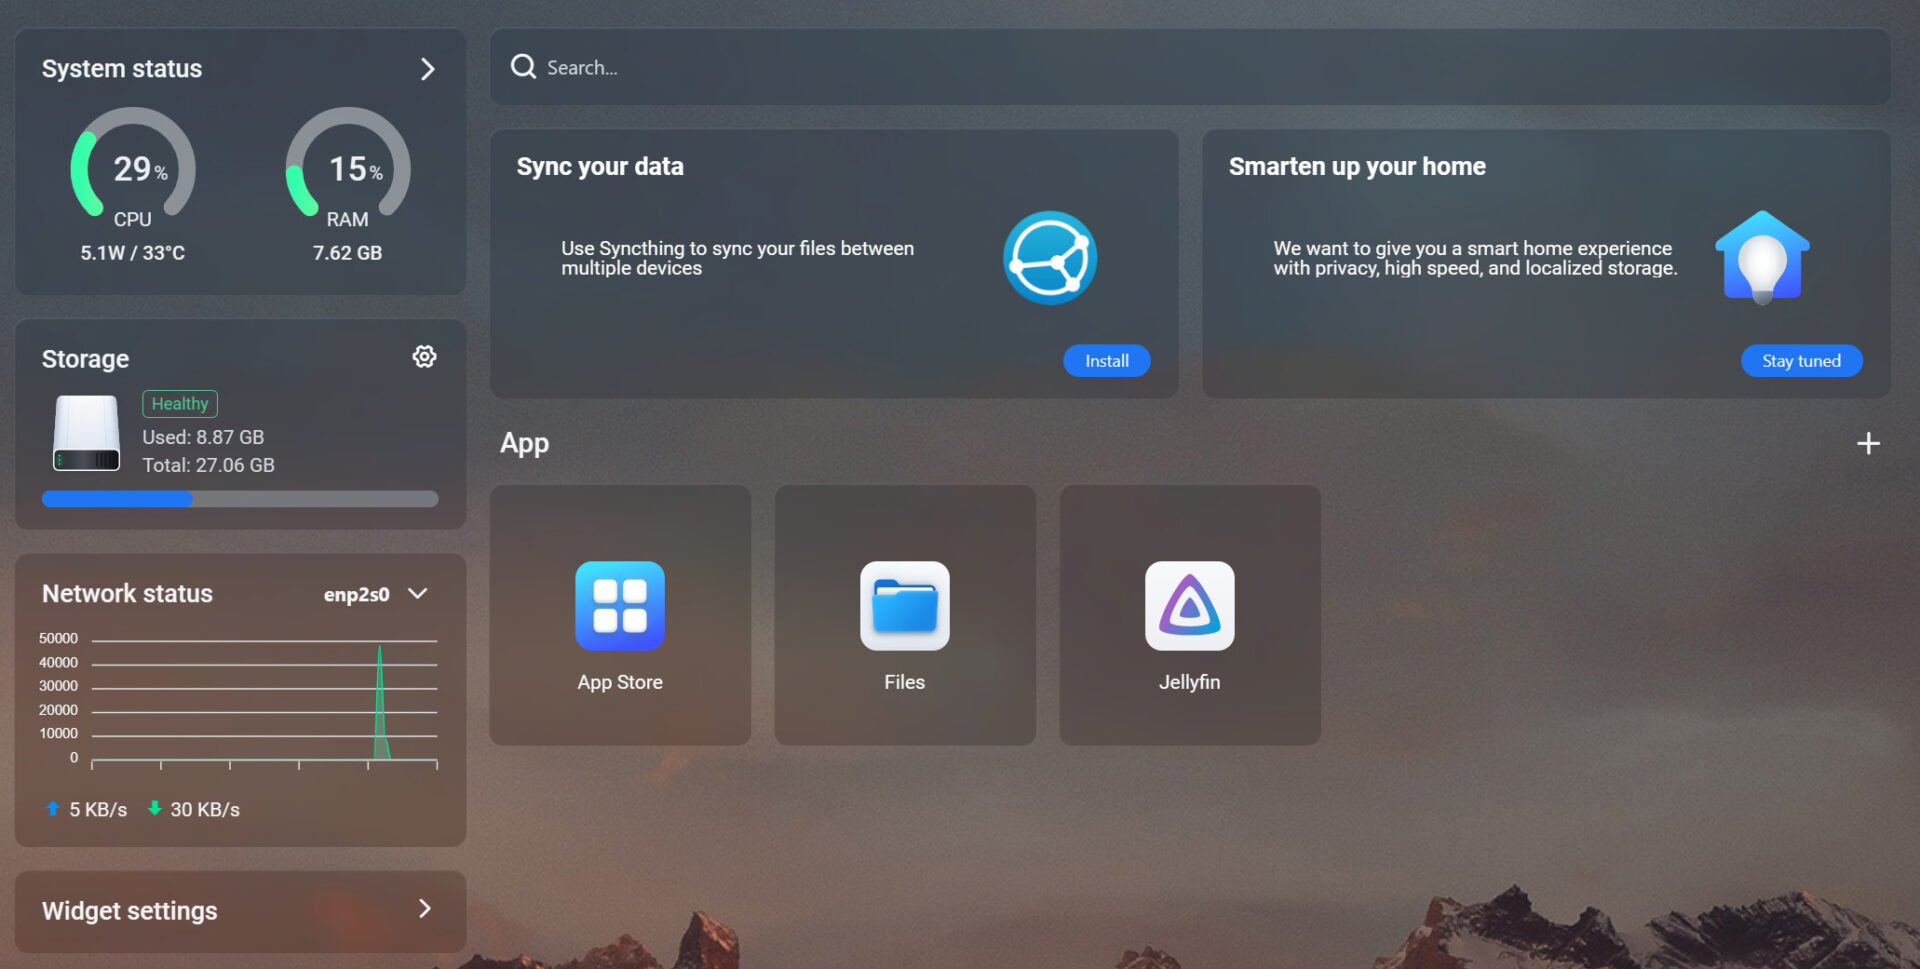
5. Now that the system has been updated, you’ll be able to access the dashboard and start using the operating system!
While CasaOS isn’t really designed to be a NAS (and I’d recommend purchasing a NAS if you really want that type of functionality so you can utilize protection features like RAID), you can create shared folders.
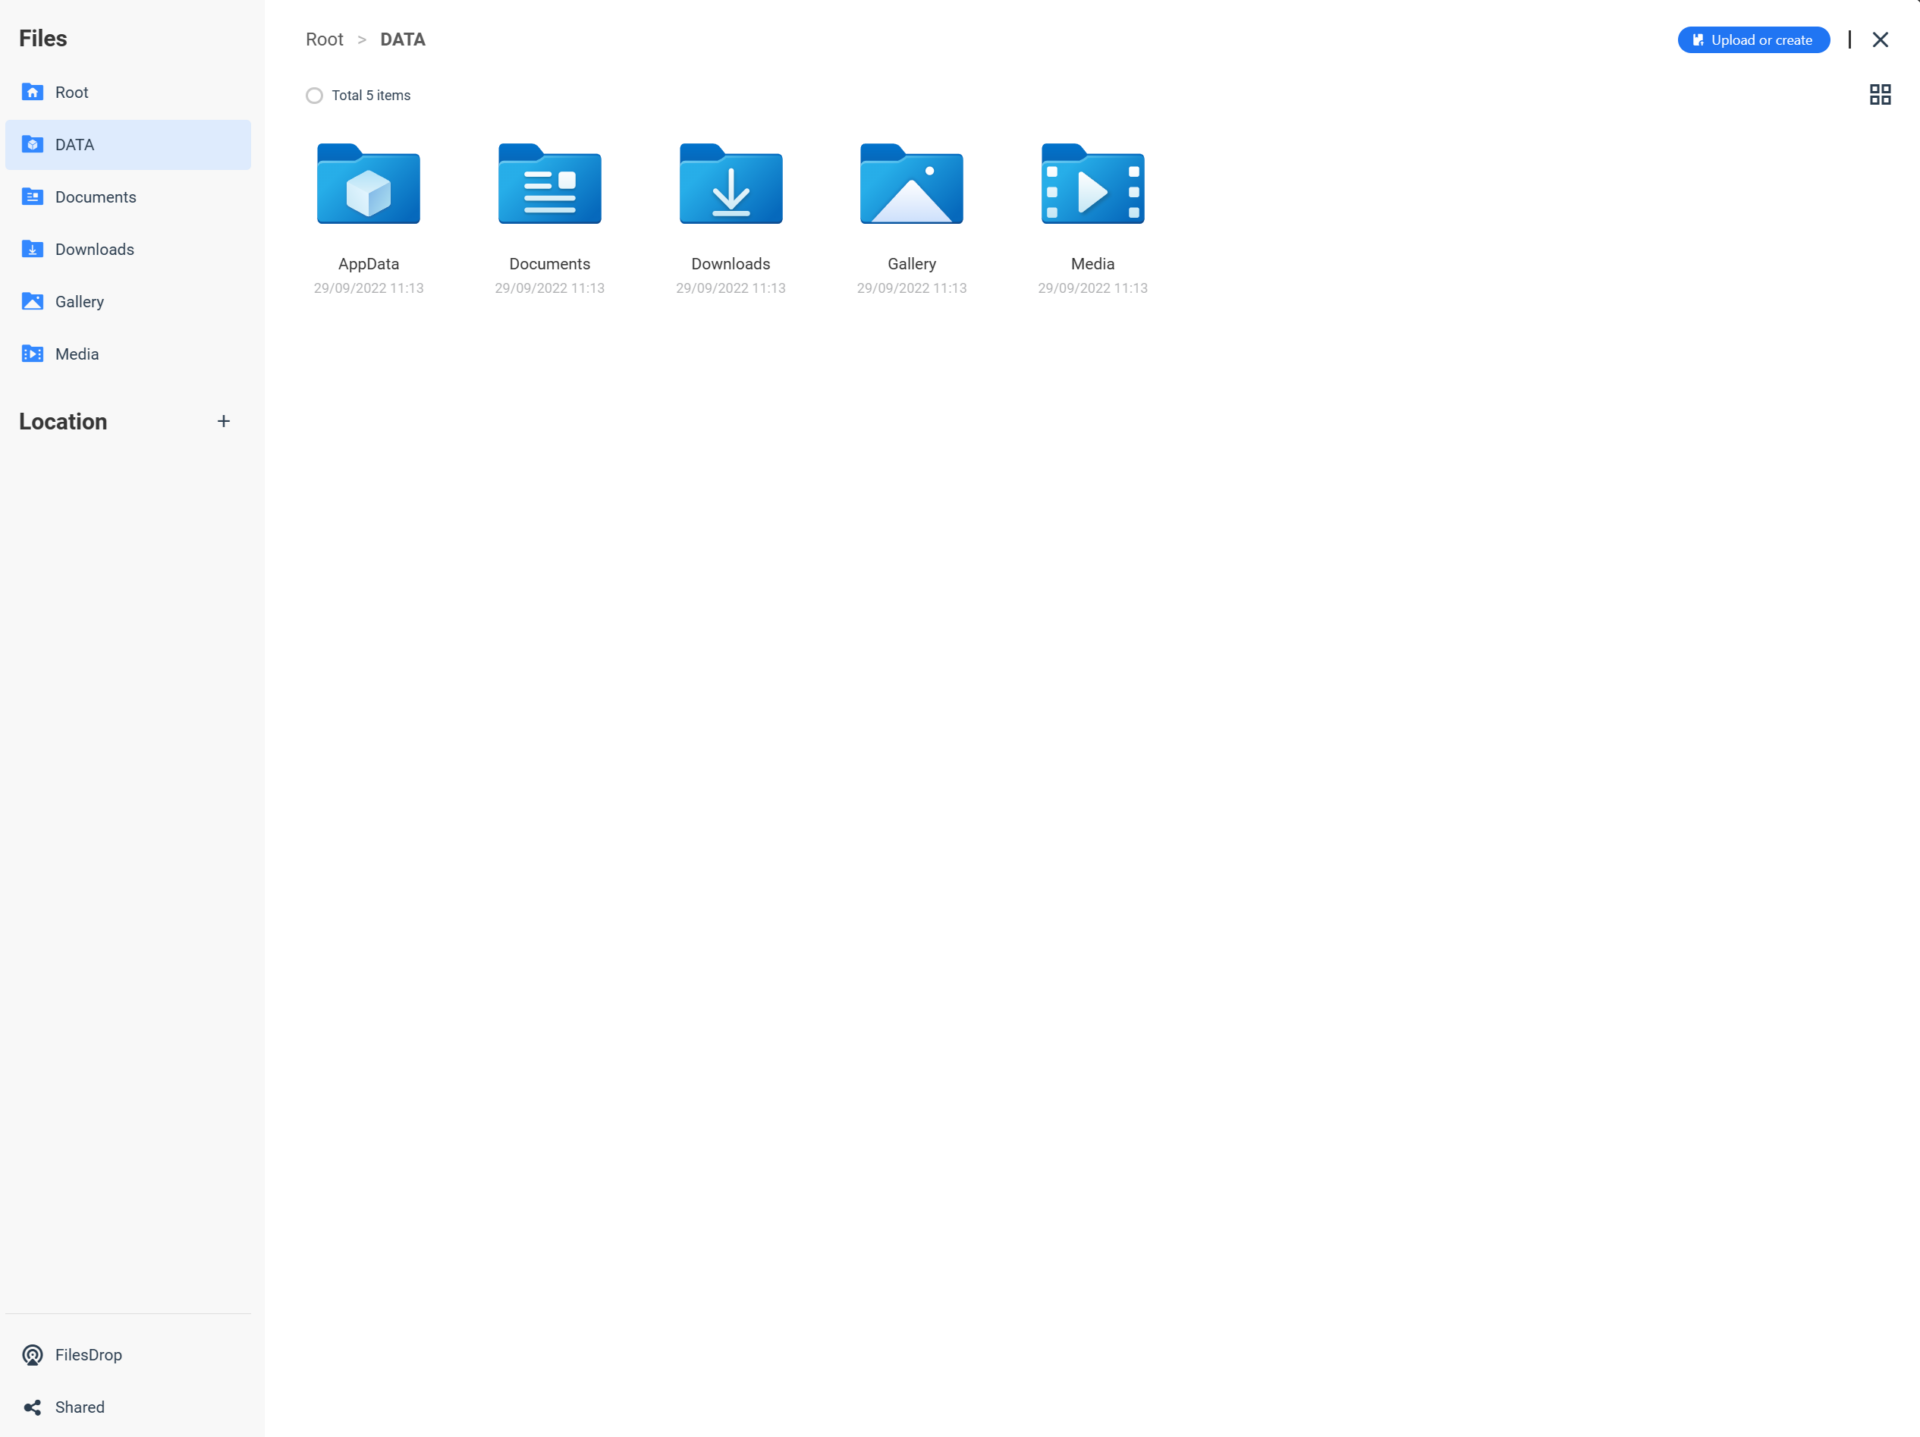
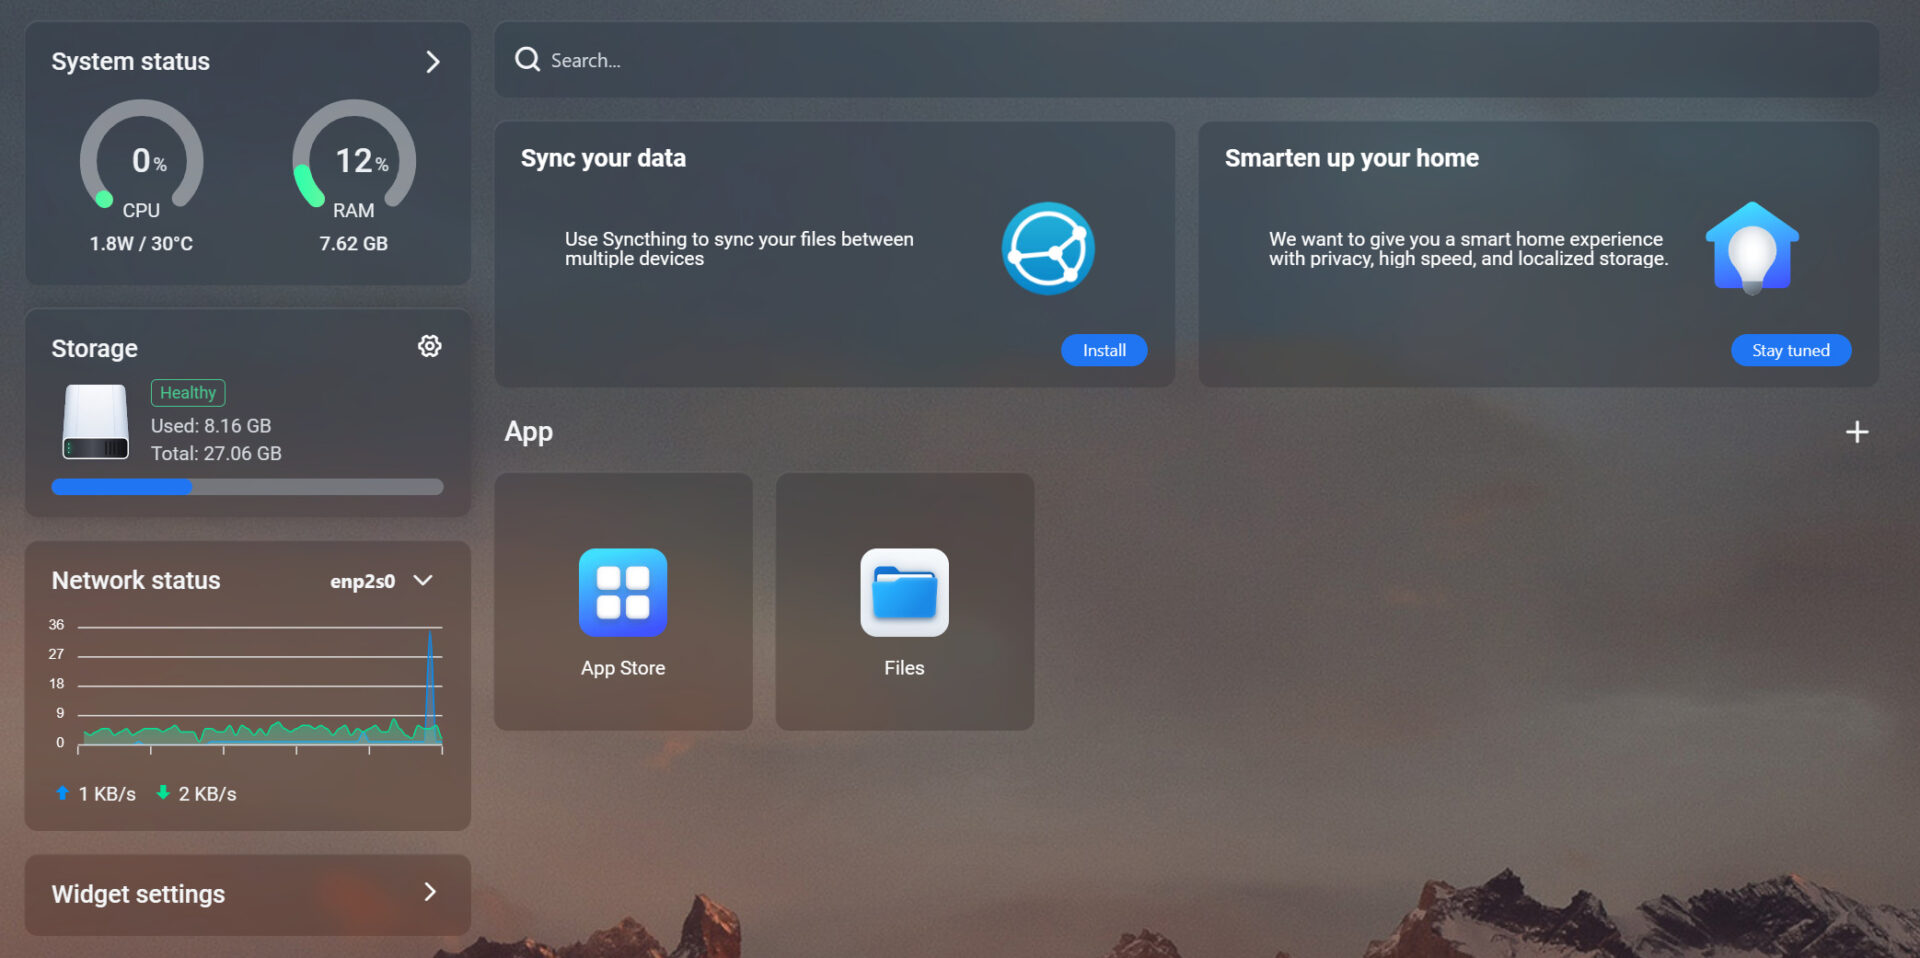
After accessing the Files app, you’ll be brought to a file explorer for the operating system. This will show everything currently on the device. You can then create new folders, or access data in existing folders.
1. If you’d like to access the data inside of CasaOS from other devices on your local network, select Shared, then Start to follow the step-by-step guide.
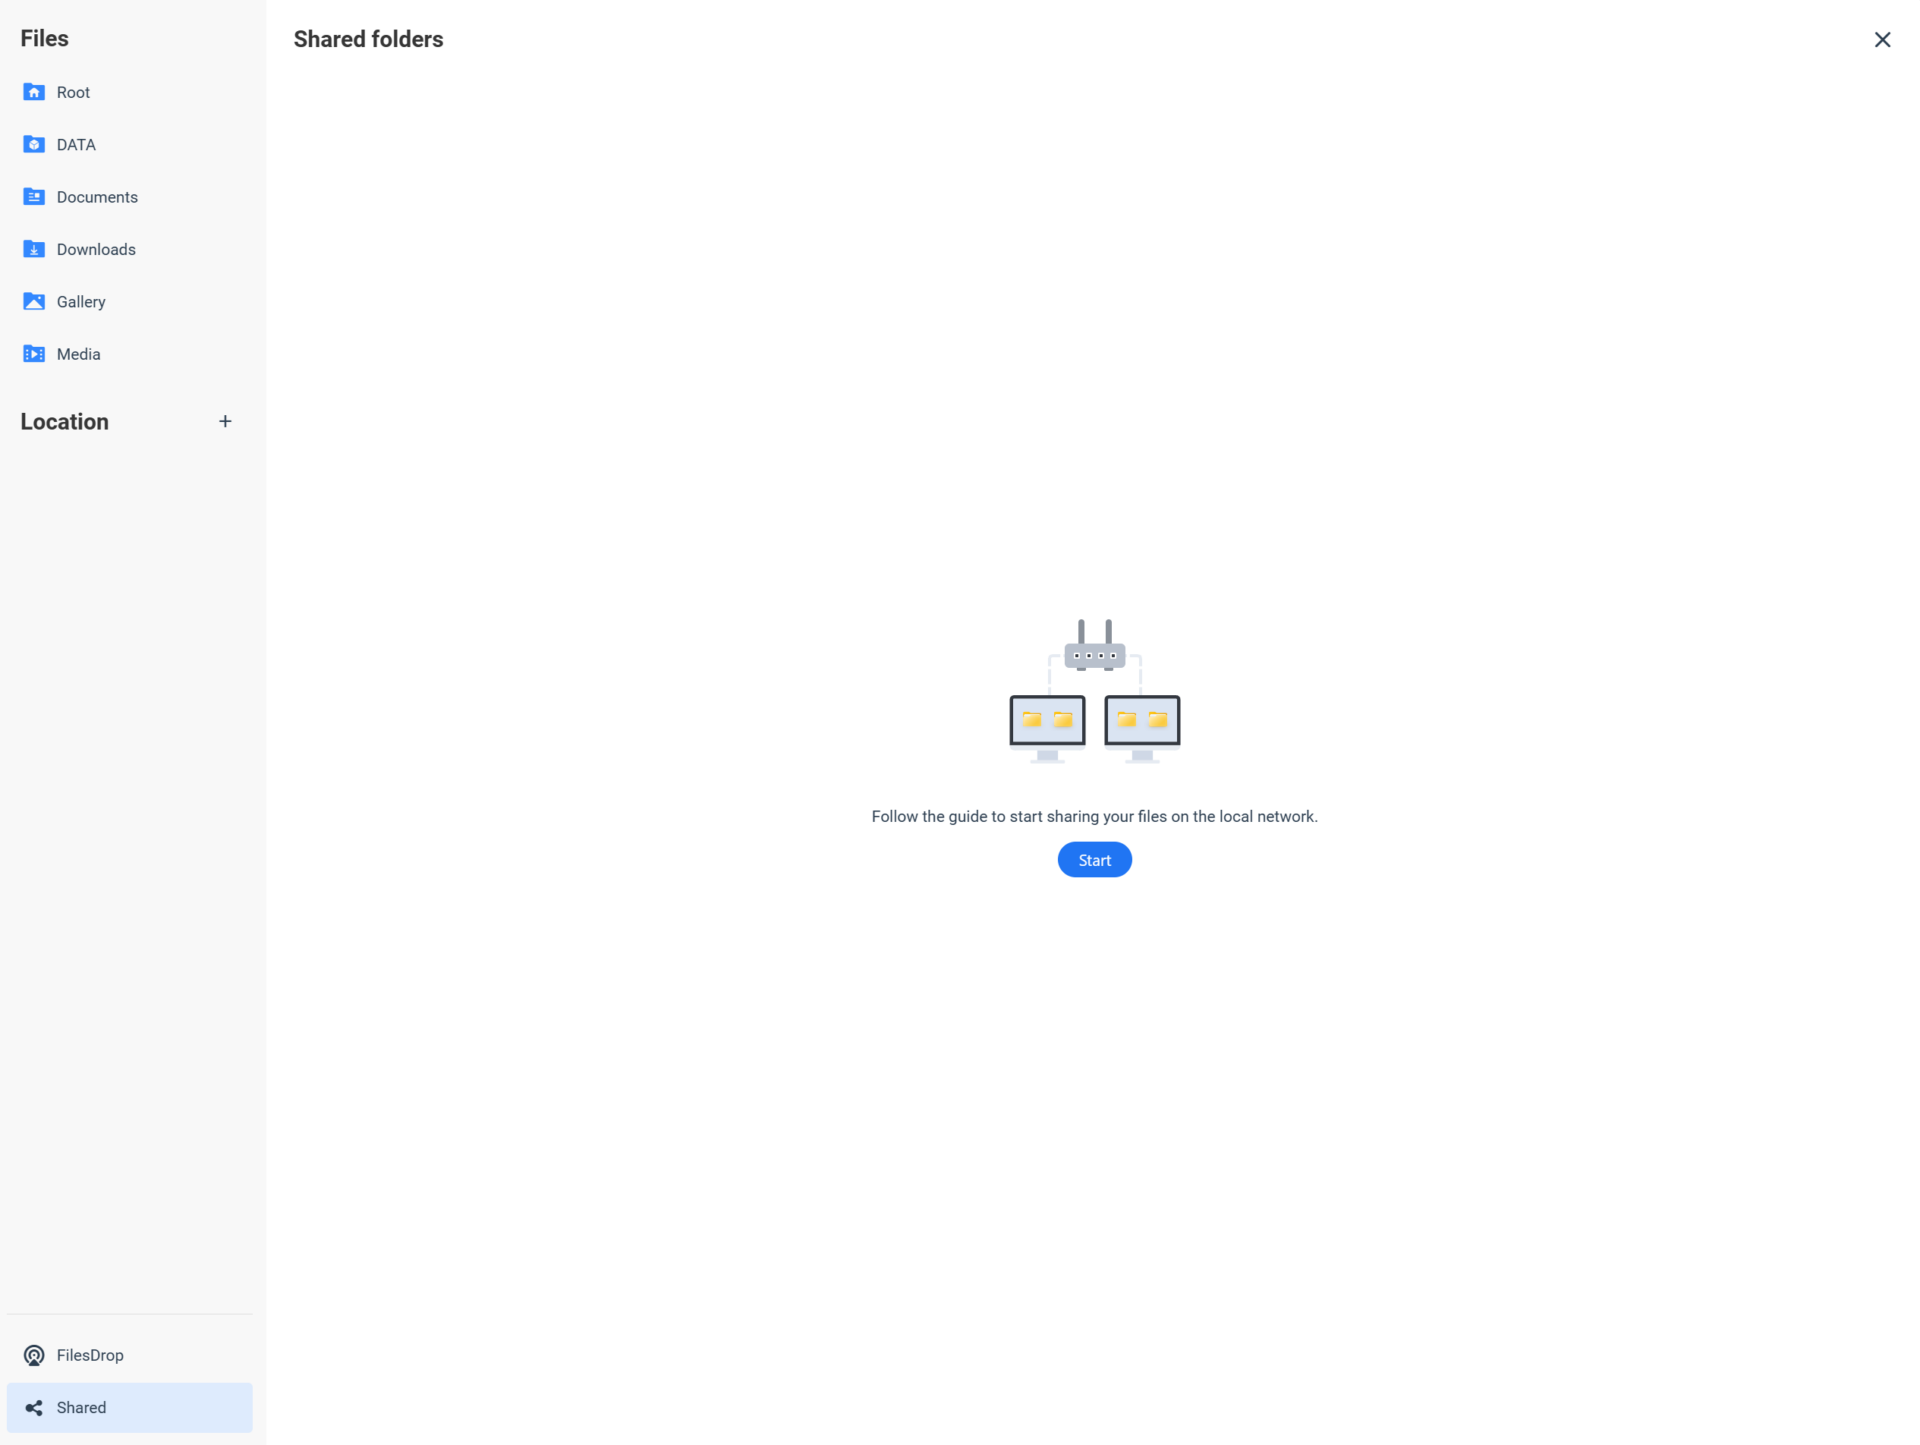
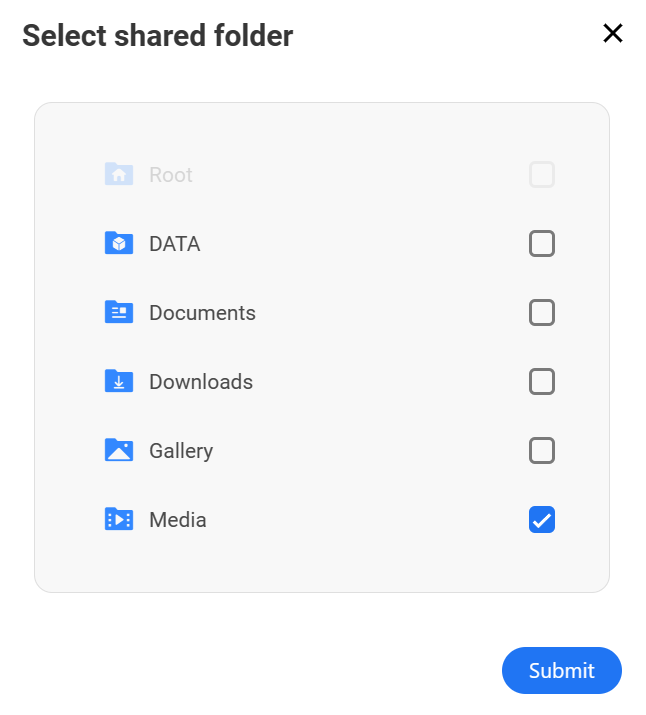
2. Select the Shared Folders you’d like to start sharing, then select Submit.
3. After sharing the folder, you can select the three ellipses next to it, then Get Network Path.

4. This will display how you can access the folder from other devices by utilizing SMB.
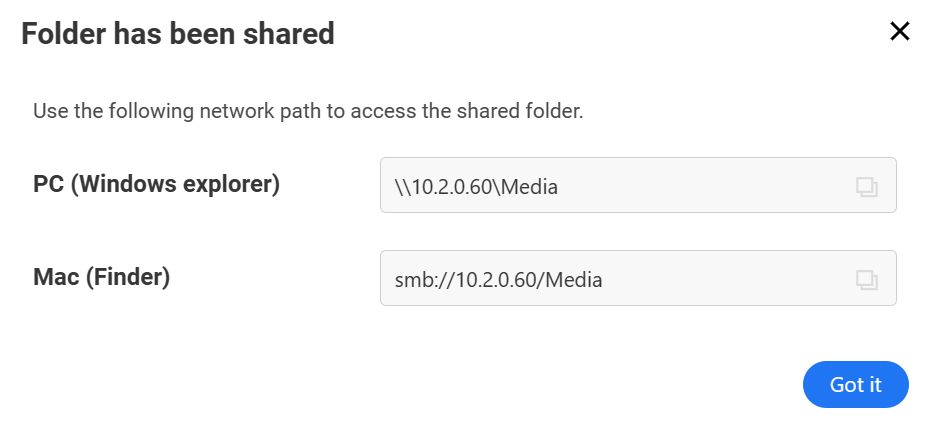
5. Moving forward, you can now access the folder above through SMB on other devices and any files stored will live on the CasaOS system.
Configuring Applications
The biggest selling point of CasaOS is that you can implement applications by using a “one-click” approach. Under the hood, this functionality utilizes Docker, meaning that you’re actually configuring Docker containers, but the functionality is extremely easy to use.
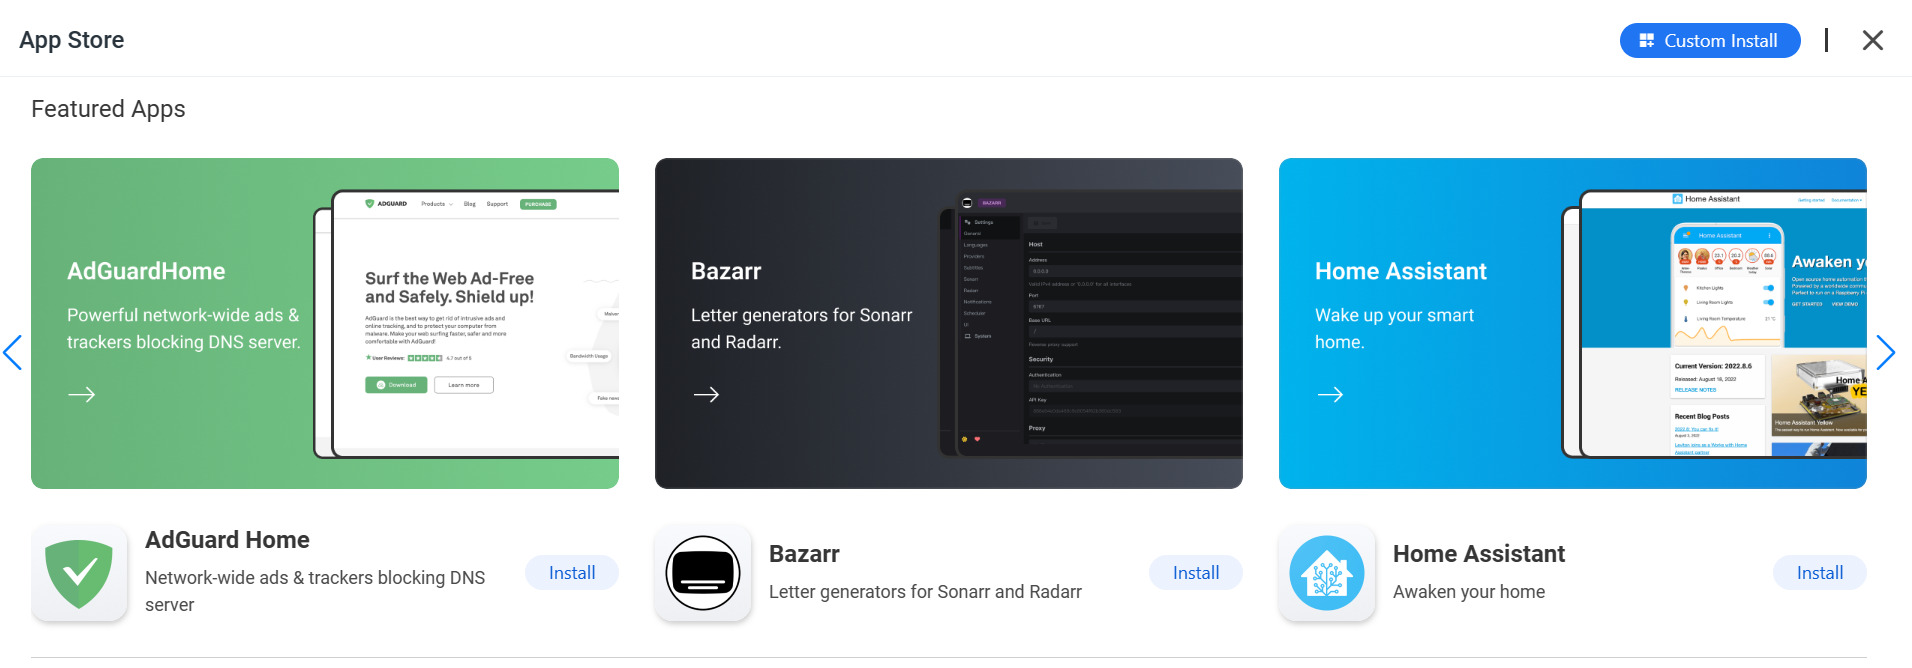
1. To configure Docker applications, open the App Store.
2. Search for any application you’d like to install, then select Install. The list is slowly growing, but not everything will have a one-click option. We’ll look at how to install custom Docker containers below.

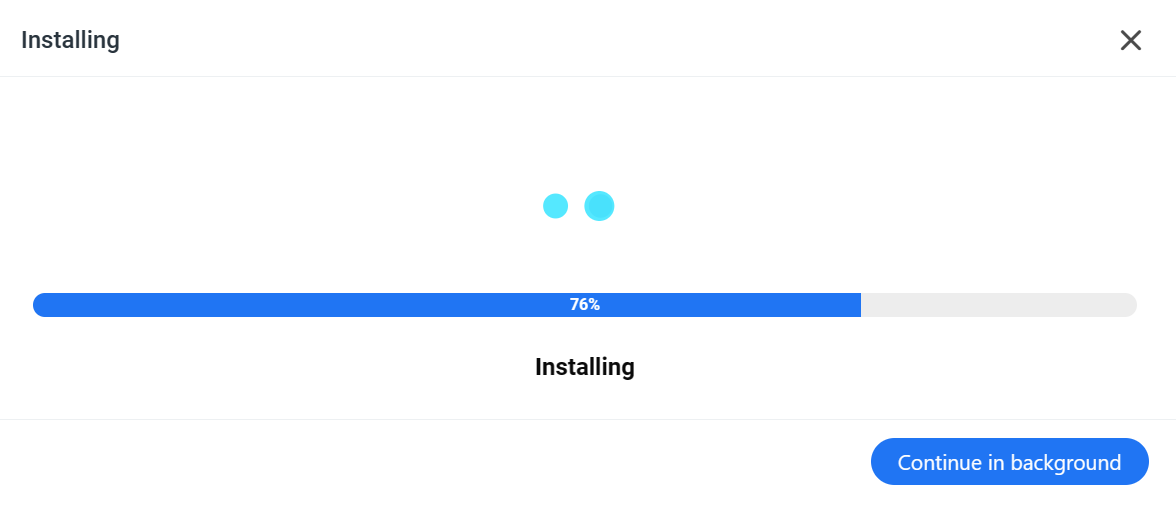
3. That’s literally it – the application (Docker Container) will now install automatically. In this example, I’ll be installing Jellyfin.
4. The application is now installed, and selecting it will automatically open it in a new browser window (depending on which application was installed).
Installing Custom Docker Containers
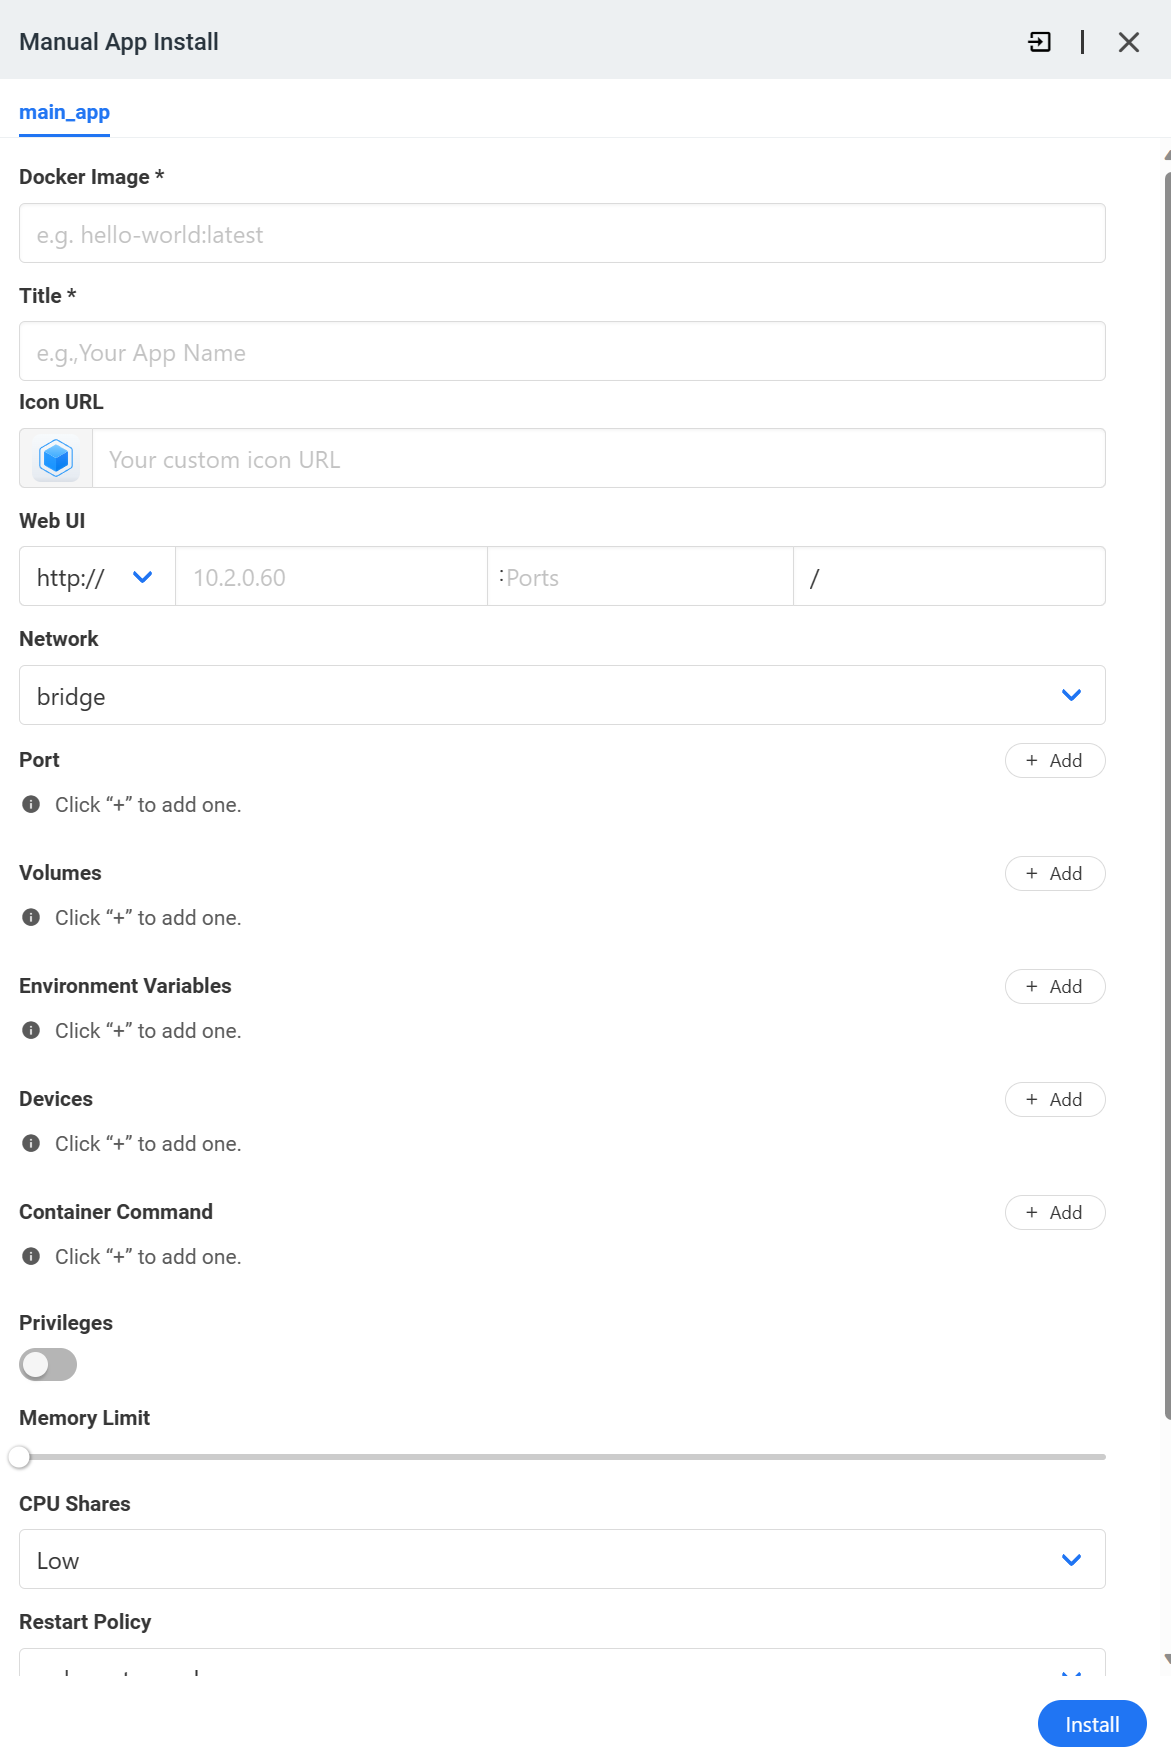
While there are a ton of predefined Docker Containers you can install, you can also install any Docker container you’d like by opening the App Store and selecting Custom Install in the top right.
From there, you can enter the Docker Image, as well as the port settings, volumes, environment variables, and any other Docker configuration needed.
Who Should Use this Tool?
Now that we looked at the actual application, determining if CasaOS is or isn’t a good fit for your Home Lab is going to be the next decision to make. Ultimately, this operating system is designed with simplicity in mind.
If you simply want something that you can easily install, run Docker containers, and share a few folders, CasaOS is a great option.
As soon as you get into more, meaning you want to run virtual machines, configure RAID arrays, or just want a more powerful OS, other options will be better.
Hypervisors like Proxmox, ESXi, XCP-ng, and NAS operating systems like Synology DSM, TrueNAS, Unraid, or OpenMediaVault will simply offer more power and will be better overall solutions.
Conclusion & Final Thoughts: Should you Use CasaOS?
At the end of the day, CasaOS is an operating system designed for users who are interested in implementing new services in the easiest way possible. It simply works and works well, but it doesn’t offer any of the advanced features that hypervisors or NAS operating systems do.
Even a Linux-based server might be a better option for some people due to the fact that you can configure it to run Docker containers as well as many other things. If ease of use is your main goal, CasaOS is a great option for a lot of people.
Remember that it’ll come pre-installed on a ZimaBoard, but can be installed on other operating systems as well if you’d like to try it out!