Port forwarding in pfSense is configured through the NAT section under Firewall > NAT > Port Forward. You create a rule that maps an external port on your WAN interface to a specific internal IP address and port, and pfSense can automatically generate the associated firewall rule at the same time.
Before you do this, it’s worth understanding that there are certainly risks associated with port forwarding. You’re exposing a service on your local network to the open internet. A VPN is a better option when it’s available — if you’re running pfSense, you can set up WireGuard on pfSense or set up OpenVPN on pfSense as alternatives. That said, there are plenty of legitimate reasons to forward a port, and pfSense handles it cleanly.
These steps are still working for pfSense 2.8.x (CE) and 24.11 (pfSense Plus). The UI and process have been consistent across recent releases.
What Port Forwarding Does
When traffic arrives at your WAN IP on a specific port, pfSense normally drops it — nothing on the outside can reach devices inside your network by default. Port forwarding creates a NAT rule that says, “when traffic arrives on port X, send it to internal IP Y on port Z.”
A few common use cases:
- HTTP/HTTPS (ports 80/443) — hosting a web server or reverse proxy
- OpenVPN (UDP 1194 default) — running a VPN server that remote clients connect to
- Game servers — direct connections that can’t go through a relay
- Custom applications — anything that requires inbound connections to a specific device
If your goal is remote access to your network, a VPN is the better path. If you need to expose a specific service to the public internet, port forwarding is how you do it.
pfSense Port Forwarding: Step-by-Step Guide
Step 1. Open the NAT Port Forward Section
Log in to the pfSense web UI and navigate to Firewall > NAT.
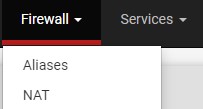
You’ll land on the Port Forward tab by default. This is where all port forwarding rules live.
Step 2. Add a New Port Forwarding Rule
Click Add to create a new rule. There are two Add buttons — one adds the rule above existing rules, and one adds it below. Either works for a fresh setup.

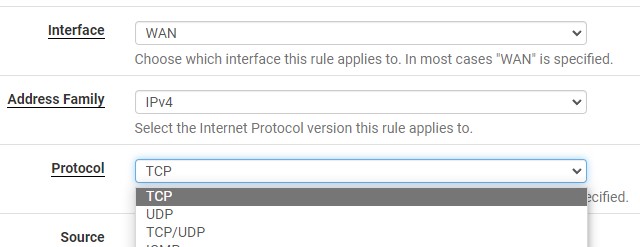
Interface, Protocol, and Address Family
Leave Interface set to WAN. Set the Protocol to TCP, UDP, or TCP/UDP depending on what the service requires. Most web traffic uses TCP; some applications (including OpenVPN by default) use UDP.
Destination Settings
Set Destination to WAN address. In Destination Port Range, either pick a service from the dropdown (HTTP, HTTPS, etc.) or enter a custom port number. If you’re forwarding a single port, set both the start and end of the range to the same value.

Step 3. Set the Redirect Target
In Redirect Target IP, enter the local IP address of the device that should receive the traffic. This is the machine inside your network that will be exposed.

In Redirect Target Port, enter the port number on that device. In most cases, this matches the destination port you set above — for example, if you’re forwarding port 5001 inbound, the redirect target port is also 5001 unless the service is running on a different port internally.

If you’re using a hostname instead of a static IP, set up DDNS on pfSense using Cloudflare so the external address stays current.
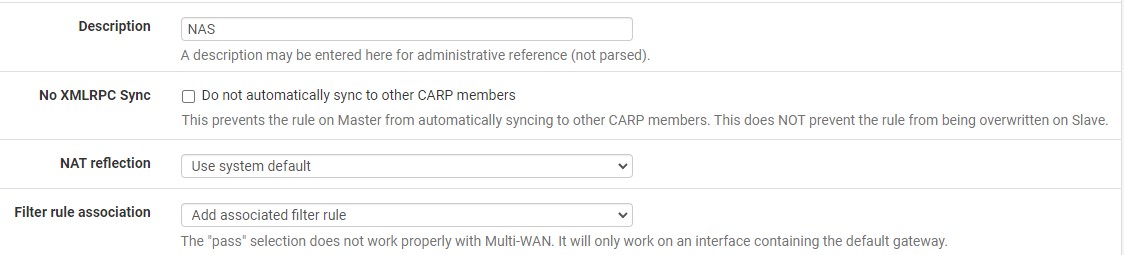
Step 4. Add a Description and Save
Give the rule a clear description so you can identify it later. Under Filter Rule Association, leave it set to Add associated filter rule — this tells pfSense to automatically create the matching firewall rule on the WAN interface. Without this, the NAT rule alone won’t let traffic through.
Click Save, then click Apply Changes.
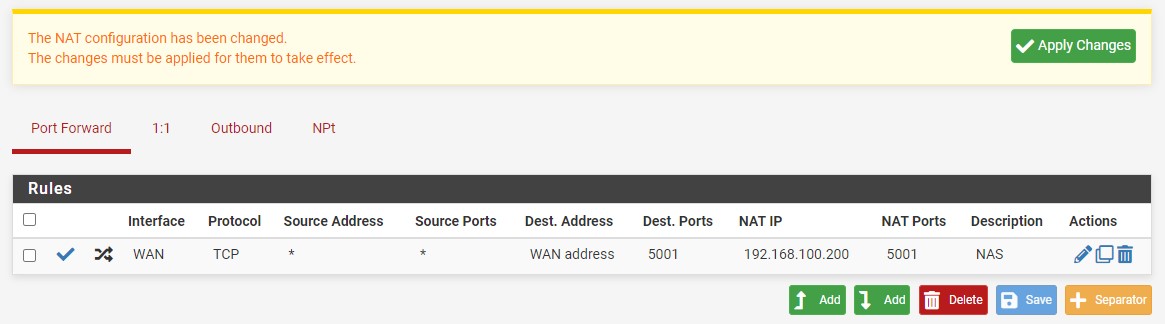
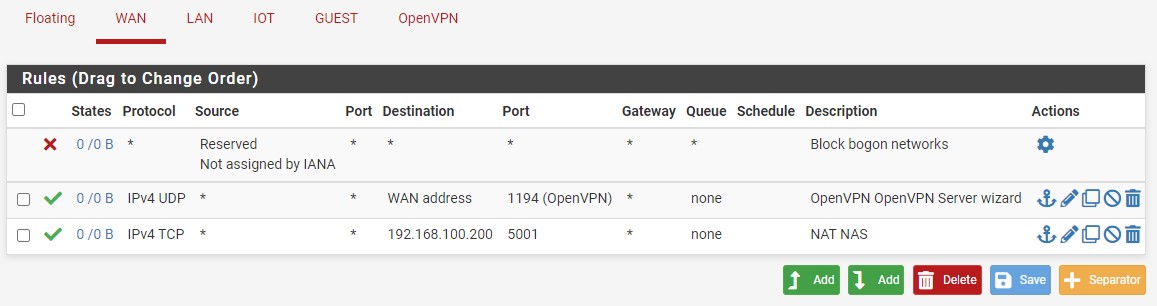
Step 5. Verify the Firewall Rule Was Created
Go to Firewall > Rules > WAN. You should see a new rule with “NAT” prepended to your description. This rule was automatically generated by the port forward you just created.
One important note: this rule is linked to the NAT rule. If you delete the port forwarding rule, the firewall rule gets deleted with it. If you want to understand how pfSense firewall rules work more broadly, the guide to creating firewall rules in pfSense covers the full process.
Step 6. Restrict Access by Source IP (Recommended)
By default, the rule allows anyone on the internet to reach the forwarded port. If you know the IP addresses or subnets that should have access, you can lock it down.
Edit the port forwarding rule you just created and scroll down to the Source section. Click Display Advanced to reveal it.

Change Source Type to Single host or alias. You can enter a single IP address directly here, or reference an alias if you have multiple IPs to manage.
To create an alias:
Go to Firewall > Aliases, click Add under the IP tab, give it a name, and add individual IPs, IP ranges, or subnets. Once saved, go back to the port forwarding rule and enter the alias name in the Source field.
Aliases are the cleaner approach if you’re managing more than one or two addresses — pfSense’s alias handling makes it straightforward to update a group of IPs in one place without touching individual rules. Tech Me Out has a solid walkthrough of alias configuration on his channel — worth subscribing to his YouTube channel if you’re going deep on pfSense.
Restricting source IPs significantly reduces your attack surface. It doesn’t replace securing the service itself, but it means random scanners can’t even reach the login page.
Security Considerations
Port forwarding is convenient, but it does expand your attack surface. A few things to keep in mind:
- Use a VPN when possible. If you’re the only one accessing the service, setting up WireGuard on pfSense is cleaner than opening a port. It adds an authentication layer that port forwarding alone doesn’t have.
- Consider a DMZ for exposed services. If you’re running a publicly accessible server, isolating it in a DMZ in pfSense limits how far an attacker can move if that server gets compromised.
- Keep pfSense updated. Security patches matter when you’re running an internet-facing firewall. The pfSense update best practices guide walks through the safe way to do it.
Security practices evolve — what’s considered sufficient hardening today may not be enough tomorrow. Review your exposed services periodically.
If you’re using a different router or firewall, the same concepts apply — the UI just looks different. The process for port forwarding in OPNsense is similar if you’re considering a switch.
Frequently Asked Questions
Does pfSense automatically create a firewall rule when I set up port forwarding?
Yes, as long as you leave Filter Rule Association set to Add associated filter rule when creating the NAT rule. pfSense will generate a matching WAN firewall rule automatically. If you change this setting or delete the NAT rule later, the firewall rule will be removed as well.
What’s the difference between the NAT rule and the firewall rule in pfSense port forwarding?
The NAT rule handles the address translation — it redirects traffic arriving on a WAN port to an internal IP and port. The firewall rule controls whether that traffic is allowed through at all. Both are required for port forwarding to work, which is why letting pfSense create them together is the easiest approach.
Can I forward the same port to two different internal devices?
Not directly on the same interface. pfSense can only map one destination per inbound port per interface. If you need to route traffic to multiple devices, you’d need to use different external ports and redirect each to the appropriate internal device.
How do I forward a port range in pfSense?
In the Destination Port Range field, set the From and To values to the start and end of the range. Set the Redirect Target Port to the starting port of the range on the internal device, and pfSense will map the entire range accordingly.
Should I use a static IP for the redirect target device?
Yes. If the internal device gets a new DHCP-assigned IP, the port forwarding rule will stop working. Either assign a static IP on the device itself or create a DHCP static mapping in pfSense to reserve a specific IP for that device’s MAC address.
Is port forwarding safe?
It depends on what you’re exposing and how it’s secured. Opening a port means that service is reachable from anywhere on the internet unless you restrict it by source IP. If the service has weak authentication or an unpatched vulnerability, that’s a real risk. Locking down source IPs and keeping software updated are the two most important mitigations.
What’s the default OpenVPN port I need to forward if I’m hosting a VPN server on pfSense?
OpenVPN defaults to UDP port 1194. If you’re hosting an OpenVPN server on pfSense, you’ll need to forward that port (or whichever port you configured during setup) from WAN to the pfSense firewall’s own LAN IP. The pfSense OpenVPN setup guide covers the full configuration.