In this tutorial, we’re going to look at how to port forward in OPNsense. If you’re new to OPNsense, port forwarding might be slightly confusing. Especially if you’re coming from a “basic” router, where port forwarding is handled by entering the port, protocol, and local server.
OPNsense is different in the sense that you create a NAT rule, but a firewall rule that allows traffic is required as well. If you don’t have both, you will have trouble accessing your server from an external network.
What is Port Forwarding?
Before you actually port forward anything in OPNsense, it’s important to understand exactly what port forwarding does. Port forwarding exposes a service on your local network to the outside world. After a port has been forwarded, a user outside of the local network can navigate to a domain name, DDNS hostname, or external IP address, append the port number that was forwarded, and access that service.
In general, you want to ensure that you’re safely exposing services as there are certain risks associated with port forwarding. However, there are also circumstances where port forwarding is necessary. Here are a few examples of ports that are commonly forwarded.
HTTP: TCP Port 80 is the default port for HTTP traffic. While it’s in your best interest to use the HTTPS protocol (TCP Port 443) when exposing a web service (shown below), there are circumstances where users will port forward 80.
HTTPS: TCP Port 443 is the default port that most users open. This can be port forwarded to host a website, or used with a reverse proxy server and domain name to expose multiple different web services safely.
VPN: If you’re utilizing something like OpenVPN or WireGuard, you’ll be forced to port forward UDP Port 1194 (OpenVPN) or UDP Port 51820 (WireGuard). VPN servers are a great way to access services on a local network, as users interested in connecting will be required to authenticate with a username, password, and certificate.
You can host a WireGuard VPN server in OPNsense easily, or use something like OpenVPN and a Raspberry Pi if you’d like an alternative setup.
Now that we understand exactly what port forwarding is, follow the instructions below to learn how to port forward in OPNsense.
How to Port Forward in OPNsense
We will look at how to port forward in OPNsense below, but again, make sure you understand exactly what you’re doing above before port forwarding.
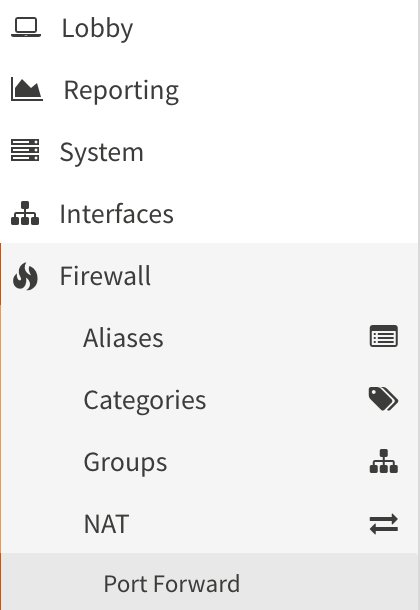
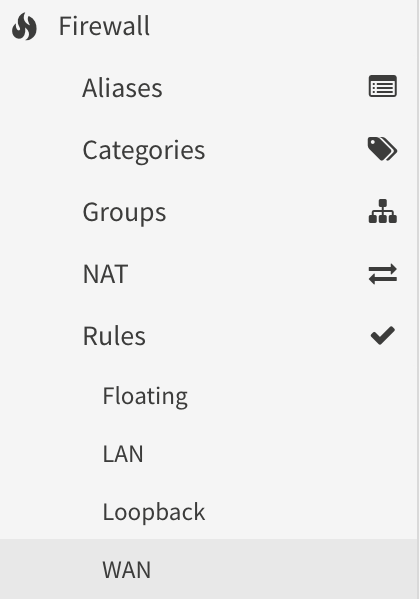
1. Log in to OPNsense, then select Firewall and Port Forward.
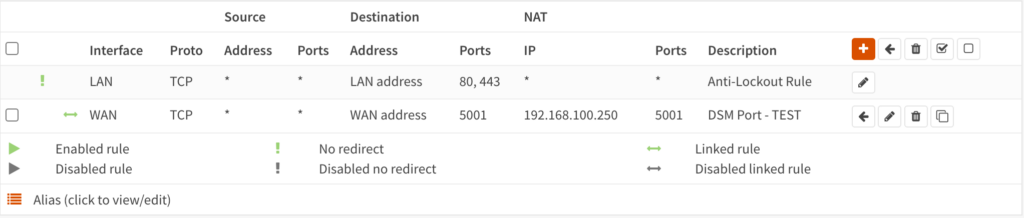
2. A default anti-lockout rule will exist. Do not modify this as it allows you to connect to the web administration portal. Select the + symbol to create a new NAT rule.

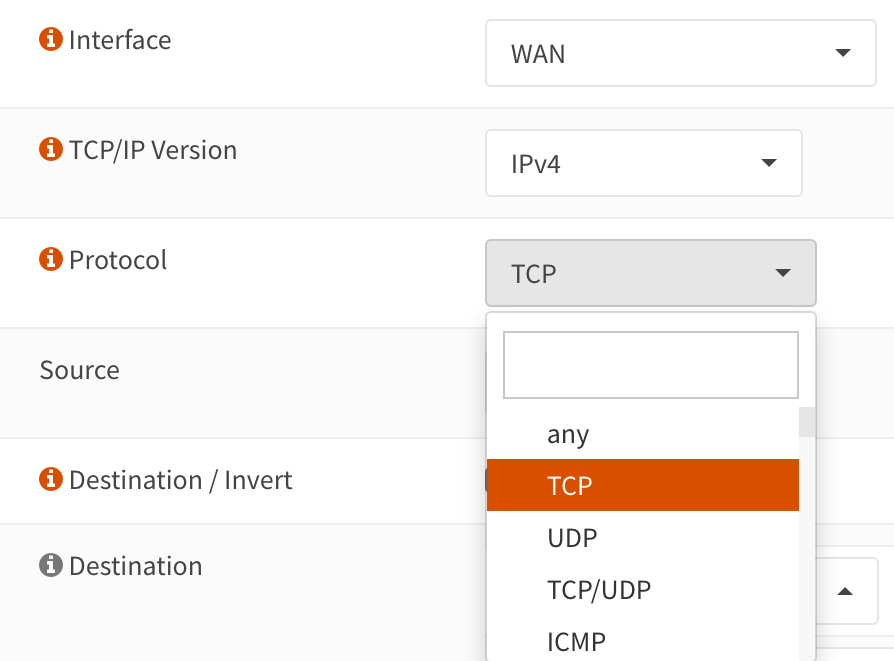
3. Leave the interface as WAN, then in the Protocol section, select the correct protocol. Generally, this will be TCP or UDP.
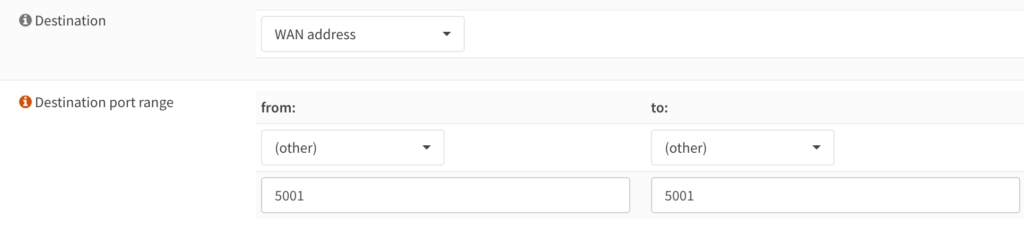
4. Set the Destination as the WAN address, then in the Destination Port Range, you can either select from an existing item using the drop-down menu or enter in a custom port (other).
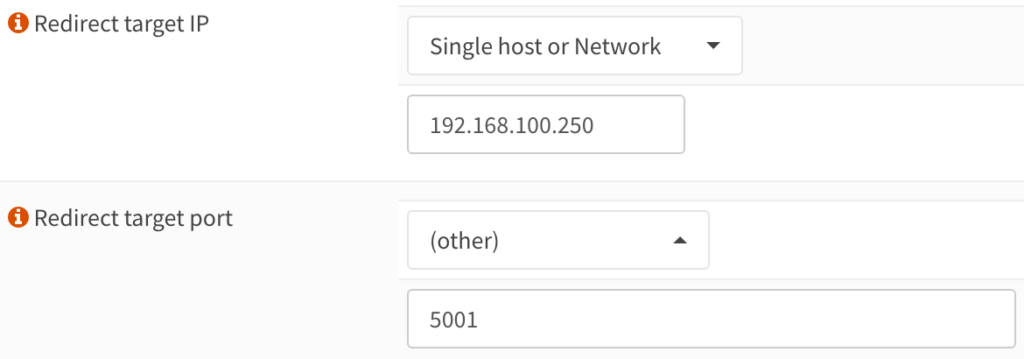
5. In the Redirect Target IP, set the local IP address of the server where the port should be mapped. This will be the local device that you’re exposing to the internet. Ensure the Redirect Target Port matches the Destination Port Range that you entered above.
6. Give the rule a description, then ensure that Filter Rule Association is set as Add Associated Filter Rule. Finally, you can save and apply changes to create this NAT rule.
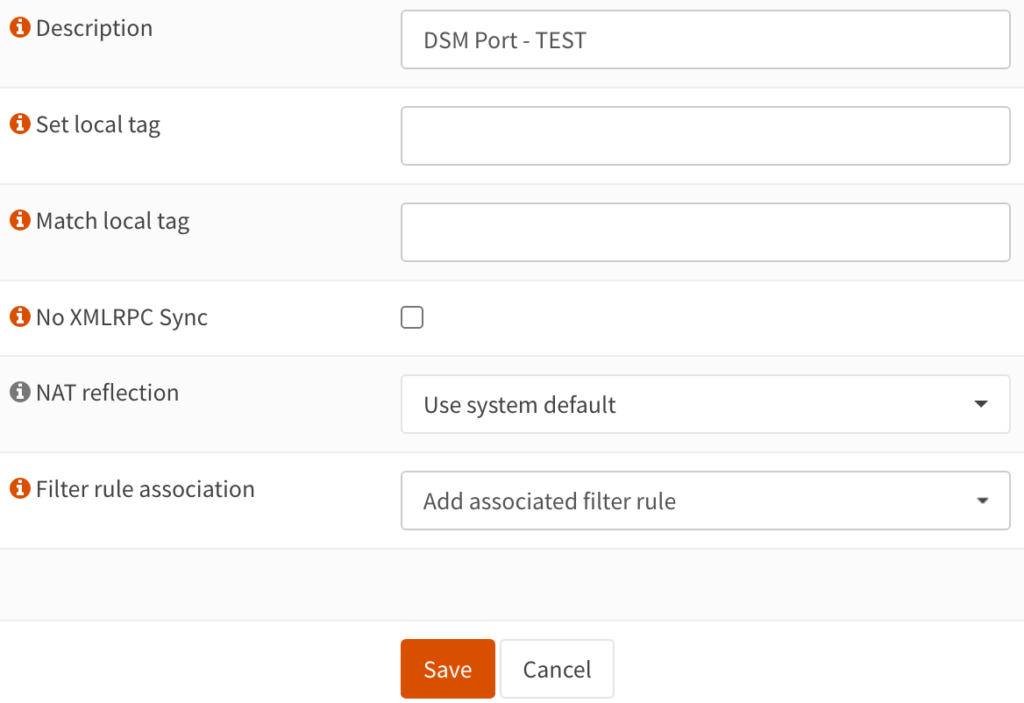
7. The NAT rule will now be created!
Firewall Rules for OPNsense Port Forwarding
As mentioned above, when you create a NAT rule for OPNsense port forwarding, and use the add associated filter rule option, a firewall rule will be created automatically that is linked to the NAT rule. This firewall rule determines exactly who can connect to this port.
Please be aware that when the firewall rule is automatically created for the OPNsense port forwarding rule, you cannot modify it. If you’d like to limit traffic on this port, you should not use the add associated filter rule option above, and should instead create your own.
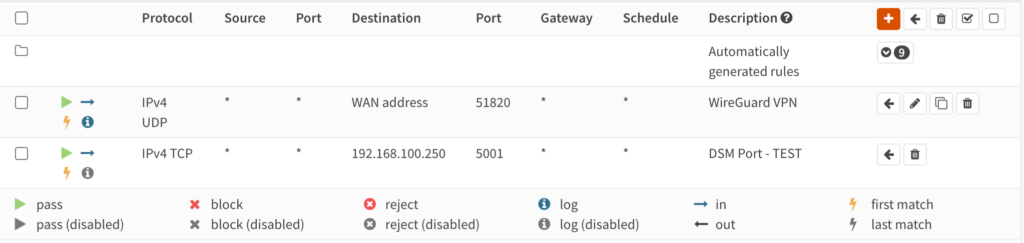
1. To view the firewall rule, select Rules, then WAN.
2. You will see that the rule has been created, but you cannot modify it as it was automatically created. As mentioned above, if you do want to limit traffic on this port, manually create the firewall rule and you’ll be able to limit traffic any way that you’d like.
Conclusion & Final Thoughts: Port Forwarding in OPNsense
This tutorial looked at how to port forward in OPNsense. The process of port forwarding is extremely straightforward, however, it’s important to understand exactly what you’re doing so that you don’t indirectly expose local resources without wanting to.
Just remember that your goal is to limit traffic as much as you humanely can, meaning that a firewall rule limiting traffic to certain IP addresses will always be better than a firewall rule that exposes it to everyone.