In this tutorial, we’ll look at how to configure Dynamic DNS on UniFi Cloud Gateways to ensure you always have a route back to your home network.
What is Dynamic DNS (DDNS)?
Most users have a dynamic external IP address, meaning that it periodically changes from their ISP. If you do have a dynamic external IP address, configuring dynamic DNS is mandatory if you’re hosting services, so that you always have an updated record with your external IP address.
Without it, you’ll connect using your external IP address, but that external IP address will periodically change, so you’ll lose access to your services when it does. After configuring Dynamic DNS on UniFi, you’ll be able to configure various local services (even for things like an OpenVPN Server or WireGuard Server) and access them!
Selecting a DDNS Provider
Before we get started, I want to mention that there are a bunch of DDNS providers that you can use with UniFi Cloud Gateways. Ubiquiti is continuing to add to this list, and Cloudflare was just added in UniFi Network 9.1.
If you’re looking for a free version, in general, I find DuckDNS to be a good overall option. It’s free, and you don’t have to worry about maintaining it (some services require you to click a link monthly, etc).
While I find this to be a good overall option, if you own your own domain using something like Namecheap, I’d recommend using your domain and Cloudflare. This should provide better overall reliability, and Cloudflare offers a bunch of benefits.
With that said, you don’t have to purchase your own domain – DuckDNS is fine for most…though, as with all things free, potential issues (like infrequent downtime) may occur.
How to Configure Dynamic DNS on UniFi Cloud Gateways
Follow the steps below to enable Dynamic DNS on UniFi Cloud Gateways.
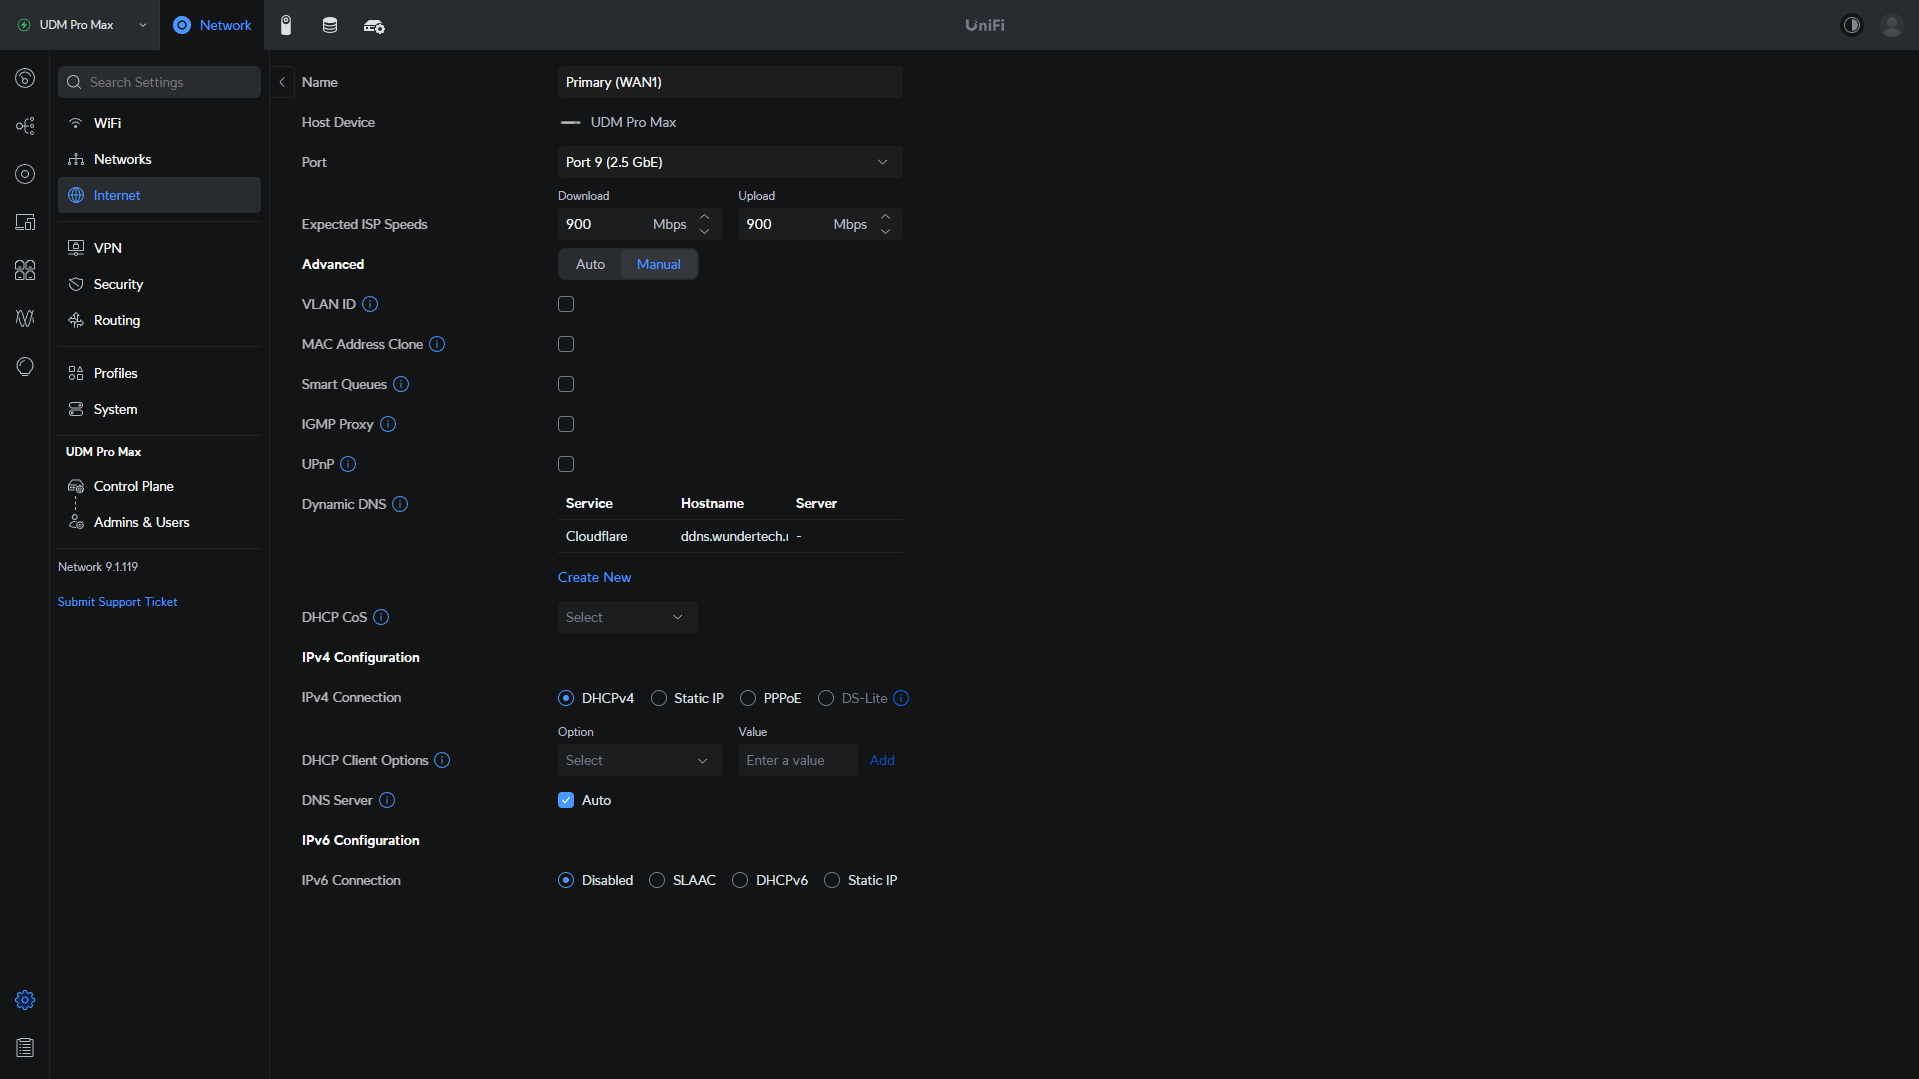
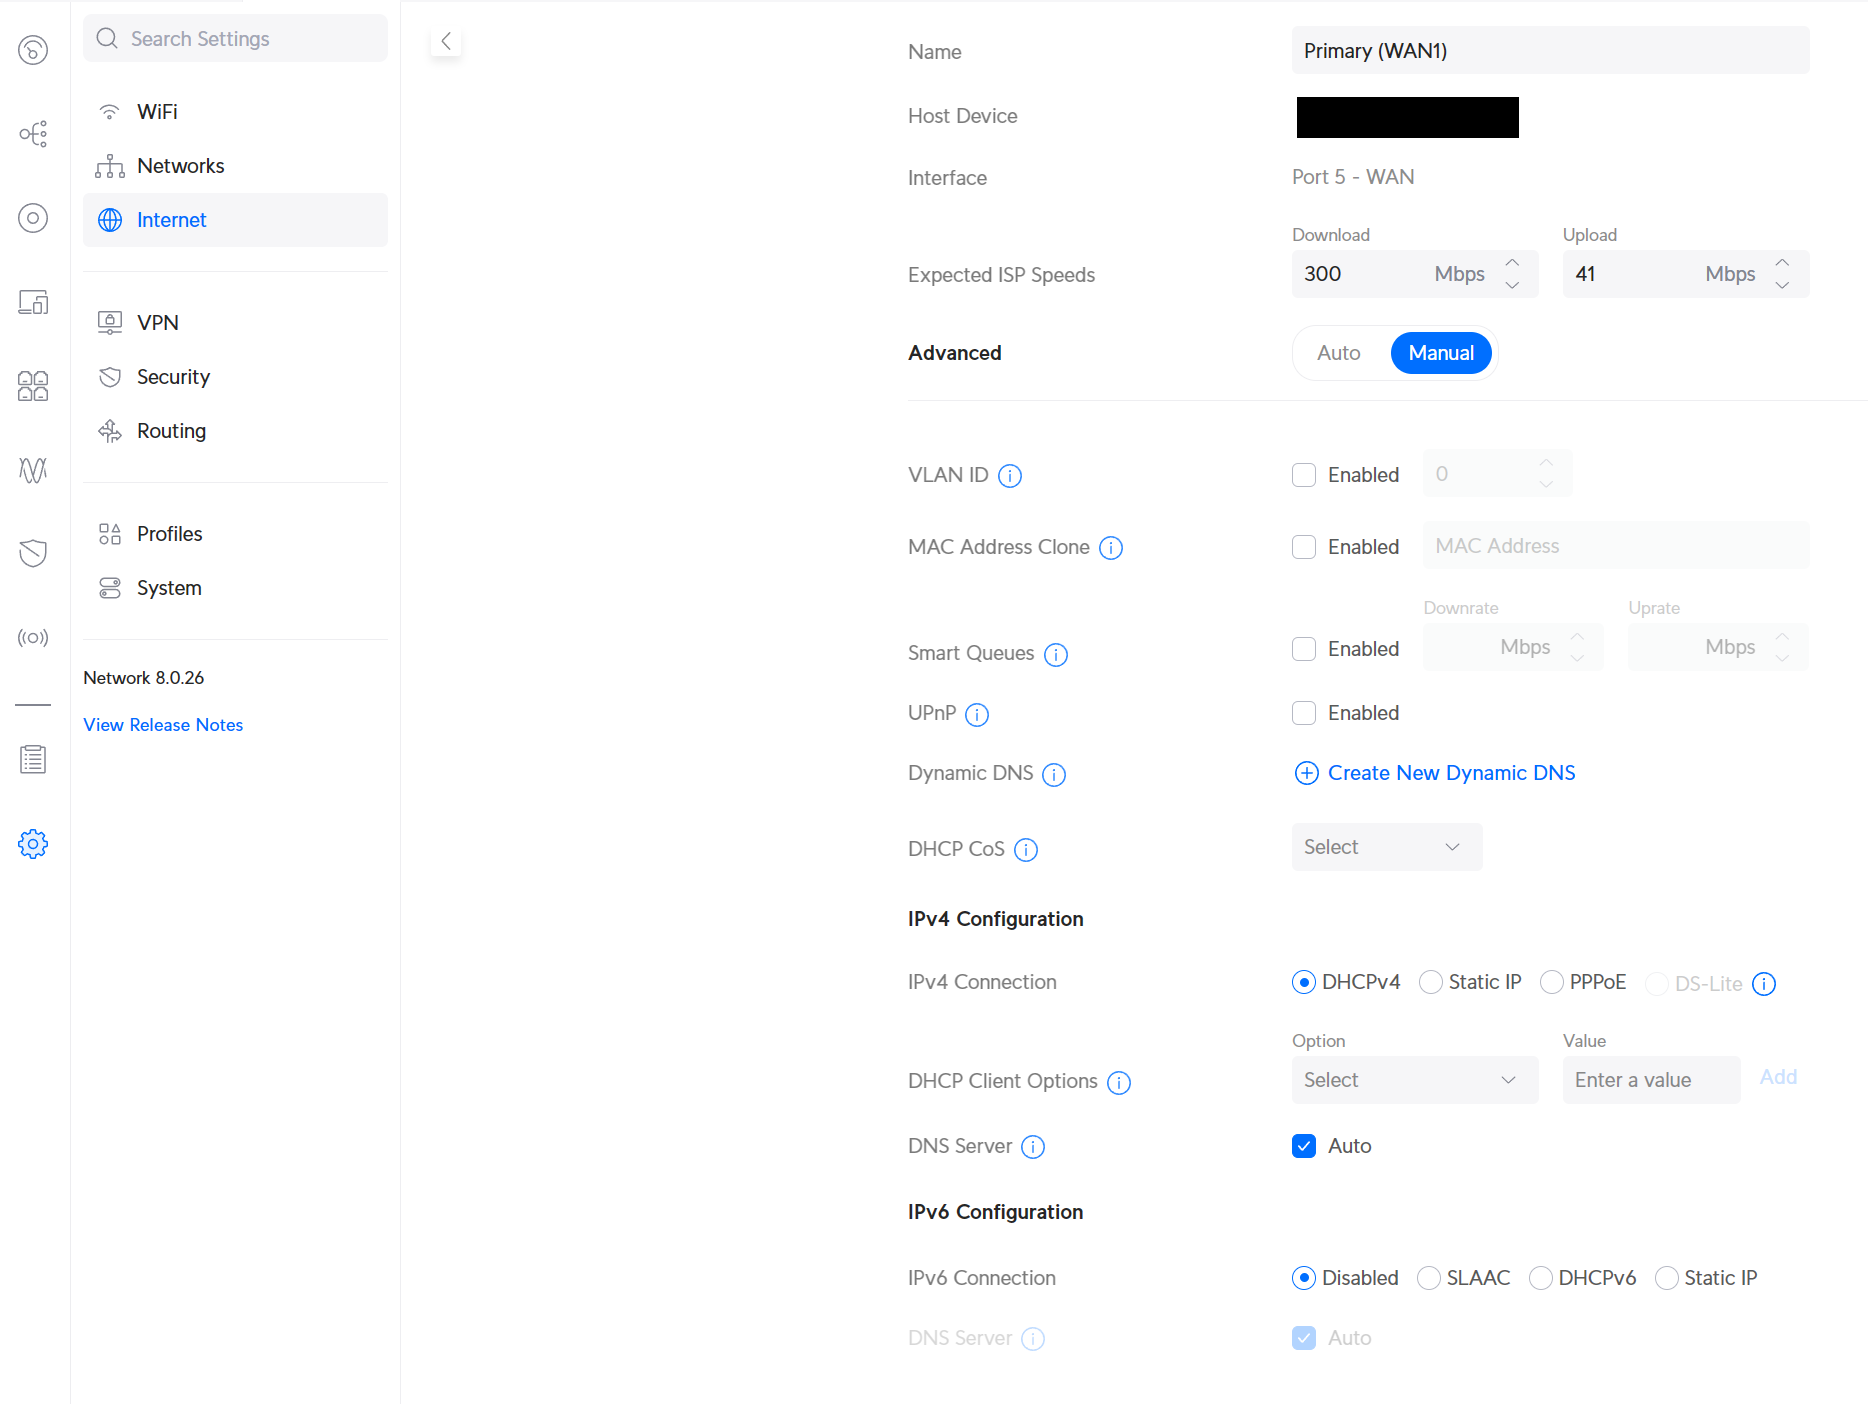
1. Select Settings, then Internet, then select your WAN Connection. Change Advanced to Manual so that you have access to the DDNS section. From there, select Create New Dynamic DNS.
2. In a new browser window, navigate to DuckDNS and create a user account, then sign in. After signing in, create a new domain (which is what you’ll use to access your external IP address) and select Add Domain.

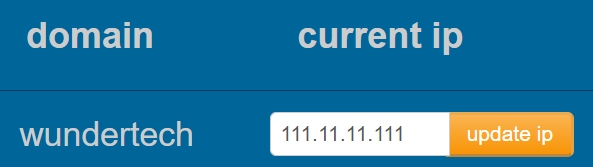
3. Update the IP address to something generic (so that you can confirm the IP address changes after configuring DDNS in UniFi).
At the top, you’ll see your username and a Token. Copy the token and move on to the next step.

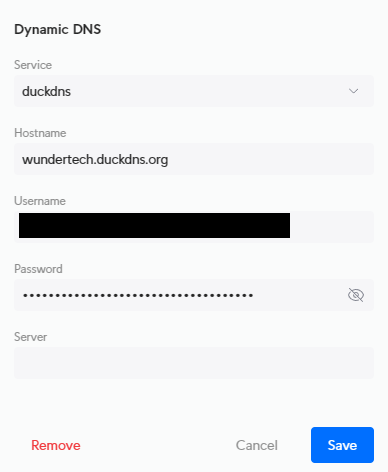
3. In the UniFi configuration section, change the settings to match the information below, then save:
- Service: duckdns
- Hostname: [your_subdomain].duckdns.org
- Username: [Token]
- Password: [Token]
4. After the settings have been saved, navigate back to DuckDNS and check to ensure the IP address is updated. It might take a minute or so, but you should see your IP address change, and it should be your external IP address!

From this point forward, any time your IP address changes, your UniFi Cloud Gateway will update DuckDNS, and you’ll always connect properly to your external IP address!
Final Thoughts on DDNS in UniFi
Dynamic DNS is the start of most home labs, as you need to ensure that you have a route back to your home network at all times. Without a static external IP address, Dynamic DNS (DDNS) is required, or things will constantly break as your external IP address changes.
While I’d recommend using Cloudflare if you own your own domain, this is a great, free alternative!