In this article, we’ll look at how to set up OpenVPN on UniFi devices. In the latest UniFi Controller version, you can now use OpenVPN. OpenVPN is a new addition that can be installed alongside the L2TP/IPSec and WireGuard options that previously (and still do) exist.
This tutorial will look at how to set up OpenVPN on UniFi devices, but as mentioned above, this isn’t the only VPN server you can run on UniFi devices.
Disclosure: Some links below are UniFi affiliate links which means that I earn a percentage of each sale at no cost to you. Thank you for your support.
How to Set Up OpenVPN on UniFi Devices
We will look at how to set up OpenVPN on UniFi Devices below with the newly supported OpenVPN server option!
1. Open the UniFi Controller and select Settings.

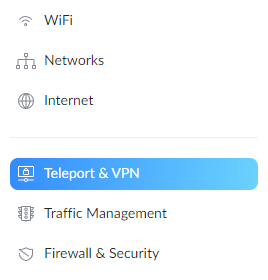
2. In the settings menu, select Teleport & VPN.
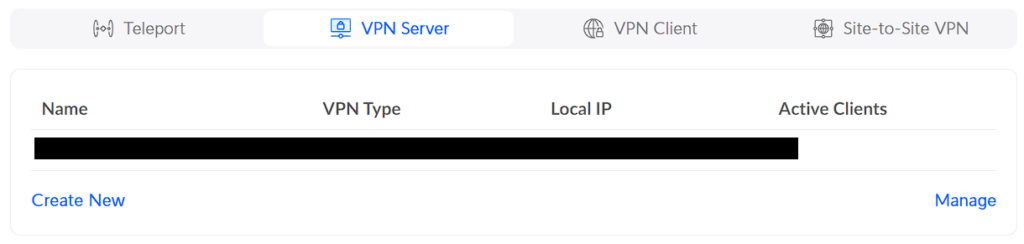
3. In the VPN Server section, select Create New.
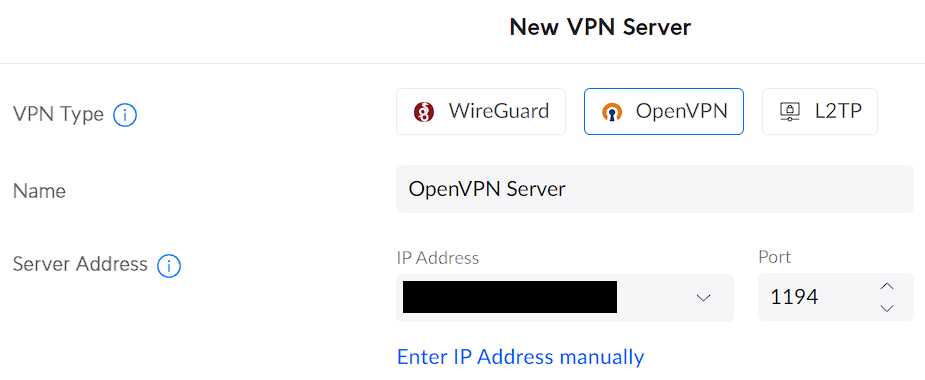
4. Select OpenVPN and give the VPN server a name. The default port for OpenVPN is 1194, but if you’d like to use something different, you can change that here.
If you’d rather use WireGuard or L2TP/IPSec, you can follow one of those tutorials.
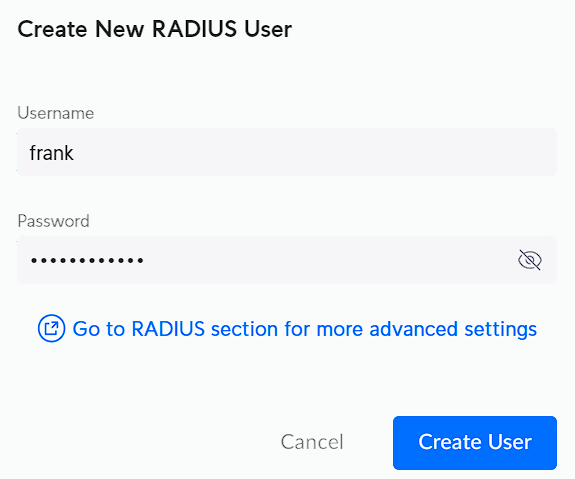
5. A user is required to authenticate with OpenVPN, so we have to create a user. In the User Authentication section, select Create New User.

Add a Username and a Password, and then select Create User.
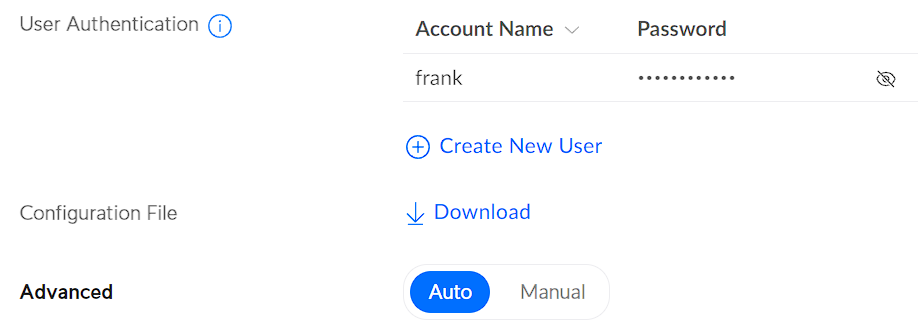
6. After the user has been created, select Add at the bottom to add the new VPN server. This is required before you can download the configuration file.

7. After adding the new OpenVPN server, you’ll be brought back to the VPN Server section. Select the OpenVPN Server that we created in the previous step.

8. The OpenVPN Configuration File will be generated (which might take a little while), so when you access the OpenVPN Server, if it hasn’t been generated yet, you might have to wait a little longer.
Select Download, then open the configuration file in your favorite text editor.
Configuring Dynamic DNS (DDNS)
If your external IP address (given to you by your ISP) is static, meaning it doesn’t change, Dynamic DNS (DDNS) is not required. However, most users have dynamic external IP addresses, (meaning they periodically change).
If you do have a dynamic external IP address, you must configure DDNS to ensure you’re always accessing your external IP address. You can do all of this through the UniFi Controller by following the steps below.
Please keep in mind that you do not have to run a DDNS server on your UniFi device, however, you can if you don’t have anywhere else that DDNS is configured. If you do not need this or already have it configured, skip to the next step.
1. Select Internet, then select your Primary network to access its settings.

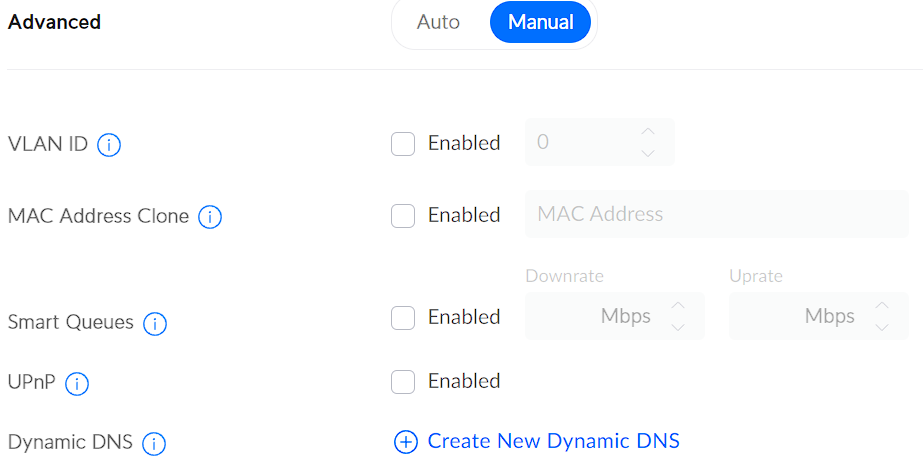
2. Change the Advanced settings to Manual, then select Create New Dynamic DNS.
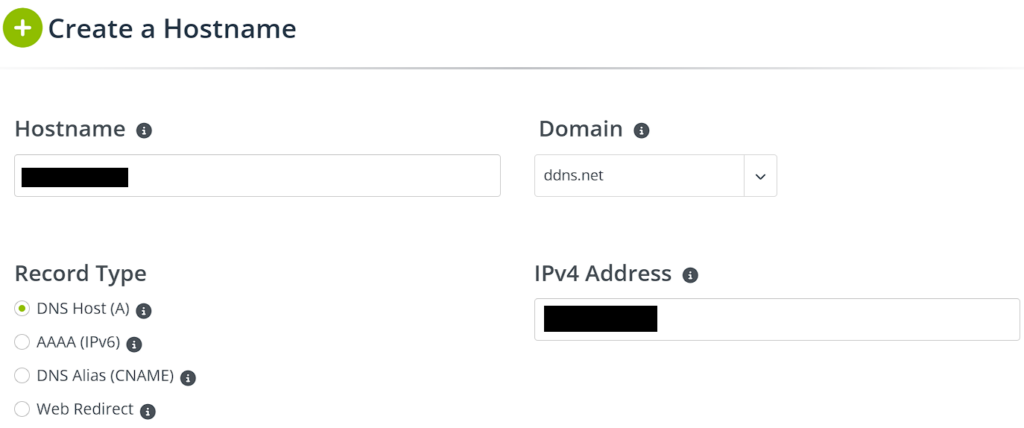
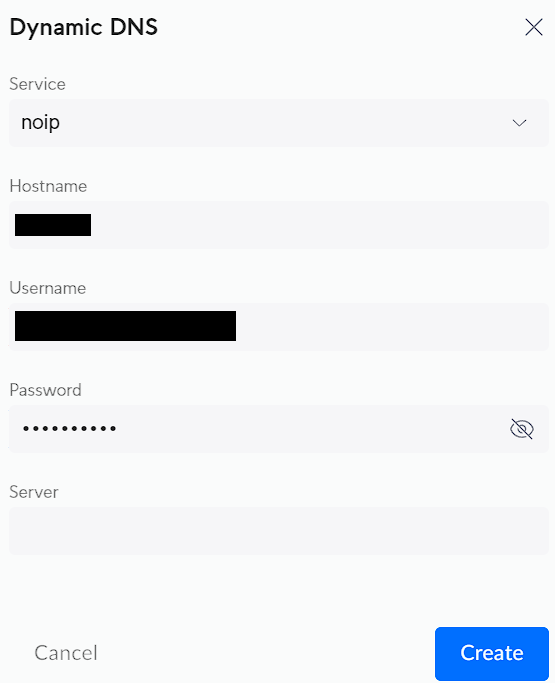
3. Select the service you’d like to use, then enter the hostname (configured through the service), username, and password. The easiest option (in my opinion), is No-IP, however, you can use any service you’d like.
Example No-IP Configuration
4. In the UniFi settings, enter the information that you configured above, then select Create. If you configured everything properly, your DDNS name should update with your external IP address if/when it changes.
OpenVPN Configuration File Changes
For the most part, the OpenVPN file can stay as default outside of the remote server (assuming you are using DDNS). However, there are some other settings that can be changed as well.
1. After editing the OpenVPN Configuration File that UniFi automatically generated, edit the remote field to be your DDNS hostname (if you’d like to use DDNS).
remote YOUR_DDNS_HOSTNAME 11942. The second addition you can make will depend on if you want to use a full-tunnel VPN. The difference between a full-tunnel and split-tunnel VPN is explained here, but in summary, you will either route all traffic through this VPN tunnel (full-tunnel) or only local IP addresses (split-tunnel).

Full Tunnel VPN – OpenVPN on UniFi
If you’d like to use a full-tunnel VPN, add the line below to the configuration file under the redirect-gateway def1 line.
redirect-gateway def1
redirect-gateway ipv6
Split Tunnel VPN – OpenVPN on UniFi
If you’d like to use a split-tunnel VPN, remove the line below from the configuration file.
redirect-gateway def1Then, add the lines below adding in your subnet (the local IP addresses you’d like to access).
route-nopull
route 192.168.1.0 255.255.255.0
Please keep in mind that you can use two different configuration files if you’d like to use a full-tunnel and split-tunnel VPN.
Sample OpenVPN Configuration File
With the configuration file changes made, your file should look something like the example below with potential changes highlighted in red.
client
dev tun
proto tcp
remote YOUR_DDNS_HOSTNAME 1194
resolv-retry infinite
nobind
# Downgrade privileges after initialization (non-Windows only)
user nobody
group nogroup
persist-key
persist-tun
auth-user-pass
remote-cert-tls server
cipher AES-256-CBC
comp-lzo
verb 3
auth SHA1
key-direction 1
reneg-sec 0
# full-tunnel
redirect-gateway def1
redirecrt-gateway ipv6
# split-tunnel
route-nopull
route 192.168.1.0 255.255.255.0
<ca>
-----BEGIN CERTIFICATE-----
-----END CERTIFICATE-----
</ca>
<tls-auth>
-----BEGIN OpenVPN Static key V1-----
-----END OpenVPN Static key V1-----
</tls-auth>
<cert>
-----BEGIN CERTIFICATE-----
-----END CERTIFICATE-----
</cert>
<key>
-----BEGIN PRIVATE KEY-----
-----END PRIVATE KEY-----
</key>
OpenVPN Client Configuration
Now that we have configured everything, we need to test our connection. Download the OpenVPN client on your cell phone or on a PC that you can connect to a different network with. Remember, you must be connected to a different network to test this.
1. Download the OpenVPN client software for your device here.
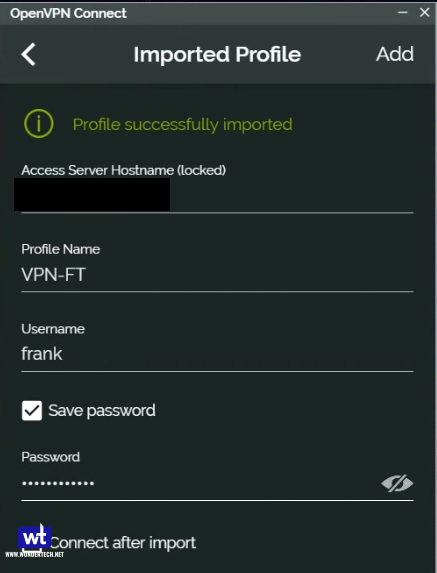
2. Select the add button at the bottom and then choose File. You should now be prompted to browse for the .ovpn file that we created earlier. Upload the file and then log in with the RADIUS username and password we created.
3. You should be able to connect to your VPN now. Test your connection and ensure you’re able to access your local servers!
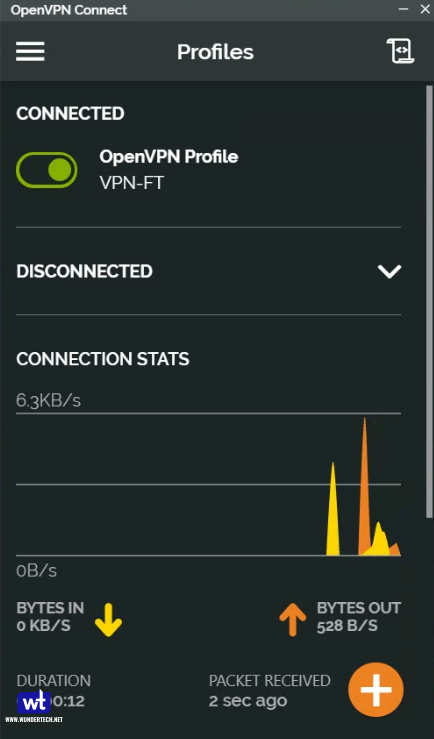
You can also test your VPN type (full tunnel or split tunnel) by checking your external IP address and ensuring that it’s either the current networks (split tunnel) or VPN servers (full tunnel).
Conclusion: How to Set up OpenVPN on UniFi Devices
This tutorial looked at how to set up OpenVPN on UniFi devices. This is a necessary enhancement that brings further functionality to the UniFi OS that’s been missing for a while. Along with WireGuard and allowing for OpenVPN Clients (which is necessary for site-to-site VPN functionality), this update brings UniFi VPN configurations closer to firewall offerings like pfSense and OPNsense.