In this tutorial, we’re going to look at how to set up a VPN server on UniFi.
There are many different places that you can run a VPN server, however, one of the best places is on your router. Offloading the process from a NAS or Raspberry Pi to a router means that you don’t have to worry about maintaining another device, and in general, if you can run a VPN on your router, you probably should.
One downside to the current UniFi VPN is that it uses L2TP over IPSec as opposed to other popular VPN options like OpenVPN or WireGuard (not that L2TP over IPSec is bad, because it’s not). However, UniFi recently released Teleport for UniFi devices which requires no port forwarding and utilizes the WireGuard protocol. If you’re interested in using that, please check out our tutorial on how to set it up!
Please keep in mind before proceeding that if you do not have a static external IP address, you will have to configure DDNS. A DDNS hostname will track your external IP address and whenever it changes, it will update the DDNS hostname. This ensures that you are ALWAYS connecting to your external IP address.
This tutorial utilizes the Unifi Dream Router, however, it should work on any UniFi devices that support L2TP/IPSec.
How to Set Up a VPN Server on UniFi
As mentioned above, the VPN protocol that we will be using is L2TP over IPSec.
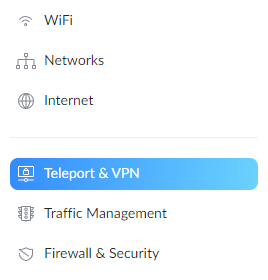
1. Open the UniFi Controller and select Settings.

2. In the settings menu, select Teleport & VPN.
3. Scroll down to VPN Server and Enable the VPN server.
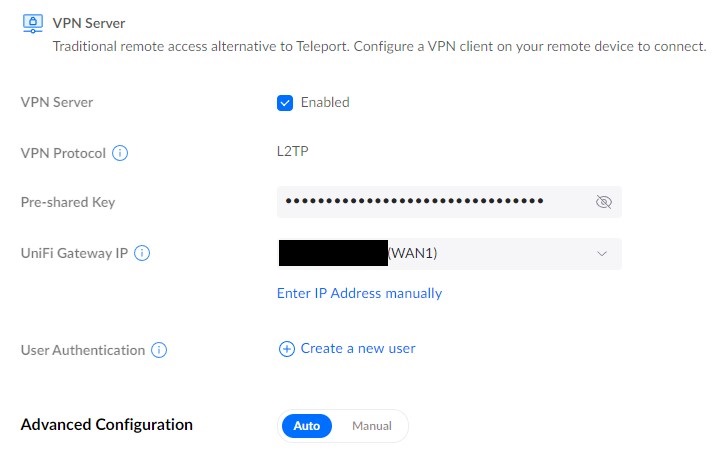
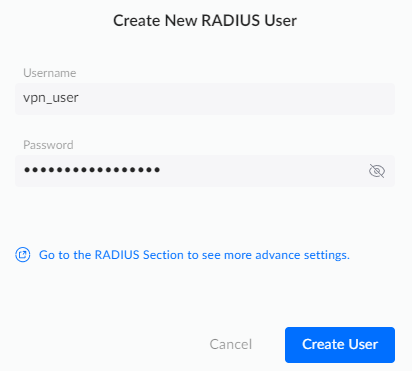
4. Select create a new user, then enter a username and password at the next screen. When you’re done entering both, you can select create user. This is the username and password that we will use to authenticate with our VPN.
NOTE: If there are a few people that will be connecting to this VPN, you can create multiple user accounts.
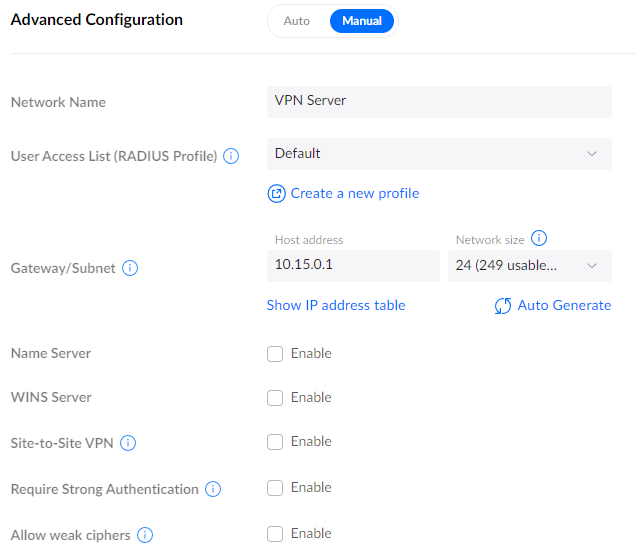
5. In the Advanced Configuration section, select manual, then modify any of the settings that you’d like. When you’re done altering the settings, select apply settings to save everything.
NOTE: This is also where you’ll change the VPN subnet if you’d like something different than the default value.
6. At this point, the VPN configuration is complete! The firewall rule should be automatically completed, but you can confirm by selecting Firewall & Security, then looking for the L2TP over IPSec firewall rule (UDP port 3007).

Connecting as a VPN Client
At this point, the VPN server is configured. However, we need to modify our VPN client in order to connect. I will be utilizing Windows to show how this works, however, you can also use an Android, iOS, or Mac device.
Windows Instructions
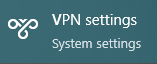
1. Search for VPN and launch the VPN Settings application.
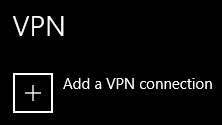
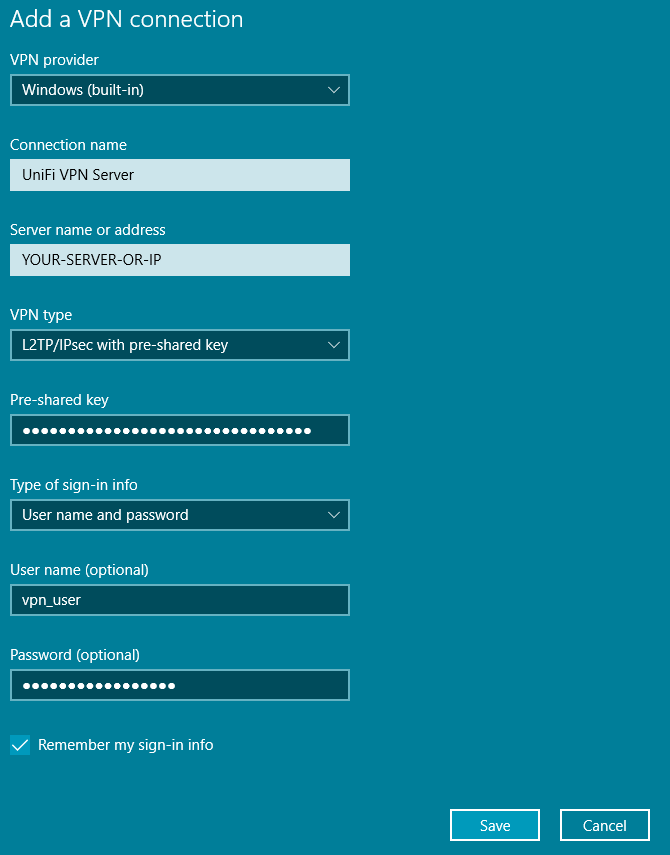
2. Select Add a VPN Connection.
3. Change the settings to match the info below:
- VPN Provider: Windows (built-in)
- Connection: UniFi VPN Server
- Server Name or Address: Enter your DDNS hostname or external IP address
- VPN Type: L2TP/IPSec with pre-shared key
- Pre-shared Key: Copy and paste the pre-shared key from the UniFi VPN settings
- Type of Sign-in Info: Username and Password
Finally, enter the username and password, then Save.
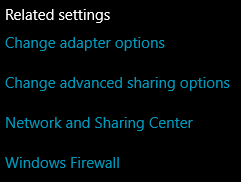
4. After the connection has been saved, you must allow the MS-CHAP v2 protocol. Select change adapter options on the right-hand side.
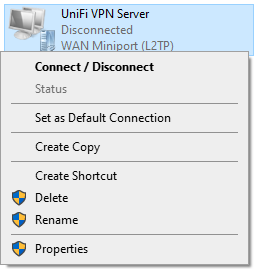
5. Right-click the VPN server we created and select Properties.
6. under security, select allow these protocols and ensure that Microsoft CHAP Version 2 (MS-CHAP v2) is selected, then press OK.

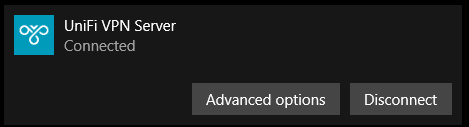
7. If you head back to the VPN Server settings, you should now be able to connect!
UniFi VPN Server Notes
Now that our server has been configured and we’ve successfully connected with one of our clients, there are a few notes that I want to be clear on:
- If you are not using DDNS and your external IP address changes, you will not be able to connect. Set up DDNS if you have a dynamic external IP address to avoid this issue.
- Depending on the device that you’re connecting from, settings on the VPN server or client may need to change. Using our Windows example above, we had to enable MS-CHAP v2. Without this enabled, the connection will fail, so be sure that the protocol you’re using to connect is a protocol that the server and client accept.
- The same username and password can be used on multiple devices, but if different users will be connecting, it’s a good idea to create individual usernames/passwords for them.
Conclusion & Final Thoughts: L2TP VPN on UniFi Devices
This tutorial looked at how to set up a VPN server on UniFi. The server protocol used is L2TP over IPSec, which has its benefits and downsides. You can also set up Teleport on your UniFi device if you’re not interested in using L2TP over IPSec or don’t want to use port forwarding. However, if you do decide to use it, it functions well and will allow you to access everything on your local network.