In this tutorial, we’re going to look at how to set up a site-to-site VPN in UniFi.
A site-to-site VPN is helpful because after configuration, two separate locations will be connected to one another. This means that any devices on the first or second network will be able to communicate with one another (assuming the subnets are allowed in the configuration). There are advanced configurations that can be used as well to limit traffic, but the first step is getting the site-to-site VPN set up.
There are technically two different configuration types, and we will look at how to set up a site-to-site VPN in UniFi using IPsec and OpenVPN. If you want to set up a traditional VPN, please check out our IPSec tutorial.
I want to be clear on a few things before we get started:
- Both, IPSec and OpenVPN have been extremely finicky for me – specifically, when attempting to set up a site-to-site VPN with a double-NAT.
- If you do have a double-NAT (UniFi device behind a router, either on one side or both), the setup is fairly difficult as you’ll have to set up port forwarding on the router to the UniFi device. However, it is possible to set up.
- If you have a dynamic external IP address, you should skip to the OpenVPN setup as you’ll be able to use DDNS. IPSec uses static external IP addresses.
- If you have two UniFi gateways connected directly to your modem (and your modem isn’t a router as well), the process is actually fairly straightforward. It just gets complicated when you add in different variables which is why I pointed it out above.
Disclosure: Some links below are UniFi affiliate links which means that I earn a percentage of each sale at no cost to you. Thank you for your support.
How to Set Up a Site-to-Site VPN in UniFi
First, we’ll look at how to set up a site-to-site VPN on a UniFi device using IPsec.
Before moving forward, there is a requirement that the remote server is entered as an IPv4 address. Therefore, if you don’t have a static external IP address on both servers, you will run into issues at some point (whenever the IP address changes). Skip to the OpenVPN setup below if you’d like to use DDNS.
Configuring a Site-to-Site VPN with IPSec
1. On the first UniFi device, open the UniFi Controller and select Settings.

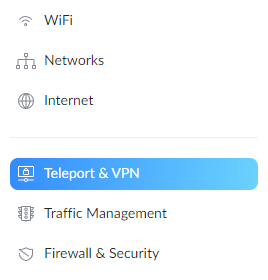
2. In the settings menu, select Teleport & VPN.
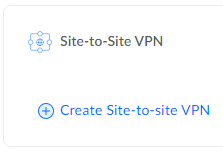
3. Under the Site-to-Site VPN section, select create site-to-site VPN.
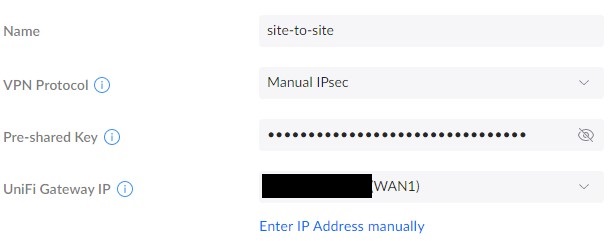
4. Give the VPN a name, select Manual IPsec, then ensure the correct WAN address is selected.
NOTE: Please keep in mind that WAN addresses (if you don’t have a static external IP address) will periodically change. When it changes, this site-to-site VPN will stop working.
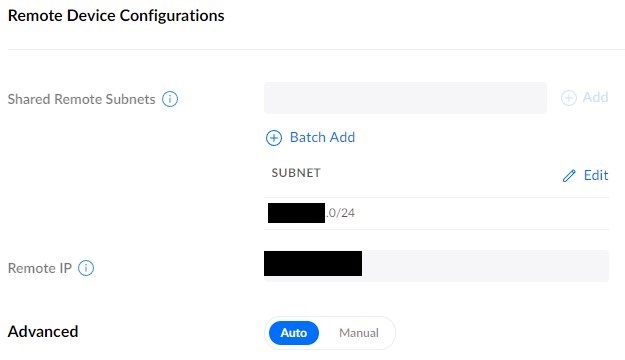
5. In the Remote Device Configurations section, enter the subnets you’d like to route over this VPN tunnel. In the Remote IP section, enter the external IP address of the other server.
NOTE: The subnet entered should be the subnet that you want to access on the other network.
6. On the second UniFi device, follow the same process we followed above to create a new site-to-site VPN. The settings will be very similar, but these are the key differences:
- Pre-shared Key: The same key the other server is using.
- Subnet: The subnet you would like to connect to on the other network.
- Remote IP: The first UniFi device’s external IP address.

7. Save the settings and both UniFi devices should be set up at this point. Assuming that the pre-shared keys are the same, and the IP addresses are entered correctly (gateway and remote), you should be able to connect!
UniFi will handle all the routing, so this is the only configuration that should be needed. However, as mentioned above, there are many variables that can impact this. If you run into any trouble, please check out this troubleshooting guide from UniFi.
Configuring a Site-to-Site VPN with OpenVPN
We’re now going to take a look at how to set up a site-to-site VPN in UniFi with OpenVPN. There are many reasons why you might want to use OpenVPN, but one of the main reasons is if have a dynamic external IP address. If you do, you’ll be able to use DDNS (separate setup required) to ensure you’re always connecting to the correct external IP address.
Before we look at the OpenVPN configuration, we’re going to have to generate an OpenVPN key. SSH into your UniFi device (we only have to do this once and it doesn’t matter which device you use).
1. To get your SSH username and password, log in to the UniFi Controller, select Settings, then System, and under Device SSH Authentication, ensure it’s enabled. Then copy the password.
NOTE: You might have to enable SSH in the Console Settings as well (which will force you to enter an SSH password)! If you do, the username should be root!

2. Open a terminal window or your favorite SSH application and connect to the UniFi device.
ssh username@UNIFI_IP_ADDRESS
3. Run the command below to generate a new OpenVPN key.
openvpn --genkey secret /tmp/ovpn

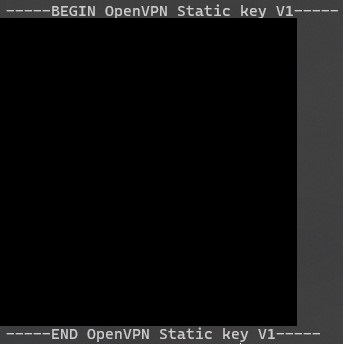
4. After the key has been created, we’re going to view it so that we can use it in our OpenVPN configuration. Run the command below and copy it into a notepad, then remove all of the linebreaks – this should be one long line.
Save this long OpenVPN key for later and then we will move on to the UniFi configuration.
5. On the first UniFi device, open the UniFi Controller and select Settings.
6. In the settings menu, select Teleport & VPN.
7. Under the Site-to-Site VPN section, select create site-to-site VPN.
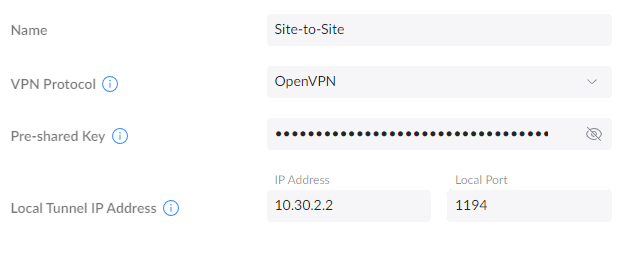
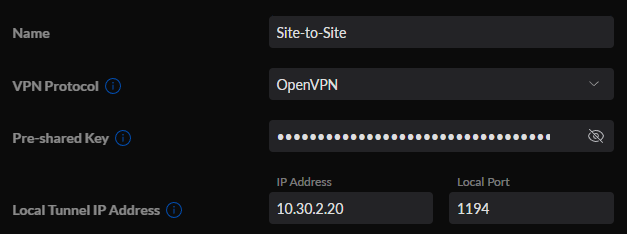
4. Give the VPN a name, select OpenVPN, then set a unique local tunnel IP address. We will use this on both UniFi devices.
NOTE: If you’re using OpenVPN already on the source or destination server, you can use a different port number.
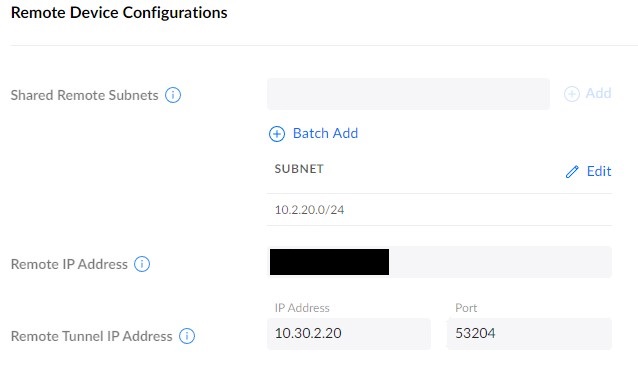
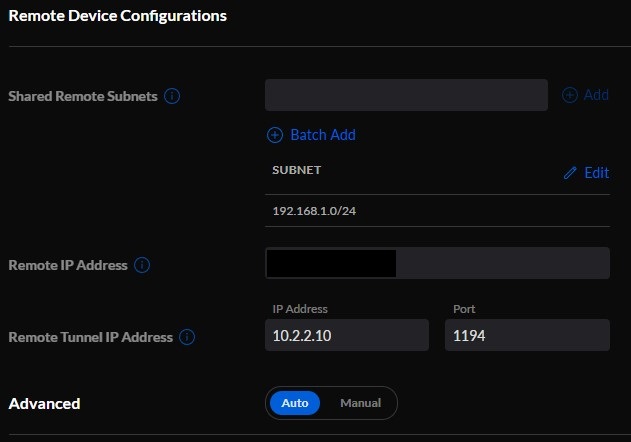
5. Enter the remote subnets that you’d like to access, then the remote IP address (or DDNS hostname). Finally, add the remote tunnel IP address (this will be a unique IP address as well and it must match what’s configured on the remote server, explained below) and port. When you’re done, select Add New VPN Network.
6. On the second UniFi device, create a site-to-site VPN, then enter the same pre-shared key as on the first VPN server. In the local tunnel IP address field and port, enter the same information as entered for the remote tunnel IP address and port from the last step.
NOTE: To be clear, the information should be as follows:
- Site A
- Local IP: Remote IP Address for Site B
- Remote IP: Local IP Address from Site B
- Site B
- Local IP: Remote IP Address for Site A
- Remote IP: Local IP Address from Site A
7. In the remote device configurations section, enter the shared remote subnets (what you want to route over this VPN tunnel), the remote IP address, and finally, the remote tunnel IP address (that you specified in the step above). When you’re done, select Add New VPN Network.
8. Now that everything is set up, the shared remote subnets from each server should be accessible depending on which network you’re on. This is because UniFi should handle all of the routings without you having to do anything else.
As mentioned above, this process can be finicky and if you have a double-NAT, there are port forwarding configurations that must be made. Please check out this troubleshooting guide from UniFi if you have any trouble.
Conclusion & Final Thoughts on Site-to-Site VPNs in UniFi
This tutorial looked at how to set up a site-to-site VPN in UniFi using IPsec and OpenVPN. The benefit of setting up a site-to-site VPN between two UniFi devices is that UniFi will handle all of the routing (which is generally the most difficult part). With that said, you also have to be aware that if you don’t have two UniFi devices set up as your router (double-NAT) things get tricky and this configuration will be harder to set up.